Snapbacks for Retail Merch Drops: Buyer's Order Guide
Snapbacks for retail merch drops usually outperform softer caps for one simple reason: they hold their shape. The crown stays crisp, the logo reads clean on camera, and the hat still looks intentional after a few days on a shelf. That matters more than people admit. Retail buyers are not just buying a cap. They are buying how the cap behaves under fluorescent lights, in a shipping carton, and in a customer's hands.
The real decision is not “what looks cool?” It is what spec will actually sell, what landed cost still leaves margin, and what production path can hit the launch date without chaos. Miss one of those and the order starts drifting. Miss two and you are explaining why a pile of hats is sitting in receiving while the campaign already went live.
Snapbacks for retail merch drops: what buyers need first
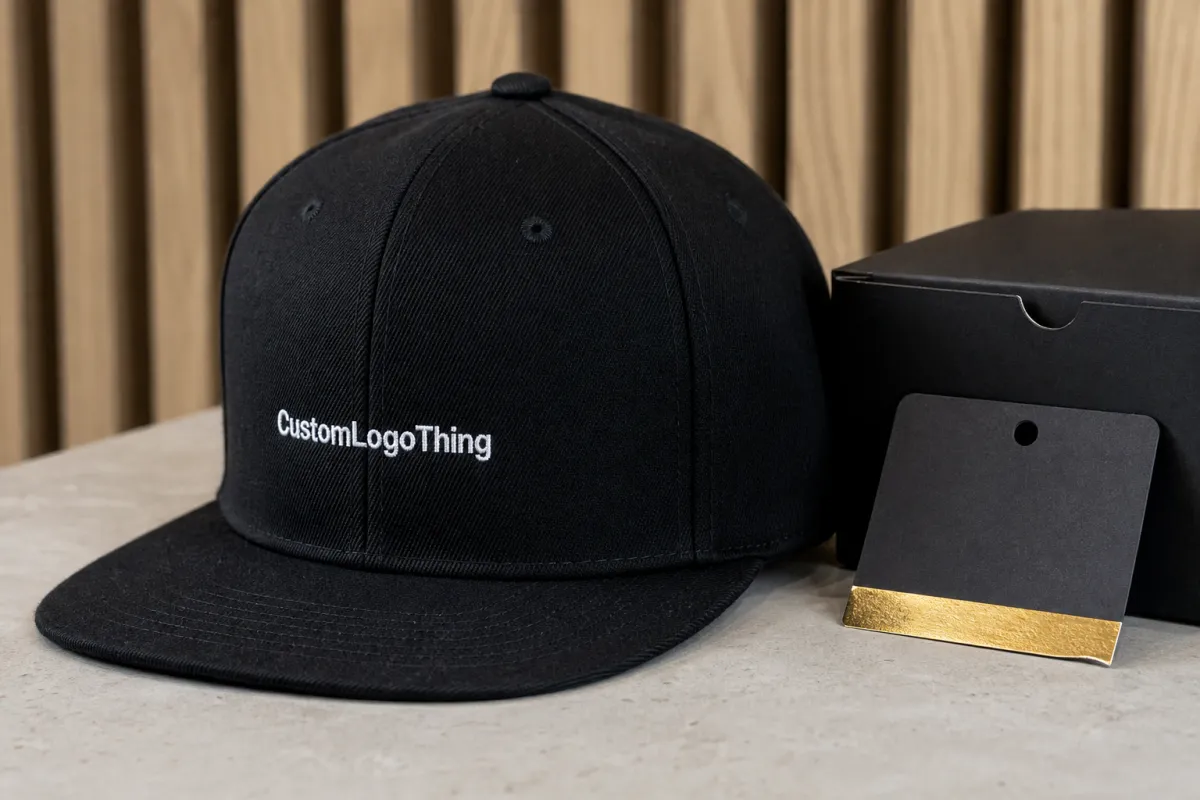
For snapbacks for retail merch drops, shape sells first. A structured front panel keeps the crown upright, supports embroidery or patches, and gives the product more presence on a retail table. That is why buyers keep coming back to snapbacks when they need something that feels premium without turning into a sizing problem. One size, clear silhouette, easy display. Simple works.
A good merch-drop snapback usually starts with a structured crown, a flat or slightly pre-curved brim, and a plastic snap closure. That combination covers a broad audience and gives the cap a familiar fit. It also makes reorders easier if the drop hits. The more repeatable the body is, the less you spend re-solving the same product problem next season.
There is a trap here, though. A cap can look expensive in a mockup and still fail in real life once decoration, labels, shipping, and packing get added. A buyer has to protect margin, but also protect the actual product. If the build gets too complicated, the cap stops feeling clean and starts feeling busy. That usually hurts retail sell-through more than it helps it.
Keep the spec explainable in one sentence. If it takes a paragraph, it is already too complicated for a drop that needs to move.
The safest starting point is a six-panel structured snapback with one clear decoration method. From there, add detail only if it improves the product. A patch can elevate the hat. So can a better brim shape or a cleaner sweatband. What usually does not help is stacking add-ons just because the team wants to make the item “special.” Special is good. Overbuilt is not.
Retail buyers also need to think beyond the first shipment. If the cap goes into stores, it has to survive handling, folding, re-stacking, and customer trial. That means checking carton counts, polybagging, size stickers, hang tags, and barcode placement before production starts. The cap should arrive ready to merch, not requiring a rescue mission from the store team.
Production process and timeline for retail orders
The workflow is usually predictable: brief, mockup, sample, revisions if needed, bulk production, quality check, packing, freight. Buyers who keep changing the product after sample approval are the ones who pay for urgency later. Factories can build fast or build accurately, but they cannot guess what you meant after the spec changed three times.
Delays tend to show up in the same places every time. Artwork arrives late. Pantone references are vague. The logo gets resized after sampling. Someone decides the patch should sit higher, which means the panel layout no longer matches the approved sample. Small changes on paper can become expensive changes in production because stitch density, panel curvature, and logo balance all interact.
Lead time depends on how much of the cap is standard versus custom. A stock body with basic embroidery is faster. A custom crown, special fabric, contrast underbrim, custom taping, or multiple patch types adds steps. Nothing mysterious there. More parts take more time, and more time means more chances for something to drift.
For snapbacks for retail merch drops, a realistic planning window looks like this:
- Small drops of 100-300 units: sample in about 7-14 days, bulk in roughly 15-25 business days after approval, depending on decoration complexity.
- Mid-size drops of 300-1,000 units: sample in 7-14 days, bulk often 20-30 business days.
- Larger drops above 1,000 units: production can run beyond 30 business days, especially with multiple colorways, custom labeling, or special packaging.
Freight adds another layer. Air is fast and expensive. Ocean is slower and more economical. That tradeoff is not negotiable. If the launch date is fixed, transit planning matters as much as decoration. A finished cap that is still in transit is just inventory with better excuses. For packaging and transit risk, ISTA publishes useful guidance on transport testing at ista.org.
One thing experienced buyers check early is whether the factory has enough time for QC before shipment. If you want a retail-ready product, there should be time for a final check on logo placement, stitch quality, crown symmetry, and carton counts. Rushing that step is how good orders become annoying ones.
Cost, pricing, MOQ, and quote inputs that move the number
Pricing on snapbacks for retail merch drops is driven by a few obvious inputs and a few hidden ones. Obvious: fabric, closure type, panel structure, and decoration method. Hidden: label work, packaging, carton config, and how many times your team needs to revise artwork before approving it. A quote only makes sense if everyone is pricing the same product.
Typical ex-factory pricing for a retail-ready snapback can land anywhere from about $4.50 to $12.00+, depending on how custom the build is. That range is wide because a stock cap with flat embroidery is a very different product from a fully custom body with woven patches, printed taping, and branded retail packaging. Shipping, duties, and domestic handling can add a meaningful amount on top. Buyers who only compare unit price usually miss the actual cost.
MOQ matters because it changes the economics of the drop. A lower per-piece price can still be a worse deal if the minimum is too high for the audience. If the plan is to sell 250 hats, ordering 1,500 just to unlock a better quote is not efficiency. It is a storage problem waiting to happen. And storage is not free, no matter how many spreadsheet columns people use to pretend it is.
| Build level | Typical unit price | Typical MOQ | Best use |
|---|---|---|---|
| Basic stock blank + flat embroidery | $4.50-$6.50 | 100-300 | Test drops, simple logos, tighter margin targets |
| Mid-tier structured cap + woven or leather patch | $6.50-$9.00 | 300-500 | Most retail merch drops with a cleaner premium feel |
| Premium custom build + 3D puff, custom labels, special pack-out | $9.00-$12.00+ | 500-1,000+ | Higher-priced retail, launches, stronger shelf presence |
If you want cleaner quotes, send the factory the actual inputs up front: target quantity, target retail price, vector art, closure preference, decoration method, packaging needs, and in-hand date. For retail programs, it also helps to know whether the hats are going to a DC, a 3PL, or straight to stores. That affects carton labeling, pallet strategy, and how much labor needs to happen before the product lands.
There is always a tradeoff between premium detail and margin. A 3D puff logo looks strong, but it is not always the right move if the retail price is fixed and the design already carries enough weight. The same goes for custom inside labels, printed underbills, or extra embellishment. Nice touches can move the product upmarket. They can also eat the margin if they are added without a clear reason. Buyers should ask for two or three quote scenarios so they can compare a baseline build against a more premium version without guessing.
For packaging, simple often wins. FSC-certified paper hang tags or inserts can make the product feel retail-ready without blowing up cost. If that is part of the program, check the source and certification trail at fsc.org. Retail teams notice that kind of detail. Sometimes more than the people quoting the job do.
Specs that shape sell-through: fit, panels, and decoration
Structured versus unstructured is the first real decision. For retail drops, structured usually wins because it gives the hat a stronger front face and a cleaner display shape. Unstructured caps can feel softer and more relaxed, but they read less premium on a shelf. If the product needs to hold attention in a crowded display, structure helps.
Panel count affects how the cap sits and how the logo lands. Six-panel snapbacks are common because the front panel is clean and predictable for decoration. Crown height changes the silhouette. Brim shape changes the vibe. Closure style affects comfort and perceived fit. Small details, yes. But in retail, small details decide whether someone picks the cap up or walks past it.
Decoration should fit the artwork instead of forcing the artwork to fit the decoration. Flat embroidery is the safest option when you want clean pricing and straightforward production. 3D puff gives more dimension and stronger shelf impact. Woven patches work well for logos with fine detail. Leather patches create a tougher, lifestyle-driven feel. Printed underbrims and inner taping can add personality, but only when they support the brand story. Random “premium” add-ons do not make the cap better. They just make it louder.
Fit matters more than some buyers expect. The cap should not pinch the forehead, sit too high, or feel flimsy at the snap closure. Plastic snaps are usually the practical choice for retail because they are light, adjustable, and familiar. Metal hardware can look nice, but it adds cost and can create comfort or rust concerns depending on the build and use case. If the cap is meant to be worn often, comfort should outrank novelty.
Here is the practical rule: if the logo has fine detail, do not force it into a treatment that muddies the art. If the design is bold and simple, 3D puff or a larger patch can work well. If the drop depends on repeat wear, keep the comfort high and the weird extras low. Buyers chase novelty, then act surprised when the piece only gets worn once. Usually the spec explains that outcome.
For snapbacks for retail merch drops, the spec should support three outcomes: strong photo appeal, easy repeat wear, and low return risk. The cap needs to look good from five feet away, not just under studio lights. That is where crown shape, patch scale, embroidery density, and brim proportions matter. Good product reads clean quickly. Bad product asks the customer to work for it.
Step-by-step order plan for a clean launch
Start with the quantity and the sales goal. Are you testing demand with 150 units, or building a more serious retail run with 800? That answer changes almost everything. Then pick the body, choose the decoration method, approve the artwork, and lock the spec. If you skip that order, you end up re-litigating decisions you should have closed the first time.
The sample stage is the real checkpoint. Check logo size, crown shape, color match, patch placement, sweatband feel, and closure quality. Check the brim too. Some caps look great flat and awkward once worn, which is why the sample needs to be evaluated on a head, not just on a table. If it is wrong, fix it now. If it is right, move. Samples are there to catch expensive problems while they are still cheap.
Pack-out planning belongs in the same conversation. Confirm size stickers, hang tags, polybags, barcode labels, master cartons, and whether retail wants the caps pre-packed in a certain order. If the product is going to a store network, ask for carton counts and outer-case labeling that matches the receiving team's setup. That small coordination step prevents a lot of unnecessary back-and-forth later.
- Use one hero colorway if the drop has no sales history.
- Build backward from the launch date so freight and receiving are included, not guessed.
- Lock artwork early so approval delays do not turn into production delays.
- Keep pack-out simple unless the retailer has specific requirements.
For snapbacks for retail merch drops, I would always build the calendar backward. If the product needs to be on shelves by a certain date, subtract receiving time, freight time, production time, sample time, and a buffer for normal human problems. That is not pessimism. That is how schedules survive contact with reality.
Common mistakes that hurt margin and timing
The first mistake is overdesigning the cap. Too many colors, too many materials, too many decoration methods. At a certain point the product stops feeling like a retail item and starts feeling like a spec sheet with a brim. Simpler usually sells better because the hat stays readable from a distance and easier to merch alongside other product.
The second mistake is approving artwork without checking how it behaves on a curved front panel. A logo can be technically correct and still stitch badly if it is too small or too detailed. Patch placement matters too. Move the patch a quarter inch and the whole cap can shift from balanced to slightly off. That is geometry, not drama.
Inventory planning is another weak spot. Splitting a modest drop into too many colorways spreads demand thin and creates leftovers. If there is no real data yet, three colors is not “choice.” It is three small problems. Concentrating quantity on the strongest colorway usually protects margin better than dividing the run just to make the line look fuller.
Packaging and freight are the hidden traps. Unclear carton specs can slow receiving. Missing labels can cause hold-ups. Assuming freight will behave because the product is done is a rookie move, and it tends to be expensive. Ask how the retailer wants the goods packed before production starts. Packaging is part of the order, not an afterthought.
One more blunt point: a premium cap that arrives late is not premium. It is late. Timing needs to be part of the product brief from the beginning, especially for launches, collaborations, and store resets tied to a fixed date. The market does not care how nice the embroidery looked if the launch already passed.
Expert checks before you place the order
Before you approve the run, run the basics one more time. Confirm target retail price. Confirm quantity. Confirm artwork files are vector and production-ready. Confirm decoration method, closure style, crown profile, and pack-out. Confirm the in-hand date. If any of those are fuzzy, the quote and the production plan will be fuzzy too. That is how avoidable problems get dressed up as “production issues.”
Ask for two or three quote scenarios if you are comparing options. One should be the clean baseline build. One should include a premium decoration choice. One can include extra packaging or labeling. That gives your team a real comparison in dollars, not just a prettier mockup. Buying decisions get better when the tradeoff is visible.
QC should also be practical, not ceremonial. Check stitch count consistency, seam alignment, panel symmetry, crown firmness, sweatband quality, and snap closure tension. Make sure the embroidery is centered and the patch edges are clean. Look for loose threads, crooked labels, and color drift against the approved sample. These are small defects individually. Together, they are the reason a product feels cheap even when the materials were not.
If the drop is untested, start with one hero colorway and maybe one backup, not five variations because somebody liked the palette board. Watch sell-through. Then scale the next order from real numbers instead of enthusiasm. That is the boring answer, and boring is usually profitable.
For brands ordering snapbacks for retail merch drops, the smartest approach is to treat the cap like a retail product first and a creative object second. Get the spec tight. Keep the quote inputs clean. Give production enough time to do the job properly. Do that, and the order stops feeling like guesswork. It becomes a controlled run with a product people actually want to wear.
Frequently asked questions
What MOQ makes sense for snapbacks for retail merch drops?
For smaller drops, 100 to 300 units is usually a practical starting range. At 300 to 500 units, unit cost often improves enough to protect margin. Ask for tiered pricing so you can see the break points before committing to a quantity that is too large for demand.
How long do retail snapbacks usually take to produce?
Sample development often takes about 7 to 14 days when artwork is ready. Bulk production commonly runs 15 to 30+ days depending on customization. Add freight and receiving time, because a finished cap that is still in transit is not actually finished for your launch.
Which decoration method works best for retail snapbacks?
3D puff embroidery is strong for bold logos and a premium retail look. Patches work well when the artwork has fine detail or needs more presence. Flat embroidery is usually the safest choice when you want cleaner pricing and simpler production.
How do I keep unit cost down without making the hat look cheap?
Use one core body style and limit color changes across the run. Cut back on add-ons like custom lining, overly complex labels, or oversized patch builds. Increase quantity on the strongest colorway instead of splitting the order into tiny variants that are hard to sell through.
What should I send for an accurate quote on retail snapbacks?
Send artwork, target quantity, target retail price, and your required in-hand date. Include closure type, crown style, decoration method, and pack-out needs. If you already have a sample or reference photo, include that too so the quote stays apples to apples.


