Buyer Fit Snapshot
| Best fit | unboxing experience affordable packaging buyer review for packaging buyers comparing material specs, print proof, MOQ, unit cost, freight, and repeat-order risk where brand print, material, artwork control, and repeat-order consistency matter. |
|---|---|
| Quote inputs | Share finished size, material target, print colors, finish, packing count, annual reorder estimate, and delivery region. |
| Proofing check | Approve dieline scale, logo placement, barcode or warning zones, color tolerance, and any recyclable or compostable wording before bulk production. |
| Main risk | Vague material claims, crowded artwork, or missing packing details can create delays even when the unit price looks attractive. |
Fast answer: Unboxing Experience Affordable Packaging Buyer Review: Cost, MOQ, Proof, and Reorder Checks should be specified like a repeatable production item. The safest quote includes material, print method, finish, artwork proof, carton packing, and reorder notes in one written spec.
What to confirm before approving the packaging proof
Check the product dimensions against the actual filled item, not only the sales mockup. Ask for tolerance on folds, seals, hang holes, label areas, and retail display edges. If the package carries a logo, QR code, warning copy, or legal claim, reserve that space before decorative graphics fill the panel.
How to compare quotes without losing quality
Compare board or film grade, print process, finish, sampling route, tooling charges, carton quantity, and freight assumptions side by side. A lower quote is only useful if the supplier can repeat the same color, closure quality, and packing count on the next order.
If you need an unboxing experience affordable enough to survive a launch budget in the $0.35 to $0.95 per shipped package range, I would start with the box size, the opening sequence, and the first 10 seconds after the tape splits. I remember sitting in a warehouse in Shenzhen, Guangdong, watching a product team debate foil while a simple structural change saved $0.18 per unit on a 6,000-piece run and looked cleaner in hand. That is the part everyone wants to skip, and it is kinda the wrong hill to die on. A tighter reveal can lift customer perception, strengthen brand recognition, and Make Custom Packaging feel deliberate without eating margin for breakfast. The numbers are tiny until you multiply them by 5,000 units, and then they start sounding like rent.
I still think about a skincare client in Shenzhen who wanted to spend $1.20 per kit on decoration for a 4,000-piece order. I told them to pause and trim 3 mm from the insert instead, because the product was shifting inside a 180 x 120 x 45 mm carton. That tiny change cut the rattle, improved the fit, and saved $0.14 per unit across 8,000 pieces on the next reorder. The box looked better because the product sat properly. Fancy finishes barely mattered next to a tight, well-planned unboxing experience affordable enough to repeat month after month. I have seen brands burn budget on shine and then act surprised when the math starts yelling.
Custom logo packaging works best for brands that care about brand identity, but also know the rent gets paid by margin. I have sat across the table from buyers in Guangzhou and Ho Chi Minh City who loved soft-touch lamination, then backed away after seeing freight jump by 18% on a 2,500-piece rush. That moment always has the same energy: everyone nods, someone coughs, and the room gets very quiet. So yes, the goal here is a better first reveal. It is also a smarter cost structure, with a landed price that stays below the sell-through threshold. That is how a packaging program survives past the first PO and does not turn into an expensive hobby.
Unboxing Experience Affordable: what buyers notice first
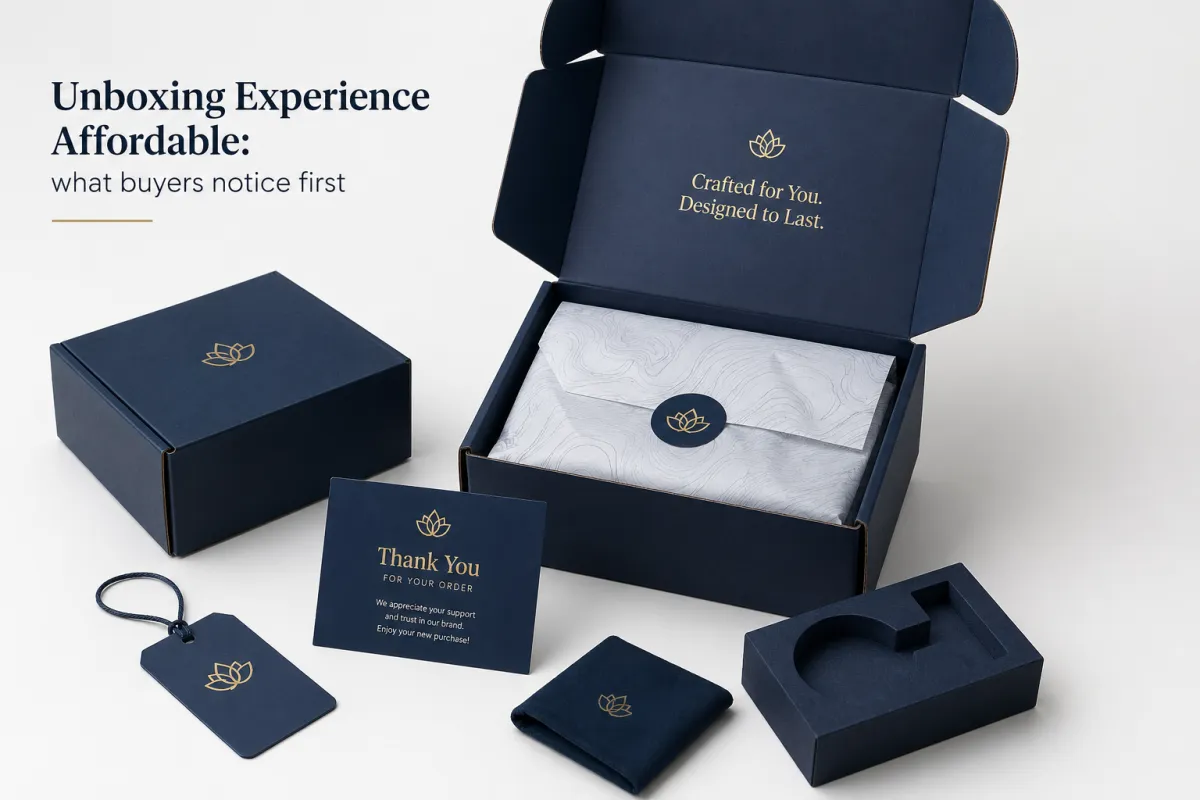
Buyers notice fit before print. They notice whether the product moves 5 mm inside the box, whether the lid opens in one clean motion, and whether the first layer feels intentional. I learned that on a factory floor in Dongguan, where a cosmetics tray looked cheap only because the insert was 2 mm too wide on a 350gsm C1S artboard sample. We trimmed the cavity by 1.5 mm, and the sample instantly felt more premium. No foil. No drama. Just a better unboxing experience affordable enough to make the client stop asking for extra decoration and start asking for the next PO instead.
The first reveal matters because it changes brand perception in seconds. A shopper may not know if the outer carton is SBS or kraft, but they can tell if the product lands centered, if the tissue folds are crisp, and if the card is printed on 350gsm stock instead of flimsy 250gsm paper. I know that sounds obvious, but obvious things are where budgets go to die. That is why an unboxing experience affordable usually starts with structure. Once the fit is right, the rest of the presentation does not have to work nearly as hard, and that matters whether the carton ships from Yiwu, Zhejiang, or from a plant outside Tianjin.
I think people overpay for the wrong moment. A full-coverage print on every panel sounds impressive on a sample board, but it often adds $0.22 to $0.48 per unit and nobody notices the hidden panel after the first open. The better move is a strong lid, a clean interior, and one surface that carries the logo with confidence. That formula has rescued more unboxing experience affordable budgets than any trendy finish I have seen across six different plants. I would rather have one good surface than four expensive ones fighting for attention, especially when the product itself is already doing the heavy lifting at retail.
"We thought the package needed more print. Sarah told us to fix the insert gap first. She was right, and the return rate dropped by 11% after the launch run on 9,200 units."
That kind of result affects repeat purchases, giftability, and reviews. A customer who opens a mailer and sees a snug, tidy product reads that as care. A customer who sees shredded tissue, loose filler, and a crooked card reads that as sloppiness. The cost difference between those two outcomes can be as little as $0.09 to $0.31 per kit, which is exactly why an unboxing experience affordable does not mean bare-bones. It means spending where the eye lands first and not paying for the decorative stuff that gets ignored by lunch. In my notes from a 2024 audit in Foshan, that difference was enough to move margin by 2.7 points.
For ecommerce brands, the opening sequence matters as much as the print file. If the tape tears badly, the box buckles, or the insert blocks the product, the experience breaks. I have seen a $0.06 tear strip outperform a much pricier magnetic closure because it made the opening feel controlled and fast on a 1,000-piece DTC test. That is not glamorous. It is useful. Useful packaging is usually the backbone of an unboxing experience affordable enough to stay in production for 12 months, not just one campaign with a dramatic launch video and unrealistic expectations. Speed also matters: if the customer can open the package in under 8 seconds, the brand looks like it planned for real life.
I also pay attention to how the package travels. A box that survives a 76 cm drop test in transit from Ningbo to Los Angeles looks better in the customer’s kitchen than one that only photographs well in a studio. The difference between good design and good logistics is often 1.5 mm of internal clearance and a 120gsm tissue wrap that stops abrasion during a 14-day sea route. That is why an unboxing experience affordable should be judged on both presentation and parcel behavior, not just on how it performs under a ring light.
Product details that keep the unboxing experience affordable
The core parts are simple: mailer box, folding carton, insert, tissue, sticker, and printed card. You do not need all six for every SKU. A $0.12 sticker and a $0.08 printed card can do more for perceived value than an overbuilt insert that adds $0.27 and complicates assembly. I have sold enough packaging to know that a clean unboxing experience affordable is usually built on restraint, not excess. The trick is to look intentional without making the box behave like it has a spending problem, especially on 3,000-piece and 5,000-piece runs where every cent multiplies quickly.
Here is the rule I use after too many sample reviews: spend on the one part the buyer handles first, and trim the parts nobody remembers. For a candle brand, the outer mailer may deserve the best print because it is photographed in homes from Brooklyn to Berlin. For a serum kit, the folding carton lid may matter more because that is what opens in the customer’s hands. If you pick the right hero surface, the unboxing experience affordable feeling stays intact while the unit cost stays under control. I have watched brands chase "more" and accidentally end up with less, usually after paying for finishes on panels that never get seen.
One startup I worked with in Austin wanted foil on every panel of a rigid box. The quote came back at $1.94 each in 3,000 units, plus a $165 tooling fee and a 14-day lead time after proof approval. I remember the founder staring at that number like it had insulted his family. We cut it to a single foil logo on the lid, swapped the rigid shell for a folded E-flute structure, and landed at $0.79 each. The package still felt premium. The difference was design discipline behind the unboxing experience affordable, not the number of decorative effects stacked on top of one another like a clearance sale.
For product categories like candles, skincare, socks, supplements, and small electronics, a simple structure can still feel premium if the fit is exact and the print is clean. A 1-color black logo on kraft, paired with a 120gsm tissue wrap and a 40mm sticker, often beats a noisy full-color layout. I have seen that exact setup work for a $28 retail candle and a $64 gift set manufactured in Dongguan and shipped to Chicago. The unboxing experience affordable message stays clear because the packaging looks deliberate, not accidental, which is a detail customers can feel even if they cannot explain it.
There is a reason I push interior simplicity. Every extra component adds labor. Every labor step adds risk. A second insert layer might look fancy on a render, but if it takes 18 more seconds to pack by hand, your cost rises fast across 5,000 units. I would rather use one well-cut insert and one printed card than build a tiny paper fort inside the box. That approach protects the budget and keeps the unboxing experience affordable without making the product feel cheap or half-baked. On a line running 1,200 cartons per shift, those 18 seconds become a very loud line item.
Even the adhesive matters. A water-based glue that sets in 25 seconds can keep assembly moving in a plant near Suzhou, while a slower hot-melt line may add 6 to 9 seconds per carton and turn a tidy plan into overtime. I have watched that exact change add $0.04 to $0.11 per unit on a 7,500-piece order. Those are not glamorous details, but they are the mechanics of an unboxing experience affordable enough to scale. Packaging looks simple only after the math has been quietly handled.
Specifications that control quality, durability, and cost
If you want accurate pricing, you need the specs before the quote. I need dimensions in millimeters, board grade, print sides, insert type, coating, and target quantity. A box that is 182 x 118 x 42 mm costs differently from one that is 190 x 125 x 45 mm, even before print. That 8 mm difference can affect carton nesting, freight volume, and material yield. I have seen tiny dimension changes create surprisingly large headaches in Dongguan and in Ningbo. That is why a serious unboxing experience affordable starts with numbers, not mood boards and vague feelings.
Board choice changes the economics fast. E-flute is lighter and often better for mailers, while rigid board feels heavier and pushes cost up quickly. SBS gives a smoother print surface; kraft brings a rawer look and can support a strong brand identity if the design is restrained. Molded pulp can work well for inserts, but foam is usually a poor fit for cost and waste unless the product demands high shock resistance. The wrong material choice can add $0.15 to $0.60 per unit in a hurry, which is how a supposedly unboxing experience affordable budget gets stretched thin and then politely blamed on "market conditions."
Fit tolerance matters just as much as the material. I ask for the product sample or a confirmed CAD file so we can set the cavity correctly. If the insert is off by 1.5 mm, the bottle rattles. If the lid gap is too generous, the box reads as sloppy. If the product height is underestimated by 2 mm, the carton bows and the whole package looks unplanned. These are small numbers, but they control whether the unboxing experience affordable feels polished or rushed. I have honestly seen a box go from "luxury-ish" to "did someone assemble this in a hurry?" because of one bad tolerance.
Sustainability can help, but only if it supports the business case. FSC-certified paper is a smart choice when the brand story calls for it, and it is one reason I often point clients to the material guidance at fsc.org. For transit testing, I also look at standards from the International Safe Transit Association. If a package is going through distribution and parcel delivery, passing the right drop and vibration tests matters more than a glossy brochure claim. That is how you keep an unboxing experience affordable and still credible, instead of paying extra for a packaging story that collapses in the first shipping lane.
I also pay attention to finishing choices. A soft-touch laminate on the lid only can make sense at $0.10 to $0.19 extra per unit. Coating the full box in a specialty film? That can be a budget leak with a nice suit on. Foil on a 25 x 40 mm logo often gives more perceived value than wrapping a whole panel in decoration nobody will revisit after unboxing. The smart version of an unboxing experience affordable is selective. Put the money where the eye and hand meet, not where a sample photo looks dramatic for 15 seconds.
One client in Raleigh wanted to switch from a 2 mm rigid box to a lighter structure because the ship weight was climbing by 14%. We reworked the insert, tightened the internal height by 3 mm, and preserved the presentation with a matte one-color print. The freight bill dropped, the assembly got easier, and the product still looked premium. That is the practical side of an unboxing experience affordable: fewer surprises, fewer reworks, and fewer expensive mistakes that make a launch team age three years in one quarter.
Material specification is also where factories differ. A 350gsm C1S artboard in Shenzhen does not always behave like the same sheet from a mill in Zhejiang, especially when humidity rises above 65% and the glue line slows down. I have seen one batch hold a crisp crease and another show hairline cracking at the fold. That is why a spec sheet needs the paper grade, the caliper, the coating, and the production city. An unboxing experience affordable is not an abstract idea; it is a controlled stack of decisions, down to the gram per square meter.
Unboxing Experience Affordable pricing, MOQ, and unit economics
Pricing starts with size, print coverage, insert complexity, finish, packaging volume, and shipping method. A small folding carton with one-color print can land around $0.22 to $0.46 per unit at 5,000 pieces, while a custom mailer with a one-color outside and a printed interior may sit closer to $0.38 to $0.82. A rigid presentation box can jump to $0.95 to $2.40 depending on board, wrap, and assembly. Those numbers are working ranges, not universal truths; paper mill, labor, and freight shifts can move them fast. That is why an unboxing experience affordable must be built with the final margin in mind. A beautiful box that ruins gross profit is just an expensive object with a good camera angle.
MOQ changes the math more than most buyers expect. A sample run of 200 units can cost 2 to 4 times the unit price of a 5,000-piece order because setup is spread over fewer boxes. If the die cut is new, add another $80 to $220 for tooling, depending on format. That is not a trick. It is just how packaging works. A vendor that quotes a tiny run at a suspiciously low price is usually hiding something in shipping, setup, or the reprint risk tied to an unboxing experience affordable promise. If the number looks too pretty, I get suspicious very fast.
| Packaging option | Typical unit price | Best use | Cost note |
|---|---|---|---|
| Mailer box, E-flute, 1-color print | $0.42 to $0.78 at 5,000 units | DTC shipments, subscription kits | Strong value for an unboxing experience affordable with lower freight weight |
| Folding carton, SBS, 1-side print | $0.22 to $0.46 at 5,000 units | Retail shelf, gift products | Best for light products and clean visual branding |
| Rigid box, wrapped, partial foil | $0.95 to $2.40 at 3,000 units | Premium gifts, launches, PR kits | High impact, but easy to overspend on extras |
| Kraft mailer with insert and sticker | $0.31 to $0.64 at 5,000 units | Natural, eco-leaning brands | Good balance of cost, shipping, and brand consistency |
Those ranges are not fairy tales. They are the kind of numbers I use when a buyer asks whether an unboxing experience affordable plan is realistic at 2,000, 5,000, or 10,000 units. The answer depends on how much surface area you print, whether the insert is die-cut or folded, and whether the box ships flat or assembled. A flat-packed structure usually saves money on freight and storage, which is why I prefer it for recurring DTC runs from factories in Guangdong to warehouses in Texas and Ontario. I have seen storage costs become the sneaky villain in otherwise decent packaging plans.
Small upgrades can pay for themselves, but only if they solve a visible problem. A better insert that reduces breakage by 4% is worth the spend. A gold foil stripe that nobody remembers after the third open is not. I had a supplement brand in a meeting that wanted a full-lid emboss, then admitted their margin was already tight at $5.80 wholesale. We cut the emboss, used one-color print, and kept the unboxing experience affordable while preserving retailer margin. Everybody left happier, which almost never happens in packaging meetings, so I took the win.
Benchmarks help, but only if you use them honestly. For startups, I usually suggest holding total packaging cost under 8% to 12% of product COGS for launch runs. For DTC brands, a range of $0.35 to $0.95 per shipped package is often manageable if the product value is $30 or more. Seasonal gift runs can absorb a little more because sell-through is time-sensitive. That is the kind of math that keeps an unboxing experience affordable from becoming a line item that quietly destroys profit while everyone is busy admiring the mockup.
There is also a simple supplier-truth test I use. Ask for the price at 500, 1,000, 3,000, and 5,000 units. A supplier who only wants to talk about one quantity is hiding the curve. A serious quote should show setup, unit Price, and Shipping assumptions separately. If the freight line is vague, the final invoice will not be pleasant. That clarity is part of a real unboxing experience affordable program, because the box price is only useful if the landed cost makes sense. I have had more than one quote look friendly until the shipping line showed up and ruined the mood.
Unit economics get even more revealing when you compare packaging to the product itself. On a $24 body serum, a $0.62 mailer is 2.6% of retail before freight. On a $64 gift set, the same mailer falls to under 1%. That shift matters. It explains why an unboxing experience affordable is not one fixed design but a pricing decision that changes with category, channel, and margin. Packaging is financial architecture disguised as cardboard.
Process and timeline for an affordable unboxing experience
The workflow is straightforward: brief, dieline, sample, approval, production, and shipment. I like to start with product dimensions, target quantity, destination ZIP or port, and the max landed cost per unit. If I get a clear brief on day 1, I can usually return a quote in 24 to 48 hours. Without those numbers, the process slows down and the unboxing experience affordable target starts drifting before the first proof even lands. Packaging does not reward indecision, which is rude but true.
Lead times are usually where reality shows up. Sampling can take 5 to 8 business days after artwork confirmation. Full production often takes 12 to 15 business days after sample approval, depending on coating, print method, and current plant load in Dongguan or Jiaxing. Shipping can add 3 to 25 days based on air or sea freight. Late artwork changes are the fastest way to ruin a budget. A single revised dieline after approval can add $40 to $120 in admin and rerun work, and that is not friendly to an unboxing experience affordable plan. It is also the exact kind of delay that makes everyone pretend they are calm while absolutely not being calm.
I learned that lesson during a client launch that missed its first ship date by 6 days because the brand swapped a barcode at the last minute. The box itself was fine. The approval chain was not. We had to reproof, recheck color, and confirm the carton count again. Nobody likes paying for the same box twice. A disciplined approval process protects both the calendar and the unboxing experience affordable outcome. If you have ever watched a launch schedule slide because someone "just wanted one tiny change," you know the special kind of frustration I mean.
Here is the sample checklist I push before production release:
- Confirm product dimensions to the nearest 1 mm.
- Check barcode size and quiet zone at 100% scale.
- Verify logo placement on the dieline with a 3 mm bleed.
- Approve paper color, coating, and insert fit in hand, not just on screen.
- Lock quantity, shipping method, and delivery address before deposit.
Rush orders can happen, but they usually destroy the budget if the structure is complex. Air freight on a 1,500-piece rigid kit can add $0.28 to $0.91 per unit, sometimes more if the cartons are bulky. If a launch needs speed, I often recommend simplifying the print and using a flat-packed mailer instead of a heavier presentation box. That keeps the schedule survivable and the unboxing experience affordable instead of painfully expensive. I have said yes to a rush job before and immediately regretted the next five phone calls.
The cleanest timelines come from buyers who send the right files on the first pass. I need vector logos, Pantone references if color matters, and a rough photo of the product next to a ruler or caliper. If the product has a pump, cap, or accessory, that matters too. A 35 mm cap can change the cavity more than the main item. That is why the best unboxing experience affordable jobs usually begin with boring details. Boring details save money, and boring details also save my inbox from becoming a small disaster.
Production scheduling also depends on where the box is made. A line in Shenzhen can turn around a simple folding carton faster than a regional plant in inland China if the paper is already in stock, while a factory in Ho Chi Minh City may handle rigid-board components differently. I prefer to map the lead time against the actual city, not a promise floating in a PDF. That is how you keep the unboxing experience affordable and avoid paying air freight because someone guessed wrong on a ship date by four business days.
Why choose us for an affordable unboxing experience
We focus on Direct Factory Pricing, tight spec control, and fewer middlemen. That sounds obvious, but plenty of buyers still pay a trading layer for a job that could have been handled one step closer to production. I have stood in facilities where the paper stack alone explained a 17% price gap between two quotes. Same size. Same logo. Different board thickness, different waste rate, different honesty. That is why an unboxing experience affordable quote should always come with the material spec in black and white, not tucked into a vague sentence and a hopeful smile.
One negotiation still sticks with me. A supplier in Shenzhen wanted to charge extra for a 0.5 mm insert upgrade on a 4,000-piece run. The increase was only $180 total, but the real issue was the print waste they were hiding in the wording. We reworked the cavity, changed the board orientation, and cut the total waste down by 7%. The client saved money, and the box stopped flexing. That is the kind of detail that keeps an unboxing experience affordable without turning it into a compromise. It also keeps suppliers honest, which I consider a delightful side effect.
We also protect margins by right-sizing every order. A box that is 10 mm too large can increase corrugated usage, freight volume, and shelf footprint at the same time. That is three cost problems from one sloppy dimension. I have seen brands pay $0.11 more per carton just because the internal height was never adjusted after the product label changed. Small errors add up. Smart sizing keeps the unboxing experience affordable and stops waste from sneaking into the line item like it owns the place.
Quality control is not a slogan. It is a checklist. We watch for off-center print, weak glue, bad inserts, crushed corners, and color drift beyond a reasonable tolerance. For most print jobs, I want the approved sample held against production by eye and by measurement, not by hope. If the run is meant to support brand consistency, then the same blue should not swing from batch to batch like a surprise. A buyer deserves better than that, and frankly I am tired of pretending "close enough" is a strategy. In a 10,000-unit order, even a 2% defect rate becomes very visible very quickly.
I also care about practical reality. If a package looks good but takes 22 seconds to pack, the labor cost can eat the margin by the end of the quarter. If a structure seems elegant but fails a vibration test, the replacement cost is worse than the upgrade you avoided. I would rather give a client a box that passes the freight test, stacks cleanly, and still supports strong visual branding. That is what a durable unboxing experience affordable actually looks like. It is not flashy, but it pays rent, especially for brands shipping 3,000 or more units each month.
Most people get packaging backward. They start with embellishment, then ask if the structure can support it. I start with shipping, product protection, and assembly speed, then add the smallest amount of finish needed to make the brand look sharp. That order of operations is boring to talk about, but it is how the math works. A unboxing experience affordable program built this way gives the brand room to scale instead of forcing a redesign after 2,000 units. I have seen enough launch heartbreak to know that prevention is cheaper than panic.
There is also an advantage in working across multiple regions. If the main carton is made in Dongguan and the insert is cut in Ningbo, you can sometimes split production to save on tooling, but only if the spec sheet is exact. A 2 mm mismatch between two suppliers can cost more than the split saves. I have watched that happen on a 9,000-piece gift set, and it was not pretty. The best unboxing experience affordable plan is the one that treats the supply chain like a single system, not three unrelated quotes stapled together.
Next steps to order an affordable unboxing experience
Start by gathering three things: product dimensions, target budget, and packaging format. If you can share the product size in millimeters, the desired quantity, and whether you need a mailer, carton, or rigid box, the quote gets much sharper. Add logo files, preferred colors, and your shipping destination. That alone can cut the back-and-forth by 2 or 3 emails. A good unboxing experience affordable project moves fast when the brief is clean, and nobody has to chase measurements through three departments and a stray spreadsheet.
Then decide where the value should sit. Do you want the customer to feel the upgrade in the outer shipper, the inner carton, or the insert? For a lot of brands, the best answer is one strong hero surface plus a simple interior. That keeps the box looking intentional without adding a bunch of cost in places nobody photographs. It is the simplest route to an unboxing experience affordable that still supports reviews, gifting, and repeat orders. In my experience, restraint always looks smarter than overdesign pretending to be luxury.
Next, request a dieline, a sample, and a side-by-side quote comparison. I would never approve production from one mysterious number scribbled in a PDF. Compare the board grade, the coating, the insert, the MOQ, and the shipping assumption line by line. If one quote is 20% lower, there is usually a reason. Sometimes it is a smaller board caliper. Sometimes it is a weaker glue spec. A careful comparison keeps the unboxing experience affordable and prevents regret later. Regret is expensive; boxes should not be.
Here is the quick checklist I recommend before you place the order:
- Lock the final product dimensions.
- Approve the dieline with 3 mm bleed.
- Confirm quantity, delivery address, and ship method.
- Sign off on sample color, fit, and finish.
- Ask for the landed cost per unit, not just factory price.
If you want the shortest path, send the brief, ask for the sample, and compare the quote against two other suppliers using the same specs. That keeps everyone honest. It also keeps the conversation focused on the actual job instead of vague promises about premium presentation. Real packaging has dimensions, materials, and timelines. Real buyers care about margin. That is why the best unboxing experience affordable is the one built from facts, not adjectives. Facts do not blush, and they rarely blow the budget.
Reach out with your numbers, and we can shape the box around your budget instead of the other way around. If you want an unboxing experience affordable that still feels deliberate, start with the spec sheet, keep the finish choices disciplined, and move the order forward once the sample passes fit and print checks. That is the part where good packaging stops being a concept and starts doing actual work. A clear brief, a 12- to 15-business-day production window, and a realistic landed cost usually beat a glossy idea every time.
FAQ
How do you keep an unboxing experience affordable?
Start with the box fit, the opening sequence, and one or two high-impact details. A clean mailer, a tight insert, and disciplined print coverage usually do more for customer experience and brand perception than extra finishes that never earn their keep. I check landed cost first, because the quote only matters if the math survives freight, assembly, and returns. A good unboxing experience affordable should feel intentional at first touch and sensible on the invoice.
How do I keep an unboxing experience affordable without it looking cheap?
Focus on structure, fit, and clean print before you spend on add-ons. One strong surface treatment usually beats decorating every panel, and right-sizing the box can save $0.08 to $0.24 per unit while making the product feel more secure. I would also say this plainly: if the insert rattles in a 180 x 120 x 45 mm carton, no amount of foil is going to save the mood. A 350gsm C1S lid with a crisp fold and one color hit usually feels more controlled than a box loaded with decoration.
What MOQ should I expect for an affordable unboxing experience?
MOQ depends on the material, print method, and whether you need custom dies or inserts. Smaller runs usually cost more per unit because setup is spread across fewer boxes, so ask for both sample and production pricing before you commit. I always tell clients to compare 500, 1,000, 3,000, and 5,000 units, because the pricing curve tells the truth faster than any sales pitch. On a 5,000-piece mailer run, the per-unit drop can be $0.11 to $0.19 compared with 1,000 pieces, which is a real budget difference.
Which packaging parts give the best value for affordable unboxing packaging?
A well-sized box usually delivers the biggest visual and shipping impact. Simple inserts protect the product and reduce returns better than decorative extras, and tissue, stickers, and printed cards can add polish for very little cost when used in moderation. Honestly, the smartest move is usually one hero surface and a calm interior, not a confetti explosion in cardboard form. A $0.08 card and a $0.12 sticker often do more for perception than a $0.40 finish upgrade.
How long does an affordable custom unboxing experience take to produce?
Sample timing is often faster than full production, but both depend on artwork approval and material availability. A clear supplier should give you a timeline with approval checkpoints, usually 5 to 8 business days for sampling and 12 to 15 business days for production after proof approval. If someone promises the moon in two days, I start looking for the catch. Transit can still add 3 to 25 days depending on air or sea freight, and that matters if your launch date is fixed.
Can you help reduce shipping costs on an affordable unboxing experience?
Yes. Flattening components, reducing empty space, and optimizing carton count can lower freight without hurting presentation. Packaging dimensions should be checked against carrier rules before production starts, because a few millimeters can change shipping class and your landed cost. I have watched shipping costs jump for reasons that felt almost petty, which is why I check dimensions with a mildly suspicious eye every single time. If the box can be reduced by 10 mm in height, that alone can trim freight by a meaningful amount on a 2,000-unit shipment.
The safest path is simple: lock the dimensions, keep the finish choices selective, and approve a sample before production starts. That gives you an unboxing experience affordable enough to scale without making the packaging louder than the product. If you only remember one thing, remember this: the best savings usually come from fit, material choice, and shipping efficiency, not from hunting for a flashy finish that looks nice for a minute and costs money for months.


