An apparel Logo Patch Beanies supplier does more than decorate knitwear. The right one helps turn a logo into something that survives texture, stretch, folding, and winter use without losing its shape or meaning. That sounds simple until you see how often a strong mark turns muddy on ribbed yarn or sits awkwardly on a cuff that was never sized for it.
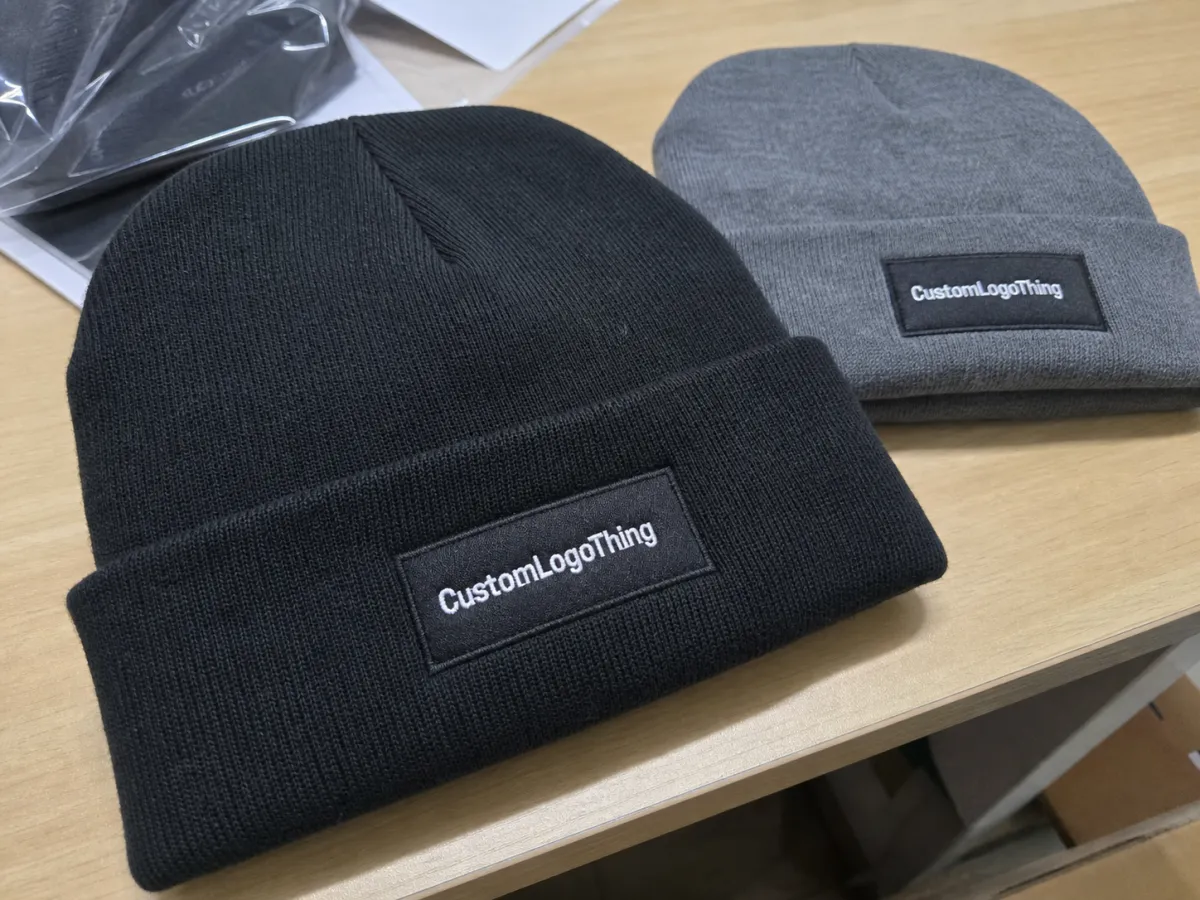
The patch choice changes the whole read of the product. A woven patch can make a fine-line logo legible. A leather patch can make a basic beanie feel restrained and premium. TPU or PVC gives a cleaner, more athletic edge. Direct embroidery still has a place, but on chunky knit it often struggles with detail and can look crowded fast.
Most weak results come from treating the beanie like a blank canvas instead of a textured substrate with limits. The supplier’s real job is to match the logo, the hat body, the patch material, and the budget so the final piece looks deliberate. If any one of those drifts, the hat starts to feel like a sample instead of a product.
What an apparel logo patch beanies supplier actually delivers
A serious supplier starts by translating your artwork into a patch that can actually be produced. Tiny lettering, thin outlines, gradients, and cluttered crests usually need simplification before they survive on knitwear. On a screen, a logo can look crisp at 200 percent zoom. On a ribbed cuff, those same details can collapse into noise.
That is why the first useful conversation is not about price. It is about readability. How far away should the logo be legible? Does the brand need a low-profile mark that blends in, or a patch that announces itself across a room? The answer changes patch size, contrast, and whether the supplier should recommend woven, embroidered, leather, or molded construction.
The supplier also has to balance placement. Center-front is the simplest choice, but not always the best. A cuffed beanie gives a more stable surface than a slouch fit, and a side placement can feel contemporary if the logo is small enough. Move a patch too close to the top seam or stretch zone and it starts to warp when worn. Move it too low and it gets hidden when the cuff folds.
Good suppliers ask the practical questions early: What yarn weight is the beanie body? Is the cuff double-layered? Does the artwork need a custom die-cut shape or a clean rectangle? Are the hats going into a retail channel, a team order, or a promotional drop? Each answer changes how the order should be built. The weak suppliers skip those details and rush straight to a mockup.
A clean patch can lift a basic beanie. A bad one makes the whole product feel rushed, even when the knit itself is solid.
Quality also depends on how the product is expected to travel. Beanies are soft, but the patch is not. It can crease, lift at the edge, or lose shape if packaging is poor or cartons are crushed in transit. For orders headed into retail or direct-to-consumer fulfillment, transit testing and packaging discipline matter. The ISTA testing framework is useful for judging how an item holds up under handling and distribution pressure.
That is the difference between a supplier and a parts broker. One simply quotes a hat with a logo on it. The other helps you avoid a product that looks fine in a digital proof and weak in the hand.
How patch construction changes the final beanie
Patch type sets the tone immediately. Woven patches handle detail well and sit flatter, so they are usually the safest choice for small logos or typography with fine strokes. Embroidered patches add texture and depth, which works well for bolder branding, but they can feel bulky if the design has too much small text. Leather patches tend to communicate restraint and quality with less visual clutter. TPU and PVC offer sharp edges and a more technical look, which suits outdoor or athletic branding. None of those is universally best.
Backing method matters just as much as the face material. Sew-on is still the most dependable option because it tolerates stretching, repeated wear, and washing better than shortcuts do. Heat-applied patches can be clean and efficient for production, but they depend on the right temperature, pressure, and dwell time. If the process is sloppy, the edge starts to fail. Adhesive backing can work for short-run prototypes, but it is not the answer for finished retail stock that has to survive real use.
Edge finish changes the visual weight of the patch. A merrowed edge frames the artwork and gives a classic border, but it also creates a thicker profile. Laser-cut and heat-cut edges can look sharper and more modern, especially on smooth materials like TPU. They need precise artwork and accurate cutting, though. If the linework is irregular, the whole patch reads as cheap instead of intentional.
There is also a tactile issue that buyers underestimate. The heavier the stitch density or the stiffer the material, the more the patch resists the stretch of the knit. That can be fine on a structured cuff, but on a soft slouch beanie it may feel clumsy. The best result is usually a compromise: enough structure to hold shape, not so much that the hat stops feeling like a beanie.
| Patch type | Best use | Typical strengths | Watchouts |
|---|---|---|---|
| Woven | Fine detail, small logos | Flatter surface, readable artwork, lighter feel | Less texture than embroidery, can look understated |
| Embroidered | Bold logos, classic merch | Texture, depth, familiar retail appearance | Tiny text can blur, thick borders can feel bulky |
| Leather | Minimal branding, premium lines | Simple, upscale, strong contrast on knit | Not suited to fine detail or very soft styling |
| TPU / PVC | Modern, athletic, outdoor styling | Crisp shapes, durable look, easy to spot from a distance | Can feel out of place on heritage or fashion-led products |
| Mixed-material | Custom statements, special projects | Flexible visual impact, more design options | More revision points, more risk of delay |
The simplest rule still holds: bold artwork tolerates bolder construction, while delicate marks need a flatter, cleaner patch surface. If the brand name depends on micro-text, the knit will fight back. That is not the beanie being difficult. That is the material telling you the design needs to change.
Specs that change handfeel, durability, and fit
Before a buyer debates patch finish, the beanie body itself should be locked down. Yarn gauge, cuff height, and stretch level shape the outcome more than many first-time buyers expect. A shallow fashion beanie gives less room for branding. A tall cuffed beanie gives a more stable canvas. A slouch silhouette creates space, but the patch can sit at a less predictable angle once worn.
Patch size should be chosen against the hat, not against the logo file on a laptop screen. That mistake is common and expensive. A patch that looks elegant in a proof can swallow a small cuff. A patch that seems modest can disappear on a looser knit or a dark colorway. For many branded beanies, a width around 2 to 3 inches works well, but that is a starting point, not a rule. Cuff height, stitch density, and visual contrast all affect the final read.
Contrast controls visibility. A black patch on charcoal knit can look sophisticated in a mockup and nearly vanish in daylight. A white patch on a pale cream beanie can feel too loud for brands that want a quieter voice. A good supplier should flag those issues before sampling, because a poor contrast choice is hard to rescue later without changing the whole design language.
Durability is where the product is either proven or exposed. Beanies get folded into bags, pulled on and off repeatedly, brushed against outerwear, and washed more than many buyers assume. A patch should not curl at the corners, crack at the edges, or peel after a few wear cycles. If the beanies are going to sports teams, winter events, or consumer retail, ask what happens after repeated abrasion and laundering. A supplier who cannot describe likely failure points is guessing.
Material composition matters here too. Acrylic knit is common because it is affordable and easy to form, while wool blends usually carry a warmer handfeel and a higher price. Mixed yarns can improve drape or reduce itch, but they also change how a patch sits on the cuff. A softer knit may require a lighter patch backer so the beanie still stretches naturally. A stiffer knit can support a heavier badge without complaint. Matching those variables is part of the job, not a bonus feature.
For product lines with multiple colors, consistency is worth more than novelty. Keep the cuff height, patch placement, and body proportions stable across colorways so customers see one product family, not a collection of almost-the-same hats. That kind of discipline saves money later, because it reduces sampling drift and keeps the order easier to repeat.
Cost, MOQ, and quote drivers for branded beanies
Pricing for branded beanies follows a few predictable rules, even if the quote sheet sometimes looks arbitrary. The biggest cost drivers are patch material, patch size, number of colors, backing method, beanie body, packaging, and whether the patch shape needs a custom die line. A woven patch with one or two colors is usually cheaper than a molded or leather option with special finishing. Custom colors, contrast stitching, and nonstandard placements add labor and coordination.
The other trap is hidden cost. Sample fees. Setup charges. Artwork cleanup. Shipping. Customs. Revision rounds. All of those can move the real landed cost far above the headline quote. A low unit price means little if the supplier adds charges later for art corrections or packaging changes that should have been discussed on day one.
For rough budgeting, basic patch beanies at higher volumes can sometimes land around $2 to $5 per piece before freight, depending on the patch style and knit body. More customized orders, lower MOQs, or premium materials often move into the $4 to $8 range or beyond. Leather, molded, or heavily customized builds can run higher still, especially once packaging and shipping are included. Those numbers are broad, but they are more useful than pretending every beanie should cost the same.
MOQ shapes the pricing curve in a very direct way. Smaller runs carry a higher per-unit cost because setup is spread across fewer hats. Larger runs are more efficient, but only if the spec is already locked. If the design is still moving, the savings disappear quickly in revisions. For comparison, ask for pricing at 50, 100, 250, and 500 pieces. One number hides the pattern. Four numbers show whether the cost actually makes sense.
| Run size | Typical unit cost behavior | Best for | Common tradeoff |
|---|---|---|---|
| 50 pieces | Highest per unit | Samples, creator merch, very small launches | Setup costs dominate the quote |
| 100 pieces | Still elevated | Test drops, regional promotions | Limited room for design changes |
| 250 pieces | Usually better balanced | Retail trials, team orders, seasonal programs | Requires tighter planning on colors and packing |
| 500 pieces | More efficient unit cost | Core programs, repeat seasonal supply | Higher cash commitment up front |
Packaging can shift the quote in ways buyers forget to ask about. Some orders ship folded and bulk packed. Others need individual polybags, size stickers, hangtags, or carton inserts. A paper hangtag or recycled insert may be worthwhile if the hats sit in retail, but there is no reason to pay for decorative packaging if the product is going straight into a warehouse bin. Spend on what the customer actually sees.
Process and timeline: artwork, sampling, and bulk delivery
The cleanest orders follow a fairly strict path: artwork review, digital proof, sample production, sample approval, bulk production, quality check, and shipment. Skip any of those steps and the order usually pays for it later. The biggest delay is rarely sewing. It is unclear artwork, slow decisions, or a buyer changing the specification after the sample process has already started.
Timing depends on complexity, but the pattern is consistent. A vector file and clear placement notes can produce a mockup quickly. Sampling often takes about 1 to 2 weeks, sometimes longer if the patch material needs to be sourced or the artwork needs cleanup. Bulk production after approval commonly takes another 12 to 20 business days for standard orders. Add time for special packaging, multiple colorways, or orders that require additional QC before shipment.
Rush orders can happen, but they remove breathing room. If the timeline is compressed, the buyer needs to make decisions faster and accept that corrections may be limited. A rushed order can still succeed. It just cannot afford uncertainty.
Sample review should be disciplined. Check patch width against the cuff, not against the mockup alone. Look at edge quality, color fidelity, stitch density, and how the patch sits when the beanie stretches. If the material feels too rigid, say so before bulk starts. If the logo reads too small, measure the real issue and not just the impression. Good suppliers want that feedback because it prevents a bad detail from being repeated hundreds of times.
There is also a transport element that gets ignored too often. Compression in cartons can distort a soft beanie body or imprint a patch edge if the packing is poor. Some buyers only notice this after the first retail shipment arrives with flattened cuffs and bent badges. A basic approach to handling and distribution, informed by ISTA-style testing, helps protect the product before it reaches customers.
Common ordering mistakes that create weak samples
The first mistake is asking a knit surface to do something it cannot do. Thin strokes, tiny type, and layered graphics can look great in a file and fail on the hat. If the logo needs a magnifying glass, it probably needs simplification. The goal is not to preserve every pixel. The goal is to make the mark recognizable from a normal viewing distance.
Another common miss is approving a proof without checking scale on the actual beanie style. A patch can look perfectly centered in a flat mockup and still feel awkward on a cuffed product once the fabric folds. A slouch beanie presents the mark differently from a tight-fit style. That change in surface is enough to move the logo out of balance if the placement was never tested in context.
Material chasing causes its own problems. A buyer sees one glossy sample and assumes the same look will work for every line. It may not. Some finishes feel too stiff on stretch knit. Some crack under repeated bending. Some look out of place on a quiet, minimal product. The right patch is the one that supports the brand and the garment together, not the one that looked exciting in a photo.
Variant creep is another budget leak. Add a second logo color, a new patch placement, and a different beanie shade, and the project suddenly needs another proof, more approvals, and more room for error. The smart move is to keep the first run narrow. Learn how the design behaves in production. Expand after the product has earned it.
If the sample is already awkward, bulk production will not improve it. It will only repeat the same mistake at scale.
Revision policy matters too. Some suppliers include a round or two of art changes. Others treat every adjustment as a paid step after the first proof. If the internal team is still debating logo details, that policy can turn a cheap order into an expensive one. The right supplier is not the one that says yes to everything. It is the one that tells you where the order is likely to break.
Expert tips and next steps for a cleaner first order
Send vector artwork, Pantone references, and a plain description of the target look before asking for quotes. “Clean and premium” does not help much. “Low-gloss black patch with muted contrast on a dark olive cuff” gives the supplier something usable. Better input usually produces a better proof, and better proofs reduce back-and-forth.
Lock the patch type, placement, quantity, and beanie color before requesting pricing. If you are comparing woven against leather, ask both versions to be quoted on the same spec. If you want center-front and side placement options, state that clearly. Comparable quotes only work when every supplier is pricing the same thing. Otherwise you are comparing a finished product to a half-defined idea.
Ask for photos of past samples, then request a physical sample if the order matters. Screen images can show shape and proportion, but they do not tell you how stiff a patch feels, whether the edges are clean, or how the beanie behaves after stretching. For retail-facing orders, the physical sample is not optional. It is the cheapest check you will get.
A one-page spec sheet is usually enough to keep an order under control. Include the logo file, patch type, patch width, placement, beanie color, quantity, packing preference, and delivery target. Then compare suppliers on five points: unit cost, sample quality, turnaround, revision policy, and how clearly they answer technical questions. That is a better way to judge an apparel Logo Patch Beanies supplier than relying on a polished quote alone.
The strongest results usually come from the least dramatic process: clear art, realistic timelines, honest samples, and a supplier who explains problems before they become expensive. Keep the spec tight, keep the branding legible, and respect what knitwear can and cannot do. The final beanie should look intentional the moment someone picks it up.
What patch type works best for chunky knit beanies?
Woven patches usually handle detail well, while embroidered patches work better for bold logos with thicker shapes. Leather and TPU can look especially clean if the artwork is simple. On chunky knit, avoid tiny text and delicate linework because the texture will swallow it.
How do I compare quotes from a beanie patch supplier?
Compare unit price, setup fees, sample charges, shipping, and revision policy in the same format. Ask whether packaging, artwork cleanup, and any custom patch shaping are included. One quote number is rarely enough to understand the real landed cost.
What MOQ should I expect for custom logo patch beanies?
Small runs often start around 50 to 100 pieces, but the exact MOQ depends on the patch material and the beanie style. Lower quantities usually cost more per piece because setup is spread across fewer hats. Mixed colorways may count as separate runs.
How long does sampling and production usually take?
Mockups can be quick if the artwork is ready, while sampling often takes about 1 to 2 weeks. Bulk production typically takes another 12 to 20 business days after approval, sometimes longer if packaging or multiple variants are involved. Faster timelines reduce flexibility for revisions.
Can I mix beanie colors or patch placements in one order?
Yes, but every added variant increases complexity and can raise the cost. Ask whether each color or placement shares the same MOQ or is treated as a separate run. Different placements may need separate sample approval if the supplier wants sign-off on each version.


