Event merch Logo Patch Beanies sample checklist sounds administrative, but it is really a quality-control filter. One or two millimeters can change the whole read of a beanie: a patch sits too high on the cuff, a logo border gets swallowed by the knit, or the blank feels scratchy once it is actually worn. On paper, all of those issues can hide behind a neat mockup. On a physical sample, they show up immediately.
That is why the sample stage matters for concerts, festivals, team kits, and brand drops. Buyers usually want the same three things: a clear view of the finished piece, confidence that the fit is comfortable, and evidence that the decoration can be repeated without drift. A good checklist keeps those goals tied together. It forces the review to cover the patch, the blank, the placement, and the production notes at the same time instead of treating them as separate tasks that will somehow reconcile later.
There is also a practical reason to stay disciplined here: beanies are small, but they are unforgiving. A 2.25-inch woven patch might look exact on a clean digital proof and still appear undersized on a chunky rib knit. A thick PVC patch can look premium and feel wrong if it lands too close to the fold. The sample tells you whether the design works as a wearable object, not just a visual.
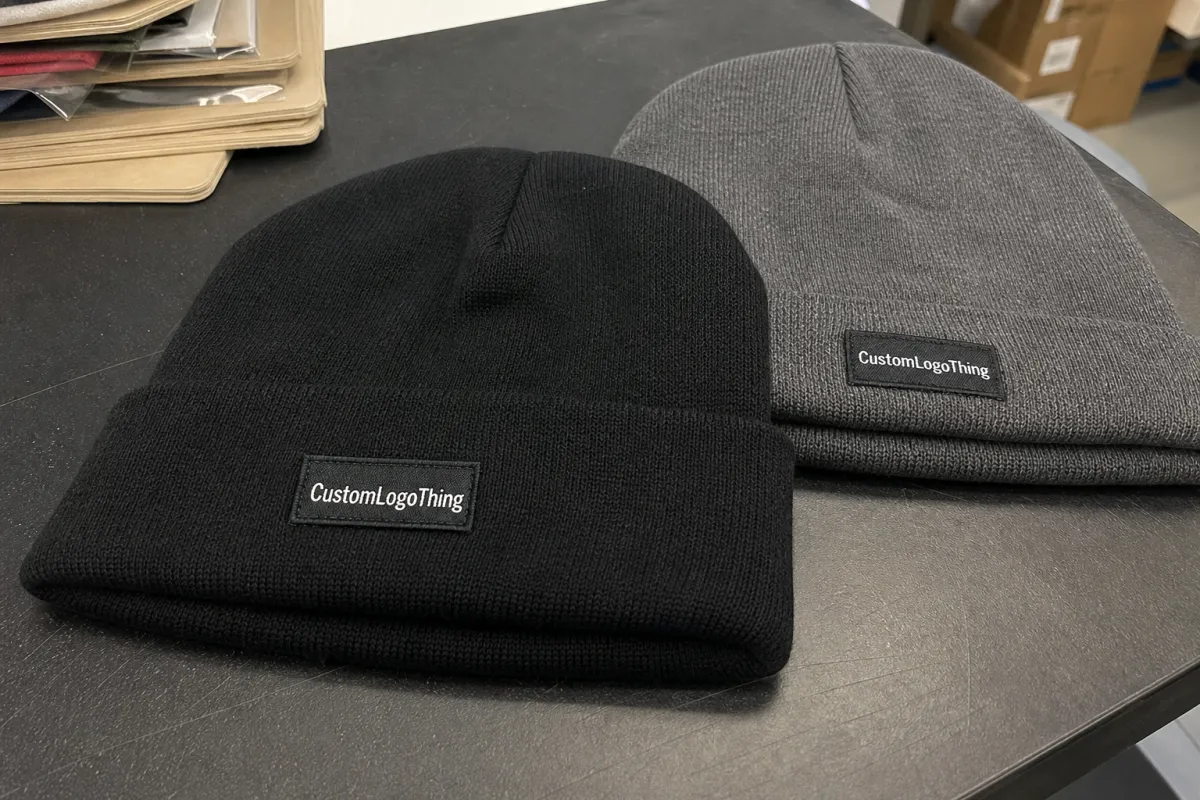
A screen proof can flatter a logo. A physical sample reveals scale, texture, hand feel, and placement in a way the mockup cannot.
What the Event Merch Logo Patch Beanies Sample Checklist Catches First
The first job of the checklist is simple: catch the problems that look minor on a file and major in production. Patch size, knit density, cuff depth, and color contrast all affect the final impression. A logo with fine internal detail may survive in embroidery if the stitch count is high enough, but the same art can blur once the patch is reduced to fit a shallow cuff. A tonal logo can read as sophisticated in a presentation deck and disappear completely under event lighting. The sample tells you which version is real.
It also exposes the difference between a nice-looking decoration and a usable merch item. For event giveaways, the beanie has to read from a few feet away, photograph well in mixed light, and survive repeated wear without the patch curling, puckering, or peeling at the edges. A sample that looks polished but wears badly will create returns, complaints, or a dead-on-arrival merch table. A sample that feels comfortable but lacks legibility is almost as bad; people may wear it, but the logo will not do its job.
One of the most useful habits is to compare the sample against the actual audience scenario. A staff beanie needs clarity and consistency. A festival beanie needs visual impact from a distance and a finish that survives being stuffed into bags and pockets. Retail-style details matter in both cases, but the priority shifts. The checklist helps you decide whether the beanie should read as premium, casual, understated, or loud, and whether the production plan supports that goal.
The other thing the checklist catches early is whether the patch and blank feel like one product. A lot of approval problems start when the logo, the knit, and the placement are reviewed separately. They do not behave separately. A blank made from 100% acrylic with a 1x1 rib and a deeper cuff can hold a patch differently than an acrylic-poly blend with a softer stretch. That difference is small in a spreadsheet and obvious in hand.
How Logo Patch Beanie Samples Are Built and Reviewed
A proper sample process starts with the art file, but the file is only the first layer. The logo has to be prepared for the decoration method, and the decoration method has to match the blank. Embroidery needs stitch planning and enough line width to keep detail readable. Woven patches handle smaller elements better and usually present a flatter, cleaner face. Leatherette or faux leather requires stronger shapes and enough contrast to keep the mark legible. Silicone and PVC-style patches can give crisp color blocking, but they add thickness and need careful placement so the cuff does not feel bulky.
The blank matters just as much. Stock beanies are often 100% acrylic, acrylic-poly blends, recycled yarn mixes, or wool blends depending on budget and climate. Common construction choices include 1x1 or 2x2 rib knit, cuffed or uncuffed shapes, and midweight to heavyweight gauges. A shallower cuff leaves less space for a patch and leaves less room for error. A looser knit can make the patch flex more than expected. If the buyer reviews only the decoration and ignores the blank, the final run can still miss the target.
That is why the sample should be reviewed as a finished system. The patch may be correct, but if the beanie crown sits tall, the visual balance changes. The patch may be centered on the paper proof, but once the cuff folds, the mark can drift upward or sit too close to the edge. A difference of 2 to 3 mm is easy to dismiss in a digital mockup and very easy to notice on a real hat.
Here is a practical snapshot of how common patch styles behave on beanies:
- Embroidered patches create a classic textured finish and work well for bold logos, but very fine text and thin outlines can soften.
- Woven patches preserve tighter detail and usually feel flatter, which helps with a cleaner retail look.
- Leatherette patches feel understated and premium, but dark-on-dark designs can disappear unless the contrast is managed carefully.
- Silicone or PVC-style patches offer strong color blocking and shape, though they can feel heavier and are less forgiving on small cuffs.
Two other details deserve attention during review: edge finish and backing. A clean merrowed edge or laser-cut edge can make the patch look finished, but poor edge treatment will fray, lift, or look asymmetrical. Backing also matters. A stiffer backing may help the patch hold shape, yet it can create a scratch point if it lands near the forehead. The right answer depends on the beanie shape, the intended wear time, and the audience.
Cost, Pricing, and MOQ Drivers for Sample Approval
Sample pricing is driven by more than decoration alone. Patch material, artwork complexity, beanie style, color matching, and attachment method all affect the quote. A simple embroidered patch on a stock acrylic beanie is usually the least expensive route to sample. Woven, leatherette, and silicone options tend to cost more because they need tighter setup, more precise finishing, or additional tooling. If the artwork has multiple small elements or color breaks, the setup time rises with it.
MOQ changes the economics too. A smaller order carries almost the same setup burden as a larger run, so the per-unit price is usually higher. A 50-piece order can feel disproportionately expensive next to a 250-piece or 500-piece order, not because the beanie itself changed, but because the fixed work - patch creation, digitizing, proofing, and setup - has to be spread over fewer units. That is the hidden math behind many “why is the sample so much?” conversations.
For a buyer, the useful questions are not abstract. They are practical and specific:
- Is the sample fee credited back on the bulk order?
- Are freight and express shipping separate from the sample quote?
- Will a revision sample trigger a new charge?
- Are there setup fees for digitizing, tooling, or color matching?
- Does rush service change material options or decoration choices?
It helps to think of sample costs in bands rather than as a single number. A stock embroidered sample may land in the lower range, while woven, leatherette, or silicone samples often move upward because the setup is more exacting. Rush work pushes the cost higher still. The important thing is not to chase the cheapest quote; it is to understand what the quote includes and what it leaves out. A low sample fee that excludes shipping, setup, or revisions is not really lower if the project needs two more rounds before approval.
Sample pricing also tracks with change tolerance. If the logo can move a little, the fabric color can be close rather than exact, and the patch material is already standard, the process is simpler. If the buyer needs exact pantone matching, a custom patch shape, or a revised size after the first build, costs climb quickly. That is normal, not punitive. The work simply became more specialized.
For shipping and packaging, ask early. If these beanies will ride in retail cartons, mixed event kits, or display boxes, carton strength and pack-out matter. If the program includes printed inserts, swing tags, or recycled mailers, sourcing and certification standards may matter too. The point is not to overload the order with paperwork. It is to keep the production run from being surprised by a packaging detail that should have been specified before approval.
| Patch Type | Typical Sample Cost Impact | What You Learn From the Sample | Common Watchout |
|---|---|---|---|
| Embroidered | Lower to moderate | Stitch density, border neatness, logo readability | Fine text can fill in or soften |
| Woven | Moderate | Small-detail clarity, edge crispness, flat retail finish | Very thin lines can still compress |
| Leatherette | Moderate to higher | Surface texture, deboss depth, contrast balance | Dark-on-dark graphics can disappear |
| Silicone / PVC-style | Higher | Color blocking, tactile feel, thickness on the cuff | Can feel bulky if oversized |
Process and Timeline: From Sample Request to Production Ship Date
The timeline usually moves in a familiar sequence: brief and artwork review, proof approval, sample build, buyer review, revision if needed, then bulk production after final signoff. The sequence is stable; the speed is not. Delays most often happen at the handoff points, especially when the buyer has not locked color references, placement tolerance, or packaging instructions.
For a stock beanie with a simple embroidered patch, a sample can often be ready in about 5 to 8 business days after the art is confirmed. Woven, leatherette, and silicone samples more often land in the 7 to 12 business day range because setup is more exact and the finish needs more attention. Bulk production after approval is commonly 15 to 25 business days for a moderate run, but specialty yarns, custom patch tooling, or peak-season demand can push that longer.
There are four common causes of delay:
- Color references are vague, so the supplier cannot tell whether the buyer wants a warm black, a cool black, or a specific pantone match.
- The logo is resized after the first patch is made, which creates a second sampling pass.
- The buyer wants the sample reworked on a different beanie blank after seeing it in hand.
- Carton, label, or pack-out instructions are still open when production is ready to start.
A useful planning question is this: how long does the sample take, how long does bulk take after approval, and what happens if the first sample needs changes? That answer matters even more if the beanies are tied to a concert date, a festival drop, or a staff launch window with a fixed ship date. A day lost in sampling can cost a week later if the order sits waiting for a second proof cycle.
Rush is sometimes possible, but it usually narrows the material choices and adds cost. That tradeoff should be explicit before the first proof goes out. If a supplier says they can speed up the order, ask what changes in exchange: patch type, blank color, packaging detail, or shipping method. Faster is only useful if the result still matches the brief.
Step-by-Step Checklist for Fit, Placement, and Branding Accuracy
This is the part that prevents most expensive mistakes. A sample can be reviewed in a few minutes if the order is deliberate. Start with the blank, move to the patch, then test the finished item in use. That sequence keeps the review grounded in the real product instead of in the mockup.
- Measure the blank. Confirm width, crown height, cuff depth, and stretch recovery so the beanie matches the intended fit profile.
- Check the knit and hand feel. Look at gauge, softness, and stretch so the beanie does not feel too stiff, too loose, or too thin.
- Confirm the usable patch area. Shallow cuffs shrink the space quickly, especially on smaller adult or youth fits.
- Inspect placement. The patch should sit centered, level, and far enough from the edge that wear will not distort it.
- Compare logo proportion. The artwork should fill the space without crowding the cuff or looking tiny in photos.
- Review stitching or attachment quality. Look for clean edges, even tension, secure ends, and no loose threads.
- Test the hand feel. Put the beanie on a head or form and check whether the patch feels bulky, scratchy, or off balance.
- Check distance legibility. Step back 6 to 10 feet and see whether the logo still reads for merch tables, staff, or stage-side use.
- Photograph the sample. Flat-lay and on-head photos show different problems, and both views matter.
- Lock the approved specs. Save patch type, patch size, placement, beanie color, yarn type, thread colors, and packaging notes with the approval record.
Many approvals go wrong because the sample is only checked on a table. That misses how the cuff folds, how the knit pulls, and how the logo settles once the beanie is worn for a few minutes. For event merch, photo testing matters almost as much as comfort. The item will be seen in motion, under lights, and often at a distance. If the patch looks good in one angle and poor in another, the event audience will see the poor angle at least once.
Branding accuracy also includes smaller production details. Thread color tolerance, placement tolerance, patch border width, carton labeling, and pack format all need to be fixed before signoff. A millimeter or two may not matter on a simple icon, but it can matter on a centered wordmark or a logo with a precise baseline. The checklist is where that line gets defined. If it is not written down, it will be interpreted differently by the buyer, the sample team, and the production floor.
Common Mistakes That Slow Down Event Merch Approvals
The biggest mistake is approving from a digital mockup alone. Screen art can hide texture differences and make the patch appear more balanced than it will on a real cuffed beanie. Once the sample arrives, the logo may feel too wide, too narrow, or too high on the crown, and the schedule slips while everyone argues about what looked right on the proof.
Another common issue is treating comfort as optional. A patch that looks sharp can still feel bulky against the forehead, especially if it sits too close to the fold or uses a stiff backing. For winter merch, staff uniforms, or festival giveaways, comfort affects wear time. If people do not want to keep the beanie on, the brand impression weakens fast.
Teams also slow themselves down when they leave out the details that matter most in production. If thread color tolerance, placement tolerance, carton labeling, or packaging format are still open when the sample is approved, the factory has to guess. Guessing is expensive. Rework almost always costs more than answering the question properly before bulk starts.
One more trap is underestimating the effect of contrast. A logo that blends too closely into the beanie color may look subtle on a design board and vanish in photographs. On the other hand, overly sharp contrast can make a premium brand feel louder than intended. The right balance depends on the audience and the use case. Staff merch, retail merch, and sponsor giveaways do not need the same visual treatment.
Here are the issues that come up most often:
- Approving patch size before checking how it sits on the actual knit blank
- Using vague color references instead of a clear standard
- Skipping a fit test on a real head or head form
- Ignoring photo review and then discovering the logo disappears in low contrast
- Leaving packaging and label details open until after bulk production starts
The teams that avoid these mistakes usually treat the sample like a production rehearsal, not a novelty item. That mindset keeps the order moving and reduces the odds of a last-minute correction that could have been prevented with one careful review.
Expert Tips Before You Approve the Final Run
Choose contrast with intention. A logo that matches the beanie too closely may feel refined on a concept board, but it can disappear on a merch table or in event photos. Strong results usually balance readability and restraint: enough contrast to read from a few feet away, but not so much that the patch feels loud or cheap. There is no single formula, which is why the sample matters more than the argument.
Ask for an image of the sample on a real head or a mannequin head, not only a flat lay. Flat shots are useful for placement, but they hide how the knit collapses, how the cuff curves, and whether the logo remains centered after the hat is worn. A second angle often catches the one issue that would otherwise become a bulk problem.
Lock the spec sheet before signoff. The approved version should capture patch type, patch size, placement, beanie color, yarn type, thread colors, packaging, label instructions, and the approved reference photo. A tight document makes reorders easier and reduces room for interpretation later. It also helps if the order needs to be repeated six months after the original event, when everyone has forgotten the exact shade and the exact patch placement.
Another useful habit is to store the approved photos with the spec sheet instead of leaving them in a scattered email chain. If the next order comes in with a slightly different proof, the buyer can compare the new version to the approved sample without wasting time hunting through attachments.
A final practical point: if the event is fixed, move quickly on the sample, but do not rush past the checks that matter. A beanie is a small canvas, which makes it easy to underestimate. It also makes errors more visible. The event merch logo patch Beanies Sample Checklist works because it keeps the approval tied to the actual wearable product, not to a hopeful image that still needs to survive manufacturing.
What should an event merch logo patch beanies sample checklist include?
Include patch type, logo size, placement, beanie fit, stitch quality, color accuracy, and approval notes for the bulk run. Add pricing, sample fee, MOQ, and lead-time questions so the checklist covers both quality and buying decisions.
How do I compare logo patch beanie samples before approving bulk production?
Compare the sample against your artwork by measuring patch width, cuff placement, and logo clarity in both close-up and distance views. Check comfort, seam alignment, and finish quality on an actual head or form, not only on a table.
How much does a patch beanie sample usually cost?
Sample cost depends on patch material, decoration method, artwork complexity, and whether a second revision sample is needed. Ask whether the sample fee is credited toward the bulk order and whether shipping, tooling, or revision charges are separate.
How long does the sample and production process usually take?
A sample typically moves through proofing, build, review, and revision before bulk production starts, so lead time depends on how fast approvals happen. Ask for separate sample and production timelines so you can plan event dates without building in guesswork.
What is the biggest mistake buyers make with event merch beanies?
The most common mistake is approving a mockup without checking fit, patch placement, and real-world texture on the actual beanie blank. A second common issue is not locking specs early, which can create pricing changes and delays during production.


