Beauty Embroidered Beanies Material Thickness Guide to Order
Two beanies can look nearly identical on a spec sheet and behave very differently under a needle. That is the whole reason the beauty Embroidered Beanies Material Thickness guide matters. Thickness is not just about warmth or feel in hand. It affects stitch stability, logo clarity, stretch recovery, and how the finished piece wears after a few uses.
If the goal is a clean logo, the question is not “Which beanie feels thickest?” The better question is “Which fabric structure supports the artwork without making the order harder to produce?” That shift in thinking saves a lot of bad sampling, especially when the design has small text, fine outlines, or a tight placement on the cuff.
What Buyers Miss About Beanie Thickness
A lot of buyers treat thickness like a style preference. That is the wrong frame. In production, thickness is a working specification. It includes knit density, yarn weight, layer count, cuff height, and how much the fabric rebounds after being stretched. Those details decide whether embroidery sits on top of the knit or disappears into it.
A dense knit gives the thread a stable base. A looser knit may look soft and plush, but it can let stitches sink, flare, or pull the surface into little waves. That is why a beanie that looks premium in a photo can still be a poor choice for a sharp front logo. The knit needs enough structure to hold the design, not just enough bulk to feel warm.
Direct embroidery is usually happiest on a midweight, stable blank. Very thin beanies can work, but only with simpler artwork and tighter stitch control. Very heavy styles can also cause problems if the surface gets too stiff or the crown shape makes placement awkward. The cleanest result usually comes from the middle of the range, not the extremes.
Practical buyers look at three things together: how the beanie feels, how the fabric behaves in the hoop, and how the logo reads after the beanie is stretched. If one of those fails, the order is weaker no matter how nice the mockup looked.
A beanie can feel soft and expensive in hand and still be too unstable for clean stitching once it is hooped and pulled.
The beauty embroidered Beanies Material Thickness guide works best when thickness is treated as part of decoration planning, not as an isolated fabric choice. That is where better decisions start.
How Fabric Weight Changes Stitch Quality and Stretch
Fabric weight changes the entire embroidery result. Heavier knits resist the needle better, so the logo tends to sit cleaner and the fill stitches stay more even. Lighter knits move more during stitching, which raises the risk of puckering, distortion, and thread showing through in a way that looks messy rather than crisp.
Stretch matters just as much as weight. A beanie that stretches a lot when worn can make a centered logo look slightly wider, lower, or tilted once it is on the head. That is not a mockup problem. It is a wear-test problem. A good sample needs to be checked both flat and on a head form, because many failures only show up after the fabric is pulled.
Hooping and stabilizer help, but they are not a rescue plan. Backing controls movement; it does not create structure that was never there. If the knit is weak or too open, the logo may still sink or ripple. The result can look acceptable straight off the machine and disappointing a week later after the beanie has been folded, worn, and packed.
That is why stitch density should match the blank. Fine-line logos and tiny text need a tighter, more stable surface. Bold, simplified graphics can tolerate more movement, but even those should not be pushed onto a floppy knit with no support. In general, the more stretch the fabric has, the simpler the artwork should be.
There is also a practical limit on how much detail embroidery can hold on a beanie. If the design depends on delicate counters, hairline lettering, or tiny shapes, a patch or woven badge can be the better answer. That is not a downgrade. It is a smarter fit for the material.
Shell, Lining, and Cuff Factors That Change the Result
The outer shell is only part of the build. Acrylic, wool blend, cotton blend, and recycled yarns all behave differently under the needle. Acrylic is usually the easiest to work with because it is consistent and predictable. Wool blends often feel warmer and more premium, but the surface can be a little more textured. Cotton blends can be comfortable and soft, though they sometimes need more careful handling if the knit is relaxed. Recycled yarns can be a strong fit for brand values, but the exact fiber mix still has to be tested for stitch stability.
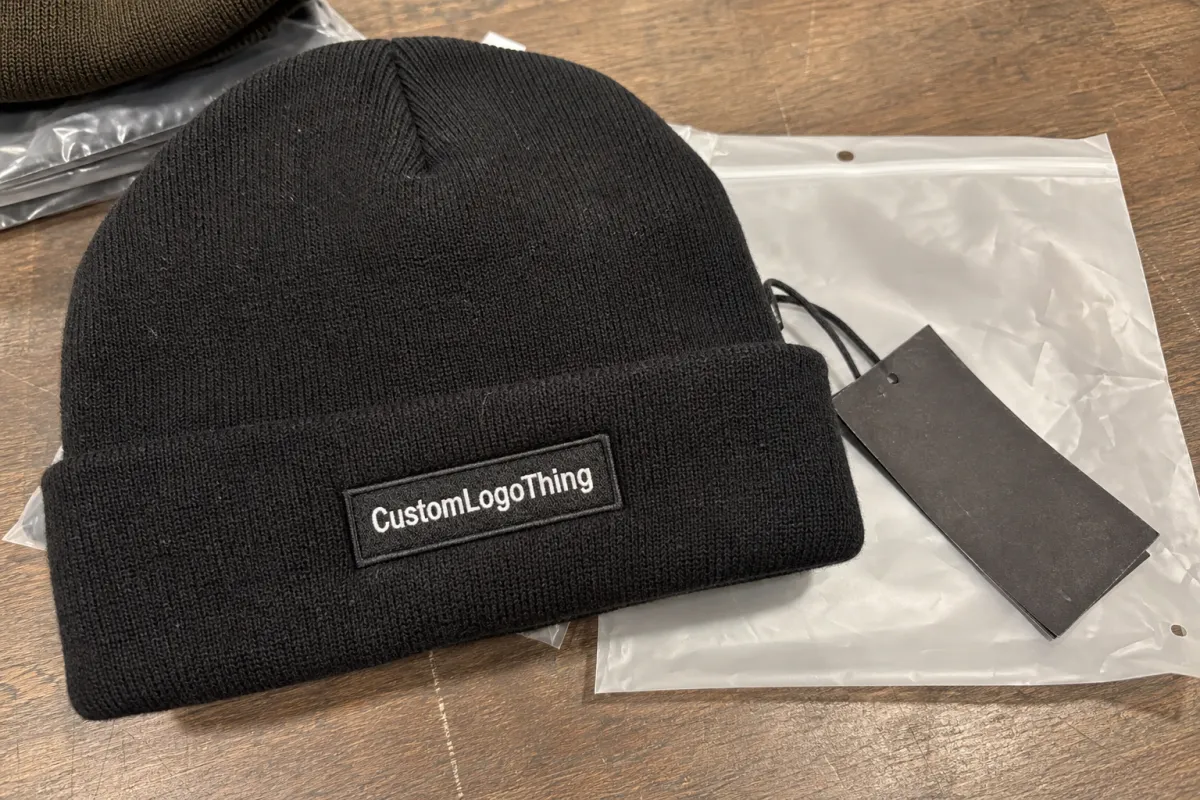
The cuff changes the stitching zone more than many buyers expect. A folded cuff adds thickness where the logo sits, which can help embroidery lie flatter because there is more material under the stitches. It can also make the beanie feel more substantial. The tradeoff is shape. Too much cuff height can make the beanie sit high, which is not great if the target look is slouchy or low-profile.
Double-layer and lined beanies add warmth and a cleaner interior finish, but they also change how the needle enters and exits the fabric. That extra layer can help the decoration area feel firmer, yet it also introduces more bulk around seams and edges. On some styles, that makes placement more sensitive by just a few millimeters. On a beanie, a few millimeters are visible.
Construction details matter as much as raw thickness. A flat, tight jersey knit is easier to embroider than a chunky rib. A seam through the decoration area can shift the logo off level. Crown shaping can force the artwork to sit slightly higher or lower than planned. Buyers often miss those issues because they focus on grams or a hand-feel description instead of the actual surface the needle has to penetrate.
So yes, thickness matters. But thickness without construction context is incomplete. A midweight blank with a stable cuff and clean knit can outperform a heavier style that looks premium but behaves badly in production.
How to Choose the Right Thickness for Embroidery
Start with the logo. Measure the artwork, confirm the minimum readable size, and check how much empty space the design needs around it. A small mark with fine lettering needs a tighter knit and a controlled stitch count. A larger logo can tolerate a bit more movement, but it still needs enough structure to avoid wobble at the edges.
Next, sort the blank into a thickness band. Lightweight beanies work best for simple logos, very small placements, or cases where a patch makes more sense than direct embroidery. Midweight beanies cover most custom orders and usually give the best balance of comfort, price, and stitch quality. Heavier beanies make sense when the brand wants a more substantial hand feel or a colder-weather retail piece, but they also add cost and can make placement less forgiving.
Then ask for a real sample or a stitched test on the exact style. A digital proof only shows placement. It does not show how the knit rebounds after it has been stretched. A stitched sample should be checked for puckering, thread tension, and whether the fabric recovers once it is pulled. If the beanie looks good only while lying flat, that is not enough.
One useful habit is to inspect the same sample in three states: flat on the table, stretched on a head form, and folded the way it will sit in packaging or a bag. That quickly shows whether the logo is centered, whether the fabric distorts, and whether the cuff keeps its shape. Buyers who skip this step usually find out too late that the blank was chosen for appearance instead of performance.
Here is a simple decision sequence that keeps the order cleaner:
- Confirm the logo size and stitch complexity.
- Match the artwork to a thickness band.
- Check whether direct embroidery, a patch, or a woven badge is the right finish.
- Approve a sample on the exact beanie style.
- Lock the material, thickness, and placement before production.
That process sounds basic because it is. It also prevents most of the expensive revisions.
Cost, Pricing, and MOQ Tradeoffs
Thicker beanies usually cost more because they use more yarn and, in some cases, more labor to knit or finish. Double-layer and lined styles add more material and more handling steps. None of that automatically means better value. It only means the blank cost rises before decoration is even added.
For rough planning, a basic acrylic cuffed blank might sit in the lower price range, while a heavier knit, special blend, or lined style can move the blank cost up by a noticeable step. On many custom runs, the blank might land roughly around $1.20 to $2.80 for a simple acrylic style, and $2.50 to $4.50 or more for heavier or more specialized constructions. Decoration then adds its own cost on top of that, often around $0.60 to $2.50 depending on stitch count, color changes, and whether a patch is involved. Those are not fixed numbers. They are realistic planning ranges.
MOQ is tied to the same logic. A standard cuffed acrylic beanie often has a lower minimum than a custom blend, custom-dyed yarn, or an unusual construction. Buyers sometimes assume the embroidery is the expensive part. It often is not. Blank sourcing, color matching, and setup can matter just as much.
Direct embroidery is usually the best value for medium and larger orders when the knit is stable and the artwork is simple. Patches add another manufacturing step, but they can protect detail on softer fabrics and lower the reject rate. Woven badges and sew-on labels are also useful when the design is too fine for thread alone.
| Beanie style | Typical use | Decoration behavior | Likely cost impact |
|---|---|---|---|
| Lightweight single-layer | Promos, low-profile giveaways | Needs small, simple artwork | Lower blank cost, higher risk of stitch distortion |
| Midweight cuffed | Most custom logo orders | Stable for direct embroidery | Usually the best value balance |
| Heavy double-layer or lined | Cold-weather retail or premium kits | Cleaner structure, but tighter placement tolerances | Higher blank cost and slower setup |
| Patch-ready knit | Detailed logos, soft knits | Better for small text and fine edges | Added patch cost, often fewer decoration defects |
Packaging also belongs in the cost discussion. Kraft paper wraps, FSC-certified cartons, recycled inserts, and corrugated cardboard shippers can all work well if the product needs shape protection without oversized packaging. If the goal is lower-impact packaging, that is reasonable, but crush resistance still matters. A neat beanie that arrives flattened is not a good finished product.
For bulk shipping, it helps if the supplier understands basic packaging tests, including ISTA drop and vibration logic. If the brand is asking for paper sourcing to be documented, FSC certification is a straightforward way to check the paper chain. These are small details, but they affect how the order arrives.
Process and Timeline From Sample to Production
The quoting stage should confirm four things before the numbers are considered real: the beanie style, the construction thickness, the decoration area, and the artwork details. If any of those are vague, the quote will be vague too. A useful quote also states whether the decoration will be direct embroidery, a patch, or a sewn label, because each one changes cost and lead time.
After the quote comes sampling. A mockup is useful for placement, but a physical sample is what shows the truth. This is where buyers should check hand feel, logo edge quality, and how the knit behaves once it is stretched. If the sample is off, fix it now. Do not try to “make it work” in bulk.
For a standard custom order, the timeline is often about 12 to 15 business days after proof approval, assuming the blank is standard and the stitch file is ready. Special yarns, custom colors, dense stitch counts, or a higher level of finishing can add time. Last-minute artwork changes also slow the process, especially if the embroidery file needs to be rebuilt.
Inspection should not be an afterthought. A clean QC check will review logo placement, stitch density, thread color accuracy, seam alignment, and whether the cuff sits as specified. A good production team will also verify that the finished beanie returns to shape after handling. That is a simple test and a useful one.
Packaging should be locked before final packing starts. The size of the carton, the pack method, and the type of insert all affect labor and shipping cost. On headwear, the finishing stage is not just about looking neat. It is about keeping shape from the moment the product leaves the machine to the moment it reaches the buyer.
Common Thickness Mistakes Buyers Make
The most common mistake is choosing by appearance alone. A plush beanie can look premium in a product photo and still be a poor embroidery surface. If the knit is loose or overly stretchy, the logo may look fine before wear and messy after it is pulled on. That is a material problem, not a decoration problem.
Another mistake is pushing too much detail onto a thin blank. Oversized logos, tiny text, and tight letter spacing all increase the risk of puckering and distorted edges. Once the fabric starts fighting the thread, the finish stops looking clean. The fix is usually simple: reduce design complexity, increase the logo size a little, or move to a patch.
Seams, cuff height, and lining are often ignored until sampling, which is too late. Those details can shift placement by a few millimeters and throw off a centered design. It does not sound like much, but on a beanie those small shifts are visible. So are crooked stitches.
Buyers also forget use conditions. Will the beanies be washed often? Folded into bags? Worn outdoors every day? Stored in cartons for months before distribution? A blank that performs well on day one may not hold the same shape after repeated handling. Stretch recovery and crease resistance deserve a real check.
The easiest way to avoid those problems is to make thickness part of the artwork discussion. Logo size, stitch count, fabric structure, and wear pattern should be reviewed together. That one habit catches a lot of avoidable mistakes.
Practical Spec Checks That Improve the Order
Ask for flat measurements and stretched measurements before approving the blank. That gives a much clearer picture of how much the knit opens up in use. A close-up fabric image helps too, because you can see whether the surface is tight, ribbed, brushed, or loosely constructed.
Send vector artwork whenever possible. If the logo includes small text, state the minimum readable size up front. That gives the decoration team enough room to decide whether the design should stay direct embroidered, be simplified, or move to a patch. Clean input usually means fewer revisions later.
Before the purchase order goes out, confirm the full spec sheet: material, thickness, decoration method, thread colors, packaging, and carton count. If the order is shipping in bulk, ask how the finished goods will be protected and what the outer carton is made from. Corrugated cardboard is usually the most practical choice for crush protection. Kraft paper and recycled inserts work well when presentation matters too.
One thing I would not skip: compare two samples side by side if possible. The thicker one is not always the better one. The better one is the one that gives the cleanest embroidery, the most comfortable wear, and the least drama in production. The beauty Embroidered Beanies Material thickness guide is most useful when it is used that way, as a comparison tool rather than a slogan.
The best result comes from matching the fabric to the logo, then confirming that match with a real sample before production starts.
How thick should embroidered beanies be for clean stitching?
A midweight, stable knit is usually the safest starting point. It gives the embroidery thread enough resistance to sit cleanly without making the beanie stiff or bulky. If the blank is thinner, keep the logo smaller and simplify the stitch structure.
Does thicker always mean better for embroidered beanies?
No. Thicker can improve structure, but it can also increase bulk and reduce flexibility. The best result comes from the right balance of density, stretch recovery, and logo size.
Can lined beanies work with embroidery?
Yes, but they need more careful setup. The outer shell still has to be stable enough for the stitch, and seam placement matters more because the extra layer changes how the fabric sits in the hoop. A stitched sample is the fastest way to confirm the finish.
How does thickness affect pricing and MOQ?
Heavier or double-layer styles usually cost more because they use more material and sometimes more labor. Custom yarns or specialty constructions can also raise MOQ. Direct embroidery tends to stay economical on stable midweight blanks, while patches can be a better value on softer fabrics.
What should I check before ordering beauty embroidered beanies?
Check the fabric type, thickness, cuff depth, seam placement, and whether the style has a lining. Confirm artwork size, stitch complexity, thread colors, and packaging. Then approve a sample so the final production run is based on a real stitched result, not a mockup.
The beauty embroidered beanies material thickness guide is really a decision filter. Use it to match the knit to the logo, compare the sample to the artwork, and lock the spec before production begins. That is how you get a cleaner finish, fewer surprises, and a product that still looks right after it has been worn, packed, and shipped.


