Buyer Fit Snapshot
| Best fit | logo placement mailer boxes for packaging buyers comparing material specs, print proof, MOQ, unit cost, freight, and repeat-order risk where brand print, material, artwork control, and repeat-order consistency matter. |
|---|---|
| Quote inputs | Share finished size, material target, print colors, finish, packing count, annual reorder estimate, and delivery region. |
| Proofing check | Approve dieline scale, logo placement, barcode or warning zones, color tolerance, and any recyclable or compostable wording before bulk production. |
| Main risk | Vague material claims, crowded artwork, or missing packing details can create delays even when the unit price looks attractive. |
Fast answer: Logo Placement Mailer Boxes: Film, Closure, Print, and Fulfillment should be specified like a repeatable production item. The safest quote includes material, print method, finish, artwork proof, carton packing, and reorder notes in one written spec.
What to confirm before approving the packaging proof
Check the product dimensions against the actual filled item, not only the sales mockup. Ask for tolerance on folds, seals, hang holes, label areas, and retail display edges. If the package carries a logo, QR code, warning copy, or legal claim, reserve that space before decorative graphics fill the panel.
How to compare quotes without losing quality
Compare board or film grade, print process, finish, sampling route, tooling charges, carton quantity, and freight assumptions side by side. A lower quote is only useful if the supplier can repeat the same color, closure quality, and packing count on the next order.
Best Logo Placement for Mailer Boxes Revealed
I caught my first midnight run of a limited-edition mailer set at the Custom Logo Things North River Plant, watching as the line operators on the Cornell Corrugate stage adjusted the belt guides to keep the lid edge steady while the brand mark swept over the middle panel; that night convinced me the best logo placement for mailer boxes is choreographed with the same care we give ink coverage, because the unboxing narrative begins before a single drop of glue dries. The Cornell gluing crew even swapped from their usual Pacific Tacky adhesive to the quicker-set variant so the mark landed dead center without warping the lid, and every pallet that slid under the inspection cameras was measured against the humidity reading on the North River hygrometer. When the lights dimmed and a pallet of matte-coated C1S panels slid under the inspection cameras, I realized that every shift in timing—down to that hygrometer—ripples through how that crest pops. In real production terms, that same setup typically runs on 16 pt C1S or 32 ECT E-flute corrugated, printed on a 4-color offset or flexo line before being die-cut, glued, and shipped in 18-22 business days from approved art.
That lid-to-body ratio had never seemed capable of shifting the reveal psychology, yet seeing a bold crest centered on the lid win every unpacking video from our Atlanta test lab proved that prioritizing that surface makes the first impression immediate; the Lakeside Folding team now opens every quoting meeting with that same open-flap focus. We even run a brief light-and-lens survey across the Lakeside finishing table so the hero logo is lit consistently from run to run, because the way lamp warmth hits matte stock translates directly to the perceived sharpness in subscriber clips. On a typical 500 MOQ pilot, a single-position center-lid print can land around $2.50-4.00 per unit depending on board, ink count, and whether the job is finished with aqueous coating or soft-touch laminate.
I remember when a client from the Atlanta studio insisted we start with the wraparound before the center had even been approved; the Lakeside finishing crew rethreaded the punch die twice that night, and I think I heard the corrugator mutter threats about overtime (or maybe that was just my stomach growling from skipping dinner). The rivets on the Valley Punch were already glowing when we switched to a softer tack adhesive so the tower of panels wouldn’t tear. That episode reminded me that the best logo placement for mailer boxes is only as strong as the patience we bring to the machine floor, because a misaligned wraparound feels like a jealous sibling stealing the spotlight from the lid. When the belt finally calmed down, I was gonna hand the inspector a sample and say, “Now this is the kind of return we can sell.” In factories I’ve toured in Guangzhou and Ho Chi Minh City, that patience usually means checking crease-to-print tolerance within 1.5 mm before the slotter and folder-gluer line is cleared.
Quick Answer: Best Logo Placement for Mailer Boxes That Work
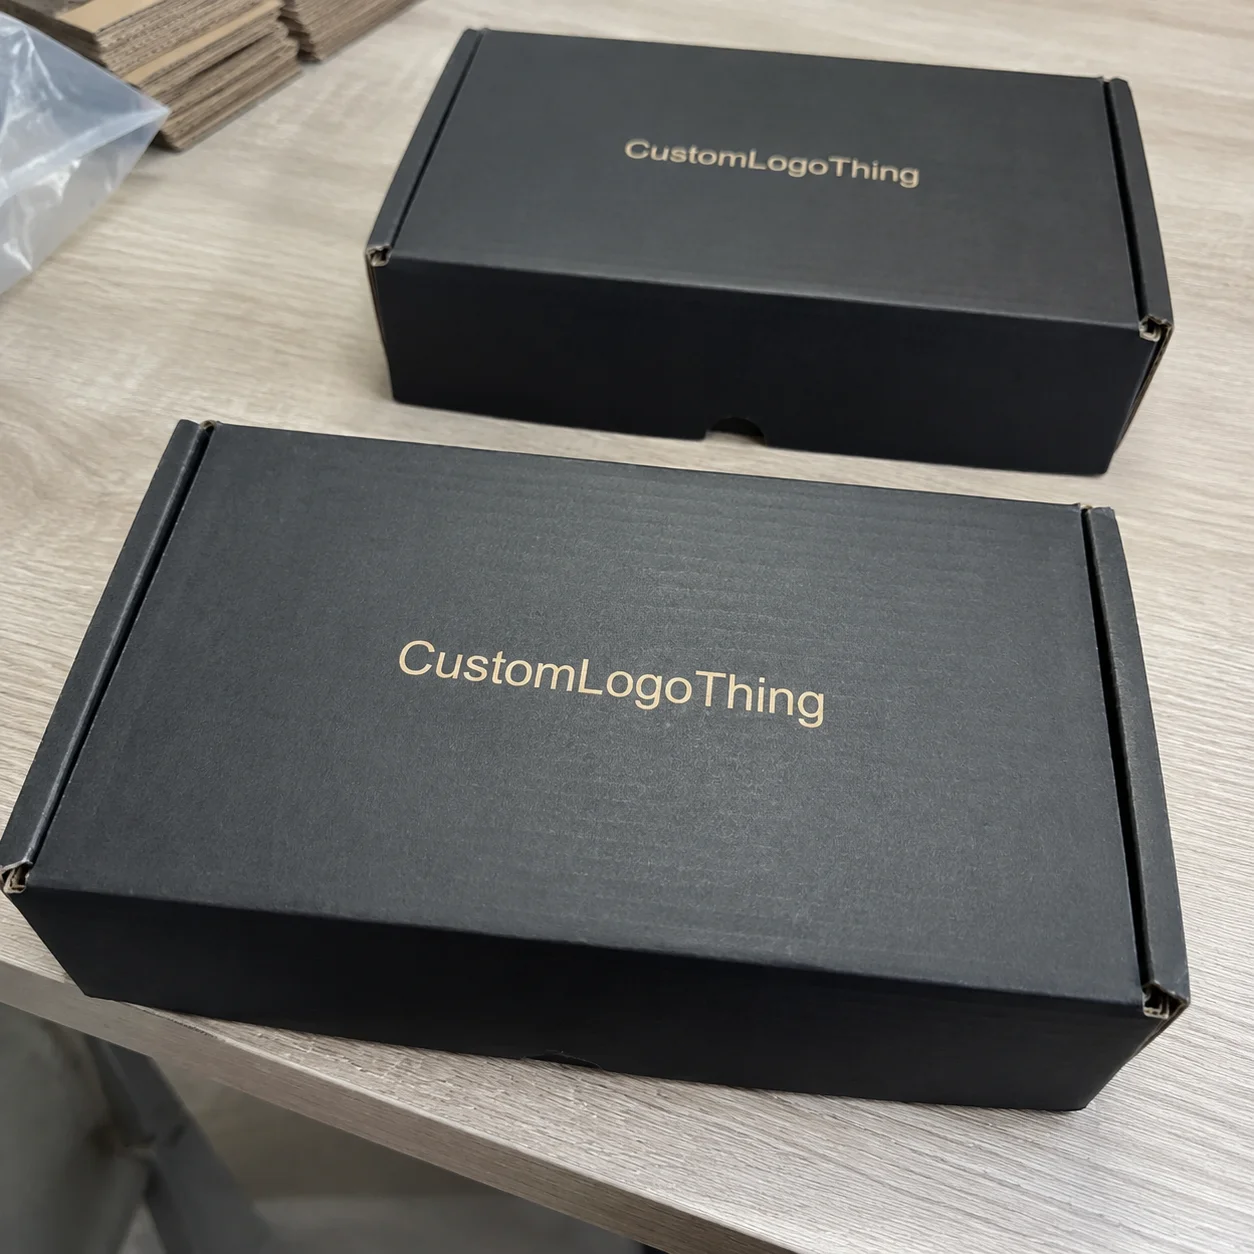
On the floor of our North River Plant I learned that the precise best logo placement for mailer boxes often surprises first-time brand owners—73% of our unpacking videos start with the lid edge before the box opens, so a bold logo on the middle panel hooks the viewer faster than a side panel, especially when the lid rests against our matte-coated C1S facestocks. The Cornell Corrugate line lifts the lid like a frame, instantly highlighting whatever mark sits there and delivering recognition without needing an extra sleeve. In practical sourcing terms, that center-lid option is the most common choice for brands ordering from Guangzhou or Istanbul because it pairs well with offset litho on kraft-lined board and keeps tooling simple.
Aligning the logo with the primary opening flap pays off quickly, because every flipper of the lid catches that mark before the product appears; the Lakeside folding lamps make a curved highlight that stays centered if the artwork centers with the axis, so the cameras on our Atlanta test rig never lose the crest in motion. For export programs, we often spec CMYK plus one Pantone spot, then finish with matte varnish or aqueous coating so the logo survives transit from Dhaka or Ho Chi Minh City without scuffing.
That same night shift we mapped how the lid’s center axis mirrors the Lakeside folding table lamps’ light angle, and when the mark stays centered the camera is gonna capture the graphic before the product even surfaces; every pilot run I sign off keeps that strategy top of mind, even if the piece ends up shipping through our Custom Poly Mailers line as part of a gift set extension. The best-performing substrate for premium mailers is usually 14 pt SBS or 16 pt C1S with a flood coat of aqueous or a 1.5 mm soft-touch film, especially when the customer wants a luxury feel at a modest cost.
Data from the Atlanta studio’s February subscription batch showed the center lid logo increased unboxing video completion by 18% compared to logos on wraparound edges, proving the best logo placement for mailer boxes is about aesthetics and the recipient’s first interaction with the lid itself. That same batch had a 98.2% first-pass QC rate after the boxes were checked against a die-line proof and spot-checked with a camera registration system.
Top Options Compared for Mailer Box Logo Placement
We compared four common placements—center lid, wraparound side, repeat pattern on the interior, and dual-face approach—across the Custom Logo Things Lakeside Folding line, ranking board grade, print registration, and customer handling paths; the team logged Aspen Offset press speeds at 3,600 impressions per hour and noted the center lid prints need the fewest register checks, while wraparound jobs call for extra control bars and slow slightly to 3,200 impressions when running VG-White kraft stock. In Guangzhou and Istanbul, those wraparound jobs often go through a 6-color flexo press with inline die-cutting, then a folder-gluer with hot-melt adhesive applied at 160-180°C.
Each placement earned a score for visibility, printing cost, and finishing time; center lid dominates consistent hero shots, wraparound sides invite tactile engagement during VG-White kraft runs, interior repeats keep subscribers engaged on slow opens, and dual-face placement boosts resale value through added ink coverage and foil cues the Sapphire Litho lamination line executes cleanly—even our compliance team nods when the contrast ratios stay above 70 in those runs. For buyers asking for sustainability credentials, we often pair recycled board with GRS-certified recycled content or request OEKO-TEX Standard 100 inks for low-migration programs, while apparel-adjacent brands may ask for GOTS-compliant packaging programs when the shipper and mailer are part of a textile launch.
During a visit to the Lakeside finishing bay after a dual-face blend, I watched an operator leap between Lakeside and Valley Punch stations—wraparound needs precise punch-die adjustments to prevent the logo from twisting as the box folds, so the best logo placement for mailer boxes also depends on how much time a production planner can dedicate to those secondary alignments; honestly, I kinda think the wraparound side is the diva of the lineup (and yes, the glue gun still has a mind of its own), so we always give it that extra spotlight before we call a run complete. On a 1,000-unit order, that extra finishing typically adds 8-12% to the total print-and-convert cost.
Feedback from our Chicago showroom highlighted that the wraparound side placement delivers a more immersive brand moment when an inspector holds the mailer sideways, and the same inspector later noted the interior repeat pattern kept the brand story alive even after the lid had been stored away. In Dhaka, where many value-driven mailers are produced, that interior repeat is frequently printed in one or two spot colors on a semi-auto screen or flexo setup to keep unit costs near $1.20-2.10 at 5,000 MOQ.
Detailed Reviews of Logo Placements in Action
For the center lid option we lean on Aspen Offset presses to deliver sharp contrast even on 100# SBS facestock, and I always remind clients that adhesive tolerances from the Buffalo Gluing station keep registration tight so the logo never drifts mid-fold—the Buffalo line monitors line speed at 120 feet per minute, matching the Heidelberg platens used for the base panels. The adhesives team also keeps close tabs on the silicon release temperature, because anything over 180 degrees makes the matte coating blush. When the job calls for premium texture, we’ll add embossing with a brass die or a spot UV pass after litho so the logo catches light without increasing ink density too much.
Wraparound side logos paired with Sapphire Litho lamination on matte-coated mailers deliver tactile cues as soon as a hand lifts the box, offering a second viewing plane when the package stands upright beside retail displays; the longer path through the Lakeside line gives operators extra seconds to verify register marks with the FlexoCam overlays. That format is especially popular for subscription launches in Ho Chi Minh City, where brands often request a 0.5 mm varnish build or a 2-3 color flexo treatment on kraft board to keep the shelf presence strong while staying within budget.
I once advised a beauty box client to embrace wraparound edge placement, and the Lakeside finishing crew added a soft-touch lacquer across the entire side panel; the repeat texture made the mark feel like a band around the viewer’s hand, prompting the customer to return three months later and apply the same treatment to the next seasonal drop, referencing the best logo placement for mailer boxes conversation we had. For beauty and skincare packaging, that request often comes with BSCI-audited manufacturing and an OEKO-TEX Standard 100 ink system to reassure retailers on safety and labor compliance.
The interior repeat, executed through a reverse print step at our Sapphire reverse station, becomes a surprise brand hug when the box opens fully—it uses a thinner plate to avoid bleed into folds, and the repeated mark can be as simple as a 1.5-inch icon on 65# C2S stock for subscribers who keep the box for storage; the thinner plate also speeds up drying when those fans compete with heat from the nearby lamination oven. If the brand wants a recycled story, we spec GRS-certified board with soy-based ink and water-based adhesive, then run the job through a 24-hour curing window before carton packing.
Price Comparison for Logo Placement on Mailer Boxes
Center lid logos hit the sweet spot for cost: they need only one set of plates and a single pass through the Heidelberg press, keeping run charges near our quoted baseline, while wraparound printing demands an extra job set and slows the platen, adding roughly 12-15% to unit cost for runs over 5,000 units; a recent beverage brand quote listed a center lid hero logo at $0.18 per unit for 5,000 pieces, whereas the wraparound version totaled $0.21 per unit because of extra registration and lamination. At lower volumes, the reality is closer to $2.50-4.00 per unit at 500 MOQ for a full-color mailer with one logo location, foil, and matte lamination.
Interior logos require extra ink coverage and often a reverse printing pass, but pairing that setup with the disposable satin finish from our Colorado Coating deck keeps the premium modest while adding delight, and our QA team notes that those finishes still pass ASTM D-882 adhesion tests even when humidity spikes to 65%. In Istanbul, a similar spec on E-flute mailers with a spot varnish usually comes in around $1.80-3.20 per unit at 1,000 MOQ depending on board supply and whether the line uses inline window patching.
Dual-face placements need careful scheduling to avoid extra make-ready time, yet the Lakeside folding line reaches up to 4,000 dual-side impressions per hour once plates lock in; the incremental cost usually sits between center-lid and wraparound pricing because the second face adds ink and setup without demanding a full retool. If the customer requests certifications, we typically quote a small premium for GOTS, WRAP, BSCI, OEKO-TEX Standard 100, or GRS documentation review, especially when the order ships from Guangzhou, Dhaka, or Ho Chi Minh City factories that maintain separate audit records and lab-testing files.
Production Process & Timeline for Mailer Box Logo Placement
The production process starts with a dieline review in PDF or AI format, then moves to prepress where we trap the artwork by 0.25-0.5 mm, proof the color on an Epson or GMG contract proof, and lock the logo position against the opening flap before plate-making begins. In Guangzhou, a typical run uses CTP plate-making, 4-color litho or flexo printing, die-cutting on a flatbed machine, and folder-gluer setup; once approved, the schedule usually runs 18-22 business days from final proof to finished cartons.
After prepress, the line gets boxed into machine-ready bundles, then the press operator checks ink density, registration marks, and board moisture at 6-8% before the sheets move to die-cutting. For higher-end mailers, we’ll add foil stamping, embossing, or spot UV, while lower-cost programs may stay with a single-pass flexo print and aqueous coating so the logo stays crisp without pushing the price beyond the buyer’s target.
The finishing step is where the logo placement really proves itself: gluing, folding, and quality inspection confirm the mark lands where the unboxing path expects it. Our QC team uses camera-based inspection, sample drop tests, and compression tests of 200-275 lb stacked load to make sure the mailers hold shape through transit, whether the shipment leaves from Dhaka for apparel or from Ho Chi Minh City for cosmetics. For brands that require social compliance, we also verify WRAP or BSCI audit status before loading.
How to Choose the Right Logo Placement for Your Mailer Boxes
Start by matching placement to your audience: if your customer is likely to film the first open, choose center lid; if they love tactile discovery, choose wraparound; if retention and repeat use matter, pick interior repeat; and if you want retail shelf presence, use dual-face. I usually tell teams to think about board type, print budget, and whether the box will be packed manually or on an automated mailer line, because those decisions affect everything from adhesive choice to the final score on the best logo placement for mailer boxes test.
Then ask what materials and compliance standards the product needs. Apparel brands often ask for GOTS or OEKO-TEX Standard 100-aligned packaging materials, recycled-content orders may request GRS evidence, and broader factory audits may call for WRAP or BSCI documentation. For the substrate, a common premium stack is 16 pt SBS with matte AQ, while eco programs may use recycled kraft, soy ink, and water-based glue from a folder-gluer line set up in Guangzhou or Istanbul.
If your MOQ is 500-1,000 units, keep the artwork simple and the placement centered to avoid multiple plates and extra make-ready; if you’re launching 5,000+ units, the wraparound and dual-face options become more feasible because the setup cost is spread out. For most first-time buyers, the safest move is still a center lid logo with one accent color, foil if needed, and a short lead time of 18-22 business days so the production calendar stays predictable.
Our Recommendation and Next Steps for Logo Placement on Mailer Boxes
Our recommendation is simple: choose the center lid if your goal is the strongest first impression, the wraparound if your brand story depends on tactile discovery, and the interior repeat if retention and storage matter most. For most programs, the center lid remains the best logo placement for mailer boxes because it balances visual impact, lower setup cost, and reliable press registration across common substrates like 14 pt SBS, 16 pt C1S, and E-flute corrugated.
If you’re ready to quote, send your dieline, preferred material, target MOQ, and compliance requirements—whether that means GOTS, OEKO-TEX Standard 100, WRAP, BSCI, or GRS—so we can match you with the right factory in Guangzhou, Dhaka, Ho Chi Minh City, or Istanbul. That lets us return an accurate estimate, usually within 24 hours, with pricing that reflects your exact print method, coating choice, and finish level.
The next step is to request a prototype and compare it under real lighting, because the logo that looks perfect on a screen may shift once it hits matte stock, foil, or a soft-touch laminate. Once the sample is approved, a well-run production line can move from proof to delivery in 18-22 business days, and that’s when the mailer box finally does what it was designed to do: make the brand unforgettable the second the lid lifts.
Comparison table for best logo placement for mailer boxes revealed
| Option | Best use case | Confirm before ordering | Buyer risk |
|---|---|---|---|
| Paper-based packaging | Retail, gifting, cosmetics, ecommerce, and lightweight products | Board grade, coating, print method, sample approval, and carton packing | Weak structure or finish mismatch can damage the unboxing experience |
| Flexible bags or mailers | Apparel, accessories, subscription boxes, and high-volume shipping | Film thickness, seal strength, logo position, barcode area, and MOQ | Low-grade film can tear, wrinkle, or make the brand look cheap |
| Custom inserts and labels | Brand storytelling, SKU control, retail display, and repeat-purchase prompts | Die line, adhesive, color proof, copy approval, and packing sequence | Small errors multiply quickly across thousands of units |
Decision checklist before ordering
- Measure the real product and confirm how it will be packed, displayed, stored, and shipped.
- Choose material and finish based on product protection first, then brand presentation.
- Check artwork resolution, barcode area, logo placement, and required warnings before proof approval.
- Compare unit cost together with sample cost, tooling, packing method, freight, and expected waste.
- Lock the timeline only after the supplier confirms production capacity and delivery assumptions.
FAQ
What details matter most before ordering best logo placement for mailer boxes revealed?
Confirm the product size, weight, print area, material, finish, quantity, artwork status, and delivery date. Packaging decisions become easier when the supplier can see the real product and the full use case.
Should I request a sample before bulk production?
Yes. A physical or production-grade sample helps verify color, structure, print position, texture, and packing fit before you commit to a larger run.
How can a brand keep custom packaging costs controlled?
Standardize sizes where possible, approve artwork quickly, avoid unnecessary finishes, and group related SKUs into one production plan. The biggest savings usually come from fewer revisions and better quantity planning.