Brand snapback Caps Unit Cost can look higher than a softer cap at first glance, yet buyers often find the real value once the fit stays consistent, the front panel holds its shape, and reorders do not turn into a new round of sizing debates. For retail, events, uniforms, and promotions, that predictability matters because a cap that wears well, photographs cleanly, and keeps the same profile from run to run supports brand consistency and stronger brand recognition. If you need examples of how structured headwear performs across programs, our Case Studies page is a useful place to compare different build choices.
From a packaging and merchandising buyer's point of view, the question is rarely just “what is the cheapest cap?” It is usually, “what gives me the best landed number, the right look on shelf, and fewer surprises during approval?” That is the right lens for brand snapback caps unit cost, because the line item is shaped by construction, decoration, minimums, packing, and freight far more than by a headline price alone.
A cap that fits the brief the first time is often cheaper than a cheaper cap that needs revisions, relabeling, and a second round of samples. That is where the real spend shows up.
Why Snapbacks Often Beat Softer Caps on Cost Per Wear
Snapbacks earn their keep because they are easy to standardize. The adjustable closure removes the need to sort by head size, and the structured crown helps the cap keep a clean silhouette even after repeated wear. In practice, that means fewer fit complaints, fewer exchanges, and less time spent explaining why one batch feels different from the next. For teams that care about visual branding, the repeatable shape is a real advantage.
Buyers sometimes focus on the purchase price and miss the broader picture of cost per wear. A softer cap may cost less at the line item level, but if it loses shape faster or lands with inconsistent crown height, the perceived value drops quickly. A snapback can be a stronger choice for retail, fan merchandise, and promotional programs where the cap needs to project a confident front panel and stay presentable after a long day of wear.
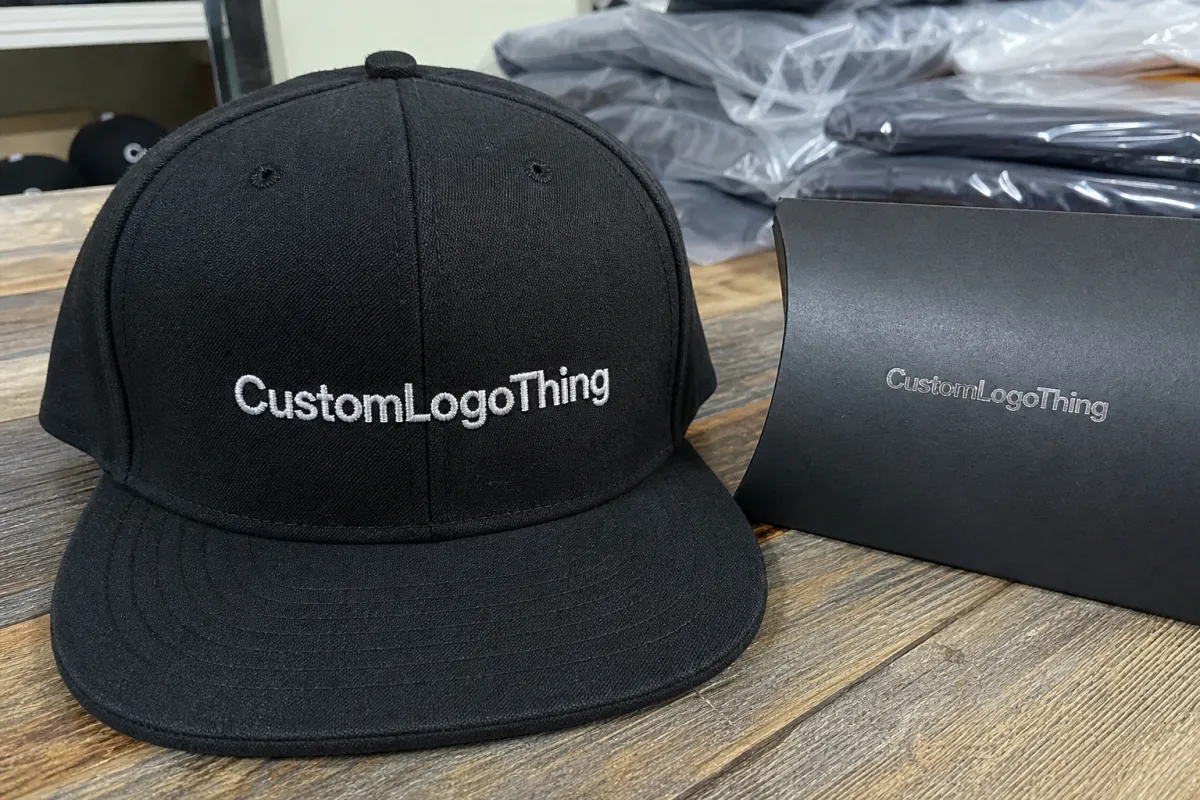
Another practical point is merchandising. Snapbacks tend to photograph well, stack neatly, and display with a more premium posture than unstructured caps. That matters for customer perception, especially if the cap is going into a display fixture, a gift bundle, or an unboxing experience where the headwear arrives folded with other branded items. A cleaner structure can make a modest program look more considered without forcing a complicated build.
- Standard sizing: one adjustable fit covers more wearers.
- Stable shape: structured fronts hold logo placement better.
- Retail appeal: sharper shelf presence and easier visual branding.
- Program efficiency: fewer size decisions and fewer fit-related returns.
That is why the smartest comparison is not snapback versus soft cap in the abstract. It is snapback versus the specific job the cap needs to do. If the goal is broad distribution, repeated use, and a dependable logo field, the snapback often wins on total value even before you start talking about decoration choices or freight.
Choose the Crown, Panels, and Closure That Fit the Order
The core build choices change both the look and the production effort. A 5-panel cap gives you a cleaner front field with fewer seams across the face, which can be useful for large graphics or simple branding. A 6-panel cap creates the classic segmented shape that many buyers expect for a retail-style snapback. If the logo is compact and centered, a 6-panel structured build is often the safer all-around choice. If the design needs a broad, uninterrupted front, 5-panel construction may be the better fit.
Structure also matters. A structured front uses reinforcement, such as buckram or fused interfacing, to hold the crown upright. An unstructured front feels softer and more relaxed, but it is less common in traditional snapback programs because the logo area can ripple more easily. Mid-profile crowns usually sit lower and feel more wearable for everyday merch, while high-profile crowns create a bolder silhouette that reads more like classic streetwear.
The closure itself is not just a finishing detail. Plastic snap straps are familiar, durable, and inexpensive to run at scale. Matching self-fabric straps with a tuck-in tab can look cleaner, but they add handling and more finishing time. If the program needs repeated wear, the snap hardware should be tested for strength and smooth adjustment, because a cheap-feeling closure can drag down the overall impression of the cap even when the front logo is done well.
Bill shape, seam placement, and interior reinforcement also affect the final feel. A pre-curved bill is easier for some retail programs because it arrives ready to wear, while a flat bill has a sharper streetwear look and more space for visual impact. Front seam placement can interfere with a large logo, so it is worth checking the art placement early rather than discovering too late that a seam crosses the design. Small decisions like these often separate a generic cap from one that feels deliberate.
Honestly, I think the biggest mistake is over-specifying a giveaway and under-specifying a retail piece. A simple event handout does not need every possible trim upgrade, and a resale cap usually deserves better reinforcement, tighter stitching, and a more polished sweatband. Match the build to the use case, and the price usually makes more sense.
Decoration Options That Change the Final Look
Decoration often moves the price more than the cap blank itself. Flat embroidery is the most familiar option because it is durable, crisp, and suitable for many brand marks. 3D puff embroidery adds foam under the stitch field, which creates a raised effect that looks strong on bold letters but requires more setup and careful digitizing. Woven patches, applique, PVC badges, and printed labels each bring a different appearance, and each one has its own labor profile.
Stitch count matters. A simple chest-level patch may be easy to produce, but a dense front logo with fine line work, extra fill stitches, and tight edge cleanup can raise the cost fast. The same is true for thread density and border treatment. A clean satin stitch edge or a merrowed patch border takes time to execute well, and the production team needs the artwork to be clear enough to avoid guesswork. This is where vector files and precise color references save money and time.
Logo placement also changes labor. Front decoration is the standard starting point, but side hits, back marks, inner labels, and under-brim graphics add setup and may require extra machine time or separate application steps. Contrast stitching can add a tasteful detail, yet it can also complicate color matching and trim inventory. If the goal is a straightforward promotion, one strong front logo is usually the best balance between appearance and unit cost. If the cap is meant to feel retail-ready, a side patch and woven label can support the story without overloading the cap.
For artwork, send vector files whenever possible: AI, EPS, or a clean PDF. Include Pantone references if your brand uses them, and flag any line that is too fine to survive stitching. Embroidery is forgiving in some places and unforgiving in others. Thin type, tiny counters, and close color boundaries can get muddled if the file is not prepared with production in mind. That is especially true on small crown areas where every millimeter counts.
One more practical note: the best decoration is not always the most expensive one. A well-placed woven patch can look sharper than a crowded embroidery file, and a simple flat stitch can outperform an overbuilt puff logo if the brand mark is compact. The goal is not to add decoration for its own sake. The goal is to create the right visual branding for the product, the audience, and the budget.
| Order Profile | Typical Build | Decoration | Indicative Unit Cost | Best For |
|---|---|---|---|---|
| 250 pcs | 6-panel structured, plastic snap | Flat embroidery, single location | $4.80-$7.50 | Events, pilot runs, controlled distribution |
| 500 pcs | 6-panel structured, pre-curved or flat bill | Flat embroidery or woven patch | $3.90-$6.10 | Merch drops, staff programs, mid-size launches |
| 1,000 pcs | Structured snapback with standard trim | Flat embroidery, patch, or simple applique | $3.10-$4.90 | Brand programs with repeat demand |
| 3,000 pcs+ | Repeatable spec with stable materials | Higher stitch counts or multi-piece decoration | $2.60-$4.10 | Retail, seasonal releases, larger promotions |
Note: Those ranges are typical factory-side references, not a final quote. Freight, packaging, sampling, and destination can move the landed number, especially for smaller runs or split shipments.
For shipping and carton handling standards, some buyers also review test methods and transit expectations through the ISTA test resources, especially when caps are packed with other branded goods. If your program uses recycled cartons, paper inserts, or hang tags, checking FSC certification guidance can help you keep the paper side of the program aligned with your sourcing goals.
Brand Snapback Caps Unit Cost: Pricing, MOQ, and Scale
Now to the number buyers really need: brand snapback caps unit cost is built from several pieces, and the quote only makes sense if those pieces are visible. The blank cap base is one part. Decoration is another. Then come digitizing or setup, sampling, packaging, and freight. If any one of those buckets is missing, the quote may look attractive while the landed spend tells a very different story.
MOQ matters because setup work has to be spread across the run. A 250-piece order pays more per cap for the same patterning, approval, and machine setup than a 1,000-piece order. That does not mean small runs are a mistake. It means the buyer should expect a higher unit cost and should ask for tiered pricing so the breakpoints are clear. Once the line is running and the materials are standardized, price often improves faster than people expect.
A clean quote should spell out what is included. Is digitizing part of the price, or billed separately? Are woven labels, hang tags, and polybags extra? Is there a charge for adding the second logo location? If the answer to any of those questions is unclear, the true brand snapback caps unit cost is not yet visible. That is where budgets go sideways.
Here is a practical way to think about the cost buckets:
- Cap blank: fabric, crown construction, bill insert, sweatband, closure.
- Decoration: embroidery, patch application, printing, or applique labor.
- Setup: digitizing, sampling, machine programming, and color matching.
- Packaging: polybags, inserts, carton labeling, master cartons.
- Freight: air or ocean, plus destination charges if applicable.
Hidden cost drivers are usually the ones buyers forget to ask about. Rush production can add a premium. Split shipments can add handling and cartoning charges. Extra thread colors may seem minor, but they can slow the line and affect efficiency. Special carton labels, retail-ready folding, or bagged individual packing can be worth it for presentation, yet they should be treated as line items, not assumptions.
In many programs, the right move is to Request a Quote in three or four quantity tiers so the buyer can compare the actual drop in unit cost. That makes the decision easier to defend internally, because the numbers show the point where the setup is paid for and the cost starts to normalize. If a supplier cannot show those tiers clearly, the quote is not giving you enough information to budget with confidence.
For buyers who manage both merchandising and logistics, one more detail matters: landed cost and perceived value are not the same thing. A cap with a slightly higher base price can still be the better buy if it packs better, displays better, and reduces return risk. That is especially true when the cap is part of a larger branded kit where the headwear has to look consistent beside shirts, drinkware, or paper goods.
Production Steps and Lead Time From Art to Shipment
The production path is straightforward, but each step affects timing. It usually begins with artwork review and cap specification confirmation. Then comes a proof or sample, followed by approval, bulk production, inspection, packing, and shipment. Buyers sometimes talk about lead time as if it is only sewing time, but in practice the schedule is driven just as much by approval speed and material readiness as by the actual stitch count.
For a standard snapback order, a pre-production sample may add a few business days, and bulk production often lands in the range of 12-15 business days after proof approval if materials are in stock and the line is not heavily booked. That range changes quickly if the closure style changes, the front panel spec gets revised, or a new packaging format is introduced after the sample phase. The smoother the approval path, the more reliable the schedule.
Late changes are the most common source of delay. Clear artwork prevents back-and-forth on logo size. Confirmed color references prevent rework on thread or fabric. A locked panel construction keeps the factory from rebuilding the sample. Even packaging changes matter, because retail folding, barcode labels, and carton counts can add handling time after the cap itself is finished. The best buyers protect the schedule by making decisions early and asking for a written timeline that separates sample timing, bulk timing, and transit timing.
If a cap is headed into a larger branded program, inspection and packing deserve attention too. Cartons should be counted, labeled, and protected in a way that matches the destination and the handling method. That is particularly useful if the caps are traveling with other printed or packaged goods and need to arrive in a clean, saleable condition. Standards such as ISTA guidance can help buyers think more clearly about transit risk, even when the order is not formally tested.
From a buyer's perspective, the most useful schedule is the one that shows where the bottlenecks sit. Ask for sample timing, bulk timing, packing timing, and shipping timing as separate items. Then verify whether the quote assumes ocean freight, air freight, or pickup. That one detail can change your launch date more than the sewing line ever will.
How to Compare Quotes Without Missing the Real Cost
Comparing quotes is easier when every line is truly like for like. Two caps may both be called “snapbacks,” but one could be 5-panel with flat embroidery and the other could be 6-panel with a woven patch, a different sweatband, and individual polybags. Those are not the same product, and the unit costs should not be compared as if they were.
Read the build details first. Check fabric weight, front structure, closure type, bill shape, logo method, packing method, carton count, and delivery terms. Then ask whether the quote includes setup, sample approval, labeling, and freight. A low number is not helpful if it leaves out the exact things your program needs to land on time and look right on shelf.
Quality controls should be spelled out, too. You want to know the stitch tolerance, the expected color match method, and the way defects are handled before shipment. If the supplier can explain how a cap is checked, packed, and approved, you get a better picture of risk. If they only talk about price, the quote is incomplete.
That is also where brand identity protects the budget. A cap that misses the approved crown height or arrives with the logo too small may technically be “in spec” in somebody's loose interpretation, but it will still feel wrong to the buyer and the end customer. A clear quote should reduce that kind of ambiguity rather than creating it.
One useful habit is to keep a simple comparison sheet with four columns: spec, included cost, excluded cost, and open question. That makes it much easier to compare suppliers and avoids the trap of treating two different programs as if they were one. If the supplier is transparent, you will be able to see where savings come from without guessing at quality.
For examples of how different programs balance finish level and budget, the Case Studies page can help you see how a simple embroidered cap compares with a more detailed retail build. The goal is not to overbuild everything. It is to spend where the customer will notice the difference.
Next Steps for a Fast, Accurate Spec Sheet
If you want a faster quote, send the details that actually drive pricing. Start with quantity breaks, target ship date, destination ZIP or country, and preferred cap style. Add logo files, decoration placement, and any packaging requirements. If you already know whether the cap needs to feel retail, promotional, or uniform-ready, say so. That context helps the supplier match the spec to the job instead of guessing.
When a close match matters, a reference cap is often worth more than a paragraph of description. A clear photo can help, but an actual sample reveals crown height, bill curve, seam feel, and closure style more accurately than words alone. That is especially useful if you want the snapback to match an existing brand line or to sit beside other items in a coordinated kit.
Keep the quote request simple, but not vague. Ask for the sample timing, bulk timing, included costs, and any separate charges. If you want a print or embroidery approval before production starts, request that in writing. Clear requests save time on both sides and reduce the chance of rework later.
For buyers building a larger merchandise or promotion plan, this is the moment to think about brand consistency across the full package, not just the cap itself. A well-priced snapback that arrives with the right structure, clean decoration, and sensible packaging can support the rest of the program and improve the unboxing experience without inflating the budget.
If you are ready to move, send the spec sheet now so the brand snapback caps unit cost can be quoted accurately and compared with confidence. A complete request usually gets a cleaner answer, a tighter schedule, and fewer surprises after the order is placed.
Frequently Asked Questions
What affects brand snapback caps unit cost the most?
Order quantity has the biggest impact because setup costs are spread across more caps as the run gets larger. Decoration complexity matters next: simple embroidery is usually easier to produce than puff embroidery, PVC, or multi-location artwork. Material choice, packaging, and freight can also move the final number once the cap is ready to ship.
How does MOQ change snapback pricing?
A smaller MOQ usually means a higher per-piece price because the factory still has to cover patterning, setup, and approval work. Larger orders usually unlock better unit pricing, especially when the same material and decoration repeat across the run. If budget is tight, ask for tiered pricing so you can see where the real breakpoints are.
Which decoration method is best for lowering snapback cap cost?
The simplest logo that still fits the brand brief is usually the most economical, often a single-location embroidery or a basic patch. Methods with more build time, such as 3D puff, molded PVC, or multi-layer applique, generally cost more. The final choice should balance price with the look the cap needs on shelf or at event handout.
How long does a custom snapback quote stay valid?
Quote validity depends on material availability, freight conditions, and how locked the specification is when the price is issued. A quote is most reliable when the cap build, logo method, quantity, and delivery terms are all confirmed in writing. If the order will sit for a while, ask for a validity window and what would trigger a price update.
What files do I need for an accurate snapback caps quote?
Send vector artwork if possible, plus Pantone or other color references for the logo and cap panels. Include your target quantity, decoration placement, preferred cap style, packaging needs, and delivery destination. If you have a sample cap or a reference photo, include it so the factory can match the structure more precisely.


