Bulk headwear looks straightforward until fit, feel, and decoration start competing with each other. A cap can look right in a render and still sit too shallow, pinch at the temples, or feel overly rigid once worn. That is why the snapback caps Material and Sizing guide matters: the cap is a system, and the fabric, structure, and closure all affect the final result.
Snapbacks are usually sold as one size fits most, but that phrase is only a shortcut. Circumference matters, yet crown depth, front-panel reinforcement, visor shape, sweatband build, and snap range often decide whether the cap stays in rotation or gets put aside.
The safest buying approach is to evaluate the whole build. The fabric has to support the decoration. The structure has to match the target head shape. The closure has to cover the real wear range, not just a label spec. Miss one of those pieces and the order becomes harder to wear, resell, or reorder.
A cap that technically adjusts is not the same as a cap that actually fits.
What this snapback caps material and sizing guide helps buyers avoid
Most fit problems show up after approval, not before. Buyers often focus on logo size, thread color, and placement, then discover the cap wears smaller than expected once it reaches a mixed group of heads. That is a spec issue, not a design issue.
The common failure pattern is predictable. The sample looks good on a table. A wearer with thick hair feels the closure is tight. Another person says the crown sits too tall. A third likes the look but finds the front panel too stiff for casual wear. Those reactions point back to structure and material, not random preference.
The two decisions that matter most are:
- Material affects hand feel, breathability, decoration performance, and how premium or casual the cap reads.
- Sizing and structure determine whether the cap fits a range of head shapes, not just whether it closes.
Experienced buyers ask for fabric weight, panel reinforcement, and closure specs before they ask for mockups because the substrate is the product. The logo sits on top of it, but the wearer feels the construction first.
How snapback construction changes fit and feel
A snapback is the sum of several small decisions. Five-panel or six-panel construction changes the front shape. Mid-profile and high-profile crowns sit differently on the head. A flat visor gives a sharper silhouette, while a slightly pre-curved bill feels more familiar to everyday wearers.
Front-panel reinforcement usually comes from buckram or another stiffener. It helps embroidery hold shape, but it can also make the cap feel smaller than its measurements suggest. A softer front can feel more relaxed, though it may collapse under a heavy logo or layered patch.
Closure style changes the usable range more than many buyers expect. Plastic snaps are common because they are inexpensive and easy to adjust. Fabric straps feel less plasticky. Metal closures can raise the perceived quality, but they add cost and sometimes weight. Velcro is fast, but it usually reads as more utilitarian than premium.
Inside finishing matters too. A smooth sweatband reduces irritation during long wear. Clean seam tape helps the cap hold its shape after repeated use. Eyelets should be evenly stitched and properly placed; bad spacing can make the crown look off-center even when the outer branding is correct.
Fit is not just a measurement. A rigid crown may feel tighter than the size range implies. A softer cap may feel roomier but lose structure sooner, especially with dense embroidery or layered decoration. Decide that tradeoff before sampling, not after bulk production starts.
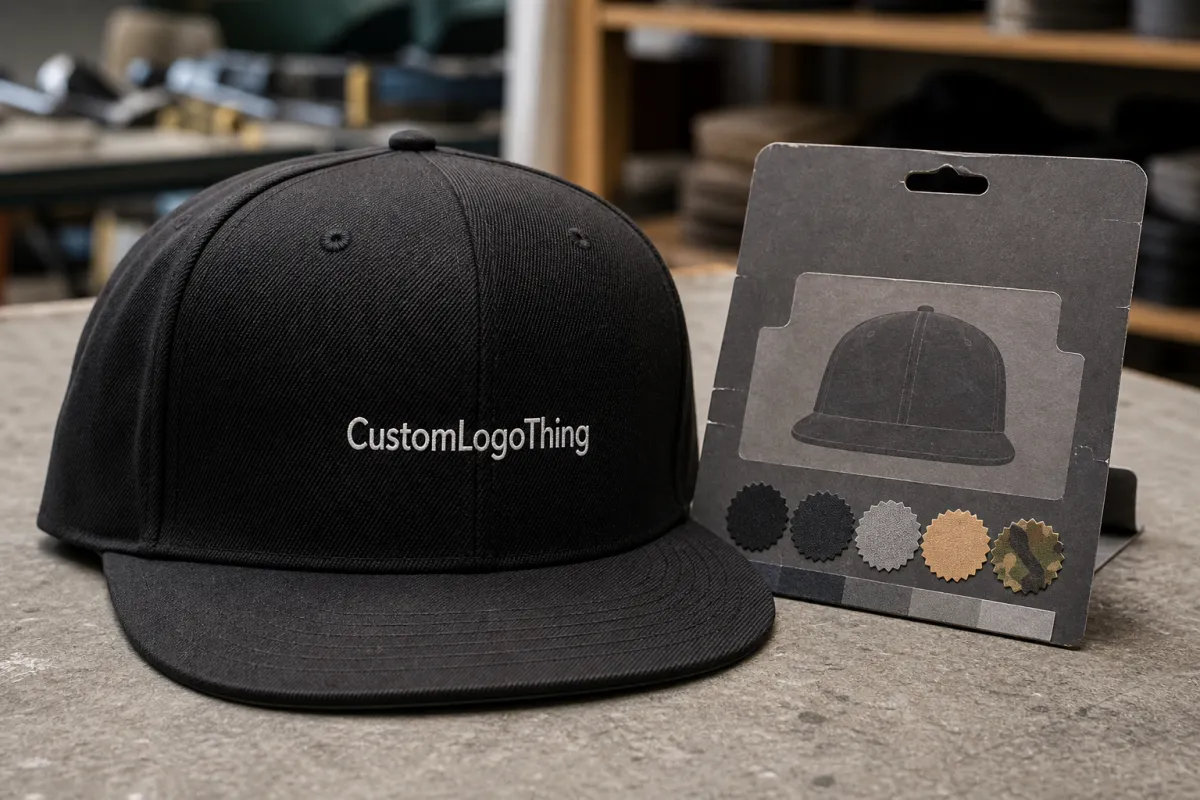
Picking the right fabric for structure, breathability, and decoration
Fabric choice affects appearance, fit, and decoration performance. A fabric that photographs well can still fail if it wrinkles, overheats, or puckers under stitching.
Cotton twill is the safest default for a classic snapback. It has a familiar hand feel, accepts embroidery cleanly, and works well with structured fronts. The downside is that it can show wear faster than synthetic options and may not hold color as consistently across repeated washing.
Polyester is a practical option for better color consistency, easier cleaning, and improved durability in active or outdoor use. It often gives the most consistent result across large quantities. Wool blends create a heavier, more premium impression, but they are not ideal for every market. In hot climates, they can feel overly warm.
Mesh-back constructions suit summer programs, sports programs, and outdoor teams. They improve airflow and reduce heat buildup, though the front still needs enough support to avoid a flimsy look. A weak front panel with a mesh back is a compromise, not a premium upgrade.
Fabric weight matters. Light fabric can buckle around a large logo or make the crown appear underbuilt. Heavier fabric usually supports embroidery and woven patches better, but too much weight can make the cap feel stiff and less breathable. The right choice depends on whether the cap is for retail, promotion, or staff use.
The decoration method should influence the fabric decision. Embroidery needs stability to avoid puckering. Printing prefers flatter panels and cleaner surfaces. Patches can hide minor surface issues, but they add thickness and cost. Dense, multi-color artwork usually needs a stronger front panel than a simple one-color mark.
- Embroidery works best on structured fronts with stable fabric and controlled stitch density.
- Printing prefers flatter panels and cleaner fabric surfaces.
- Patches add dimension but increase unit cost and thickness.
For shipping, packaging should protect shape rather than just fill space. Corrugated cartons with simple inserts usually keep visors and crowns in better condition than loose packing. If sustainability matters, recycled paper, kraft wrap, and FSC certified board are practical choices without making pack-out more complicated. Transit testing standards such as ISTA are useful when the route is rough or the shipment is expensive.
How to size snapbacks for mixed head sizes
Do not rely on one size fits most without checking what that means in practice. Measure a sample group. Compare head circumference with the actual usable adjustment range. Then test the fit on real people, because the back closure can close while the cap still sits wrong.
A cap can technically fit and still be uncomfortable. It may ride too high, press at the temples, or feel unstable when the wearer turns their head. Those issues show up quickly when the crown is shallow or the panel structure is too rigid for the audience.
Hair volume changes the outcome more than spec sheets usually admit. Thick curls, braids, ponytails, locs, and different styling habits can all make the same cap feel smaller or larger. If the target audience includes a broad range of hair types, that needs to be part of sampling, not a footnote.
A useful fit brief should include:
- Target head circumference range
- Preferred crown depth
- Closure range and the minimum usable setting
- Front-panel height or any no-go shallow fit condition
- Wear notes from different testers, including hair volume and comfort feedback
That last item saves time. A supplier can work from measurements, but a note like “fits medium heads well, tight on thick hair” gives production a much clearer target. It also helps during revisions, when the difference between slightly deeper crown and substantially deeper crown can save a full sampling round.
Ask for a physical fit sample whenever the caps will be worn by a mixed audience. Digital proofs cannot show pressure points. They also cannot tell you whether the bill feels too flat, whether the front panel stands too high, or whether the adjustment range looks generous but wears tight.
Cost, pricing, MOQ, and unit-cost tradeoffs
Price is driven first by material, then by structure, then by decoration, then by labor. The more reinforcement and hand finishing a cap needs, the higher the unit cost. That is not a mark-up mystery; it is production math.
For a simple custom run at around 5,000 pieces, these rough ranges are common:
| Build | Typical unit price | What drives the cost | Best for |
|---|---|---|---|
| Basic cotton twill, embroidered front | $2.10-$3.40 | Standard structure, simple stitch count | Events, staff wear, promotions |
| Structured polyester, woven patch | $2.40-$3.90 | Better color consistency, patch application | Brand merch and repeat orders |
| Wool blend, premium label, embroidery | $3.20-$5.10 | Heavier fabric, refined hand feel, more finishing | Retail and higher-margin drops |
| Mesh-back build, custom closure, mixed decoration | $2.80-$4.80 | Extra paneling, ventilation, more setup | Outdoor use and summer launches |
MOQ changes the math quickly. Lower quantities push the unit price up because sampling, machine setup, and color matching are spread across fewer pieces. Larger runs lower the per-unit burden, but only if the spec stays stable. A late fabric swap or decoration change can erase those savings.
Watch the hidden cost items. Custom Woven Labels, special closures, puff embroidery, multiple thread colors, and upgraded packaging all add up. None of them looks expensive alone. Together they can move a quote enough to change the commercial decision.
When comparing vendors, ask for the same exact specification each time: fabric weight, panel structure, closure type, decoration method, and packaging assumptions. If those variables differ, the quotes are not truly comparable. You are looking at different products dressed up as the same one.
If packaging is part of the order, keep it tied to protection and transport, not just presentation. Kraft wraps, recyclable inserts, and FSC certified cartons can be sensible. Custom printed boxes look polished, but they only make sense if the line needs that level of unboxing support. Otherwise the extra spend mostly inflates landed cost.
Process and turnaround: from spec sheet to approval
A well-run cap order follows a predictable sequence: brief, measurements, material selection, artwork review, sample or proof, approval, production, inspection, packing. The workflow is simple; delays usually come from missing information or last-minute changes.
The most common slowdown points are easy to spot:
- Missing size data leaves the supplier guessing at crown depth and adjustment range.
- Unclear artwork files create revisions before sampling can begin.
- Late sample changes affect the crown, closure, or decoration and push back the schedule.
- Material changes after approval force a new production setup.
Typical timing depends on order complexity, but a realistic planning window is close to this:
- Sample or proof preparation: 5-10 business days
- Bulk production after approval: 12-20 business days
- Final QC and packing: 2-5 business days
Custom fabrics, special closures, multiple decoration methods, and packaging changes can stretch that schedule. If the order is tied to a launch date, assume revisions will cost time. Build the calendar around approvals being slower than hoped, not faster.
Approval should lock the exact crown shape, closure, color, logo size, and placement. A clear spec sheet does more for speed than vague feedback ever will. Production teams move quickly when instructions are specific and slow down when they have to interpret preferences from scratch.
Common mistakes, expert tips, and next steps
The most common mistake is pairing a soft fabric with a heavy logo. The second is ignoring crown depth. The third is approving a sample after only one person tries it on. That creates confidence on paper and returns in the real world.
A few practical habits improve the result immediately:
- Request a physical fit sample if the caps will be worn by a mixed group.
- Ask for exact fabric weight, reinforcement details, and closure type before final approval.
- Keep decoration simple if the order is large and the budget is tight.
- Use a measurement-driven spec sheet instead of a loose creative brief.
If sustainability is part of the buying decision, keep the discussion grounded. Recycled materials, kraft paper wraps, and FSC certified cartons are straightforward improvements. Post-consumer content is worth asking about if sourcing claims matter to your audience. Just do not specify a green pack-out that crushes the visor in transit.
Shipping details matter because headwear keeps its value only if the crown and bill arrive in shape. For rough distribution routes, confirm the pack-out against transit stress rather than assuming standard cartons are enough. That is a quality check, not a marketing flourish.
For most buyers, the path forward is clear: collect head-size data, decide the wearing scenario, lock the fabric and closure, and issue a proper spec sheet before sampling. The best orders leave the least room for interpretation. That is the real value of using a snapback caps Material and Sizing guide before production, rather than after the first complaint.
What is the best material for snapback caps with embroidery?
Structured cotton twill and polyester are the most reliable choices because they hold shape and resist puckering better than soft, unstable fabrics. If the design is large or dense, ask for front reinforcement so the stitches do not pull the panel out of alignment. Very light fabrics usually look cheaper once the logo goes on.
How do I size snapback caps for different head sizes?
Measure a sample group and compare the results with the cap's actual usable adjustment range. Do not stop at one size fits most, because crown depth and panel stiffness can make the cap feel much smaller than the closure suggests. Test on people with different hair types before final approval.
Do snapback caps run true to size?
Not exactly. The closure adjusts, but the fit still depends on crown shape, panel structure, and sweatband build. Two caps with the same closure range can feel very different on the head, especially if one has a deep crown and the other sits high.
What drives snapback cap pricing the most?
Material choice, decoration method, and the amount of structure in the front panel usually drive price first. MOQ matters because setup and sampling are distributed across the order quantity. Packaging, specialty closures, and extra finishing details can also move the quote more than expected.
How long does snapback cap production usually take?
Simple orders often need a few days for sampling or proofing and two to three weeks for production after approval. More complex builds take longer if the supplier has to source custom fabric, change closures, or revise artwork. Final QC and packing typically add a few more business days.


