Custom auto stickers usually fail for one of two reasons: the wrong material or the wrong adhesive. The artwork gets blamed because it is visible. The construction does the quieter work, and when that work is weak, the sticker curls, fades, cracks, or leaves adhesive behind like a bad receipt.
A vehicle decal is not just a sticker with a car in mind. It has to tolerate UV exposure, rain, road salt, windshield cleaners, hot panels, cold mornings, pressure washing, and constant grime. A bumper sticker, rear window decal, Oil Change Reminder, fleet door graphic, and dealership badge may all fit under one quote category, but they should not all be built the same way.
The useful starting question is simple: where will the sticker live, and for how long? A 30-day promotion on glass does not need the same film as a three-year logo on a service van. Treat vehicle graphics like outdoor signage attached to moving metal. Because that is the job.
What Custom Auto Stickers Are and Where They Actually Work
Custom auto stickers are printed adhesive graphics made for vehicles. The category includes bumper stickers, window decals, service reminder labels, fleet identification, dealership decals, promotional car graphics, oil change stickers, safety labels, and branded graphics for delivery cars or local service vans.
Some are meant to last years. Some are meant to peel off after a weekend event. Mixing those two use cases is where budgets disappear.
The difference between indoor stickers and vehicle-grade decals is construction. Indoor stickers may use paper stock, basic adhesive, light-duty ink, and little or no coating. Vehicle decals usually need outdoor vinyl, stronger adhesive, UV-resistant ink, weather protection, and sometimes clean removability. A label on a retail carton lives an easier life than a decal on a south-facing rear windshield in July.
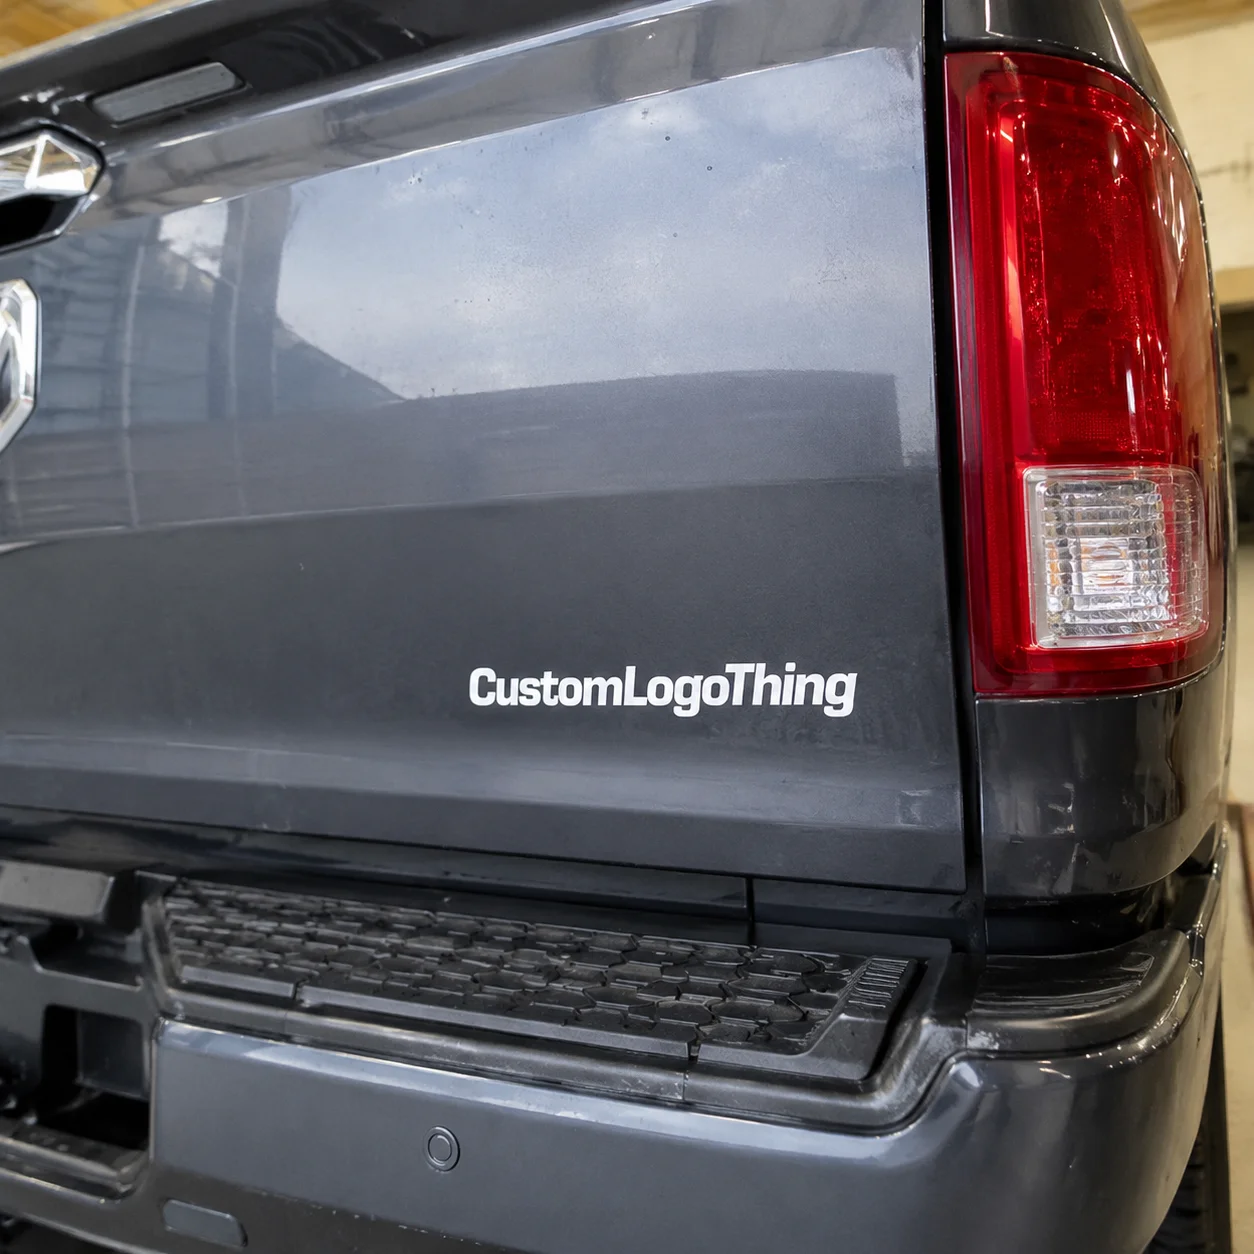
Businesses use auto decals for mobile advertising, brand identification, dealership promotions, mechanic shop reminders, event giveaways, and service fleet labeling. A plumber’s truck decal has to be readable from 20 to 40 feet. A service reminder sticker has to stay legible through windshield heat and cleaning. A dealership decal needs to look clean without irritating the buyer who now owns the car.
Small differences matter. Glass, painted metal, plastic trim, bumpers, and coated panels all have different adhesion behavior. A good supplier will ask about surface, lifespan, finish, and removal. Those questions can feel slow during quoting. They are cheaper than a reprint.
Practical rule: if the decal lives outside, specify it like exterior signage. Material, adhesive, finish, surface, lifespan, and removal expectations all belong on the quote.
How Vehicle Sticker Materials, Adhesives, and Finishes Work
Every vehicle sticker has a stack: face material, print layer, adhesive, backing liner, and optional laminate or coating. The face material controls look and flexibility. The print layer carries the design. The adhesive decides whether the decal stays put or peels like a sad banana. The liner protects the adhesive before installation. The laminate or coating adds protection against abrasion, UV exposure, moisture, and handling.
White outdoor vinyl is the standard choice for bold full-color printing because it gives ink a clean base. Clear vinyl works well on glass and for transparent effects, though white ink may be needed if the design needs strong color. Static cling is useful for temporary interior window use, not long-term exterior branding. Reflective vinyl improves nighttime visibility and costs more. Perforated window film creates one-way view graphics, common on rear windows and larger glass panels.
Adhesive choice is just as important. Permanent adhesive is built for long-term hold. Removable adhesive suits short campaigns where clean removal matters. Low-tack adhesive is for temporary placement and light-duty use. Aggressive adhesive helps on tougher surfaces, but removal can be rough.
Curves, texture, wax, ceramic coating, silicone residue, and dirt reduce bond strength. No sticker adhesive enjoys being slapped over dust. Shocking, I know.
Finish controls both durability and appearance. Gloss makes colors look brighter. Matte gives a softer look and can pair well with package branding when a company wants its vehicle graphics, mailers, and retail materials to feel related. Clear laminate adds abrasion resistance and is usually the safer choice for outdoor decals expected to last beyond a short campaign. UV coating costs less and can be fine for budget runs. No coating only makes sense when lifespan expectations are low.
If the sticker will live outside for more than a few months, quote vinyl plus laminate. Skipping laminate to save pennies often means reordering early. Congratulations, you saved nothing.
| Material | Best Use | Typical Lifespan | Buying Note |
|---|---|---|---|
| White outdoor vinyl | Bumper stickers, fleet decals, full-color logos | 1 to 5 years with proper finish | Best all-around choice for most business orders |
| Clear vinyl | Glass decals and transparent effects | 1 to 3 years depending on ink and laminate | Ask about white ink if color strength matters |
| Static cling | Temporary interior window use | Weeks to months | Not ideal for exterior long-term vehicle branding |
| Reflective vinyl | Night visibility, safety markings, service fleets | 2 to 5 years depending on grade | Costs more, but visibility is the point |
| Perforated window film | Rear windows and large glass graphics | 1 to 3 years | Needs careful installation and local visibility compliance checks |
Key Specs That Decide Durability, Color, and Fit
Start with size and shape. Small service labels might be 2 x 3 inches or 2.5 x 4 inches. Medium bumper stickers often sit around 3 x 10 inches or 4 x 6 inches. Large door graphics can run 12 x 18 inches, 18 x 24 inches, or larger depending on vehicle space. Shapes include rectangles, circles, ovals, die-cut logos, kiss-cut sheets, and contour-cut decals.
Thickness sounds impressive on paper, but thicker is not always better. Flexible vinyl conforms better to curved vehicle surfaces. Rigid film may lift at corners, especially around door contours, bumper curves, and trim breaks. For compound curves, ask whether cast vinyl is more appropriate than calendared vinyl. Cast film costs more, but it handles curves and long-term outdoor exposure better. Cheap stiff film on a curved bumper is a future complaint waiting patiently.
Print method matters too. Digital printing works well for full-color artwork, gradients, short runs, and mid-size orders. Screen printing can make sense for simple high-volume graphics with limited colors. Specialty production may be needed for metallic effects, reflective films, white ink on clear stock, or exact brand requirements.
CMYK printing is common, but brand colors may need Pantone matching or a printed proof. Reds, oranges, and neon-looking colors deserve extra attention because screens lie. They lie constantly. A logo that glows on a monitor may print duller on vinyl, especially under matte laminate. Color-critical buyers should approve a printed sample under daylight, not under office lighting that makes everything look like soup.
Artwork requirements are not decoration. Send vector logos when possible. Outline fonts. Add bleed, usually 0.0625 to 0.125 inch depending on the printer’s template. Keep safe margins inside the cut line. Use high-resolution raster art, ideally 300 dpi at final size for detailed graphics. Provide cut lines as a separate vector path. Check contrast from the real viewing distance. A phone number in 8-point type on a moving truck is not marketing. It is confetti.
Environmental specs should be part of the order. Ask about expected outdoor lifespan, UV exposure, snow, salt, high heat, humidity, car wash frequency, and clean removability. Longer life usually means a higher unit cost, but better materials reduce replacement labor and public brand damage. For general guidance on material claims and waste reduction, the U.S. Environmental Protection Agency is a useful reference. Not thrilling bedtime reading. Useful, though.
Pricing, MOQ, and Unit Cost for Auto Decals
Price depends on size, material, adhesive type, shape, print colors, laminate, quantity, finishing, proofing needs, packaging, and shipping. A 2 x 3 inch service reminder sticker is not priced like an 18 x 24 inch reflective fleet door decal. Area matters. Setup matters. Finishing matters. The quote should show the spec, not just a cheerful total.
Small service reminder stickers may land around $0.05 to $0.45 each at volume, depending on material, print, and quantity. Medium bumper stickers often range from about $0.35 to $2.50 each, with lower prices at larger runs and higher prices for laminated, die-cut, or specialty finishes. Large fleet decals can range from $4 to $25 or more per piece because material area, finishing, and installation tolerance matter. Reflective, perforated, metallic, or specialty films push pricing higher.
MOQ logic is simple, even if nobody loves it. Digital printing can support lower minimums, sometimes 25, 50, or 100 pieces. Screen printing, specialty films, and Custom Die Cutting usually need higher quantities because setup has to be spread across the run. A 100-piece order may feel expensive because the setup cost is sitting on fewer stickers. A 1,000-piece or 5,000-piece order usually drops unit cost hard. Math. Annoying, but useful.
Quote requests should include size, quantity, material preference, indoor or outdoor use, vehicle surface, finish, artwork file, number of versions, packing requirements, and deadline. If you need decals bundled with branded packaging, inserts, or Custom Labels & Tags, say that early. Combining projects can simplify purchasing, but only if the specs are clean.
Never compare quotes without matching specs. One supplier may quote unlaminated vinyl with removable adhesive. Another may quote laminated outdoor vinyl with permanent adhesive. A third may assume a smaller size because the request was vague. If the spec sheet is vague, the price is basically a magic trick.
| Product Type | Common Size Range | Typical Unit Range | Best Quantity Break |
|---|---|---|---|
| Service reminder stickers | 2 x 3 in to 2.5 x 4 in | $0.05 to $0.45 | 1,000+ pieces |
| Bumper stickers | 3 x 10 in to 4 x 6 in | $0.35 to $2.50 | 500+ pieces |
| Window decals | 4 x 4 in to 12 x 18 in | $0.50 to $8.00 | 250+ pieces |
| Fleet door decals | 12 x 18 in to 24 x 36 in | $4.00 to $25.00+ | 100+ pieces |
Production Steps, Timeline, and Turnaround Expectations
A typical order moves through quote request, spec confirmation, artwork submission, digital proof, proof approval, printing, laminate or coating, cutting, weeding if needed, quality check, packing, and shipping. Simple digitally printed stickers may take 3 to 7 business days after proof approval. Custom shapes, laminates, specialty materials, multiple versions, or large quantities may need 8 to 15 business days or more.
Proofing time is separate from production time. Production usually starts after proof approval, not after the first email. This is where rushed buyers accidentally lose two days. If the art file arrives Monday but the proof is approved Thursday, the production clock usually starts Thursday. Printers are not psychic. They print approved files.
Several issues slow orders down: low-resolution logos, unclear sizing, multiple design versions, missing cut lines, late approvals, specialty material sourcing, weather-related shipping delays, and last-minute quantity changes. QR codes deserve special attention. Test them at final size from a phone, under normal lighting, before approval. A QR code that scans on a giant monitor may fail when printed at 0.75 inch wide on a glossy decal.
Quality control should be more than counting pieces. Check print registration, color consistency, laminate alignment, clean cutting, edge lifting, liner release, surface scratches, and version separation. For roll labels or service reminders, confirm winding direction if the stickers feed into a dispenser. For die-cut decals, check that the cut path does not slice into small type or thin logo details.
Add buffer time for first-time orders, color-critical work, fleet rollouts, event deadlines, and dealership campaigns with fixed launch dates. If removability, adhesion, or color matching matters, request a material sample, printed proof, or small pilot run. A 10-piece pilot can save a 1,000-piece headache. Industry groups such as ISTA focus on transport packaging performance, and the same disciplined thinking helps here: test real conditions before betting the whole order.
Approve artwork only after checking size, spelling, phone numbers, QR codes, bleed, cut path, and intended surface. The press will print the typo perfectly. Machines are rude like that.
Step-by-Step Buying Guide Before You Approve Artwork
- Define the job. Decide whether the sticker is for advertising, compliance, service reminders, promotions, identification, resale, or a short campaign. Purpose controls material and adhesive.
- Choose the surface and lifespan. Note whether it goes on glass, painted metal, plastic, bumper material, or temporary event vehicles. Decide whether it needs to last 30 days, 6 months, 2 years, or longer.
- Pick the format. Choose a bumper sticker, window decal, die-cut logo, kiss-cut sheet, static cling, reflective decal, or fleet graphic based on use, not habit.
- Set the size using real-world visibility. A decal read from 20 feet needs larger type than one read by a customer standing beside a windshield. For vehicles, 0.5 inch letter height is often a bare minimum for short-distance readability.
- Prepare artwork correctly. Use vector files where possible, include bleed, outline fonts, confirm cut lines, and test QR codes at final size.
- Request the right quote. Ask for material, adhesive, finish, expected outdoor lifespan, MOQ, unit cost at multiple quantities, proofing process, and lead time.
- Approve against the real use case. Check the final proof against the vehicle surface, viewing distance, weather exposure, and removal needs. The cheapest reprint is the one you never need.
This same buying discipline applies across package branding, Custom Packaging Products, labels, and vehicle graphics. If your brand color appears on a box, bottle label, van decal, and retail display, do not let each supplier guess. Share color targets, finishes, and approved art files. Consistency is not glamorous, but mismatched branding looks cheap fast.
For fleet use, document installation instructions. Include cleaning method, recommended temperature, cure time, squeegee guidance, and whether pressure washing should wait 24 to 72 hours. Many adhesive failures blamed on “bad stickers” are actually installation failures. Dirty surface. Cold panel. Fresh wax. No pressure on the edges. The usual suspects.
Common Mistakes, Expert Tips, and Your Next Order Checklist
The first common mistake is using paper or indoor sticker stock for vehicles. It may look fine at delivery and terrible after sunlight, rain, and one enthusiastic car wash. Paper has its place in product packaging and retail packaging, but a car bumper is not a candle jar or shipping insert.
The second mistake is choosing the wrong adhesive. Removable adhesive is smart for temporary promotions, seasonal decals, and leased vehicles where clean removal matters. Permanent adhesive is better for long-term hold. Using removable adhesive for a multi-year fleet decal is optimistic. Using permanent adhesive for a 10-day event on questionable paint is brave in the worst possible way.
The third mistake is tiny text. Vehicle stickers are often viewed quickly, at distance, and in motion. Tiny copy becomes decoration, not communication. Prioritize the logo, short message, website, phone number, or QR code. Do not ask a 3 x 5 inch decal to carry a brochure’s worth of copy.
The fourth mistake is skipping installation instructions. Clean, dry, wax-free surfaces matter. Use an alcohol wipe when appropriate, install within the recommended temperature range, and allow cure time before heavy washing. Curved panels may need extra care. Large decals may need a wet or dry install method depending on the material and installer preference.
- Order 5 to 10 percent extra for installers, replacements, future vehicles, and damaged pieces.
- Use laminate for outdoor exposure beyond short campaigns.
- Keep contrast high, especially for phone numbers and service categories.
- Test one sticker on the real surface before rolling out hundreds.
- Request the same specs from each supplier so pricing comparisons mean something.
- Store extras flat, clean, and away from heat so adhesive stays usable.
Before ordering, measure the placement area, photograph the vehicle surface, decide the required lifespan, choose quantity breaks, gather artwork, and request quotes using the same material, adhesive, finish, size, and timeline. Good ordering is boring. Boring prevents surprises.
Treat custom auto stickers like outdoor signage on wheels: specify the job, material, adhesive, finish, and deadline before chasing the lowest price. Cheap decals that fail early do not save money. They just make your logo peel off in public, which is a very specific kind of embarrassing.
FAQ
How long do custom vehicle stickers usually last outdoors?
Most vehicle-grade vinyl stickers last roughly 1 to 5 years depending on material, laminate, sun exposure, climate, washing, and installation quality. Unlaminated budget stickers are better for short campaigns, while laminated outdoor vinyl is safer for fleet, dealership, and bumper use. Harsh sun, road salt, pressure washing, and constant abrasion can shorten lifespan.
What material is best for custom car decals?
White outdoor vinyl is the standard choice for full-color vehicle decals because it prints cleanly and holds up well outside. Clear vinyl works well for glass when you want the background to show through, but white ink may be needed for strong color. Static cling is best for temporary interior window use, not long-term exterior vehicle branding.
Are custom auto stickers removable without damaging paint?
Removability depends on adhesive type, paint condition, installation time, sun exposure, and removal method. Removable adhesive is better for temporary promotions, while permanent adhesive is better for long-term hold. Old, weak, repainted, or poorly cured paint is riskier, so test first if the vehicle finish is questionable.
What affects the price of custom automotive stickers the most?
Size, quantity, material, adhesive, laminate, cut shape, print complexity, and specialty films are the biggest cost drivers. Higher quantities usually lower the unit cost because setup is spread across more stickers. A quote without material, finish, and adhesive details is not a real comparison.
How should I prepare artwork for custom auto decals?
Send vector artwork when possible, outline fonts, include bleed, and provide a clear cut line for custom shapes. Use high-contrast colors and avoid tiny text if the sticker needs to be read from a distance. Confirm final size, spelling, phone numbers, website URLs, and QR code scanning before approving the proof.


