Why a 3-Inch Patch Can Outsell a Printed Tag at a Saturday Stall
Two jam makers can sell nearly identical peach preserves from nearly identical folding tables. The one with a stitched logo on the apron, a patched tote hanging from the tent rail, and a few branded caps stacked beside the jars often looks more established before anyone reads a label. That is why embroidered patches unit cost for Farmers Market Sellers matters: a patch is not just decoration; it is a small brand asset that can lift perceived value on aprons, tote bags, caps, denim, bundled gift items, and staff apparel.
Shoppers make trust decisions fast. Sometimes in three seconds. Texture helps. A raised thread edge, a clean border, and a logo that feels permanent can say “real business” before the customer gets close enough to scan ingredients, smell soap, or ask whether the tomatoes are heirloom.
Printed tags still have a role. So do woven labels and kraft stickers. But embroidered patches fit the farmers market model unusually well because they take little storage space, can be applied across several product lines, and do not force a seller to order separate printed goods for every seasonal item. A beekeeper can use one bee patch on hats, aprons, canvas bags, wax wrap packaging, and small retail add-ons. That flexibility is commercial, not cosmetic.
The application choice should match the selling plan. Sewn-on patches suit premium apparel and frequent-wash pieces. Iron-on patches help with fast inventory updates if the fabric accepts heat and pressure correctly. Adhesive patches can work for short-run promotions, sampling kits, or display props, but they should not be treated as a permanent garment solution. Merrowed-edge patches bring the old workwear signal: durable, familiar, and honest.
Buyer reality: the best patch is not the fanciest patch. It is the patch that looks right at six feet, survives handling, and fits the margin of the finished item.
This is a buying and quoting outline, not a decoration wish list. The goal is to understand which specifications change unit cost, what order quantities deserve comparison, and how to prepare artwork so Custom Logo Things can quote the patch without guessing.
Patch Value Proposition: Branding That Survives Weather, Washing, and Handling
Farmers market branding has a harder life than most retail packaging. Products sit in sun, move through damp coolers, rub against crates, collect dust, and get handled by customers who pick up three items before buying one. Apparel gets folded, tossed into bins, washed after long market days, and worn under aprons or jackets.
Embroidery performs well under that kind of abuse. Thread remains dimensional. The patch keeps its shape if the base fabric, border, and backing are specified correctly. Unlike a paper hang tag, it does not vanish after the first purchase moment. Unlike a direct print, it can move from one blank product to another without committing to a large apparel print run.
There are tradeoffs. Paper labels are cheaper and useful for jars, bags, and compliance information, but they are disposable. Screen printing can be efficient for larger apparel runs, especially with simple one- or two-color art, but it is less flexible if you want to test caps, totes, aprons, and jackets in small batches. Woven labels are refined and excellent for seams or necklines, though they tend to be smaller and flatter. PVC patches are rugged, but for many farm, bakery, flower, and handmade brands, PVC can feel more tactical than craft-driven.
One patch design can brand a staff hat on Friday, a tote bag on Saturday, and a denim jacket for online merch photography on Sunday. That matters because farmers market sellers often manage inventory in mixed batches: 24 caps, 40 totes, 12 aprons, and a handful of premium gift bundles. A shared patch system keeps branding consistent without forcing every blank item through a separate decoration process.
The margin logic is straightforward. A patch that costs $1.20 to $2.80 may be too expensive for a $6 produce bag unless it clearly supports a higher selling price. The same patch can make sense on a $22 tote, a $28 cap, or a $45 work apron if it helps the product look intentional rather than improvised.
Giftability is the quiet advantage. Markets run on impulse purchases, and a tactile logo can turn a functional item into a keepsake for a regional farm, bakery, flower grower, coffee roaster, or specialty food seller. Many sellers underprice that effect. A cap with a stitched farm mark can become proof of place, not just sun protection.
The cheapest patch is not always the most profitable patch. If it looks flat, frays early, lifts at the edge, or misses the brand color customers recognize, the low cost per piece becomes a false economy.
Product Details That Change How Your Custom Patch Looks and Feels
An embroidered patch is a small engineered product. The core anatomy includes base fabric, thread, edge style, backing, stitch coverage, shape, and artwork complexity. Change one element and the quote can move with it.
Stitch coverage is one of the largest visual and pricing variables. A 50% embroidered patch may show twill fabric behind the logo and work well for simple marks with bold lettering. A 75% to 100% embroidered patch feels denser and more premium because thread covers most or all of the surface. More stitching usually means more machine time, more thread, and a higher unit cost.
Edges matter too. Merrowed borders are traditional, durable, and cost-efficient for circles, rectangles, ovals, shields, and other standard shapes. Laser-cut or heat-cut borders are better for irregular silhouettes: a flower bouquet, mushroom cap, honeycomb, mountain outline, or farm animal profile. Custom silhouettes can look excellent, but they need more review because the border must support the art rather than fight it.
Backing is the practical decision. Sew-on patches offer the strongest long-term durability, especially for garments that will be washed frequently. Iron-on backing is convenient for faster application, though performance depends on heat, pressure, fabric texture, and coating. Hook-and-loop backing suits removable uniform patches, event staff roles, or rotating seasonal teams. Adhesive backing is best treated as temporary. No backing works for buyers who plan to stitch patches in-house or have a local sewer attach them.
- Honey seller: gold-and-black patch, simple bee icon, merrowed circle, 2.5-inch size.
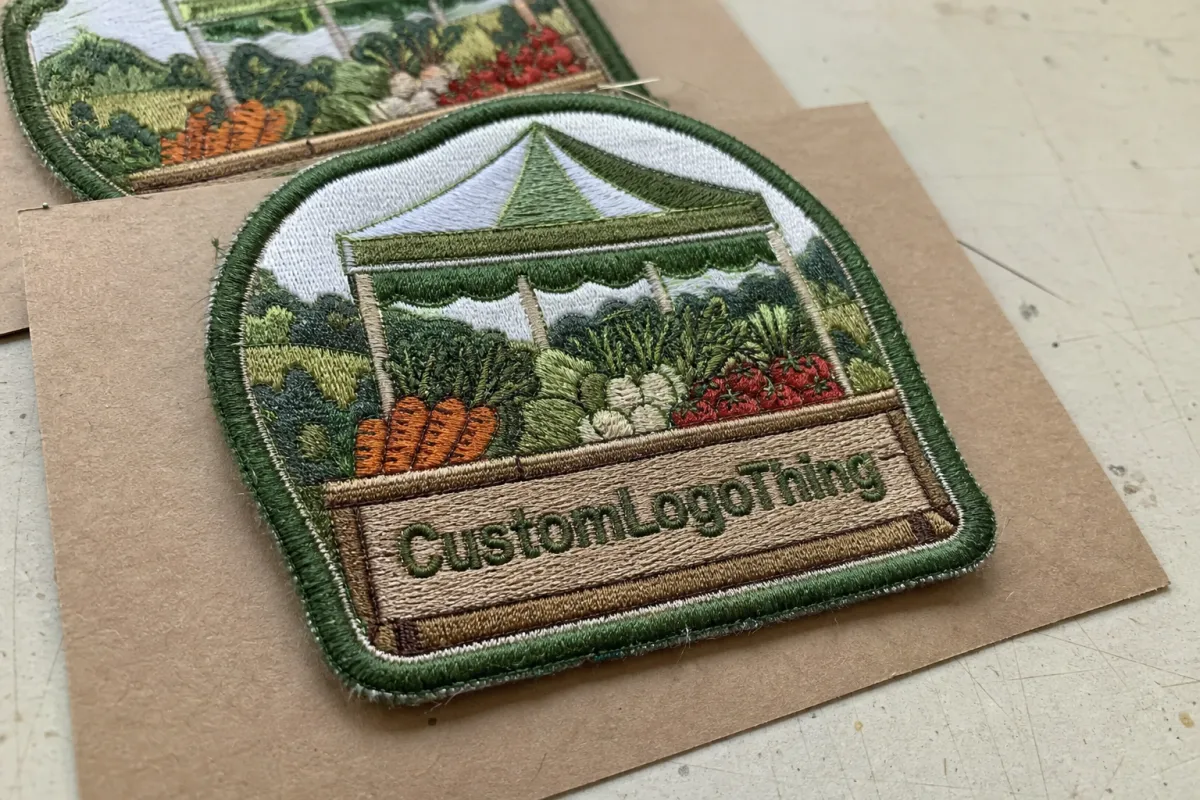
- Flower grower: multicolor bouquet, cut-to-shape border, 3.5-inch patch for totes and aprons.
- Mushroom vendor: earthy thread colors, twill background, sew-on backing for canvas caps.
- Bakery stall: cream base fabric, brown script simplified into bold lettering, oval merrowed edge.
Small patches punish over-detailing. Tiny script, thin outlines, gradients, and photographic artwork can add stitch complexity without improving legibility. A 2-inch patch is not a billboard. Prepare two artwork versions if possible: one full logo for larger merch and one simplified icon or wordmark for 2-inch to 3-inch applications.
Thread count is not the only quality signal. Look at border consistency, letter spacing, stitch direction, color contrast, and whether the base fabric peeks through in places where it should not. A clean 70% coverage patch can look better than a dense 100% coverage patch with cramped lettering and puckered fills.
Specifications to Lock Before Requesting a Patch Quote
A precise quote starts with disciplined specifications. Give the supplier patch width and height, shape, quantity, backing type, edge type, thread colors, artwork file, desired use, and delivery location. Missing one of those details can turn a clean quote into a chain of follow-up emails.
Size should follow the product, not the reverse. A 2-inch patch suits beanies, small pouches, and compact gift items. A 2.5-inch to 3-inch patch is usually the working range for caps, sleeves, and chest placements. A 3.5-inch to 4-inch patch has enough presence for aprons, tote bags, jackets, and table-display textiles.
Measure the actual placement area. A cap front panel, apron chest pocket, tote corner, or jacket sleeve can look generous until seams, curves, straps, and folds steal usable space. For packaging-minded buyers, this is similar to checking a dieline before print approval. The patch has to live on a real surface.
Artwork files matter. Vector files such as AI, EPS, or editable PDF are preferred because clean curves and shapes digitize more predictably. High-resolution PNG or JPG files can often be used if the logo is crisp, but fuzzy screenshots slow the process and may require redraw work.
Digitizing is not file conversion. The design must be translated into stitch instructions: direction, density, thread breaks, layering, and sequence. Poor digitizing can distort lettering, create puckering, or make a border look uneven. For buyers used to packaging specs, think of digitizing as the embroidery version of prepress.
Color matching deserves realism. Embroidery thread cannot reproduce every screen color exactly. Pantone references or brand color notes help the production team choose the closest thread match, but thread has sheen, texture, and limited shade availability. If a specific green or red is central to the brand, say so early.
One quick readability test works well: view the logo at actual patch size on a phone screen. If the business name cannot be read there, thread will not rescue it. Simplify before paying for production.
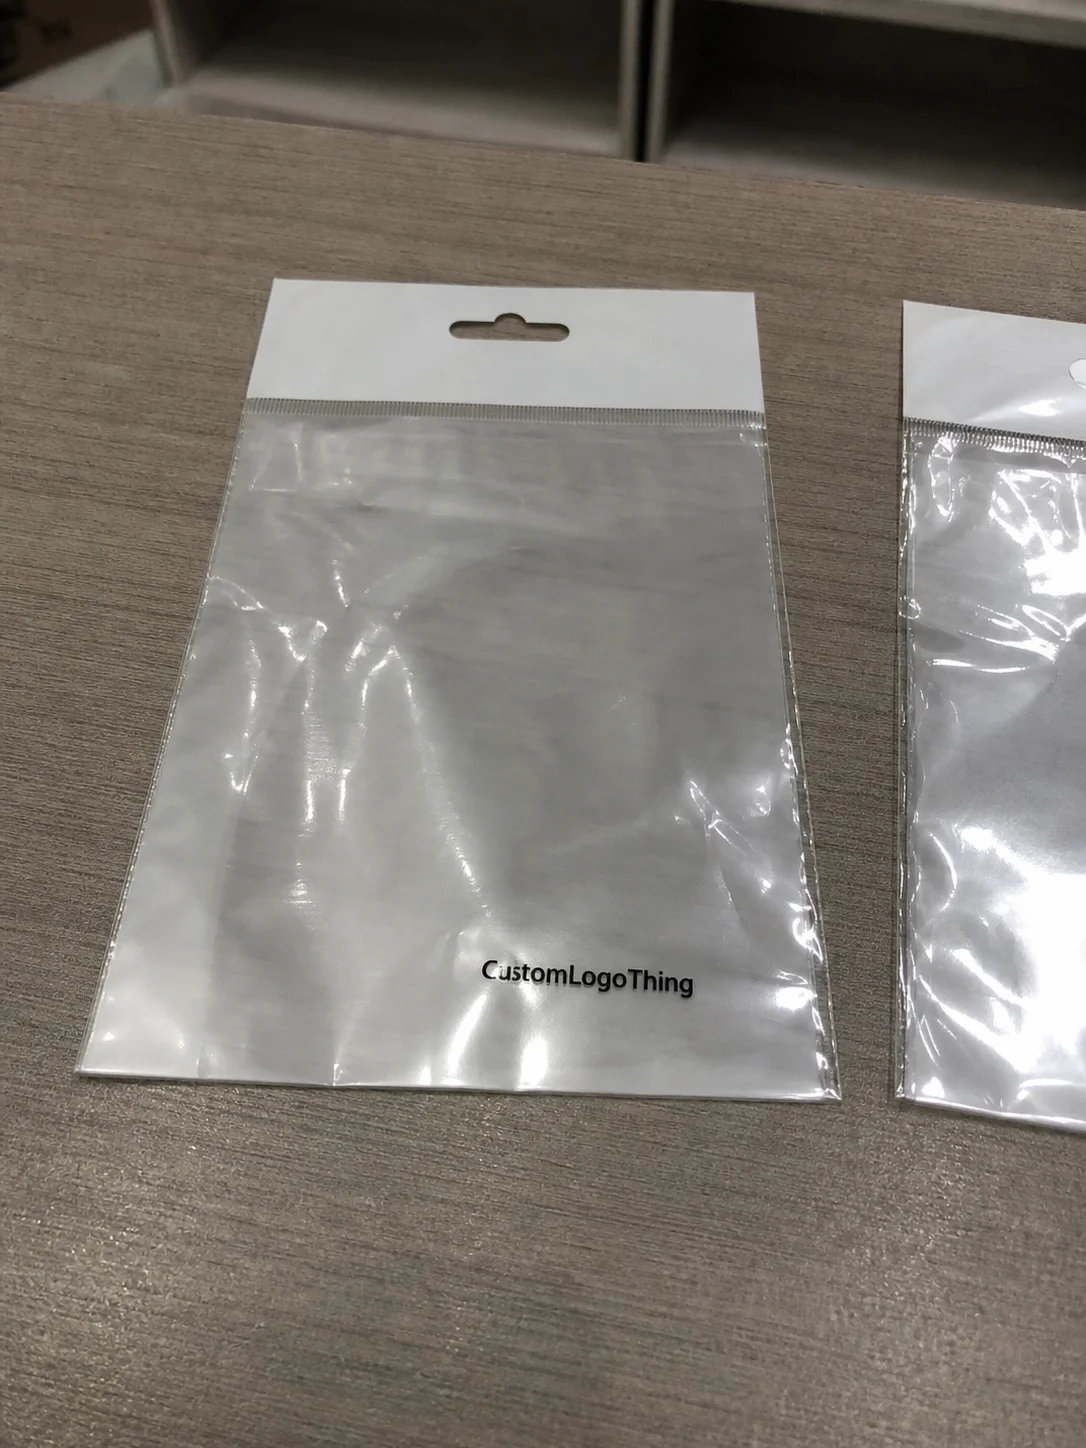
Patches can also be supplied loose as retail add-ons, attached to header cards, bundled with branded apparel, or included in loyalty kits. If packaging presentation is part of the plan, mention that in the quote request. FSC-certified paperboard for header cards may be relevant for sellers who care about responsible sourcing; the Forest Stewardship Council is a useful reference point for paper-based packaging claims.
Embroidered Patches Unit Cost for Farmers Market Sellers
Embroidered Patches Unit Cost for farmers market sellers is usually driven by five variables: patch size, stitch coverage, order quantity, backing type, and artwork complexity. Setup charges and digitizing can also affect the first order, especially for small runs.
Quantity matters because setup work is similar whether you order 50 patches or 500. A 250-piece order usually has a lower cost per piece than a 50-piece test run because digitizing, production setup, and administrative handling spread across more units. That does not mean every seller should overbuy. Cash flow is real. But it does mean MOQ and bulk pricing should be compared before choosing the smallest possible quantity.
Here is a practical comparison for quoting conversations. These are planning ranges, not guaranteed prices, because artwork and production details change the final number.
| Specification Choice | Typical Cost Effect | Best Fit for Market Sellers |
|---|---|---|
| 2-inch to 2.5-inch standard shape | Lower unit cost; less thread and machine time | Beanies, small pouches, cap sides, loyalty gifts |
| 3-inch merrowed patch | Balanced cost per piece and visibility | Caps, aprons, tote bags, sleeve placement |
| 3.5-inch to 4-inch custom shape | Higher unit cost due to size and border complexity | Premium aprons, jackets, table-display pieces |
| 50% embroidery | Lower thread usage; base fabric visible | Simple logos, rustic brands, budget-sensitive runs |
| 75% to 100% embroidery | Higher cost; denser premium feel | Merch intended to support higher retail prices |
| Hook-and-loop backing | Higher than sew-on or standard iron-on | Removable staff patches and event uniforms |
For planning, a $1.20 to $2.80 branding component may be reasonable on premium apparel, especially when the blank item costs $7 to $16 and the retail price sits between $22 and $45. On a low-priced produce bag, that same patch may be too heavy unless it raises the perceived value enough to change the selling price.
Ask Custom Logo Things for pricing at 100, 250, 500, and 1,000 pieces. The price break is not always linear. Sometimes 250 pieces are the sensible midpoint; sometimes the jump to 500 creates enough savings to justify the inventory. The only way to know is to quote tiers.
Line-item clarity helps. Ask whether digitizing, sample charges, backing upgrades, tooling fees, shipping, and retail packaging are included or separate. A low headline price can become less attractive if every required step is added later.
The target is not the lowest theoretical price. It is the lowest reliable unit cost for the exact patch that supports margin, application method, and brand presentation. A 30-cent savings disappears quickly if the patch needs extra labor, fails on the chosen fabric, or makes the finished item harder to sell.
Process and Timeline: From Logo File to Market-Ready Patches
A standard patch order follows a predictable path: submit artwork and specifications, receive a quote, approve the order, digitize the design, review a proof or stitch sample, produce the patches, complete quality checks, and ship.
The proofing stage deserves attention. Check size, border, backing, thread colors, and any simplified details before production begins. If the proof shows a tagline removed or a line thickened, that may be a smart embroidery adjustment rather than an error. Ask before approving if the reason is unclear.
Quality control should be concrete, not sentimental. Review whether the border is even, the backing is correct, the stitching is dense enough for the approved design, the patch lays flat, and loose threads have been trimmed. For lettering, look at the worst letter, not the best one. Small type tends to reveal the limits of the design first.
Production timelines vary by quantity, complexity, sample requirements, current production load, and seasonality. Sellers ordering before holiday markets, harvest festivals, spring openings, or regional fairs should build in buffer time. Do not place a patch order the week before launch if the patches still need to be sewn or pressed onto finished goods.
For planning, count backward from the first market date. Then add time for application, product photography, online listing updates, pricing signs, and stall display preparation. If 100 tote bags need patches and each one takes two to four minutes to position and attach, the labor alone can consume a long evening or more.
A pre-production sample can be a smart spend for a new logo, high-margin merchandise, or a patch with dense stitching and multiple thread colors. For a reorder with approved artwork, the process can usually move faster because digitizing and decisions are already settled.
Customer-side delays are common and avoidable. Late artwork revisions, unclear size decisions, missing delivery details, and last-minute backing changes all slow the order. A controlled proofing and production sequence is slower than guessing, but it protects inventory dollars.
Packaging and shipping also deserve basic discipline. If patches are being shipped loose, bundled, or attached to header cards, confirm how they will be packed. For sellers shipping finished merch later, general transit testing concepts from ISTA are useful: vibration, compression, and handling can expose weak packaging choices quickly.
Costly Ordering Mistakes That Make a Cheap Patch Expensive
The most common mistake is ordering a patch too small for the amount of logo detail. If the business name is unreadable at normal shopping distance, the patch becomes texture without branding. Attractive texture, maybe. Weak selling tool.
Backing is another trap. Iron-on sounds convenient, and often it is. But coated totes, textured fabrics, heat-sensitive synthetics, and frequent-wash garments may need sewing for long-term durability. A failed patch on a $28 cap is not a small defect; it is a refund risk and a brand problem.
Overcomplicated artwork creates the same issue. Gradients, tiny farm illustrations, thin taglines, and delicate script often translate poorly into thread. A logo designed for a website header may need a bolder patch version. That is normal. Good embroidery design removes detail strategically.
Under-ordering has a hidden cost too. If a first batch sells out quickly, a rushed reorder can create shipping pressure, inconsistent market availability, and lost sales during peak weekends. Testing demand is sensible. Starving a proven seller is not.
Color assumptions also create friction. Screen colors glow. Thread reflects. A bright digital orange may become a slightly deeper stitched orange because thread is physical material, not pixels. Approve approximations with realistic expectations and provide brand color notes where possible.
Attachment labor can change the economics. A low patch price is less attractive if the seller spends six hours applying patches without a jig, placement mark, heat press plan, or sewing schedule. Labor is cost, even if no invoice is generated.
Test before committing to hundreds of finished products. Apply the patch to the actual hat, apron, tote, or garment fabric. Wash it if the product will be washed. Bend it if it will sit on a curved cap. Rub it if it will be handled repeatedly. A patch is only a good buy when it survives the selling environment, supports the retail price, and can be applied efficiently.
Build a Quote Packet That Gets a Precise Price Fast
A strong quote packet saves time and usually improves pricing accuracy. It also signals that the buyer understands the job. Suppliers can quote faster when they are not filling in missing details.
- Choose a target patch size, such as 2.5 inches for caps or 3.5 inches for aprons.
- Decide backing: sew-on, iron-on, hook-and-loop, adhesive, or no backing.
- Select edge style: merrowed for standard shapes or heat-cut for custom silhouettes.
- Request quantity tiers, such as 100, 250, 500, and 1,000 pieces.
- Gather artwork files, ideally AI, EPS, or editable PDF.
- List intended products: caps, aprons, totes, jackets, header-card retail patches, or gift bundles.
- Set an in-hands date and include the delivery location.
Send photos of the actual placement if you have them. A cap front, apron chest pocket, tote corner, or jacket sleeve tells the production team more than a size number alone. If you are unsure, request two versions: a lower-cost standard option and a premium option with denser stitching, a custom shape, or upgraded backing.
Build a simple margin worksheet before approving the order. Include patch unit cost, blank product cost, application labor, packaging, market fees, and target retail price. If the finished cap costs $11.50 before labor and sells for $28, the patch may make sense. If the finished item sells for $9, the same patch needs a harder look.
Custom Logo Things can help clarify digitizing suitability, stitch coverage, MOQ, backing choice, proof review, production timing, and bulk pricing. The cleaner the information, the cleaner the quote.
For farmers market sellers comparing patch options, the smartest move is to submit complete specs and ask for quantity-based pricing before locking the design. A precise quote protects cash flow, avoids overbuying, and helps you choose the patch that makes sense for both brand presentation and unit economics.
FAQ
What is a realistic embroidered patch unit cost for farmers market sellers?
Cost depends on size, stitch coverage, backing, edge style, quantity, and artwork complexity. Request pricing at several quantity tiers, such as 100, 250, 500, and 1,000 pieces, because the per-piece price often drops as setup charges are spread over more patches. Calculate the patch as part of the finished product margin, not as an isolated expense.
What MOQ should a farmers market seller choose for embroidered patches?
A small test quantity can make sense for a new product launch, but very low quantities usually carry a higher unit cost. If the patch will be used across hats, aprons, totes, and merch, a mid-sized order may be more economical. Ask for MOQ and price breaks before deciding so you can compare cash flow against long-term savings.
Are iron-on or sew-on embroidered patches better for market merchandise?
Sew-on patches are usually best for durability, frequent washing, and heavy-use apparel. Iron-on patches are convenient for faster application, but performance depends on the fabric and heat tolerance of the item. For coated totes, textured fabrics, or high-value garments, test application or choose sewing for a more secure finish.
How long does embroidered patch production take after approval?
Timeline depends on artwork readiness, proof approval, quantity, backing type, sample requirements, and current production load. Build in extra time if you need to attach patches to finished goods before a market date. Avoid last-minute ordering before holiday markets, harvest events, or seasonal launches.
What artwork works best for custom embroidered patches for farmers market brands?
Simple, bold logos with clear shapes and readable lettering stitch best. Tiny taglines, gradients, fine outlines, and detailed illustrations may need to be simplified. Send vector artwork when possible, plus notes on size, thread colors, backing, and intended placement.