A candle brand approves a proof that looks tidy on screen. Two weeks later, 5,000 Frosted Plastic Bags arrive with the logo drifting toward the side gusset and a warning label so small it needs a magnifier. A candle brand Plastic Bags Print Proof Checklist is not paperwork for the sake of paperwork. It is the last inexpensive checkpoint before a small approval mistake becomes boxed inventory.
Why Candle Bag Proofs Fail More Often Than Buyers Expect
Candle packaging has an odd pressure profile. The product is compact but heavy. The copy is often small. Seasonal collections may carry 6, 12, or 24 scent names, each with its own barcode or fragrance callout. Retail buyers may notice the bag before they ever smell the candle.
A one-millimeter print drift can disappear on a corrugated shipper. On a glossy boutique candle bag held at eye level, it can read as careless. Add a side gusset, die-cut handle, bottom seal, or translucent film, and the margin for error gets thinner than many buyers expect.
A print proof is a digital or physical approval document showing artwork placement, print colors, bag dimensions, material, finish, handle position, and production notes. It may include a flat artwork view, a simulated bag mockup, ink callouts, film details, and notes such as LDPE, HDPE, PP, recycled-content film, or compostable alternatives.
What is it not? It is not a mood board. It is not a finished product photo. It is not a substitute for checking dielines, UPCs, compliance copy, scent-specific artwork, or whether the finished bag will actually fit a boxed 8 oz glass candle with tissue paper around it.
Proof approval is risk control. Treat it less like judging a pretty picture and more like checking evidence before production starts.
Founders, marketing managers, purchasing teams, and designers do not need to become print technicians. They do need a repeatable review method. The checklist turns approval from a gut reaction into a structured inspection.
How Plastic Bag Print Proofs Work for Candle Packaging
The proofing sequence looks simple: the buyer submits artwork and bag specs, the manufacturer preflights the files, a proof is generated, the buyer reviews it, revisions are made if needed, and written approval follows. After that, the order can move into plate, screen, digital setup, or production scheduling.
A useful proof should show the flat artwork view, imprint area, trim or seal marks, handle placement, gusset orientation, ink callouts, material callouts, production quantity, and print side. If the proof does not show the bag opening direction or gusset position, ask before signing. Candle bags are often carried and photographed front-facing, so orientation errors are not small errors.
Digital proofs are fast. They catch spelling, logo placement, barcode position, dimensions, and layout problems within one or two review rounds. Physical samples answer different questions: film feel, opacity, handle strength, ink density, matte versus gloss behavior, and whether the finish supports the price point of the candle.
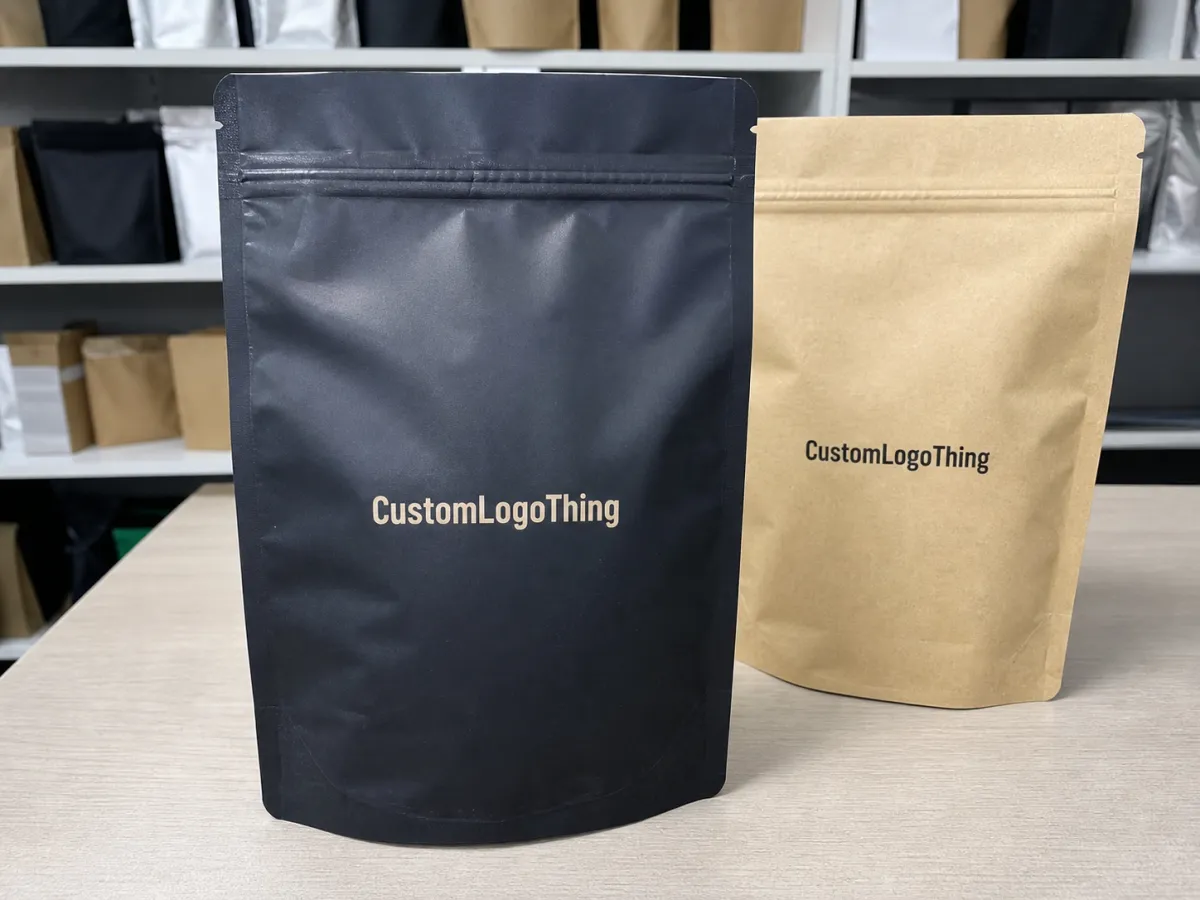
Plastic does not behave like paper. Film can stretch. It reflects light. Ink edges may soften. A cream logo printed on white film, frosted film, clear film, and amber-tinted film can look like four different colors. CMYK, spot color, white ink, metallic ink, and matte print finishes also behave differently across polyethylene, polypropylene, and biodegradable film alternatives.
Candle packaging adds extra checks. Will the bag hold one jar, two boxed candles, or a gift set? Does the warning language match the product label? Can a barcode scan through a glossy finish? Is the fragrance name tied to the correct SKU? If the bag carries a $30 to $80 candle, the handoff has to feel intentional rather than improvised.
Many failures start because the designer, buyer, and factory are not picturing the same bag from the same angle. Three people can approve the same PDF while imagining three different finished products.
Candle Brand Plastic Bags Print Proof Checklist: Key Artwork, Material, and Sizing Checks
Start with hierarchy. Logo, scent name, brand mark, tagline, website, social handle, sustainability message, and QR code should not all shout at the same volume. A polished candle bag usually has one primary message, one secondary cue, and a few quiet supporting details.
File quality is the next gate. Confirm vector logos, outlined fonts, embedded images, correct color mode, adequate resolution, clean dielines, proper bleed, and no hidden layers from older versions. A surprising number of proof errors come from archived files with names like “final-final-new-logo.ai.” That filename is not evidence.
- Artwork: vector logo, live area, bleed, font outlines, current brand mark, and correct scent collection.
- Print placement: safe zone, front/back orientation, handle clearance, gusset clearance, bottom fold, and heat-seal edges.
- Bag specs: width, height, gusset, film gauge, handle style, material, finish, and order quantity.
- Retail copy: UPC, QR code, warning copy, country-of-origin language, recycling mark, URL, and social handle.
- Color: Pantone reference, CMYK build, white ink underprint, opacity target, and acceptable variation range.
Imprint area deserves close attention. The print should not land over handle holes, seams, bottom folds, side gussets, or heat-sealed edges unless that effect is intentional and technically approved. For side-gusseted bags, confirm whether the artwork is centered on the front panel or centered across the full flattened bag width. Those are different measurements.
Bag size is not just width by height. Compare the listed dimensions against the actual candle jar or box, including tissue, inserts, matchboxes, care cards, or multiple-unit bundles. A common retail size may work for one 8 oz boxed candle and fail once a second candle or rigid insert is added.
Load matters. Candle jars are dense, and glass concentrates weight. A bag that looks fine in a mockup may stretch if the film is too thin or the handle style is wrong. For boutique candle orders, buyers often review 2.5 mil to 4 mil film for a sturdier presentation, though the right gauge depends on bag size, handle design, and total carry weight.
Color review is its own discipline. Black, cream, amber, terracotta, muted green, charcoal, and metallic palettes are common in candle branding, but they can shift on plastic. Ask whether the proof uses CMYK, flexographic printing, digital printing, offset printing, or spot color matching. Then ask what tolerance is realistic. “Exact” is rarely an honest promise on film unless the process and substrate are tightly controlled.
Most proof failures are not dramatic design disasters. They are small mismatches between the bag spec, the artwork file, and how the bag will actually be carried.
Process and Timeline From Proof Request to Press Approval
A practical approval path runs through file submission, artwork preflight, first proof, buyer review, revisions, final approval, plate or screen preparation if required, and production scheduling. If a physical sample is needed, add time before production begins.
Basic items can often be reviewed from a digital proof: spelling, logo placement, dimensions, quantity, material, finish, print side, and ink count. If the files are clean and the specs are confirmed, one review round may be enough. Two rounds is common. More than three usually points to missing information or too many decision-makers.
Several issues slow approval. Low-resolution artwork, missing fonts, unclear measurements, custom Pantone matching, heavy ink coverage, specialty finishes, physical sampling, or multi-SKU fragrance runs can add days. Seasonal candle collections create another problem: one fragrance name changes, then a UPC changes, then the wholesale team updates a claim, and suddenly the proof set is no longer synchronized.
Gather all scent names, UPCs, label claims, warning language, and retail copy before proofing starts. Do not ask the manufacturer to revise one bag while another team is still rewriting copy in a shared document. That is how mistakes travel.
Approval discipline helps. Assign one final decision-maker. Consolidate comments into one numbered revision list. Avoid sending separate markups from design, operations, and wholesale sales unless someone has merged them first. The manufacturer should not have to guess which comment is final.
Lead time does not truly begin until proof approval. A factory cannot responsibly schedule production around artwork that may still change. For candle brands, that matters because launches cluster around holiday sets, local markets, subscription boxes, and wholesale ship dates. One slow proof round can compress fulfillment, packing, and outbound freight into a much tighter window.
Clean files and confirmed specs make proofing feel less like negotiation and more like confirmation. That is the quiet value of a candle brand plastic bags Print Proof Checklist.
Cost, Pricing, and MOQ Factors Hidden Inside the Proof
A print proof is also a pricing document in disguise. Every material, ink, finish, handle, size, and quantity choice affects unit cost. The proof may look like artwork approval, but from a purchasing angle it is also a cost lock.
The largest pricing drivers are bag size, film thickness, order quantity, number of print colors, front-only versus two-sided printing, custom color matching, and specialty print finishing. Minimum order quantities vary by supplier and method. Custom Printed Plastic Bags usually become more economical as volume increases because setup costs spread across more units.
| Proof Choice | Typical Cost Impact | Buyer Question to Ask |
|---|---|---|
| Front-only one-color print | Often the lowest custom print route for simple branding | Does one strong logo carry the brand well enough? |
| Two-sided print | May add setup and ink cost, especially with different art on each side | Will the back print improve retail presentation or just add expense? |
| White ink underprint | Common upcharge on clear, frosted, or tinted film | Is opacity critical for logo legibility? |
| Thicker film gauge | Higher unit cost, but better carry strength and perceived value | What is the loaded weight of the candle or gift set? |
| Physical sample | Can add sampling fees and time before production | Is color, texture, or handle strength risky enough to justify it? |
For a moderate custom bag order, a simple printed plastic bag might price around $0.18-$0.28 per unit at 5,000 pieces, depending on size, film, print coverage, and setup structure. Premium finishes, heavier film, additional colors, or low-quantity runs can push that higher. These are planning ranges, not guarantees; actual pricing depends on supplier, region, freight, labor, and material availability.
Setup-related costs may appear as plates, screens, color matching, physical sampling, rush handling, or artwork correction. Sometimes those costs are shown separately. Sometimes they are absorbed into the unit price. Ask how the quote is structured before comparing one supplier against another.
Proof review can control cost before it hardens. Catching an oversized imprint, unnecessary second-side print, or excessive ink coverage before approval can reduce spend without weakening brand identity. The cheapest approved option is not always the lowest-cost option in use, though. Thin bags that stretch, handles that tear, or ink that scuffs can create replacements, complaints, and weak boutique presentation.
For broader packaging standards and testing context, organizations such as ISTA publish transport testing resources, while FSC is relevant when paper-based components are part of a candle packaging program. Plastic bag proofs will not be governed by every paper standard, but responsible buyers should understand the wider packaging system.
Common Proofing Mistakes Candle Brands Should Catch Early
The most common mistake is approving the overall look without checking the dull fields: dimensions, quantity, material, thickness, print side, finish, and handle style. Beautiful artwork cannot rescue the wrong bag spec.
Logo scale errors come next. A logo that looks elegant on a small digital mockup may look timid on a large frosted bag. The opposite also happens: an oversized logo visually wraps toward the gusset and makes the bag feel cheaper, even if the material is good.
Orientation mistakes are expensive because they are easy to miss. Artwork can be upside down relative to the handle, reversed between front and back, or positioned incorrectly for side-gusseted construction. Ask for a marked front panel and bag opening direction if the proof is ambiguous.
Color traps deserve suspicion. Screen brightness can make cream look white, charcoal look black, and warm beige look pink. Store lighting adds another variable. Printed plastic may shift differently under LED shelves, natural market light, and warm boutique fixtures.
Small-copy failures are brutal. Fragrance names, warning statements, QR codes, URLs, and batch language may pass a glance test on a screen but fail after printing on reflective or textured film. For barcode readability, ask whether the final size and contrast are suitable before approval. Do not assume a code that scans on paper will scan equally well on a glossy bag.
Version control is another repeat offender. Older logos, discontinued scent names, outdated URLs, and wrong barcode files often survive in shared folders. The proof should be checked against the current label file, current website, and current quote. If Custom Logo Things has developed similar branded packaging scenarios for other buyers, the Case Studies page can help teams think through proof risk before placing an order.
Then there is the bag-product mismatch. A bag can be beautifully printed yet too narrow for boxed candles, too flimsy for glass jars, or too shallow for tissue wrap. If the error would embarrass the brand in a boutique photo or wholesale unboxing, it deserves attention before approval.
Expert Review Tips for Cleaner Approvals and Fewer Reprints
Print the proof at actual size when possible. Scale problems become obvious on paper after looking harmless on a laptop. Even a black-and-white office printout can reveal whether the logo feels too low, the URL is too small, or the scent name competes with the brand mark.
Review in three passes. First, judge brand presentation: logo scale, balance, tone, and shelf appeal. Second, check technical specs: size, material, gauge, print colors, handle, gusset, and finish. Third, inspect operational details: SKU names, UPCs, quantity, quote match, and packaging fit.
Place a real candle box or jar next to the proof dimensions. Picture the bag in a retail handoff, gift set, market stall, or influencer unboxing. If a bag will hold two candles, test the loaded dimensions before the proof is approved. Dense products punish optimistic assumptions.
Ask the manufacturer to define every abbreviation you do not recognize. Gauge, gusset, Pantone, matte, gloss, LDPE, HDPE, PP, and imprint side labels are not decorative language. They are production instructions. A checklist should pull those terms into the open instead of burying them in email threads.
Request a warning on anything that may not reproduce as expected: fine lines, gradients, metallic effects, low-contrast copy, dense ink coverage, or artwork crossing folds. Flexographic printing, digital printing, and offset printing each have strengths, but none can turn a weak file or vague approval into precise production.
Use a second reader. Someone outside the design process is better at catching misspellings, wrong URLs, and SKU inconsistencies because they are not emotionally attached to the layout. That person should read slowly, not admire quickly.
Maintain a master checklist for each candle collection. Seasonal scent swaps should not restart the review process from memory. The goal is boring consistency: same proof fields, same approval record, same evidence trail. Treat the proof like evidence, not art.
Next Steps Before You Sign Off on Custom Candle Bags
Before approving custom candle bags, gather the latest artwork, confirm the exact bag size, list every candle SKU, check copy against product labels, and compare the proof against the quote. Do this before the pressure of a launch date turns small questions into rushed approvals.
Create a one-page approval record. Include proof version number, approved quantity, material, width, height, gusset, film thickness, ink colors, finish, date, and the person authorizing production. If there are multiple scents, list each SKU and confirm the correct barcode, fragrance name, and warning copy.
Send revision notes in a numbered list rather than scattered screenshots. For example: “1. Move logo 8 mm upward. 2. Replace URL with current domain. 3. Confirm white ink underprint behind cream logo.” That format reduces guessing and helps the manufacturer return a cleaner revised proof.
Request a revised proof after any change affecting placement, color, sizing, copy, material, or print method. Minor changes are not minor if they alter production instructions. One adjusted logo can affect safe zones. One material change can affect ink opacity. One SKU change can affect barcode accuracy.
Approve only when the proof, quote, and physical use case agree. The bag must look right, cost right, carry right, and arrive on the needed schedule. For more packaging examples and production-thinking prompts, review Custom Logo Things custom packaging case studies before finalizing a new order.
Before production starts, use the candle brand plastic bags print proof checklist as the final audit trail, not a design formality. It protects the artwork, the budget, the launch date, and the customer’s first impression.
FAQ
What should a candle brand plastic bag proof checklist include?
A candle brand plastic bag proof checklist should include logo placement, bag dimensions, gusset size, material, thickness, handle style, print colors, finish, quantity, barcode readability, warning copy, scent names, and approval version. Also check that the proof matches the quote, because mismatched quantities, materials, or ink counts can change cost and production timing.
Do candle brands need a physical proof before printing plastic bags?
A digital proof is usually enough for layout, spelling, placement, and basic specifications. A physical proof is worth considering when color accuracy, film texture, opacity, handle strength, or premium retail presentation is critical, especially for gift sets or higher-price candles.
How long does print proof approval take for custom candle bags?
Clean artwork and confirmed specs can make proof approval relatively quick, often requiring only one or two review rounds. Timelines stretch when fonts are missing, dimensions are unclear, multiple candle SKUs are changing, custom spot color matching is requested, or physical sampling is needed.
What proofing mistakes cause reprints on candle plastic bags?
Common reprint triggers include wrong logo files, incorrect scent names, unreadable QR codes, color shifts, artwork placed over seams, and bag sizes that do not fit boxed candles. Version control is a major risk, especially when seasonal collections reuse older templates.
How does proof approval affect the cost of printed candle bags?
Proof approval locks in cost-driving details such as size, material, ink count, print coverage, finish, quantity, and setup requirements. Changing those details after approval can add revision fees, delay production, or require a new quote.

