If you are reviewing a ceramic Trucker Caps Material sample guide, the real question is not, "Does this look close?" It is, "What will break once this moves from one sample to a full run?" The biggest misses are often subtle: a half-shade color shift, mesh that feels stiffer than expected, or a patch that looks premium on a screen and cheap in hand. Those are the details that turn an approved proof into a return.
In practice, a sample is not just a mini cap. It is a working test of fit, finish, decoration clarity, and how the style reads under retail lighting. Buyers who treat the sample as a risk check usually save themselves a second round of shipping, a rework fee, or a quiet margin loss that shows up only after the first pallet lands.
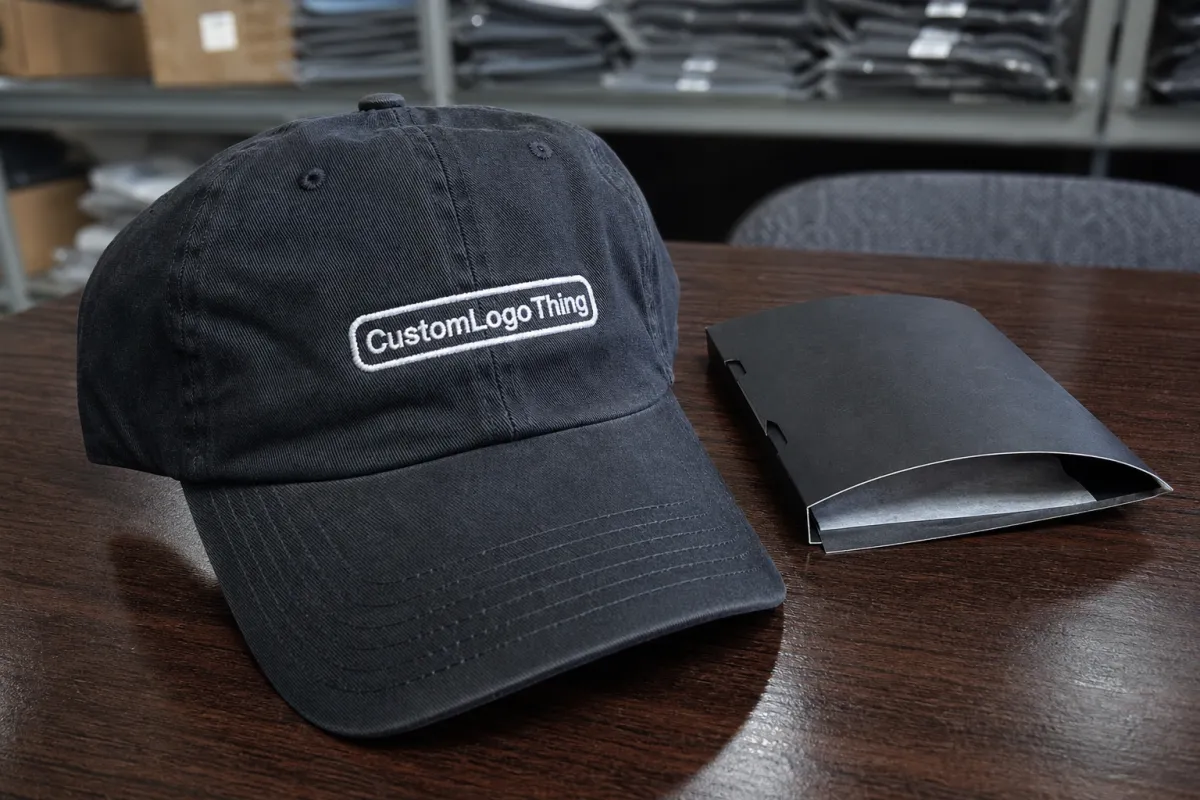
Ceramic Trucker Caps Material Sample Guide: What It Covers
A good sample has one job: show you how the final cap behaves, not how polished the mockup looked on a laptop. That means checking the crown shape, the front panel structure, the mesh stiffness, the visor curve, and the decoration under normal handling. If the sample sits too high, pinches at the temples, or collapses after a short wear test, those are not cosmetic issues. They are product issues.
This is why a ceramic Trucker Caps Material Sample guide should sit in the approval process, not in the "nice to have" folder. It helps buyers compare the intended fit against the actual build and spot the small failures that photos miss. A front panel can look crisp online and still take on a wavy surface once embroidery is stitched. A closure can appear sturdy and still feel flimsy after repeated adjustments.
"A sample that passes under office lighting but fails in daylight is not approved. It is postponed."
For buyer teams, the sample also becomes a shared reference. Sales wants visual impact. Operations wants repeatability. Finance wants the unit cost to behave. The sample is the only place where all three concerns can meet the same physical object.
- Fit: crown depth, head circumference range, and closure stability.
- Finish: panel alignment, seam balance, stitch neatness, and visor shape.
- Decoration: embroidery density, print edge sharpness, patch adhesion, and color accuracy.
- Wear: sweatband comfort, breathability, and how the cap feels after 15-30 minutes.
That last point matters more than buyers expect. A cap can pass visual review and still fail on comfort once someone wears it through a meeting, a tradeshow shift, or a warm warehouse floor. Those failures are expensive because they are quiet. Nobody argues with the sample. They just stop wearing the product.
How the Sample Request Process Works
The cleanest sample workflow is simple, but it only stays simple if the request is specific from the start. A supplier usually needs the target fit, logo placement, fabric preference, color references, closure type, and packaging expectations before they can quote the first sample correctly. If any of those pieces are vague, the sample becomes guesswork dressed up as progress.
Here is the sequence that usually works best:
- Request intake: share the style name, artwork, dimensions, and intended use.
- Spec review: confirm panel count, mesh type, visor style, stitching, and closure.
- Mockup or proof: check placements, scale, and thread or print colors.
- Sample production: the factory builds a physical sample, often with production-relevant materials.
- Shipment: the sample is packed and sent for inspection.
- Buyer signoff: the team compares the sample against the approved checklist.
The approval trail should be written, not remembered. A sample can pass through several internal hands, and memories drift fast. One person recalls a matte finish. Another remembers a darker mesh. A third assumes the patch border was supposed to be thicker. A written trail avoids that drift and keeps the decision tied to the same spec sheet.
Low-friction changes are usually small: thread color tweaks, minor logo repositioning, or a tighter embroidered border. Bigger changes are more disruptive: moving from structured to unstructured front panels, changing closure style, or switching from woven patch to printed patch. Those revisions often mean a second sample and a fresh clock.
Cost, MOQ, and Quote Variables to Compare
Sample pricing looks simple until the invoice lands. The number you see is rarely just the cap itself. Unit sample fees, setup charges, decoration cost, and shipping can all move the real landed cost. If the supplier is building a special patch or a custom label, the first sample may cost more than the production unit price suggests.
The minimum order quantity matters too. A sample might look inexpensive at $35 to $80, but the final order price only falls once the run reaches the supplier's MOQ. For many trucker cap programs, that minimum can sit somewhere around 300 to 1,000 pieces per style, depending on the decoration method and materials. Buyers who skip that comparison sometimes approve a sample that makes sense at one unit and misses the margin target at scale.
| Quote Path | Typical Cost Range | Best For | Watchout |
|---|---|---|---|
| Standard sample | $35-$85 | Basic logo placement and material check | May exclude special trims or label revisions |
| Production-intent sample | $60-$140 | Near-final fit, finish, and decoration | Usually takes longer because it mirrors the bulk build |
| Revised sample | $45-$120 | Corrections to fit, color, or decoration | Can reset timelines if materials change |
| Bulk order quote | Varies by MOQ and print coverage | Final unit pricing for the approved style | Needs the sample spec locked first |
Three variables change the quote faster than most buyers expect: extra thread colors, specialty patches, and rush production. A multi-color embroidery design can add both stitch time and setup complexity. A custom woven label or badge can add tooling. A rushed order may also push the supplier into a less efficient production slot.
Ask for two scenarios, not one: the first sample and the production order. That gives you the full cost curve instead of one flattering number. It also helps procurement explain why a lower sample fee does not always translate into the best landed cost.
Materials, Construction, and Decoration Checks
This is where the sample earns its keep. Front panels, mesh, visor, sweatband, closures, and any structured inserts should all be checked as separate parts of the same product. A weak point in one area can spoil the whole cap, even if the logo looks perfect. I would rather see a slightly plain decoration on a well-made cap than a strong logo on a flimsy build.
- Front panels: confirm stiffness, shape recovery, and whether the fabric shows puckering after decoration.
- Mesh: check openness, touch, and whether it feels scratchy or too rigid.
- Visor: test curvature, board thickness, and edge stitching consistency.
- Sweatband: assess softness, seam placement, and how it sits after repeated wear.
- Closure: verify snapback, hook-and-loop, or strap comfort and durability.
Decoration method matters just as much as the base cap. Embroidery should have enough stitch density to hold shape without distorting the panel. A printed graphic needs edge sharpness and color density, especially on curved surfaces where ink can thin out. Patches should sit flat, with clean borders and no lift at the corners. If you are using a raised badge or a thick woven patch, check whether it feels heavy on the front panel. That weight can shift the way the cap sits.
Comfort checks are not optional. Wear the sample for at least 15 to 30 minutes and watch for pressure points. The crown should not sit too low. The sweatband should not bite. The closure should not slide. Those are the kinds of issues that do not show up in a still photo, yet they drive complaints later.
For channel planning, match the build to the use case. A retail resale cap may justify a cleaner front panel, more refined stitching, and a better finishing standard. A staff uniform cap may prioritize repeatability and comfort. A giveaway cap can tolerate a simpler build, but it should still hold its shape after a few wears.
If the sample is going to ship as part of a presentation kit, ask how it is packed. I prefer a sample box built from corrugated cardboard with kraft paper wrap or tissue inside. That protects the visor shape and keeps the front panel from getting crushed in transit. For buyers under sustainability pressure, look for recycled materials, FSC certified cartons, post-consumer waste content, or even biodegradable packaging where the use case supports it.
Timeline, Turnaround, and Production Steps
A realistic sample timeline often runs 7 to 12 business days for the build, plus 3 to 7 days for shipping, depending on distance and carrier speed. That is before internal review. If the design needs artwork corrections, trim sourcing, or a material substitution, the clock stretches quickly. A supplier may build fast, but the buyer's approval loop is often the slowest part.
Production after approval is a different process from sample making. The sample may be assembled by one technician or a small team. Bulk work adds cutting efficiency, decoration batching, quality checkpoints, and packing. That is why a sample that arrives on time does not guarantee a finished order will follow the same pace. It only proves the supplier can build the style once.
There is a useful rule here: build buffer time for decision-making, not just manufacturing. If your team needs three people to sign off, add a few extra days for scheduling. If the order is tied to a launch date, that buffer is the difference between calm and scramble.
For shipping and handling, a supplier that understands transit stress is usually safer. Standards from organizations such as ISTA matter because a cap sample should arrive in a condition that reflects the product, not the trip. Crushed cartons, bent visors, or flattened mesh can create a false negative during review. The point is not to over-engineer the parcel. It is to keep the sample honest.
Once the sample is approved, lock the exact materials, decoration method, and packaging spec. That way the production run is a repeat of the decision, not a new interpretation of it.
Common Mistakes That Skew Approval
The most common mistake is approving under bad lighting. Fluorescent rooms, phone screens, and daylight can make the same cap look like three different products. A dark navy can lean black in one environment and bright blue in another. A gray mesh can look warmer or colder depending on the bulb. If color matters, compare the sample in the same light you will use for final signoff.
Another error is testing only one head size. Fit changes across wearers. A cap that feels fine on one person may sit too shallow on another, especially with structured front panels or tighter closures. If the goal is broad acceptance, test multiple heads, not one confident volunteer.
Buyers also tend to focus on the logo and ignore the rest of the build. That is understandable. The logo is what the team sees first. But weak stitching, uneven panels, poor mesh quality, or a closure that wears out quickly will undermine the whole item. A pretty mark cannot rescue a poor base.
There is one more trap: treating a sample as final when the supplier clearly marked it as pre-production or reference-only. That label matters. A reference sample may show direction, not full production intent. If it is not production-intent, do not sign it off as if it were.
For buyers using a ceramic trucker caps material sample guide, the safest path is to score the sample against the spec sheet, not against memory. Memory is flexible. The sample is not.
Next Steps After the Sample Arrives
Once the package lands, open it carefully and inspect the cap before anyone handles it casually. Compare it against the spec sheet, then test it on multiple people. After that, document every change request in writing. The goal is not to create more admin. The goal is to remove ambiguity before the bulk order starts.
A side-by-side scorecard helps. I usually like four columns: color, comfort, decoration, and construction. If each category gets a simple pass, caution, or fail, the team can decide faster and with less debate. That same scorecard also makes reorder conversations much easier later, because the approved version has a visible benchmark.
If the sample triggers a change, ask for a revised quote and a revised timeline immediately. A material update can change cost. A decoration update can change setup. A packaging update can change shipping. The earlier those shifts are captured, the less likely they are to become a surprise in production.
Packaging deserves one last look here. If the supplier can ship the sample in an FSC certified carton with minimal void fill, that is a useful signal. It tells you the team is thinking about protection, presentation, and waste together. That is a better sign than a fancy outer box that arrives crushed or overpacked. If sustainability is part of your buying brief, ask for the carton spec, the insert material, and whether the supplier can reduce plastic in favor of paper-based fill.
File the approved cap, the signed spec, the photo record, and the notes from the ceramic trucker caps material sample guide together. That archive becomes the clean starting point for the next reorder, and it keeps the team from relearning the same lesson twice.
Used well, the ceramic trucker caps material sample guide turns a risky purchase into a controlled one. It gives buyers a way to compare fit, finish, pricing, and turnaround against the same physical standard, which is exactly what a bulk order needs before anyone says yes.
What should I check in a ceramic trucker caps material sample?
Check color accuracy, mesh stiffness, crown shape, and how the decoration sits on the front panel. Wear it for at least 15 to 30 minutes to test comfort, sweatband feel, and closure stability. Compare the sample to the approved spec sheet under the same lighting you will use for final signoff.
How many trucker cap samples should I request before ordering?
Most buyers only need one production-intent sample, plus a revision sample if the first version misses the mark. Request a second sample when you are changing materials, decoration method, or fit requirements. Avoid collecting too many versions unless you have a clear decision matrix, or the review process can drag on.
Do sample fees count toward the final cap order?
Ask directly, because some suppliers credit sample fees toward the bulk order while others do not. Confirm whether shipping, tooling, and decoration setup are included in that credit or billed separately. Get the policy in writing before approving the sample so the final quote is easier to compare.
What affects turnaround for a cap sample most?
Artwork complexity, custom materials, and the number of revision rounds usually have the biggest impact. Shipping distance and the factory schedule can add days even when the sample itself is finished quickly. A complete tech pack speeds things up because it reduces back-and-forth during proofing.
When should I ask for a revised ceramic trucker caps material sample?
Ask for a remake if the color, fit, logo placement, or construction quality does not match the approved spec. Request a revised version before production if the issue would affect resale value, comfort, or brand consistency. Document the exact change needed so the next sample is a true correction, not just a guess.


