Logo Patches Material Guide for Electronics Sellers
For electronics sellers, a logo patch is rarely just a decorative add-on. It sits on a carton, sleeve, pouch, insert card, or anti-static bag and gets judged in the same moment the product is judged. If the patch looks too soft, too bulky, or too glossy for the rest of the packaging, the mismatch is visible immediately. That is why a Logo Patches Material guide for electronics sellers has to start with surfaces, handling, and durability rather than with style alone.
The packaging environment around electronics is stricter than many sellers expect. Boxes get stacked, sleeves scuffed, cartons rubbed during transit, and reusable pouches handled enough times to expose weak adhesive or fraying edges. A patch that survives on apparel can fail fast on coated board or film packaging. Some materials also create a better fit with the product story: technical, minimal, rugged, premium, or giftable. The material choice is doing more brand work than most buyers realize.
There is also a practical constraint that keeps showing up in sourcing. The more detail a logo contains, the fewer patch constructions can carry it cleanly. Thin strokes, tiny type, and complex gradients are all expensive in different ways. Sometimes the supplier can reproduce them. Sometimes the supplier will simplify them. Either way, the final result is shaped by the material first, not the mockup.
A patch usually fails for one of three reasons: the material did not fit the substrate, the adhesive did not match the packaging surface, or the logo was asked to carry more detail than the construction could hold.
Logo patches material guide for electronics sellers: what matters
A useful way to choose patch material is to work backward from the package. Ask where the patch will sit, how long it needs to stay attached, and how the item will be handled before the customer opens it. That sounds obvious, but many bad orders start with the logo file instead of the packaging surface. A patch on a display box does not have the same job as one on a cable pouch or a reusable accessory case.
Electronics packaging usually favors controlled contrast and clean lines. Texture can help, but too much texture starts to read as craft rather than precision. A soft embroidered badge can look excellent on a premium audio kit or lifestyle accessory. On a charger box or keyboard sleeve, the same badge may feel unrelated to the product. Woven, PVC, silicone, faux leather, and PU each tell a different visual story, and that story should align with the product tier.
The substrate matters as much as the face material. A patch on kraft paper, coated SBS board, corrugated mailer stock, PET film, or an anti-static bag will behave differently. Adhesive that performs well on paper can fail on low-energy plastic films. Heat-activated backings are often a poor fit for packaging unless the substrate has been validated in advance. If a seller ignores this, the failure usually shows up in storage or shipping, not on the sample table.
There is also a hidden packaging issue that changes the choice of material: thickness. A patch that looks good in isolation can interfere with folds, seals, stacking, or shelf presentation once it is placed on a real carton. Molded PVC or layered faux leather can look premium, but bulk becomes a problem if the patch sits near a flap or a compression point. Thin woven or printed constructions are less dramatic, but they stay out of the way.
For most electronics sellers, the decision is not “Which material looks best?” It is “Which material still looks right after packing, shipping, and retail handling?” That is a narrower question, and a more useful one.
How patch construction affects performance on packaging
A patch is a combination of face material, edge treatment, backing, and decoration method. Each layer affects cost and performance. Woven patches use tightly woven threads to carry detail cleanly. They are good for logos with small type, linework, or technical marks that need to stay crisp at smaller sizes. Embroidery adds depth and a more tactile surface, but that same texture can soften edges and blur very small elements.
PVC and silicone are the most durable-feeling options. They are molded or cast rather than stitched, so they can hold clean borders and tolerate moisture, scuffing, and frequent touch. That makes them useful for rugged accessories, travel kits, outdoor electronics, cable organizers, and packaging that will be handled repeatedly before opening. The downside is setup. Tooling is heavier, revision cycles are slower, and small runs are usually less attractive on price.
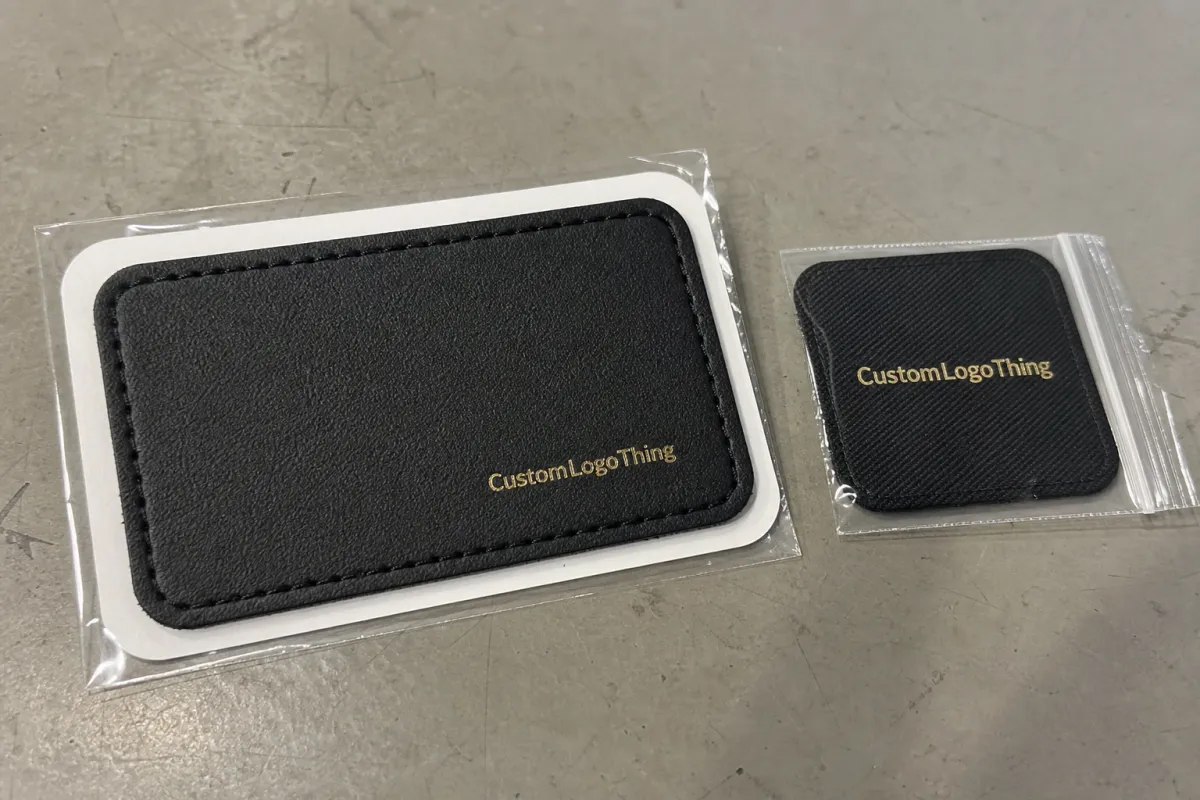
Faux leather and PU sit in a quieter category. They are often selected for premium boxes, gift sets, and accessory packaging that should feel restrained rather than sporty. These materials can look expensive without depending on bright color or obvious texture. They also pair well with black, charcoal, and muted paper stocks, provided the logo contrast is handled carefully. On very light packaging, they can disappear unless the artwork is adjusted.
Border style affects the final read more than buyers expect. A merrowed edge gives a soft, traditional outline. Laser-cut or heat-cut edges look more precise and tend to suit minimal packaging. On kraft or recycled board, a slightly rougher edge can feel natural. On glossy cartons, a tight edge looks cleaner. The wrong border can make a well-made patch appear out of place even if the material is sound.
Detail level is where many orders drift off course. If a logo contains multiple fine lines, tiny lettering, or thin negative spaces, woven construction or print-based decoration usually performs better than embroidery. If the mark is bold and simplified, molded PVC or silicone can carry it without losing definition. A small logo with too many details is not a design problem later in production. It is already a production problem now.
Best material options for electronics branding
Woven patches are usually the safest starting point for electronics branding. They stay relatively flat, preserve fine detail better than embroidery, and do not add much bulk to packaging. For sellers working with compact logos, icon marks, or small text, woven is often the cleanest first option. It reads technical without becoming heavy-handed.
Embroidered patches fit better where texture is part of the brand language. They work for premium accessory lines, soft goods bundled with electronics, and packaging that wants a tactile, human feel. That said, embroidery should be used with restraint on small pieces. Dense thread can flatten detail and make a logo look less precise than intended. If the brand leans into minimal industrial design, embroidery may pull in the wrong direction.
PVC and silicone are the hard-wearing choices. They handle abrasion, moisture, and repetitive contact better than fabric-based patches. These are useful for outdoor gear, ruggedized accessories, and high-touch packaging that needs to survive shipping and retail handling without looking tired. Silicone can feel slightly softer and more modern, while PVC tends to read bolder and more dimensional. Thickness usually falls in the 1.5 to 2.5 mm range for molded styles, and that bulk should be checked against box geometry before ordering.
Faux leather and PU work well for restrained premium branding. They are a good fit for gift sets, upscale cable kits, and branded packaging that aims for polish without visual noise. Typical PU constructions often sit around 0.8 to 1.4 mm, which keeps them refined on carton faces. They are less tolerant of deep texture and fine embossing than a buyer might assume, so the logo should be tested in a simple, high-contrast form rather than overloaded with detail.
The most common mistake is choosing a material for the logo alone and ignoring the rest of the packaging system. A rugged molded patch on a delicate white box can look disconnected. A soft textile badge on a highly engineered product line can feel like it belongs to a different brand. Good material selection creates continuity between product, packaging, and price point.
| Material | Typical look | Best use | Typical MOQ | Rough unit price at 5,000 pcs |
|---|---|---|---|---|
| Woven | Flat, sharp, technical | Fine logos, small text, clean packaging | 100-300 pcs | $0.18-$0.40 |
| Embroidered | Textured, soft, traditional | Lifestyle bundles, softer brand presentation | 100-300 pcs | $0.22-$0.48 |
| PVC / silicone | Bold, molded, wipe-clean | Rugged gear, high-touch packaging | 200-500 pcs | $0.35-$0.85 |
| Faux leather / PU | Premium, muted, understated | Gift sets, upscale carton branding | 100-300 pcs | $0.28-$0.60 |
For sellers comparing these options, the table should be treated as a planning range, not a quote. A small color change, a custom shape, an unusual border, or a special backing can move pricing enough to change the whole order. For example, a simple woven patch with standard adhesive backing may stay near the low end, while a molded silicone version with multiple colors and a custom shape can climb fast. That is not unusual. It is how the production line prices complexity.
ISTA test logic is helpful here because shipping stress changes what “durable” means. A patch that survives a tabletop test may still fail after carton compression, vibration, or humidity. For paper-based packaging, ask whether the board is FSC certified if the rest of the pack already uses corrugated cardboard, kraft paper, recycled materials, or post-consumer waste content. Packaging choices should agree with each other instead of competing for attention.
Cost, MOQ, and unit pricing tradeoffs
Price is driven by material, size, number of colors, backing, edge treatment, and how much artwork cleanup the supplier has to do. Simple woven patches tend to be the cheapest route because they need less setup and less tooling. Molded PVC, silicone, and layered faux leather cost more because the process is less forgiving and revision cycles are heavier.
For planning purposes, low-complexity runs at scale often land in the low tens of cents per unit, while specialty materials move toward the middle of the range quickly. If the order is small, setup matters more than unit price. A quote that is a few cents cheaper on paper can become more expensive once sample fees, revision fees, mold fees, or artwork cleanup are added. Sellers often discover this only after the first proof, which is a poor time to learn it.
The backing choice also changes cost and performance. Adhesive-backed patches are usually the cleanest fit for cartons and sleeves because they are fast to apply and do not require sewing. Sew-on works for reusable fabric items, not paper packaging. Velcro is useful when a patch needs to be removed or reused, but it is rarely the first choice for retail packaging. Heat-activated backing can work on textiles, though it is not a default choice for board, film, or anti-static surfaces.
Another factor that changes pricing more than expected is artwork readiness. A clean vector file with a limited color palette saves time. A low-resolution image with tiny text forces the supplier to redraw or simplify the design. That can add days and extra approval rounds. For orders that need repeatability, standardizing the logo artwork before quoting is more valuable than chasing the cheapest headline price.
| Quote factor | What it changes | Buyer takeaway |
|---|---|---|
| Backing type | Adhesion, reusability, packaging compatibility | Adhesive is easiest for boxes; sew-on fits fabric items better |
| Color count | Production complexity and setup time | Fewer colors usually mean lower cost and fewer approval issues |
| Patch size | Material usage and visual impact | Oversized patches can look strong, but they cost more and may interfere with folds or seals |
| Tooling or mold | Initial setup cost | Custom molds make sense for repeat programs, not for one-off launches unless volume is real |
| Sample and proofing | Schedule and revision cost | Catch problems before production; rework after the run is far more expensive |
MOQ is not arbitrary. It usually reflects labor setup, line changeover, and the amount of manual work needed to finish the run. A supplier may accept a smaller order if the design is simple and the backing is standard. Once the build becomes specialized, the minimum rises because the factory has to justify the change in process. That is normal manufacturing math, not a pricing trick.
Production steps, timeline, and proof approvals
A clean order usually moves through a predictable sequence: inquiry, artwork review, material recommendation, digital proof, sample or pre-production approval, then mass production. Each step is there to reduce risk. If the sequence gets compressed too much, the odds of a color error, edge issue, or adhesion problem go up fast.
Vector art matters. A clear logo file in AI, EPS, or high-quality SVG form gives the supplier something they can actually build from. Pantone references help too, especially if the patch needs to sit near existing packaging print. If the brand color must match a box, sleeve, or insert, the supplier needs a reference that is stable enough to reproduce. A screen capture from a website is not that reference.
Simple woven or printed patch orders often move in about 7 to 12 business days after proof approval. Molded PVC, silicone, or layered faux leather usually takes 12 to 20 business days because tooling and approval are heavier. Shipping sits outside that timeline, and transit can add another week or more depending on lane, customs, and destination. Buyers planning a launch should build in extra time rather than treat the fastest estimate as the only estimate.
Proofing is where a large share of avoidable loss gets removed. A color shift caught on a screen is cheap. A color shift caught after thousands of finished patches is not. The same applies to logo distortion, border thickness, and adhesive placement. If the patch is going onto a real carton, sleeve, or pouch, approve it in that context. A patch can look balanced on a blank sheet and still feel wrong once it sits on the actual package geometry.
For packaging that must survive transportation, pair the proof review with basic transit logic. An adhesive that holds on a desktop sample may fail after exposure to heat, humidity, or compression. The point of the proof stage is not to admire the artwork. It is to expose weak assumptions before they reach the warehouse.
Size, backing, and durability checks before you order
Patch size changes the feel of a package quickly. Small patches are subtle and work well on slim boxes, accessory sleeves, and insert cards where the logo should support the layout rather than dominate it. Larger patches can anchor a plain carton or make a gift set feel more deliberate, but they also raise the risk of interference with folds, seals, and shipping wear.
Backing should follow the surface, not the other way around. Adhesive is usually best for carton faces, sleeves, and other packaging components because it is fast and clean. Sew-on belongs on reusable fabric goods, not paper packs. Velcro is useful only when the patch needs to move between items. If a supplier suggests heat-activated backing for a paper-based package, ask how the bond behaves on the exact substrate and under heat, pressure, and humidity.
Test a sample before committing to the full run. Rub the corners. Bend the sample. Press it against the package and leave it for a day. Peel a corner after 24 hours. Then look for edge lift, residue, warping, or color shift. These tests are simple, but they catch a surprising number of failures. If the sample cannot survive ordinary handling, the shipping line will not improve it.
Electronics packaging deserves extra attention because some surfaces are less friendly to adhesives than they look. Anti-static bags, low-energy plastics, and coated films can all create weak bonds. Temperature swings matter too. A backing that behaves in a dry office may fail in a hot warehouse. That is why the Logo Patches Material guide for electronics sellers needs to include the real substrate, not just the artwork and size.
Thickness is the last practical check. A patch that is too thick can catch on machinery, crush under stacked cartons, or telegraph through thin packaging. A patch that is too flat can disappear into a busy surface. The goal is not maximum dimension. The goal is enough presence without packaging friction.
Common mistakes when choosing patch materials
The biggest mistake is choosing a fashion-first patch because it looks good in a generic mockup. That approach makes sense for apparel. It is weaker for chargers, keyboards, hubs, cables, and other technical products where the packaging language needs to feel exact. Electronics buyers notice whether the surface treatment agrees with the product category.
Another common error is over-detailing the logo. Tiny lettering, thin strokes, and crowded iconography all become harder to reproduce as the patch gets smaller. If the logo must stay readable at 35 mm or 40 mm, simplify it before production. Otherwise the supplier will simplify it during production, and the result may not match the brand’s expectation.
Inconsistent materials quietly damage the package story. A rustic, textured patch on a very minimal carton can look like it was borrowed from another brand. A glossy molded patch on a recycled-paper package can create the same problem in reverse. The customer may not identify the mismatch explicitly, but they feel it as a drop in coherence. That is enough to lower the perceived quality of the whole pack.
Skipping sample approval is still one of the costliest habits. It is how sellers end up with weak adhesive, wrong color, or a patch that interferes with folding cartons. If a supplier offers a pre-production sample, use it. If they only provide a digital proof, ask for a physical sample against the actual packaging material before confirming the mass run. Replacing a bad batch is always more expensive than approving one extra sample.
There is also a sustainability mismatch to avoid. If the packaging system uses recycled materials, kraft paper, or biodegradable packaging, a glossy, heavy-plastic patch can feel out of place unless the brand has a clear reason for it. That does not make PVC wrong in every case. It means the material finish has to work with the rest of the pack, not against it.
Next steps for ordering the right patch spec
Start with the packaging surface. Carton, sleeve, pouch, insert card, or anti-static bag. That one decision narrows the field faster than the logo file does. Then decide what the patch is meant to do. Is it mainly visual, or does it also need to handle repeated touch, shipping friction, or removal and reuse? The answer determines whether woven, embroidered, PVC, silicone, faux leather, or PU is the better fit.
After that, build a short comparison sheet with the top three options. Include size, backing, target unit cost, MOQ, and acceptable timeline. Keep the note practical. Suppliers respond better when the brief is narrow, and internal teams approve faster when the options are easy to compare. A patch order becomes much easier to manage once the nonessential variables are cut away.
Request a sample in the actual packaging context. Put it on the carton or sleeve. Check it beside the printed graphics. Run a basic handling test. Look at edge lift, color interaction, and thickness against folds or seals. That is where most packaging problems show up, and it is much cheaper to catch them there than after production.
For electronics sellers, the right patch specification is the one that fits the substrate, survives handling, matches the product tier, and stays within budget without forcing rework. That is the practical job of a material guide. Not to make the choice feel bigger. To make it narrower.
What logo patch material works best for electronics seller packaging?
Woven and faux leather are often the best starting points for clean, premium packaging because they stay controlled visually and do not overpower the box. PVC and silicone make more sense when the patch has to survive moisture, scuffing, or frequent handling. The better choice depends on whether the patch sits on board, film, or a reusable pouch.
Are embroidered patches a bad choice for electronics brands?
No. They are simply more specific. Embroidered patches work when the brand wants texture and a softer feel, especially on premium accessory kits or giftable bundles. They are less effective when the packaging needs to look technical, minimal, or highly precise. If small text matters, compare an embroidered sample against a woven version before approving the run.
What MOQ should electronics sellers expect for custom logo patches?
MOQ depends on material, size, backing, and tooling. Simple woven or embroidered patches often start lower than molded PVC or silicone builds. Special shapes, extra colors, and custom tooling raise the minimum because the setup work is heavier. For a small launch, ask for the simplest viable construction and compare it with your reorder plan.
How long does production usually take for logo patch orders?
Simple orders can move in about 7 to 12 business days after proof approval. More complex molded or layered constructions often take 12 to 20 business days because tooling and review take longer. Artwork readiness matters a lot here. Clean vector files and clear color references shorten the back-and-forth.
How do I keep logo patches from damaging electronics packaging?
Test the backing on the exact carton, sleeve, pouch, or bag before approving the main run. Check for residue, curling edges, poor adhesion, and interference with seals or folds. Avoid oversized or overly thick patches if they affect stacking or retail display. The point of a Logo Patches Material guide for electronics sellers is to choose a patch that works with the package instead of fighting it.


