Logo Patches Material Guide for Restaurant Groups: What Actually Matters
A Logo Patches Material guide for restaurant groups should start with the unglamorous part: the patch that looks excellent in a supplier photo can look tired after three brunch shifts, two sauce spills, and one aggressive wash cycle. Restaurant uniforms do not live normal apparel lives. They meet fryer oil, bleach, steam, tomato sauce, bar lime, commercial dryers, storage rooms, staff lockers, and the occasional “I left this in my car for a week” incident.
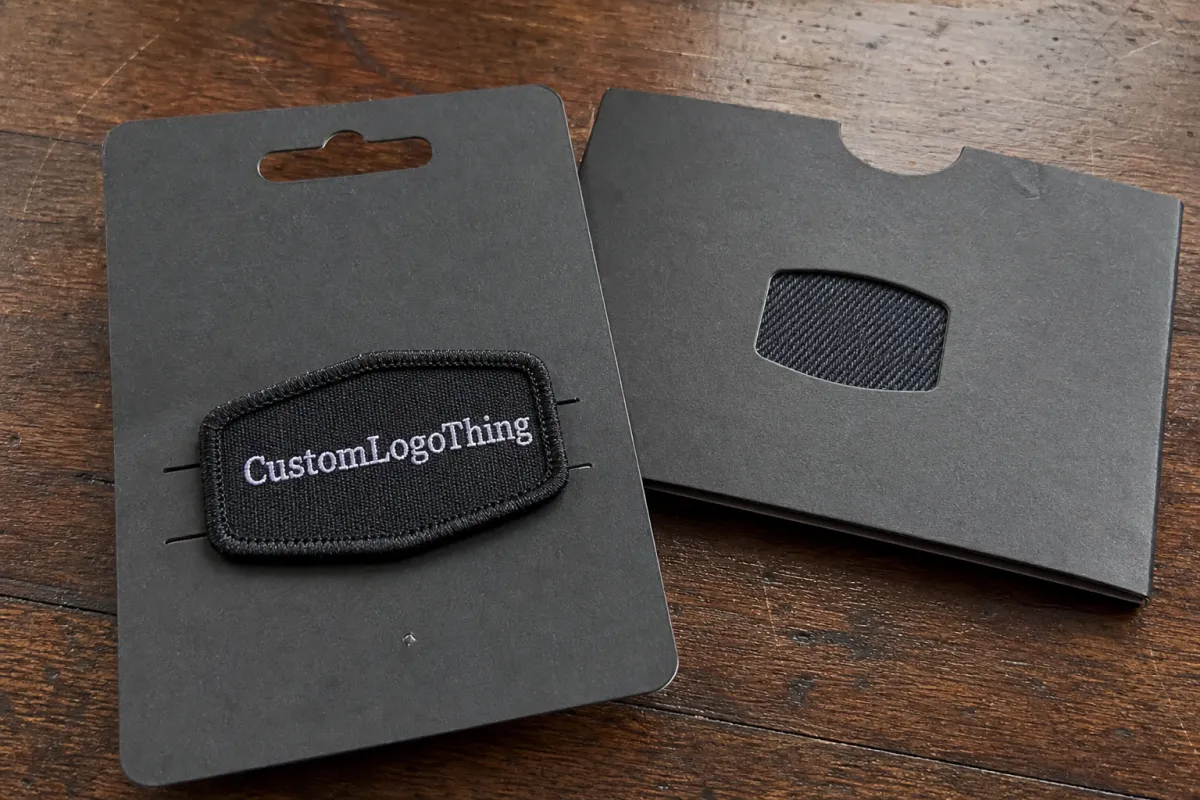
Logo patches are branded emblems applied to uniforms, workwear, and merch. Common materials include embroidered thread, woven thread, printed fabric, sublimated polyester, PVC or rubber, genuine leather, and faux leather. They usually land on aprons, chef coats, polos, caps, jackets, tote bags, and staff merch using sewing, heat-seal backing, Velcro, or, for short-term promotional use, pressure-sensitive adhesive.
Restaurant groups have a harder buying problem than a single shop ordering 40 hats. Multiple locations need consistent colors. New hires need uniforms quickly. Servers, bartenders, kitchen teams, managers, catering staff, retail teams, and event crews may all wear different garments under one brand system. One patch rarely does all of that well. It sounds efficient. It often creates a drawer full of compromises.
The right patch material affects wash durability, comfort, safety perception, attachment method, reorder consistency, and unit cost. Soft and premium usually costs more. Rugged and washable may look less refined. Cheap patches can punish the budget later through peeling corners, frayed borders, color drift, stiff backing, or reorder batches that look almost right but not quite.
Buyer reality: a patch is not just decoration. It is a repeatable uniform component. Treat it like a spec, not a mood board.
The practical goal is simple: match the patch material to the actual restaurant use case before money gets burned on the wrong option.
How Patch Materials Perform on Aprons, Chef Coats, Hats, and Staff Merch
The best material depends on the garment, logo style, wash process, placement, and brand tone. A brewery apron, a fine dining chef coat, and a fast-casual cap should not automatically share the same patch. Shocking, yes. Also expensive to ignore.
Embroidered patches
Embroidered patches use thread stitched onto a backing fabric, often with a merrowed border or laser-cut edge. They work well for bold logos, block lettering, mascots, casual dining, barbecue concepts, diners, breweries, food trucks, and neighborhood restaurants that want visible texture.
The tradeoff is detail. Tiny text under roughly 0.20 inches tall can turn into fuzz. Thin line art may close up. Small interior spaces in letters can fill in. Embroidery also adds bulk, so it is not always ideal on lightweight polos, stretchy performance shirts, or chef coats where comfort matters.
Embroidery looks best when the artwork has been simplified for thread. Thickened strokes, fewer colors, and a slightly larger patch often produce a cleaner result than forcing a full brand lockup into a two-inch badge.
Woven patches
Woven patches are thinner and cleaner because the design is woven directly with fine threads. They handle small lettering, narrow lines, and crisp logo marks better than traditional embroidery. For restaurant groups with modern branding or detailed wordmarks, a woven patch often looks more controlled.
They do not have the raised texture of embroidery. If the brand needs a chunky heritage look, woven may feel too flat. For chef coats, sleeve marks, chest logos, and polished service uniforms, that flatness can be an advantage. Less bulk. Less snagging. Fewer complaints from staff who have to wear the thing for eight hours.
Printed and sublimated patches
Printed patches are useful for gradients, illustrations, full-color mascots, watercolor-style marks, and artwork too complex for thread. Sublimated fabric patches are common for colorful designs because the ink bonds into a polyester surface rather than sitting as a heavy layer on top.
The weak point is not always print quality; it is the restaurant environment. Abrasion, detergent, stain treatment, dryer heat, and repeated folding can change the way a printed patch looks. A sample should be washed, rubbed, and bent before approval. Full color does not mean foolproof.
PVC and rubber patches
PVC patches are flexible, waterproof, wipe-clean, and visually strong. Raised 2D or 3D layers can make a simple logo stand out. They work especially well on caps, outerwear, utility aprons, delivery jackets, bar aprons, and casual uniforms that can tolerate a bolder look.
They can also feel heavy, tactical, or too promotional for higher-end dining. On a chef coat, a thick PVC patch may look like it wandered in from an equipment bag. PVC also needs artwork discipline. Small details and delicate typography usually need simplification, and custom molds can add cost and time.
Leather and faux leather patches
Genuine leather and faux leather patches look premium on denim aprons, caps, jackets, and retail merch. Debossed, embossed, or laser-engraved logos can feel warm and upscale, especially for coffee shops, steakhouses, cocktail bars, bakeries, and hospitality groups that sell branded gear.
Heavy commercial laundering is the danger zone. Leather can darken, warp, crack, bleed, or stiffen depending on the finish. Faux leather can outperform genuine leather in some wash settings, but only if the surface coating, backing, and application method are chosen carefully. “Leather-look” is not a performance specification.
| Patch material | Best restaurant use | Main strength | Main caution |
|---|---|---|---|
| Embroidered | Aprons, polos, casual caps | Classic texture and bold branding | Poor choice for tiny text |
| Woven | Chef coats, polos, sleeve patches | Fine detail and thinner profile | Less dimensional texture |
| Printed / sublimated | Staff merch, colorful logos | Full-color artwork and gradients | Needs wash and abrasion testing |
| PVC / rubber | Caps, utility aprons, jackets | Waterproof and wipe-clean | Can feel heavy or casual |
| Leather / faux leather | Denim aprons, caps, retail merch | Premium hospitality feel | Not always ideal for industrial laundry |
Garment choice should narrow the list quickly. Chef coats need soft, washable, low-bulk patches. Aprons can handle larger and tougher patches, especially on canvas or denim. Caps need material that works on a curved surface without buckling. Staff merch can prioritize visual impact because it usually avoids the same wash abuse as kitchen uniforms.
Material Factors Restaurant Buyers Should Compare Before Ordering
Wash durability comes first. Restaurant uniforms often face hot water, enzyme detergents, degreasers, spot treatment, bleach exposure, tumble drying, and commercial laundry cycles. A beautiful sample does not pay the replacement bill.
If uniforms go through a professional laundry service, ask whether the patch, thread, backing, adhesive, and edge finish can tolerate high heat and repeated processing. There is no universal answer. A cotton/poly chef coat behaves differently than a waxed canvas apron, a denim apron, or a performance polo.
Comfort is next. A chest patch on a polo should be flexible and light, often around 2 to 3 inches wide. A patch on the center of an apron can be thicker and larger, often 3 to 5 inches. Neck, sleeve, and hat placements need extra scrutiny because stiff edges can rub, curl, or buckle.
Logo detail drives the material choice. Embroidered patches handle bold marks. Woven patches handle smaller text. Printed patches handle gradients. PVC patches handle simplified shapes, raised layers, and strong color blocking. If the logo has a 12-word tagline under a tiny icon, the patch may not be the problem. The artwork may be trying to do too much.
Color consistency across reorders is a major issue for restaurant groups. Lock Pantone references, thread colors, PVC colors, leather finish, faux leather shade, edge style, and backing specs where possible. That matters when location number two becomes location number twelve and someone needs 300 more patches that actually match the first batch.
Attachment method is not a footnote. Sew-on patches are usually the most durable for long-term uniform programs. Heat-seal backing is fast and clean, but it depends on garment fabric, coating, temperature, pressure, and dwell time. Velcro works for interchangeable roles, department identifiers, name systems, and temporary event uniforms. Adhesive-only patches are usually not serious restaurant uniform solutions unless the use is short-term, decorative, or promotional.
Food-service perception matters too. A fraying patch on a server apron makes the entire brand feel tired. Fair? Not always. Real? Absolutely. Avoid materials that shed fibers, lift at corners, trap grime in heavy food prep settings, or create awkward raised edges in areas that rub against counters and equipment. That is not a formal food-safety certification claim. It is practical uniform logic.
Quality control should include more than “does it look nice?” Check edge stitching, loose threads, backing coverage, cut accuracy, color match, logo readability at normal viewing distance, thickness, flexibility, and odor. PVC and faux leather samples can have a manufacturing smell when first opened; it should dissipate, not dominate the uniform room.
Cost, Pricing, MOQ, and Unit Cost Tradeoffs for Logo Patches
Patch pricing depends on material, size, stitch density, number of colors, backing type, edge finish, mold fees for PVC, artwork cleanup, sampling, order quantity, and shipping. No magic here. More detail, more cost. Smaller order, higher unit price.
As a practical range, basic woven or embroidered patches often land around $0.60 to $2.50 each at volume. Premium leather, faux leather, or PVC patches can run around $1.50 to $5.00+ each, depending on size and complexity. Oversized patches, metallic thread, 3D PVC layers, specialty borders, custom molds, unusual shapes, or low quantities can push costs higher.
Many custom patch orders start around 50 to 100 pieces. Restaurant groups usually see better pricing at 250, 500, or 1,000+ pieces. Ask for price breaks at multiple quantities instead of guessing. The savings curve may be steep from 100 to 250, then flatten after 500. Or not. Material and setup fees change the math.
| Order quantity | Typical buyer scenario | Likely unit cost behavior | Practical advice |
|---|---|---|---|
| 50-100 pieces | Single location, test rollout, seasonal campaign | Highest unit cost | Good for testing before committing |
| 250 pieces | Small restaurant group or new uniform launch | Better pricing with manageable inventory | Often a smart first serious run |
| 500 pieces | Multi-location group with steady hiring | Noticeable cost improvement | Good balance if specs are proven |
| 1,000+ pieces | Larger group, long-term uniform program | Lowest unit pricing in many cases | Only buy after sample and wash approval |
Pay more for durable backing, consistent color matching, and a tested sample if patches will be rolled out across multiple locations. Replacing failed patches across ten restaurants is not a savings strategy. It is an expensive group project nobody wanted.
Do not overbuy if the brand identity is changing, uniforms are being tested, or the patch is tied to a seasonal menu, anniversary, or limited campaign. A smaller run may cost more per piece but save money overall. Inventory that becomes obsolete is just branded clutter with a purchase order attached.
Hidden costs matter: sewing labor, heat-press setup, sample fees, shipping, rush charges, sorting by location, labeling, packaging, and reorder minimums. If patches ship loose to a central office, someone still has to count, sort, label, and distribute them. Build that labor into the plan.
For planning, calculate patches by garment, not by employee. If each new hire receives two polos, two aprons, and one cap, one person may require five branded applications. Add manager uniforms, replacements, damaged pieces, seasonal staff, and opening stock for new locations. A neat headcount spreadsheet can badly understate patch demand.
Process, Timeline, and Production Steps From Artwork to Uniforms
The normal process is straightforward: submit logo files, choose patch material and size, confirm backing, review a digital proof, approve a physical sample if needed, produce the bulk order, inspect, ship, and apply to garments. Simple on paper. Easy to derail if nobody owns the specs.
Digital proofs often take 1 to 3 business days after usable artwork is submitted. Physical samples usually take 5 to 10 business days, depending on material and complexity. Bulk production often takes 7 to 20 business days after approval. Shipping, receiving, sorting, and garment application add more time.
PVC, leather, and complex embroidered patches can need longer lead times than simple woven or printed patches. Molds, debossing plates, custom shapes, specialty edges, layered designs, and color matching all add steps. Rush jobs are sometimes possible, but they narrow the options and increase the odds of a compromise.
Artwork preparation matters. Vector files are best: AI, EPS, or clean PDF. Tiny text may need simplification. Gradients may need printed or sublimated construction. Very thin lines can disappear in embroidery. Fine details that look sharp on a backlit screen do not automatically translate into thread, rubber, or debossed leather.
Restaurant groups should order a sample before rolling out patches across all locations, especially if uniforms face heavy laundering or strict brand standards. Check the sample on the actual garment, not just in your hand. A patch can look perfect on a table and awkward on a curved cap, narrow sleeve, stretchy polo, or apron pocket seam.
Application testing should be specific. For heat-seal patches, record the temperature, pressure, dwell time, peel method, and whether the garment was pre-washed. For sew-on patches, confirm thread color, stitch path, stitch density around curves, and whether the patch puckers the garment. For Velcro, check whether the hook side snags surrounding fabric or collects lint.
Operational planning belongs in the timeline. Account for current uniform inventory, new hire kits, seasonal staffing, location openings, catering teams, managers, replacements, and emergency stock. If a location opens in six weeks, patch approval cannot sit in someone’s inbox for 14 days and still be “on schedule.” Production math is not sentimental.
Set up a reorder folder. Save approved artwork, patch size, shape, material, backing, edge type, thread colors, Pantone references, supplier proof, sample photos, application instructions, and previous invoice quantities. The next reorder should not become an archaeological dig through old emails.
Step-by-Step Guide to Choosing the Right Patch Material
A useful buyer guide should turn into decisions, not a parade of options. Use this sequence before requesting quotes.
-
List every use case. Aprons, chef coats, polos, hats, jackets, bags, and retail merch may need different specs. Placement decides more than people think.
-
Rank the priority. Choose the top two or three: wash durability, premium look, low cost, tiny detail, wipe-clean surface, speed, flexibility, or long-term reorder consistency. Buyers cannot max out every category at once. Anyone promising that is selling fairy dust.
-
Match material to use case. Use woven for small details, embroidery for classic texture, printed for full-color artwork, PVC for wipeable durability, and faux leather for premium merch or denim aprons.
-
Choose size and shape. Common restaurant patch sizes are 2 to 3 inches for chest logos, 2.5 to 3.5 inches for caps, and 3 to 5 inches for apron center or pocket placement. Test paper mockups at actual size before approving.
-
Pick the backing. Sew-on is best for longevity. Heat-seal is fast if the garment accepts it. Velcro works for interchangeable roles. No backing may be right if patches are going directly to a sewing vendor.
-
Request a proof and sample. Check edge quality, color, logo readability, backing adhesion, thickness, flexibility, and how the patch feels on the garment.
-
Wash-test before bulk approval. If uniforms go through commercial laundry, run at least one real wash cycle. Three to five cycles is better if timing allows. One test can prevent a very expensive apology email later.
For a multi-location restaurant group, the best answer is often a small system: woven patches for chef coats, embroidered or PVC patches for aprons and caps, and faux leather for staff merch. One compromise patch doing four jobs badly is not efficient. It is just tidy-looking waste.
Common Mistakes That Make Restaurant Uniform Patches Look Cheap
Mistake one: choosing from a pretty close-up photo. Product photography hides stiffness, thickness, edge quality, color shifts, and how the patch behaves after washing. Ask for side views, backing photos, and garment examples if available.
Mistake two: forcing tiny text into embroidery. If the slogan turns into fuzz, that is not a production mystery. It is a spec problem. Move to woven, use print, enlarge the patch, or simplify the art.
Mistake three: using the same patch for every garment. A heavy PVC patch may be great on a cap or apron but annoying on a lightweight polo. A leather patch may look sharp on denim and wrong on a white chef coat after repeated laundering.
Mistake four: ignoring backing compatibility. Heat-seal patches do not magically bond to every fabric, coating, or textured surface. Test temperature, pressure, and dwell time on the actual garment.
Mistake five: ordering too few for a growing restaurant group. Underbuying creates rushed reorders, mismatched batches, higher freight costs, and annoyed operations managers. Add a practical overage, often 5% to 15%, depending on hiring pace, uniform turnover, and opening plans.
Mistake six: skipping samples for multi-location rollouts. Samples feel slow until the entire order shows up wrong. Then, suddenly, everyone discovers patience.
Mistake seven: not documenting specs. Save size, shape, material, backing, edge type, colors, proof files, and application notes. Reorders should be boring. Boring is good in production.
Mistake eight: choosing novelty over clean branding. Restaurant patches should support the guest experience, not look like a sticker collection from a garage fridge. A patch can have personality without screaming for attention.
A practical Logo Patches Material guide for restaurant groups is really about avoiding these traps before they become invoices, delays, and boxes of unusable patches.
Build a Patch Spec Sheet Before You Request Quotes
Before contacting suppliers, build a one-page patch spec sheet. Not a 34-slide brand deck. One useful page. Buyers who send clear specs get better quotes, faster proofs, and fewer strange surprises.
Include the restaurant group name, logo file, patch use case, garment type, desired material, size, shape, backing, edge style, quantity, delivery location, deadline, and whether a sample is required. If the patch must survive commercial laundry, say that clearly. If the garment is cotton canvas, polyester, denim, twill, ripstop, or a performance blend, include that too.
Group patches by use case. One spec for chef coats. One for aprons. One for hats. One for staff merch if needed. This prevents one compromise patch from doing four jobs badly, which is usually how “simple” uniform projects become expensive.
Ask for side-by-side options if unsure: woven versus embroidered, faux leather versus PVC, sew-on versus heat-seal. Seeing the tradeoff beats guessing from a screen. Also request price breaks and lead times at 100, 250, 500, and 1,000 pieces, plus reorder terms. Restaurant groups need repeatability more than one lucky first order.
Test patches on actual garments and run at least one wash cycle before bulk approval if the uniform will be laundered heavily. For core uniforms, a sample is not overkill. It is cheap insurance.
The strongest patch programs are not the fanciest. They are the ones with clear specs, tested materials, documented colors, realistic lead times, and a little extra inventory for the manager who needs three new aprons by Friday.
FAQs
What is the best material for restaurant logo patches on aprons?
For denim or canvas aprons, embroidered, woven, PVC, and faux leather patches can all work well. Choose embroidered for a classic textured look, woven for small logo detail, PVC for wipe-clean durability, and faux leather for a premium hospitality feel. If aprons are commercially laundered, test the exact patch and backing before placing a large order.
How much do custom logo patches cost for restaurant uniforms?
Most basic woven or embroidered patches range from about $0.60 to $2.50 each at higher quantities. PVC, leather, faux leather, oversized, or highly detailed patches can range from about $1.50 to $5.00+ each. Final pricing depends on size, material, colors, backing, quantity, sampling, shipping, and application method.
Are sew-on or heat-press patches better for restaurant groups?
Sew-on patches are usually the safest choice for long-term durability and commercial laundering. Heat-press patches can be faster and cleaner, but they must be tested on the exact garment fabric. Many restaurant groups use sew-on patches for core uniforms and heat-press patches only for lighter-duty items.
What patch material works best for small logo details or fine text?
Woven patches usually handle small lettering and fine logo details better than traditional embroidery. Printed patches are better for gradients, illustrations, or complex full-color artwork. If text is under roughly 0.20 inches tall, simplify the design, enlarge the patch, or request a proof before approving production.
How long does logo patch production take for a restaurant group?
Digital proofs often take 1 to 3 business days after artwork is submitted. Physical samples usually take 5 to 10 business days depending on the material and complexity. Bulk production often takes 7 to 20 business days after approval, plus shipping, sorting, and garment application time.


