Coffee Roaster Embroidered Baseball Caps Unit Cost Review
Pricing coffee roaster embroidered baseball caps Unit Cost Review projects is less about finding the cheapest cap and more about finding the right combination of blank body, embroidery method, quantity, and turnaround. A cap for a roastery has to do more than carry a logo. It needs to read clearly behind a bar, survive retail handling, and still look intentional when it is pulled from a box after shipping. If those jobs are mismatched, the quote may look fine on paper and still miss the mark in use.
The cleanest way to judge a cap order is to separate it into four variables: decoration, construction, quantity, and schedule. That sounds simple, but it avoids the usual trap of comparing quotes that are not actually the same product. One supplier may quote a structured twill cap with a small front logo, while another quietly uses a thinner blank and a larger stitch file. The numbers can look close while the finished pieces behave very differently. In practice, most of the price movement comes from stitch count, cap quality, and how much of the setup cost is spread across the run.
Embroidered caps are one of the more manageable merch categories for coffee brands because the production process is mature. There is no cut-and-sew pattern development, no complex decoration surface, and no heavy tooling in the way there would be with molded or engraved goods. Still, the easy part is not the same as the cheap part. A clean mark, decent blank, and decent order size can land in a sensible range. A detailed emblem, premium packaging, and a short run can move quickly in the other direction.
The cap that sells best is rarely the one with the most decoration. It is usually the one that fits the brand, keeps its shape, and clears production without surprises.
For buyers, the useful question is not whether embroidered caps are affordable in the abstract. It is whether the unit cost makes sense for the cap's job. Staff wear can tolerate a slightly lower-end blank if the logo is clear. Retail stock needs better shape retention and presentation. Event giveaways need the lowest practical cost without slipping into flimsy territory. Those are different decisions, and the quote should reflect that.
Embroidery Details That Change the Finished Cap
Embroidery is the biggest driver of visual quality and a common source of hidden cost. The first number to watch is stitch count. A simple front logo with a wordmark and one icon can often stay in the 3,000 to 5,000 stitch range. Once the art includes thin outlines, small text, layered shapes, or multiple symbols, the count can climb fast. More stitches mean more machine time, more thread changes, and a greater chance that small details lose clarity. That is not a flaw in embroidery; it is a limitation of the medium.
Thread color count matters, too, but not because more colors are automatically better or worse. Two or three colors usually run efficiently. Six or seven colors are still possible, but each added color increases handling and registration complexity. If the logo depends on a gradient, tiny type, or highly nuanced linework, embroidery is probably not the best surface unless the design is simplified first. Coffee branding often benefits from restraint. A strong silhouette, a small amount of contrast, and letters large enough to sew cleanly usually produce a more premium result than trying to preserve every line from the original artwork.
Three decoration styles come up most often:
- Flat embroidery - best for crisp wordmarks, clean logos, and the most readable everyday retail look.
- Raised puff embroidery - adds dimension and works well on bold letters, but it is less forgiving on fine detail.
- Patch decoration - useful for designs with texture, gradients, or artwork that would get crowded in direct stitching.
Placement changes both appearance and production behavior. Front-panel embroidery is the standard because it gives the logo the strongest read and the easiest quality control. Side embroidery works for a secondary mark, a small roast icon, or a subtle brand cue. Back decoration is usually the least visible and best reserved for small tags or short phrases. Any nonstandard placement should be sampled carefully because the curvature of the panel can distort the art more than buyers expect.
The practical lesson is straightforward: reduce the artwork before digitizing. A cap is a small canvas. A logo that looks rich on a screen can become crowded on a crown panel. If the stitch file is built around what embroidery can actually do, the result is usually sharper and the quote is easier to keep under control.
Fabric, Crown, and Closure Specifications to Lock In
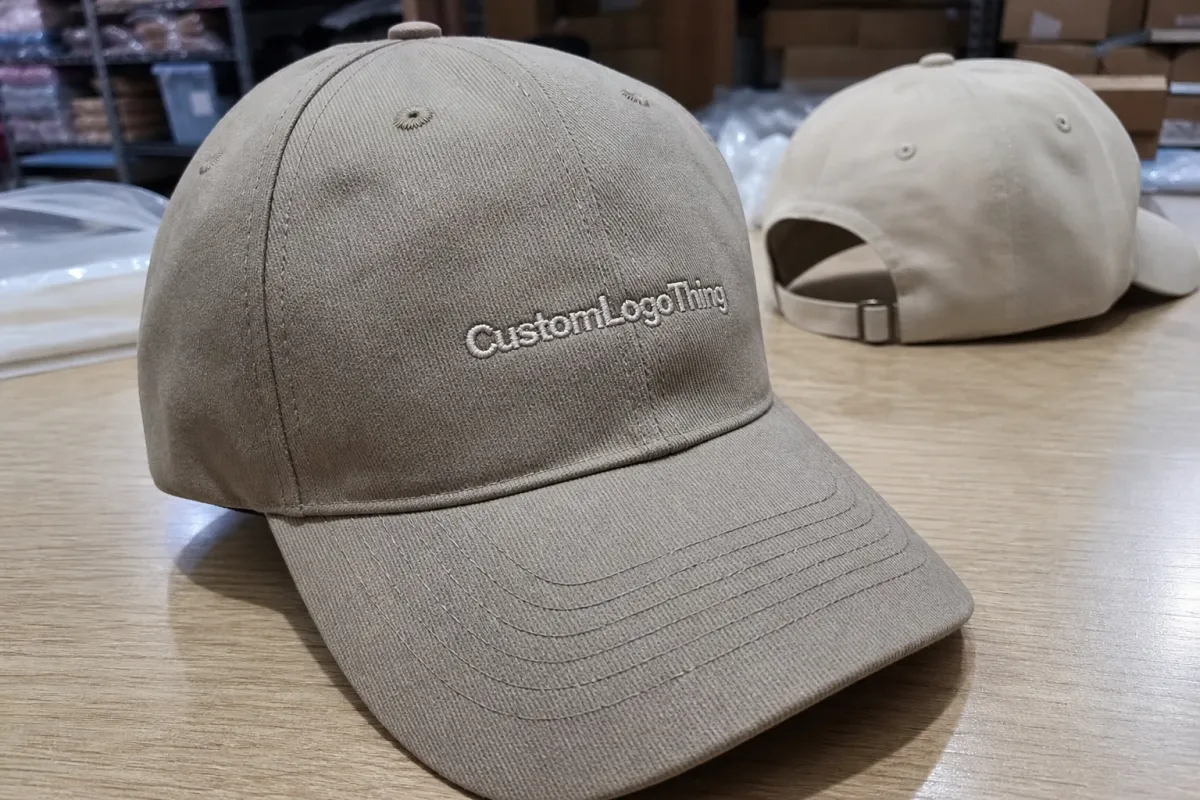
The blank cap often decides whether the finished piece feels like merch or like a promotional leftover. Structured cotton twill is a dependable starting point because it supports embroidery well and keeps the front panel upright. That matters more than many buyers realize. If the front panel collapses, the logo can look slightly warped even when the stitching itself is fine. For roaster retail, that structure usually reads as more polished. For staff wear, a softer hand can be acceptable if the brand is aiming for a relaxed look.
Brushed cotton, chino cotton, and cotton-poly blends each bring a slightly different feel. Brushed cotton is softer and can feel more worn-in from the start. Chino cotton often presents a clean, smooth surface that stitches well. Cotton-poly blends can improve wrinkle resistance and help the cap hold its shape during transit and repeated handling. The trade-off is tactile character: some blends feel a little less natural, which can matter if the brand is trying to project a warm, craft-forward identity.
Crown profile changes both fit and shelf presence. Low profile caps sit closer to the head and look more understated. Mid profile is usually the safest choice because it balances wearability and visibility. High profile gives more front-panel space and a stronger retro or workwear feel. That extra panel space can help larger logos, but it can also make the cap feel more fashion-led than practical. There is no universal best option; there is only the best fit for the brand and use case.
Visor shape matters as well. A pre-curved visor is the most predictable choice and tends to be easiest for broad retail use. Flat brims have a more stylized look and can suit younger or more fashion-aware audiences, though they are less forgiving on a wide range of head shapes. Under-brim color is a small detail with an outsized effect. A matching underside feels cleaner and more finished. A dark underside hides wear better, which is useful for staff caps that will be handled daily.
Closures are part of the cost equation, but they also influence how premium the cap feels:
- Snapback - broad fit range and usually the easiest way to simplify inventory.
- Strapback - a slightly cleaner look, often preferred when the brand wants less of a sporty feel.
- Buckle closure - classic and durable, typically reading as a step up from basic promotional caps.
- Fitted - neat and polished, but far less flexible if one size needs to serve many people.
For most coffee roasters, snapback and strapback styles are the most practical. They reduce sizing friction, handle staff distribution well, and usually keep reorders simple. It is also worth checking the sweatband quality, panel stitching, and eyelet placement. Those details do not make the marketing photos, but they show up quickly in actual wear. A cap can look good on a proof sheet and still feel cheap if the inside finishing is sloppy.
Pricing, MOQ, and Unit Cost Breakpoints
Most cap pricing moves for predictable reasons: blank quality, stitch count, color count, quantity, packaging, and whether the art needs cleanup before digitizing. There are usually no large tooling charges, but there are still setup costs. Those often cover digitizing, proof creation, and a test sewout when the art is complicated. A digitizing fee commonly lands around $35 to $95, though more intricate logos can sit above that. A sewout or physical sample may add another charge, especially if the buyer wants to verify small lettering or a difficult placement before the full run.
The cost curve changes sharply with volume. That is the part many buyers underestimate. A 100-piece order absorbs setup across relatively few units, so the per-cap price can feel high even when the design is simple. At 250 pieces, the quote usually starts to make more sense. By 500 or 1,000 pieces, the same setup work has far less impact on each cap. In percentage terms, the setup burden can drop by more than half as quantity rises, which is why larger programs often look much healthier on paper even before freight is added.
| Order Size | Simple Front Embroidery | More Detailed Logo | Typical Use Case |
|---|---|---|---|
| 100 pcs | $7.25-$10.25 each | $8.10-$11.50 each | Small launch, internal staff issue, pilot merch test |
| 250 pcs | $5.60-$7.80 each | $6.50-$9.10 each | First retail run, event merchandise, tasting-room sales |
| 500 pcs | $4.45-$6.20 each | $5.10-$7.30 each | Better margin for resale, steady staff uniform use |
| 1,000 pcs | $3.70-$5.10 each | $4.20-$6.20 each | Multi-location rollout, wholesale support, seasonal volume |
These are working ranges, not a promise. A premium structured cap, a more complex stitch file, custom labeling, and individual retail packaging will push the price higher. A plain cap with a single-color logo can stay surprisingly efficient. In other words, a quote is only useful if the specs match. A smaller embroidery size or a thinner blank can make a quote look better while quietly changing the product.
A quote request should include:
- Exact quantity by color.
- Cap style, crown profile, and closure.
- Vector logo file, if available.
- Embroidery placement and approximate size.
- Thread color preferences, if any.
- Packaging needs, such as polybags or retail cartons.
- Target delivery date and shipping destination.
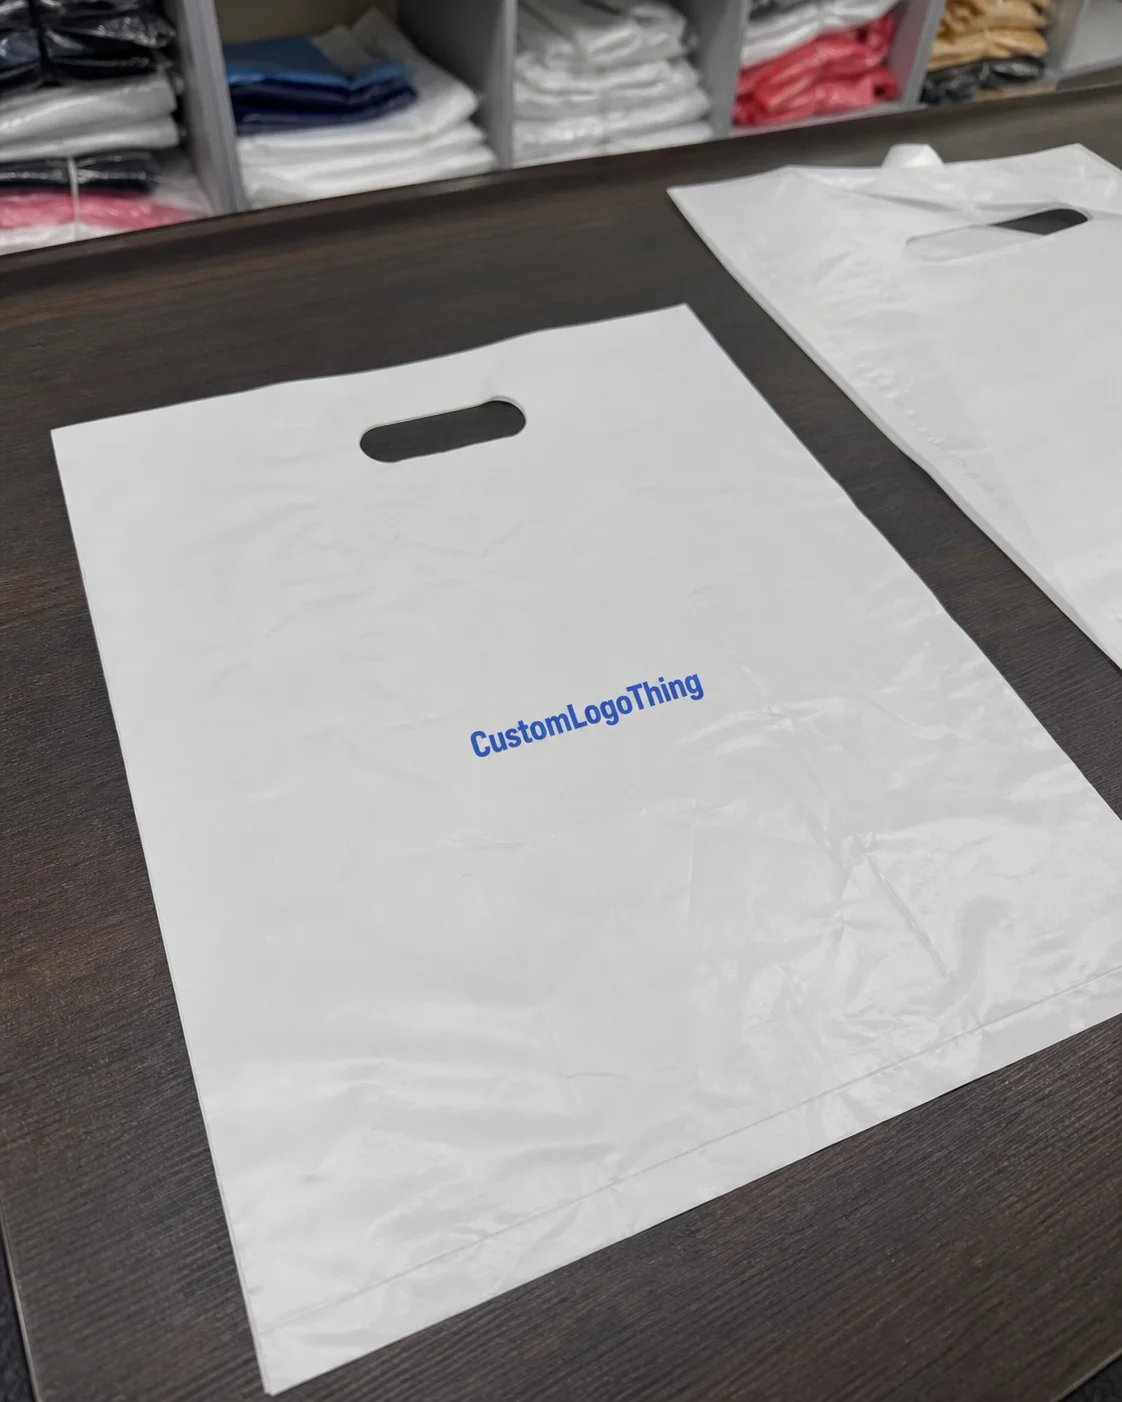
Packaging and transit can matter more than buyers expect, especially for retail programs. If the caps are headed to multiple stores or will be sold online, consistent carton counts and clear labeling reduce receiving errors. For paper-based packaging, FSC guidance can help with sourcing decisions, and ISTA testing concepts are useful if the box needs to survive longer transit. Those are not embroidery issues, but they affect the total delivered cost.
Production Steps, Proofing, and Lead Time
The production sequence is usually straightforward once the artwork is ready. It begins with art review, then digitizing, then mockup approval, followed by a stitched proof if the design needs verification. After that, the bulk run starts, the caps are inspected, and the order is packed for shipment. The delay usually happens before sewing begins. Clear files and quick proof responses save more time than trying to rush the machine schedule later.
Mockups are useful, but they do not tell the whole story. They show scale, placement, and general color intent. They do not show how thin letters behave, how tight curves sew out, or whether a detailed icon becomes too dense once thread fills the shape. That is why a stitched sample matters for logos with small type or fine internal detail. Coffee roaster branding often leans on compact marks, bean icons, and line art, which are exactly the kinds of elements that need checking before a bulk run.
A realistic timeline for a standard order often looks like this:
- Day 1-2: artwork review and clarification.
- Day 2-4: digitizing and mockup approval.
- Day 4-6: sewout or sample confirmation, if required.
- Day 7-15: bulk production, depending on order size and decoration complexity.
- Day 2-5 after production: packing and transit, depending on destination.
That puts many mid-size orders in the 12-18 business day range after proof approval. More detailed artwork, larger quantities, or extra packaging steps can stretch that out. The buyer should share the deadline early, especially if the caps are tied to a store launch, wholesale send-out, or event calendar. Once the date is known, the vendor can decide whether the project fits a standard slot or needs faster handling.
A common failure point: the mockup gets approved quickly, then the first sewout reveals that the logo is too small or the lettering is too dense. That is not unusual. It just has to be planned for. A minor stitch adjustment is normal; a late redesign after production starts can add several days and distort the cost structure.
What Makes Caps Work for Roaster Merch Programs
For a roaster, a cap is a small product with a surprisingly large branding job. It may be worn by staff, sold at retail, photographed for social posts, or packed into wholesale shipments. That means consistency matters more than novelty. The best merch programs usually stay boring in the right places: the blank is repeatable, the logo is legible, the color match holds, and the reorder looks like the original order instead of a close cousin.
Three qualities determine whether the cap behaves like real merchandise or just another giveaway. First, the cap has to wear well. Second, it has to hold shape after handling and transit. Third, it has to be easy to reorder without redesigning half the piece. If any one of those fails, the program gets more expensive over time because the buyer spends energy correcting issues instead of simply restocking a proven item.
Packaging contributes to the perceived value. Individual polybags are fine for distribution, but a branded belly band or clear case marking can improve both presentation and warehouse handling. For multi-location operations, carton labels and consistent case counts matter more than most people expect. They reduce receiving time and make it easier for staff to reconcile inventory. That kind of operational detail does not show up in a product photo, but it does show up in the day-to-day workload.
There is also a brand logic issue. Coffee businesses often care deeply about origin, roast process, and sensory detail. The merchandise should not fight that identity by looking overworked. A restrained cap with a well-placed logo usually feels more credible than a crowded design trying to explain the whole brand at once. The best cap is not loud; it is precise.
A useful roaster cap is one people keep reaching for: wearable, readable, and easy to reorder without a new round of guesswork.
What to Send for a Clean Quote and Faster Approval
The easiest quote to price is the one that already answers the questions that affect the bill. For a coffee roaster embroidered baseball caps Unit Cost Review, that means the logo file, quantity, cap style, color, decoration size, packaging need, and deadline. If any of those are missing, the estimate usually comes back with assumptions. Assumptions are fine for early discussion, but they are not good enough for budget planning.
It also helps to say how the caps will be used. Staff wear, retail sales, and event handouts each push the spec in different directions. Staff use can favor comfort and durability. Retail use puts more weight on presentation and repeatability. Event giveaways often need the lowest workable unit cost and a design that will sew efficiently. A quote that ignores the end use may still be accurate technically, but it can miss the real buying target.
A clean order flow looks like this:
- Send the logo in vector format if possible.
- Confirm cap body, closure, and crown profile.
- Choose embroidery size and placement.
- State the exact quantity by color.
- Share the delivery date and shipping location.
- Review the proof promptly so production can start on time.
Comparisons only work if the specs match. A lower quote on a smaller logo or a thinner cap body is not the same product. If the goal is to compare true unit cost, ask every supplier to quote the same construction, same embroidery size, and same packaging expectation. That keeps the decision grounded in real numbers rather than in price lines that only look similar.
Once the spec is fixed, the order becomes much easier to judge: the blank is known, the decoration is known, the setup cost is known, and the delivery window is visible. That is the point where the purchase becomes practical instead of speculative.
How do I estimate the unit cost for coffee roaster embroidered baseball caps?
Start with quantity, then add embroidery complexity, cap construction, and setup work. A simple front logo is usually the most efficient option, while detailed artwork with more stitches or extra thread changes costs more. Larger runs lower the per-cap burden of digitizing and proofing, so the same design often looks much better at 500 pieces than at 100.
What cap style works best for coffee roaster embroidered baseball caps?
Structured cotton twill is a dependable default because it supports the front panel and keeps the logo looking clean. If the brand wants a softer or more casual feel, brushed cotton or an unstructured body can work. Snapback and strapback closures are usually the most flexible for staff, retail, and mixed-size orders.
What details affect coffee roaster embroidered baseball caps pricing the most?
Stitch count, logo size, thread color count, and the blank cap body tend to move pricing the most. Quantity matters because setup cost gets spread across more units. Packaging and special labeling can add to the total as well, especially for retail-ready orders.
How long does production usually take for embroidered baseball caps?
Many orders fall into a 12-18 business day window after proof approval, though larger or more detailed jobs can take longer. Artwork readiness and response time are usually more important than the sewing stage itself. If a deadline matters, it should be shared before the proof is approved.
What should I send to get a fast quote for coffee roaster caps?
Send the artwork, quantity, cap style, decoration placement, packaging needs, and deadline. If possible, include the intended use so the quote matches the job. The more specific the request, the easier it is to compare true unit cost rather than quotes built on different assumptions.