A strong Ecommerce Embroidered Beanies physical sample checklist is the fastest way to catch problems a proof file will never reveal. Embroidery that looks crisp on a screen can sink into a knit, a logo can sit too low on the cuff, and thread color can drift once it leaves the monitor and hits actual yarn. Those gaps are small on paper. They are not small in a product listing or a customer’s hand.
For ecommerce teams, the sample is the bridge between artwork and a sellable item. It gives merchandisers, operations, and brand owners one physical reference for fit, placement, color, and finish. That matters more with beanies than with many other accessories because knit gauge, cuff depth, and stitch density all affect the final look. A beanie is soft, stretchy, and slightly unforgiving. The decoration has to work with the fabric, not against it.
If the sample looks clean flat but wrong on a head, it is not approved.
That sounds obvious. It is still where a lot of orders go sideways. A careful approval process protects margin, reduces returns, and saves the awkward email chain that starts with, “This is close, but not quite what we signed off on.”
Why the ecommerce embroidered beanies physical sample checklist matters
Beanies seem simple until embroidery enters the picture. The surface behaves like a spring. Pull it open and the stitches spread. Fold the cuff and the logo moves. Use too much density and the knit puckers. Use too little and the mark looks thin or unfinished. That is why a physical sample matters: it shows how the materials actually behave together, not how they look in isolation.
Digital proofs still have a job. They confirm artwork size, layout, spelling, and color callouts. They do not tell you whether a six-letter logo reads cleanly at 2.5 inches wide, whether a thicker yarn changes the balance of the decoration, or whether a dark thread becomes more reflective than expected. The sample catches those problems while there is still time to fix them without burning through a full production run.
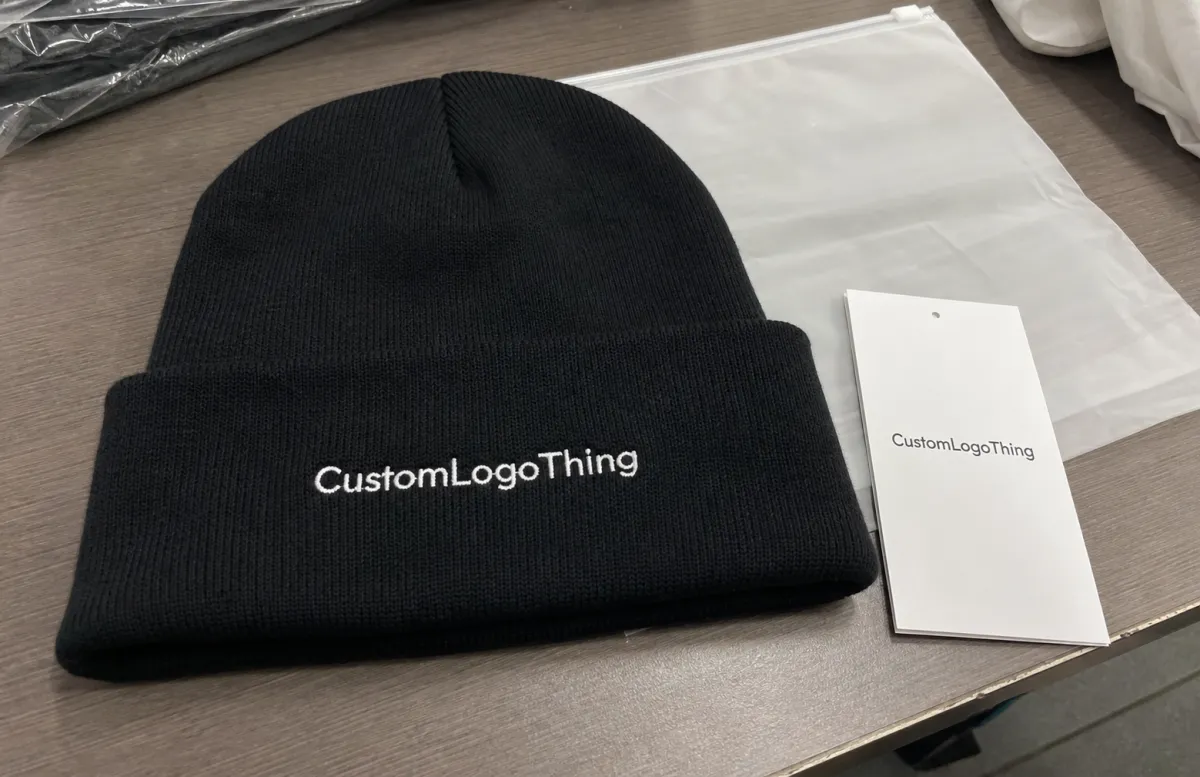
In practice, the approved sample becomes the control piece for the whole order. The buyer can point to it and say, “Match this.” That gives the factory a real target instead of a vague direction. If the sample is approved at 68 mm wide, placed 18 mm above the cuff edge, and centered on the front panel, the brief is no longer subjective. It is measurable.
That level of precision is useful for online retail because product photography magnifies flaws. A beanie that looks almost right in a warehouse can look obviously off in a close-up image or on a customer who folds the cuff differently. The checklist is not bureaucracy for its own sake. It is damage control before the goods are packed.
Sampling process and timeline from artwork to approval
The process usually starts with final artwork, not a rough idea. The supplier or decorator turns the logo into a stitch file, often called digitizing. That file controls stitch direction, density, underlay, pull compensation, and the way the needle path handles sharp corners or small letters. If the logo has fine type, multiple colors, or a filled shape, the digitizer may need to revise the file before a sample is made.
After digitizing, the order moves through thread matching, blank selection, stitching, inspection, and shipment. A simple one-color logo on an in-stock blank can move through in 5 to 10 business days. A more detailed mark with multiple thread changes, special placement, or revision rounds can take 10 to 15 business days or longer. Shipping adds another layer. Internal review does too, especially if product, marketing, and operations all need to sign off.
The timeline is not just about labor. A beanie in the wrong yarn blend or cuff depth can change the whole result even if the artwork is perfect. A thread swatch that looks close in the factory can still read differently in daylight. The sample is the place to settle those variables before they become production defects.
There is also a packaging side to this. If the beanies will ship through a warehouse or retail backroom, the sample should reflect the final pack-out as closely as possible. Carton size, folding method, polybag choice, and label placement can all affect how the piece arrives. Standards from groups such as ISTA are useful if the order will face transit abuse, not just shelf display.
Cost, pricing, MOQ, and sample fees to budget for
Sample pricing is usually setup-heavy. A basic embroidered beanie sample may run $20 to $60 for a straightforward design. Add extra digitizing, special yarn, a second revision, or premium blank stock, and the number climbs. A pre-production sample that includes the final label, fold, and packaging details can land closer to $40 to $120 depending on what is being locked down.
Bulk pricing behaves differently. Once the setup cost is spread across a larger run, the unit price usually drops. That is why MOQ matters. Some suppliers will make one approval sample with no commitment to production. Others want a minimum run, often 50 to 300 pieces, because one-off setup can eat up too much labor. Neither model is unusual. The key is knowing which one you are entering before anyone starts revising artwork.
| Sample option | Typical cost range | What it proves | Best use |
|---|---|---|---|
| Digital proof only | $0-$25 | Artwork size, layout, and color callouts | Early concept review |
| Basic stitched sample | $20-$60 | Logo size, placement, stitch behavior, thread color | Standard approval step |
| Pre-production sample | $40-$120 | Final blank, trim, label, packaging, and decoration | Final sign-off before bulk |
| Re-sample after changes | $25-$80 | Corrected artwork or revised placement | When the first sample misses the target |
Watch the hidden costs. Air shipping for a small sample box can be more than the sample itself. Rush fees appear when the calendar is tight. If the first sample is close but not right, a second round can add both money and delay. The cleanest way to control that is to define the approval standard before the first stitch is made. That means specifying whether digitizing is included, credited later, or billed separately.
If the project uses hangtags, swing tickets, or insert cards, check whether the paper stock matches the brand brief. FSC-certified stock matters for some programs. So does print quality, fold consistency, and the actual finish of the card. These details are small until the goods hit a fulfillment center and someone spots the mismatch in a stack of boxes.
Fit, stitch quality, and decoration details to verify
Fit comes first. Put the beanie on a real head or a proper headform, not just a flat table. Look at crown depth, cuff height, stretch recovery, and how the logo sits when the fabric is relaxed versus worn. A design that appears centered when flat can drift once the knit opens up. That is normal. It is also the reason flat approvals are weak.
Then inspect the embroidery under bright, neutral light. The stitches should be clean, even, and free of loose tails. Puckering around the logo means the density is too heavy for the knit, the stabilizer is off, or the stitch path needs adjustment. Very light coverage can be just as bad because the logo starts to look unfinished. The right answer is not always “more stitches.” It is the right stitch plan for that specific fabric.
Thread color deserves a real check, not a casual glance. Screen color is a poor reference for production. A navy thread can feel brighter in hand. Black-on-black can disappear unless the stitch angle gives enough contrast. If the thread sample is close but not exact, ask for the difference in writing. “Approved against Pantone 296C equivalent” is more useful than “looks fine.”
It also helps to review the piece from multiple angles. Ecommerce photos are not shot from one fixed viewpoint. Check the beanie front-on, at a slight turn, folded as it will appear in listing photos, and worn in the way your customer is likely to wear it. If the logo only works in one ideal position, it is too fragile for online retail.
- Fit: crown depth, cuff depth, stretch recovery, and comfort.
- Decoration: logo width in millimeters, stitch density, clean edges, no puckering.
- Color: thread reference, yarn shade, and consistency under neutral light.
- Presentation: fold direction, label placement, and how the logo photographs.
Step-by-step approval flow before bulk production
The cleanest approvals start with a written spec sheet. Lock the artwork file, logo size in millimeters, placement from seam or cuff edge, thread colors, label requirements, folding instructions, and packaging notes. If the design needs a certain order of operations, such as embroidery before label application or a specific fold for packing, write that down too. Do not leave it to memory. Memory is where production briefs go to die.
- Submit final artwork: send the exact file version, not a draft or screenshot.
- Confirm the spec sheet: lock measurements, placement, thread colors, and packaging details.
- Review the stitched sample: inspect it on a headform or real head under consistent light.
- Mark corrections clearly: separate cosmetic feedback from actual production changes.
- Issue written approval: name the approved sample, date, and owner of record.
That last step matters more than it looks. A verbal “looks good” can turn into a dispute if the factory follows an older file or a different placement note. A dated approval with sample photos gives everyone the same reference. It is boring. It is also how projects avoid avoidable arguments later.
If the order includes printed cartons, inserts, or mailer bags, those should be part of the approval packet too. A beanie can be technically correct and still fail the launch if the packaging arrives with the wrong insert copy or the wrong fold that crushes the decoration. The sample is not just about the hat. It is about the customer’s first look at the product.
Common mistakes that create delays, rework, or shade mismatch
The biggest mistake is approving from mockups alone. A mockup cannot show stitch pull, knit distortion, thread sheen, or the way a logo changes on a curved surface. Another common miss is skipping stretch testing. A mark that looks dead center when flat may slide once the cuff is pulled down. On a beanie, that is not a tiny variation. It is a defect.
Vague feedback creates its own mess. Notes like “make it pop more” or “make the logo smaller” leave too much room for interpretation. Better notes are measurable: move the logo 6 mm higher, reduce the width from 72 mm to 66 mm, or switch to the approved Pantone alternative if the exact thread is unavailable. Clear language saves time. Fuzzy language creates resamples.
Timing is another trap. Even a good sample can stall if nobody built in review time, weekend transit, or a resample window. Ecommerce launches are tied to photoshoots, inventory booking, and storefront setup. A two-day delay on the sample can turn into a week of pressure if the rest of the schedule is already tight. The fix is simple, just not glamorous: schedule more realistically.
Common mistakes I see over and over:
- Approving a sample without checking it on a headform or real head.
- Ignoring the difference between flat appearance and worn appearance.
- Giving subjective notes instead of measured corrections.
- Overlooking thread shade under neutral lighting.
- Forgetting to confirm packaging, labels, and fold direction.
Once those mistakes land in bulk production, rework gets expensive fast. The factory may need to unpick embroidery, re-digitize the file, or remake the sample entirely. The ecommerce embroidered Beanies Physical Sample Checklist should be treated as a control document, not a polite suggestion.
Expert tips and next steps for a clean production handoff
If the goal is a smooth handoff, ask for one production-intent sample that matches the final yarn, thread, label, and packaging setup as closely as possible. A sample that is merely “close enough” can hide differences that become obvious in bulk. That risk climbs with melange yarns, rib knits, darker thread colors, and small logos where even a slight shift reads badly.
Keep the approval packet simple but complete. A clean folder usually holds the final artwork, the spec sheet, close-up photos of the sample, a flat lay, a worn photo, measurement notes, and a dated approval message. If someone later asks whether the logo was supposed to sit 12 mm or 18 mm from the seam, the answer should already be sitting in that folder.
Ask whether the supplier can hold the same blank beanie lot for production. Yarn lots can shift slightly. That does not always create a visible issue, but consistency is easier when the sample and the bulk run come from the same material source. Small lot changes are exactly the kind of thing that sounds harmless and ends up explaining a color mismatch nobody can unsee.
If the brand has sustainability claims, verify paper inserts, carton stock, and shipping cartons against FSC requirements if those claims matter to the program. The decoration and the presentation should be approved together because that is how the product reaches the customer. Splitting those decisions creates room for surprises.
That is the real value of the checklist. It turns a loose, subjective approval into a documented decision with a physical reference attached. That is how ecommerce beanie orders move from “looks okay on screen” to “ready for production without drama.”
What should I check on an ecommerce embroidered beanies physical sample?
Check fit, cuff depth, logo placement, stitch density, and thread color under consistent light. Look at the piece stretched, folded, and worn, not just flat on a table. Compare it against the approved spec sheet so any mismatch is caught before bulk production.
How long does a custom embroidered beanie sample usually take?
Simple samples often take 5 to 10 business days, while more complex designs can take 10 to 15 business days or longer. Digitizing, blank stock, revision rounds, and shipping all affect the schedule. If the launch date is fixed, leave room for one correction cycle.
How does sample pricing affect ecommerce beanies ordering?
Sample pricing usually covers setup, digitizing, and one-off labor. Final unit cost is normally lower because those costs are spread across the full order. Ask whether the sample fee is credited back on production, since policies vary by supplier.
Can I approve embroidered beanies without a physical sample?
You can, but the risk of surprises goes up fast. Placement, scale, stitch behavior, and thread sheen are easier to judge in hand. If a sample is not possible, ask for detailed photos, exact measurements, and a written production reference before release.
What documents should go with a beanie sample approval?
Send the final artwork file, spec sheet, thread references, packaging instructions, and measurement notes. Include a dated approval message or signed sample sheet so the production team has a clear record. Keep the approved sample photos with the order file for comparison during production.


