Coffee Roaster Stand Up Pouches Print Proof Checklist sounds tidy on paper. In production, it separates a pouch that earns shelf trust from one that quietly invites reprints, complaints, and scrap. A roast-date panel shifted by 3 mm, a barcode that loses contrast on film, or a flavor note trapped under a fold can all survive a rushed review. Those are the mistakes that hurt most because they never needed to happen.
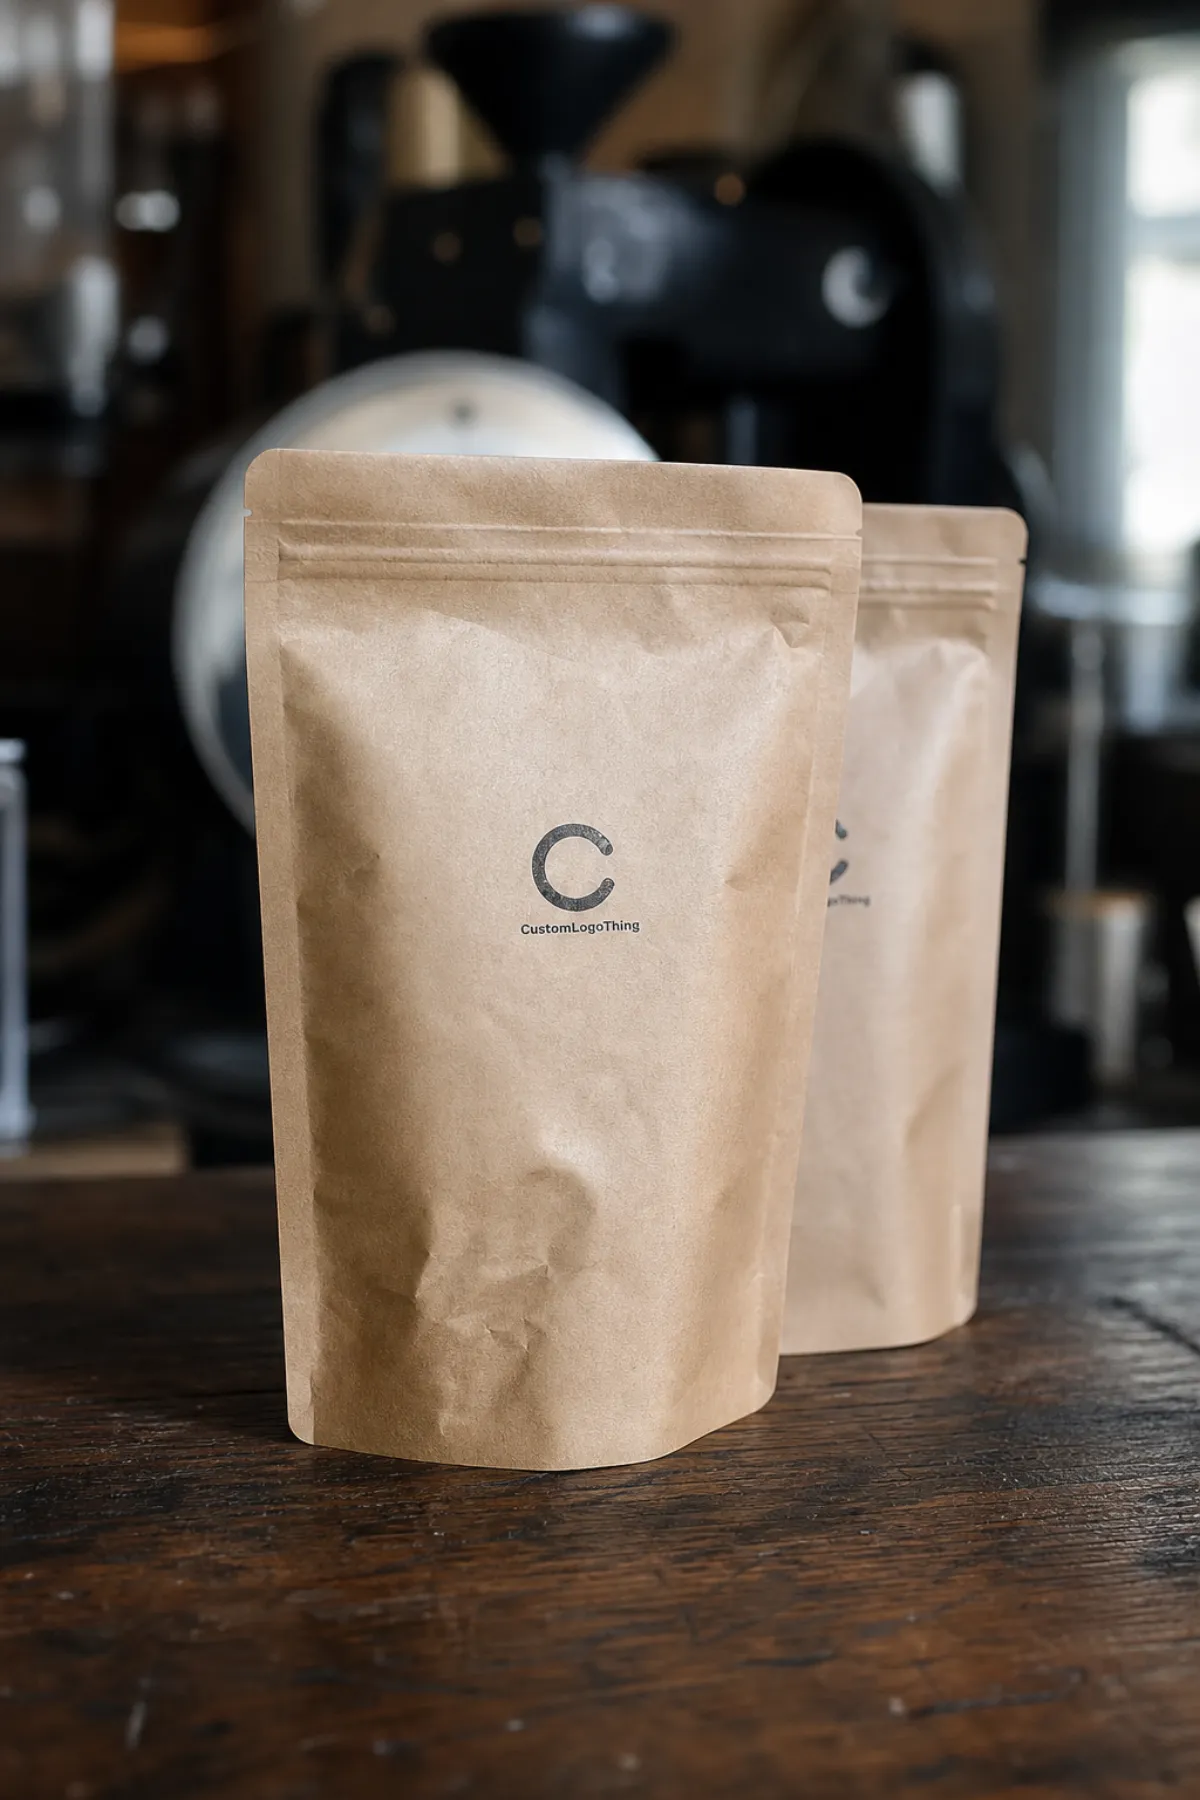
Coffee sold in Stand Up Pouches lives at the intersection of branding and machinery. The proof is not a decorative preview. It is the last checkpoint before print, lamination, converting, and filling are set in motion, which is why the coffee roaster stand up pouches Print Proof Checklist has to catch design errors and production errors at the same time. That is a different job from approving a brochure or a label sheet. A pouch carries gussets, seals, a zipper, and often a degassing valve, so the art has to look balanced and still survive the way the package is built.
From a buyer's seat, the stakes are plain. Coffee shoppers read story and utility in the same glance: origin, roast level, net weight, tasting notes, freshness claims, and sustainability language all compete for attention. A strong coffee roaster stand up pouches Print Proof Checklist keeps those details aligned, legible, and placed where the pouch shape can actually support them.
The point of this article is simple. You will see what the proof can show, what it cannot show, which details deserve the closest inspection, and how to approve with confidence instead of guesswork. Once ink, film, and laminate are committed, every correction gets slower and more expensive.
Coffee roaster stand up pouches print proof checklist: why one missed detail costs the most
The biggest proof failures are usually small. A roast-date box drifts a few millimeters. A flavor note sits too close to a seam. A barcode looks sharp on a monitor and weak on film. The coffee roaster stand up pouches print proof checklist exists because those little misses are the ones that slip through internal review when everyone is looking at the headline and not the build.
Coffee pouches have a second layer of pressure that flat packaging does not. They have to sell and perform at the same time. A roaster wants the pouch to feel premium, but the converter still has to place seals, cut a zipper, position the valve, and leave room for fill and purge. The artwork is only one part of the system. The proof has to confirm that the design and the structure can live together without crowding each other out.
That is why a coffee roaster stand up pouches print proof checklist beats a casual visual approval. It forces the review to slow down and ask harder questions: Does the panel flow still make sense? Is the logo centered where the pouch shape allows it? Are the legal lines readable after the bottom gusset is formed? Is the quiet zone around the barcode actually quiet? Those checks save money because they catch trouble before materials are locked in.
A beautiful proof that ignores the seal zones is still a bad proof.
Stand up pouches make this more delicate. The gusset shifts the visual center. The zipper shrinks the usable top band. The valve or tear notch can interrupt a clean field of color. If the coffee roaster stand up pouches print proof checklist only checks the front panel, the project can still fail on the back panel, the side panels, or the closure area.
The proof is not the same thing as the final pouch. It is a controlled checkpoint, not a finished sample from the line. That means you are reviewing layout, copy, panel mapping, and color expectations, but not every effect of the final substrate, ink system, or finishing step. Knowing that limitation keeps the team honest and blocks false confidence.
Treat the coffee roaster stand up pouches print proof checklist like a gate. The file passes, or it does not. A version that feels close enough is still a risk if the artwork has unanswered questions about placement, compliance, or scan quality.
How the coffee roaster stand up pouches print proof checklist works
The proof usually arrives as a PDF, a color-managed render, or a production simulation that shows the dieline, folds, seal areas, zipper position, and valve location. A disciplined coffee roaster stand up pouches print proof checklist starts by comparing that proof against the approved artwork file. First job: confirm that the document in front of you is the one you meant to review. Version control sounds dull until the wrong revision gets approved and the production team follows the wrong instructions.
The review should move in layers. Start with dimensions and panel orientation. Move to copy placement, barcode placement, legal lines, and image crop. Then inspect manufacturing constraints: seal-safe zones, bleed, fold behavior, zipper clearance, and whether the valve area collides with any critical art. That sequence keeps the reviewer from bouncing between logo, nutrition panel, and back copy while a structural flaw sits unnoticed in the middle.
The proof also needs to be read in the context of the print method. A pouch produced with digital printing may show color differently from one produced with flexographic printing, especially when the artwork uses dense solids or fine type. A file built in CMYK does not guarantee the final pouch will match a desktop screen or a marketing mockup. Rich blacks, metallic accents, and certain spot color choices change once they are laid onto film and paired with matte or gloss print finishing.
That is where experience shows. People used to sheet-fed offset printing often expect a pouch proof to behave like a brochure proof. It does not. Flexible packaging adds more variables: substrate stretch, seal overlap, zipper placement, valve punch-outs, and in some builds, white ink under layers that change opacity. A sound coffee roaster stand up pouches print proof checklist keeps those variables visible instead of pretending they do not matter.
| Proof format | What it shows well | Best use | Limitation | Typical timing |
|---|---|---|---|---|
| Digital PDF proof | Layout, copy, dieline, panel order, barcode position | Early review and fast corrections | Color is only an approximation | 1-2 business days |
| Color-managed render | Better visual sense of CMYK and spot color relationships | Brand and marketing approval | Still not a printed substrate match | 1-3 business days |
| Physical comp or sample | Feel, size, zipper behavior, finish, panel balance | Final confidence before production | Can cost more and take longer | 3-7 business days or more |
A physical comp has one advantage a screen never can: it shows scale with no excuses. A barcode that looks roomy on a monitor can feel cramped at actual size. A flavor description may read cleanly in a PDF and still sit too close to the gusset when folded. The coffee roaster stand up pouches print proof checklist works best when the review mixes screen-based thinking with real-size thinking.
For packaging process standards and transit durability, the industry resources at ISTA are worth keeping nearby. That matters when the pouches will move through shippers, club boxes, or ecommerce kits, because good pouch graphics still have to survive a rougher chain of handling than most people imagine.
The cleanest approvals also leave a paper trail. One final approver should be named. Corrections should be tracked by version. The approved file should live in a shared place where sales, operations, and production are all looking at the same document. That sounds basic, and it is. The coffee roaster stand up pouches print proof checklist gets more reliable once the process itself stops drifting.
Key details to verify before approving the proof
The first pass belongs to the front panel because that is what the customer sees in the first two seconds. Brand name, roast level, origin, tasting notes, net weight, and claim language need to read clearly at a glance. A good coffee roaster stand up pouches print proof checklist checks hierarchy before decoration. If the front panel does not tell the shopper what the coffee is, artwork will not rescue it.
Next, inspect the functional details that get missed in a hurried review. Barcode placement needs a clean quiet zone and enough contrast. The roast-date or lot-code area needs a clear blank field or overprint-safe zone. The valve location should stay away from important copy, and the zipper line should not cut through a headline or a certification mark. Those are the details that turn a polished design into a production-ready one.
Color deserves its own pass. Deep blacks can print beautifully, but they can also plug up if the file is built too heavy. Grain photography and latte imagery often need a careful balance so the highlights do not disappear. If the design uses metallic accents, ask how those areas will be reproduced and whether the effect is a true metallic layer, a metallic ink simulation, or a color build that merely hints at shine. A good coffee roaster stand up pouches print proof checklist makes those expectations explicit instead of leaving them vague.
Review the artwork as a pouch, not as a flat poster. Seal bleed, bottom gusset behavior, and top zipper clearance all change where the eye lands. A logo that feels centered on a flat PDF may sit too high once the pouch is formed, while a small type block can disappear into a fold. Real pouch approvals live in those details.
For paper-based pack styles or cartons tied to the same coffee line, sustainability language should match the source material and any certification claims. If your brand uses FSC-backed paper components, the reference point at FSC helps keep the claim language clean and defensible. Even if the stand up pouch itself is a flexible film structure, consistency across the brand family matters.
Copy accuracy is the final non-negotiable. This is where the coffee roaster stand up pouches print proof checklist saves the most pain because line edits are cheap before print and painful after. Verify spellings, punctuation, origin names, roast descriptions, and any regulatory lines. Check ounces or grams, and make sure the unit of measure matches the target market. A one-ounce mismatch sounds tiny until customers start asking questions or a run needs to be reworked.
Some teams like to review the pouch with a simple three-part lens:
- Brand: does the front of pack tell the right story in one glance?
- Compliance: are legal, barcode, and claim details readable and complete?
- Production: do seal zones, valves, zippers, and folds leave enough safe space?
That three-part method keeps the review from tilting too far toward one department. It stops a designer from polishing the front while the back panel still has a sizing issue, and it stops an operations lead from focusing only on fillability while the brand language is still undercooked. A practical coffee roaster stand up pouches print proof checklist should hold both views at once.
Process and timeline: moving the proof from file to approval
The cleanest proof process begins before the proof is requested. Final copy, barcode files, dieline choice, size, zipper style, valve placement, and finish selection should all be ready before the artwork is sent. A coffee roaster stand up pouches print proof checklist cannot rescue a file that still lacks core inputs, and every missing asset adds another trip through the schedule.
In a typical workflow, the sequence looks like this: artwork submission, prepress check, proof delivery, internal review, revision if needed, final approval, then plate or cylinder production and full run scheduling. The proof stage is not the same as the production stage, and buyers sometimes blur those two together. A fast proof response does not mean the bags will be on the dock the next morning. It means the artwork has cleared the first gate.
Delays tend to cluster in a few places. Marketing wants one more line of copy. Operations notices a fill-weight change. Ownership wants a different roast-description hierarchy. Legal asks for a claim adjustment. None of those changes are unusual, but each one adds time if the team waits until the proof arrives. That is why the coffee roaster stand up pouches print proof checklist works best when paired with an internal approval plan before the proof is sent.
For timing, a useful rule of thumb is that proof turnaround may take 1-3 business days for a clean digital review, while full pouch production often takes 10-15 business days after final approval. Specialty finishes, windows, foil, or more complex conversion can add more time. If the artwork needs multiple revision cycles, the clock stretches fast. Buyers who treat the proof as a deadline instead of a checkpoint usually pay for that mistake later.
One thing many teams underestimate: a proof review can be fast only when the inputs were clean. If the file still needs color corrections, if the barcode has not been finalized, or if the claim language is still in legal review, the proof stage becomes a waiting room. A disciplined coffee roaster stand up pouches print proof checklist keeps preflight work inside the team instead of pushing it into the production queue.
Internal structure helps. One person can own branding, another can own compliance, and a third can own technical print details. That split is especially useful for roasters with both marketing and operations involved in the same package decision. Everyone does not need to review everything. They do need to review the right things.
Consolidated approvals make the process cleaner almost immediately. Scattered emails, chat messages, and phone calls asking for different edits can create confusion about which comments are final. A strong coffee roaster stand up pouches print proof checklist works best when one version is marked up, one person signs it, and the decision is stored with the file.
Cost and pricing: what the proof stage changes in your quote
The proof may be included in the project quote, folded into setup, or priced as part of the overall packaging development workflow. What changes the budget is usually not the first proof. It is the number of revisions, the complexity of the artwork, and whether the project keeps moving after prepress work has already started. A smart coffee roaster stand up pouches print proof checklist helps hold that line because every change after proofing adds labor somewhere.
For flexible packaging quotes, several factors shape the final price: pouch size, material structure, print method, number of colors, finish, zipper style, valve placement, and total quantity. A simpler pouch with straightforward front and back art may sit in a lower range, while a pouch with full-coverage art, matte lamination, a one-way valve, and specialty effects will cost more. For a 5,000-piece order, it is not unusual to see unit pricing move from the low twenty-cent range into the forty-cent range or higher depending on the structure and print coverage. That is not a warning sign. It is how complexity behaves.
The proof stage changes quote clarity in another way: it reveals how much work the art actually needs. A design built around a few spot color fields may be simpler to prepare than a file full of delicate gradients, black-heavy bean photography, and layered white underprint. A roaster choosing between digital printing and flexographic printing may also see different setup patterns depending on color count and run length. The coffee roaster stand up pouches print proof checklist helps everyone speak the same language about what is simple, what is risky, and what is costly.
Separate direct production cost from administrative friction. If the internal team approves one version cleanly, there is little extra expense. If three departments send separate changes, the proof has to be revisited, and that can create delay charges or schedule impact even when per-piece pricing does not move much. The cheapest proof is usually the one reviewed carefully the first time.
Below is a practical way buyers often compare options during the proof stage:
| Option | Best for | Typical cost effect | Risk level |
|---|---|---|---|
| Single clean proof round | Final artwork with complete copy | Lowest added cost | Low |
| Two proof rounds | Projects with claim edits or internal approvals | Moderate added time, sometimes small admin cost | Medium |
| Multiple revision rounds | Still-changing copy or design direction | Higher labor, slower launch | High |
| Physical comp before release | Premium brands, new structures, first run launch | Higher upfront spend, lower downstream risk | Low after approval |
For buyers comparing suppliers, ask for a quote that separates proofing, setup, printing, conversion, and freight. That simple request makes the budget easier to read and also exposes the real cost drivers. A disciplined coffee roaster stand up pouches print proof checklist is not only a quality tool; it is a budget control tool.
One grounded observation matters on repeat orders. If you are ordering the same pouch again, the proof may be nearly identical to the last approved version, and that should work in your favor. Keep the last approved file, note the finish, note the valve spec, and compare the new proof against the old one line by line. Reorders get expensive when teams rely on memory instead of documentation.
Coffee roaster stand up pouches print proof checklist mistakes to avoid
The first mistake is approving color by instinct alone. Coffee packaging sits close to taste perception, so color carries meaning. A bag that should feel rich and premium can look muddy if the blacks are wrong, and a lighter origin profile can look thin if the contrast is weak. The coffee roaster stand up pouches print proof checklist should always include a careful look at color balance, not just a quick nod that says the file feels close.
The second mistake is checking only the front panel. The front matters, but the back panel, side gussets, and bottom seal can hold some of the most important technical content. That includes origin notes, brewing guidance, recycling marks, and lot-code space. A pouch can look polished from the shelf side and still fail if the gusset text sits too close to a fold or the back panel has a misaligned code box. A complete coffee roaster stand up pouches print proof checklist treats every panel as part of the package.
The third mistake is skipping barcode testing. A barcode that looks clean on a proof can still scan badly if the bars are too tight, the quiet zone is too small, or the contrast is weak against a dark background. That is one of those errors that is easy to prevent and annoying to fix. If your roaster sells through retail or club reorders, barcode reliability is not optional.
The fourth mistake is leaving regulatory copy until the last minute. Ingredient statements, origin claims, USDA-style or recycling marks, and weight declarations should be checked before the proof is signed. The same goes for coffee certifications or sustainability claims that need to match the actual structure. The proof is the point where those details should be locked, not discovered.
The fifth mistake is approving the wrong revision. This happens more often than teams admit. One person sees version 3, another sees version 4, and the approval note gets attached to the wrong file name. The fix is simple and strict: every proof approval should reference a version number and date, and the file should be stored in one shared place. The coffee roaster stand up pouches print proof checklist works best when the version trail is as clear as the design.
There are a few quieter traps worth naming:
- Too little white space: crowded copy becomes unreadable once the pouch is formed.
- Overconfident mockups: renderings can hide fold and seal conflicts.
- Unclear finish choices: matte, gloss, and soft-touch all change how color reads.
- Last-minute flavor changes: a small copy edit can alter hierarchy across the whole layout.
That is why the proof review should feel disciplined, not rushed. A roaster can love the creative direction and still make one of the mistakes above if the review is done with a "good enough" mindset. The best coffee roaster stand up pouches print proof checklist pushes the team to look twice where the real risk lives.
Expert tips and next steps for a cleaner final approval
One of the simplest ways to improve proof approvals is to assign roles before the file arrives. Have one person check the brand story, one person check compliance and claims, and one person check the technical print details. That avoids the common situation where everybody comments on the logo but nobody notices the zipper clearance. A coffee roaster stand up pouches print proof checklist becomes far more effective once each reviewer has a lane.
Printing the proof at actual size is another strong habit. Tiny type, barcode placement, and seal margins are much easier to judge on paper than on a zoomed screen. Even if the digital review is the first pass, a physical printout gives the team a sense of proportion that saves headaches later. That matters most for premium coffee bags, where a narrow top band or an ambitious wraparound design can create real visual pressure on the pouch.
Keep a running checklist for repeat orders. The last approved pouch tells you a lot about what should stay the same: valve position, zipper style, finish, panel order, and the exact wording that worked the first time. Reorders move faster when the team compares the new proof against the prior approved version instead of starting from memory. A well-kept coffee roaster stand up pouches print proof checklist shortens every future review because it preserves what already worked.
Another practical habit is to send one consolidated approval note. Separate emails, screenshots, and chat messages can confuse the prepress team fast. If the comment set is final, put it in one place and make sure the person sending it has authority to sign off. That keeps the trail clean and avoids the "I thought someone else approved it" problem that shows up in too many package launches.
For new structures, first runs, or premium retail programs, ask for a physical comp before final release. It adds cost and time, but the tradeoff can be right if the pouch uses a special finish, a new zipper type, or a more complicated panel layout. The extra sample can reveal issues the screen never would, especially if the brand plans a larger launch across several SKUs.
As a final habit, compare every revision against the coffee roaster stand up pouches print proof checklist, confirm the final version in writing, and keep that approval with the job ticket. That one routine protects the artwork, the schedule, and the budget at the same time. It also gives everyone on the project the same answer when a question comes up later: this is the approved file, this is the approved proof, and this is the version that moves into production.
What should I check in a coffee roaster stand up pouches print proof checklist first?
Start with the front panel so you can confirm branding, roast level, net weight, and tasting notes are easy to read. Then move to barcode placement, legal copy, valve clearance, and seal-safe zones before you spend time on decorative effects or finish details. The fastest way to miss a problem is to start with the shiny parts instead of the functional ones.
How many proof revisions are normal for coffee roaster stand up pouches?
One clean round is common when the artwork is final and all technical details were supplied up front. Two rounds are still normal if the team needs to adjust claims, copy, or compliance language. More than that usually means the artwork is still changing, which slows the schedule and adds friction for production.
Will the proof show the exact final color on coffee pouches?
A proof can show a close color-managed preview, but it may not match the final pouch exactly because substrates and inks behave differently. Matte, gloss, soft-touch, foil, and film finishes all change how color reads on shelf. If brand color is critical, ask how the printer handles color expectations and whether a physical sample is available.
What slows down the coffee roaster stand up pouches print proof checklist process?
Missing copy, unfinished artwork, and unlabeled file versions are some of the most common delays. Internal approvals can also slow things down when marketing, operations, and ownership review the proof separately. Complex packaging features such as foil, specialty lamination, or multi-panel wraps usually require more careful review.
What should I have ready before requesting a proof for coffee roaster pouches?
Have final text, barcode files, dieline selection, and brand colors ready before the proof request goes in. Confirm finish choices, pouch size, zipper style, and any valve or tear-notch requirements. It also helps to name one approval owner so the revision process stays organized and the coffee roaster stand up pouches print proof checklist can do its job without confusion.
Used well, the coffee roaster stand up pouches print proof checklist catches the small errors before they become expensive ones, and that is the kind of discipline that keeps a coffee line looking sharp, scanning properly, and moving into production with far less risk.


