Buyer Fit Snapshot
| Best fit | Custom Beverage Packaging projects where brand print, material claims, artwork control, MOQ, and repeat-order consistency need to be specified before quoting. |
|---|---|
| Quote inputs | Share finished size, material target, print colors, finish, packing count, annual reorder estimate, ship-to region, and any compliance wording. |
| Proofing check | Approve dieline scale, logo placement, barcode or warning zones, color tolerance, closure strength, and carton packing before bulk production. |
| Main risk | Vague material claims, crowded artwork, missing packing details, or unclear freight terms can make a low unit price expensive after revisions. |
Fast answer: Custom Beverage Packaging: What It Is and How It Works should be specified like a repeatable production item. The safest quote records material, print method, finish, artwork proof, packing count, and reorder notes in one written spec.
Production checks before approval
Compare the actual filled-product size with the drawing, then confirm tolerance on folds, seals, hang holes, label areas, and retail display edges. Reserve space for logos, QR codes, warning copy, and material claims before decorative graphics fill the panel.
Quote comparison points
Review material grade, print process, finish, sampling route, tooling charges, carton quantity, and freight assumptions side by side. A quote is only useful when the supplier can repeat the same color, closure quality, and packing count on the next order.
Custom Beverage Packaging: What It Is and How It Works
I still remember the first time I saw Custom Beverage Packaging look immaculate under showroom LEDs at 4,000K and then fail inside a 38-degree cooler in Columbus, Ohio, within half an hour. The sample looked premium on the table, but the 24-oz label lifted at one corner, the varnish dulled under condensation, and the carton edge softened at the seam. That sort of failure is why I take custom beverage packaging seriously: if a package survives a pitch meeting but not a dock test, it is only pretending to work.
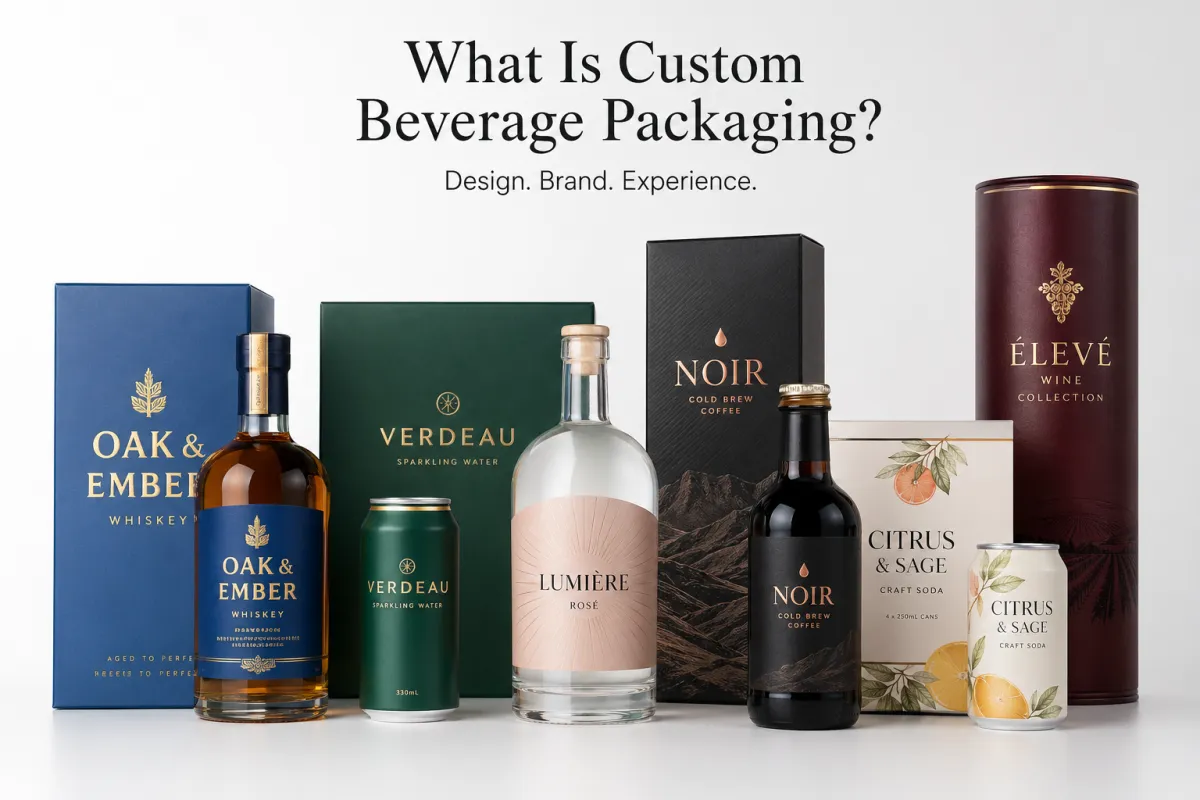
In plain production terms, Custom Beverage Packaging is the full outer system built around a drink product, not just the print on the front panel. It can include cartons, trays, six-pack carriers, shrink sleeves, pressure-sensitive labels, wraps, shipping cases, and pallet-ready secondary packs that move from a filler in Wisconsin to a retail cooler in Atlanta. A good package protects the liquid, keeps the line moving at 180 units per minute, and gives shoppers enough information to identify the product in under 3 seconds.
That matters whether you are launching a 12-ounce sparkling water can, a 500 mL cold brew bottle, or a 2-ounce functional shot in a folding carton. The structure has to fit the container, the print method has to fit the run size, and the shelf presentation has to survive a refrigerated supply chain that may include 2 days in transit and 14 days in storage. I have seen a case-count error of 8 units per pallet turn into a freight and labor headache on a 52-pallet order, and the math never gets friendlier once the warehouse starts calling.
I explain custom beverage packaging to clients as part protection, part production tool, and part sales force. It keeps the product intact, keeps the line moving, and tells the shopper what the drink is before the cap or tab ever comes into play. If you want a quick comparison of package types, our Custom Packaging Products page is a useful place to compare carriers, cartons, sleeves, and shipping cases side by side.
The focus here is practical: how custom beverage packaging works, what affects price, how long production takes, where projects break down, and what I have learned on factory floors in Wisconsin, Ontario, and Guangdong. The goal is not abstract theory; it is helping you make a better decision before a proof ever leaves prepress. I wish someone had explained it to me years ago, preferably before I sat through a reprint review with a warehouse team in New Jersey and a very expensive silence.
What Is Custom Beverage Packaging?
The short version is that custom beverage packaging is packaging created for a specific drink, a specific container, and a specific route to market. That may mean a 24-can printed tray for a local brewery, a shrink sleeve for a 12 oz glass bottle, a pressure-sensitive label for a 500 mL sports drink, or a corrugated shipper built to keep glass from cracking during a 600-mile truck route. The package is customized to the product and the supply chain, not selected from a generic shelf item.
I learned how unforgiving that can be while visiting a citrus beverage line in Riverside, California, where a brand wanted a matte paperboard carrier with an elegant soft-touch finish. The sample looked excellent in the conference room, but once the plant manager placed it near a washdown area, the edge coating softened after 6 minutes of mist and splash. That job taught me a blunt lesson: custom beverage packaging has to survive the room it lives in, not just the rendering software or the sales deck.
"It has to look premium in the store and still come off the line at 180 cartons a minute without fighting the machine." That was the line a co-packer supervisor gave me during a line trial in Milwaukee, Wisconsin, and he was right.
People sometimes treat packaging as decoration, but beverage work turns it into a control point. The right tray keeps cans upright through a 1.2-meter drop test, the right sleeve reduces print distortion on a curved surface, the right label stock resists moisture at 85% humidity, and the right secondary pack reduces breakage and labor. In other words, custom beverage packaging supports product integrity, retail presentation, and production efficiency at the same time, which is why good packaging design usually starts with the plant, not the mockup.
There is also a brand side to it. Shoppers read shape, color, finish, and copy almost instantly, so package branding has to do a lot of work in a small space. A matte white carton can suggest clean ingredients and calm, while a high-gloss metallic sleeve can imply energy and speed. I watched a cold-pressed juice brand improve unit movement after the team simplified the front panel and switched to a 35% coverage varnish, which made the shelf read clearer from 6 feet away in a Denver grocery aisle.
If you want a useful outside reference on packaging materials and market language, the resources at packaging.org are a solid starting point. I do not treat any site as the final word, but industry references help keep the discussion grounded when someone is arguing about board grade, barrier coating, or print finish. In beverage packaging, everybody has an opinion, and half of them come with a coffee stain and a strong feeling about 16pt versus 18pt board.
So when I say custom beverage packaging, I mean a system, not an ornament. It includes the printed surfaces people see, the protective layers they never notice, and the decisions that make a drink easier to fill, ship, stack, and sell. That broader view is the one that prevents expensive do-overs, especially on launches where the first production run is only 7,500 units and the retailer wants pallets delivered by Friday at 10 a.m.
How Custom Beverage Packaging Works
Custom beverage packaging usually goes well when four groups stay aligned from day one: the brand, the packaging supplier, the printer, and the co-packer. If one of them guesses instead of confirming a spec, you can lose a week or an entire line slot. I have sat in meetings where a bottler assumed a label would run on an existing applicator, only to discover the liner width was off by 3 mm and the sensor could not read the registration mark. Tiny errors are rarely tiny in production.
The flow is usually straightforward, even if the details are not. It starts with a brief, moves into structural and graphics work, then goes through dieline approval, proofing, sampling, testing, and final release. In most custom beverage packaging projects, the first round of questions is about dimensions, fill volume, closure type, shelf life, and the route from filler to warehouse to store. A 16-ounce bottle and a 12-ounce can may need completely different pack geometry, which is why a package that fits one can be awkward, expensive, or impossible for the other.
On a typical run, time gets spent in a few predictable places: gathering exact specs, matching color, sourcing substrate, making plates or cylinders, and running line trials. For a digitally printed short run, the schedule might compress into 12 to 15 business days from proof approval. For a flexo or gravure project with custom cylinders, 3 to 5 weeks is more realistic, especially if the brand wants metallic ink, a soft-touch coating, or a specialty film sourced from a supplier in Toronto or Shenzhen.
Mechanical issues show up on the floor long before they show up in a brand deck. Beverage lines do not care how good a gradient looks in a mockup. They care about fill speed, wet environments, label registration, case pack stability, and whether the package feeds cleanly at 140, 180, or 240 units per minute. When I visited a co-packer in Wisconsin, we had to trim a carton flap by 1.5 mm because the glue line was snagging on a wraparound conveyor, and that tiny change saved the job from a recurring jam.
If your team is comparing formats, custom beverage packaging should be judged against the equipment you already own. A format that asks for a new applicator, a different glue pattern, or a manual hand-pack step can quietly raise labor cost by 8% to 15% before the product reaches retail. That is why I keep telling brands to ask whether the package fits the line, not only whether it fits the mood board. Mood boards are useful for direction; they do not pay overtime in a plant outside Indianapolis.
For shipping abuse testing and transit language, I often point people to ISTA test standards. Those tests are not glamorous, but a product that survives vibration, drops, and compression is a better business choice than a package that photographs well and collapses in a truck. In beverage work, that difference is usually the line between a launch and a return shipment, and nobody in distribution wants to receive 1,200 damaged units on a Thursday afternoon.
Typical Process Flow
- Define the drink, the container, and the market channel, including bottle size, can count, or carton volume.
- Confirm dimensions, tolerances, closure type, and pack-out requirements with the co-packer or filler.
- Build the dieline and artwork together so the design does not fight the structure.
- Review digital proofs, Pantone targets, and legal copy before any tooling is cut.
- Run samples and line trials, then adjust for fit, color, and machine speed.
- Approve production, palletizing, and delivery timing with warehouse and receiving teams.
That process sounds ordinary, but the projects that go smoothly are usually the ones that respect every step. A rushed signoff can create a reprint, and a reprint on a beverage launch is expensive because the shelf window is often narrow, especially for seasonal SKUs that need to hit stores before a 6-week promotional period ends. In my experience, custom beverage packaging rewards patience at the proof stage and punishes impatience on the dock.
Custom Beverage Packaging Costs and Pricing Factors
Custom beverage packaging pricing is driven by material, print method, quantity, shape, finishing, freight, and storage. A plain corrugated shipper can cost far less than a rigid carton with foil stamping, soft-touch lamination, and a custom insert. In one quote I reviewed for a brewery in Portland, Oregon, the difference between a simple one-color kraft carrier and a laminated die-cut carrier was $0.11 per unit at 10,000 pieces, which sounds small until it becomes $1,100 in total.
The biggest misconception I hear is that the lowest unit price always wins. It does not. A low-cost substrate that tears on the fill line, absorbs moisture, or jams at pack-out can cost more in labor and scrap than a better material with a slightly higher invoice. I have seen a buyer save $2,000 on the packaging line item and lose $7,500 in rework after the first 1,000 units because the board was too thin for the product weight. That is why custom beverage packaging has to be priced as a system.
Order quantity changes everything. A 5,000-piece run may carry a setup burden that makes the unit cost look high, while a 50,000-piece run spreads tooling and prepress across a much larger base. For example, shrink sleeves can land near $0.09 to $0.14 per unit at higher volumes, while a complex paperboard carrier with specialty finish can sit around $0.18 to $0.32 per unit at 5,000 pieces. The numbers are not universal, but they show how format and quantity reshape the quote for custom beverage packaging.
One simple comparison helps brands see where the money goes. The figures below are indicative, not promises, because substrate availability, color coverage, and freight can shift the final number by several cents per unit.
| Format | Typical Use | Example Unit Cost at 5,000 Pieces | Cost Drivers | Operational Note |
|---|---|---|---|---|
| Pressure-sensitive labels | Bottles and jars | $0.06-$0.15 | Stock, adhesive, ink coverage, die shape | Fast to apply, but moisture and curl need testing |
| Shrink sleeves | Cans and bottles | $0.09-$0.18 | Film type, perforation, artwork coverage, tooling | Good shelf impact, but heat tunnel tuning matters |
| Paperboard carriers | Multi-packs | $0.18-$0.32 | Board grade, coatings, die-cut complexity | Strong for retail packaging, but glue quality is critical |
| Corrugated shipper cases | E-commerce and distribution | $0.22-$0.55 | ECT rating, print method, inserts, case count | Protection first, brand impact second |
Shape complexity also matters. A round bottle is simpler than a faceted one. A rectangular carton is easier than a carton with a carry handle, a tamper-evident panel, and an interior divider. Every extra cut or fold adds time to tooling and can increase waste on the press. In custom beverage packaging, I have seen a small handle change add a full day to prepress and cause a 4% increase in board trim loss at a converter in Ontario.
Ask for quotes that separate the pieces. Packaging price should be broken out from design, freight, warehousing, and fill costs. If a supplier only gives you one blended number, ask for a tiered quote at 3,000, 10,000, and 25,000 units so you can see where economies improve. That is especially useful if you are comparing Custom Packaging Products for a bottle program, because the material choices often change the real cost more than the artwork does.
For brands watching sustainability and cost together, paper source matters as much as print finish. Recycled content, FSC-certified board, and right-sized packaging can lower material use without stripping shelf presence. On a 6-bottle carton, an extra 12 grams of board multiplied across 20,000 units becomes a real budget line. Good custom beverage packaging respects both the margin and the shelf, which is why a mill in Quebec may quote differently from a converter in Texas for the same 350gsm C1S artboard.
Step-by-Step Custom Beverage Packaging Process
The cleanest custom beverage packaging projects start with a brief that includes exact container dimensions, fill volume, closure type, shelf life, and storage conditions. If the beverage will live in refrigerated distribution, the supplier needs to know that early because cold-chain handling changes how inks, labels, and adhesives behave. I once had a kombucha client omit the cold requirement from the brief, and the first label stock we sampled curled after 24 hours in chilled storage at 4 degrees Celsius.
After the brief, the team chooses the format. That may be pressure-sensitive labels, shrink sleeves, cartons, trays, carriers, or shipping cases. The format decision should reflect retail goals and operational limits, not just visual preference. A craft soda brand with 12-ounce cans may want a six-pack carrier for retail packaging, while a direct-to-consumer sparkling water line may need Custom Printed Boxes with inserts that protect the cans from rattling during courier transit from Dallas to Phoenix.
Next comes structural work and artwork setup. The dieline has to match the container, the glue panels need enough clearance, and the copy has to stay inside legal and barcode zones. A rushed design usually breaks down here. I have seen a beautiful front panel lose impact because the nutrition facts box grew by 3 mm after a compliance review, and suddenly the brand mark had to move closer to the fold. The pack still worked, but the art direction changed for the worse.
The proofing stage is where a brand saves itself from expensive mistakes. Read the proof at least twice, once for copy and once for dimensions. Check Pantone targets, barcode placement, legal text, country-of-origin copy, and whether the finish callout is correct. If the project uses varnish, foil, or embossing, ask for a sample board or press proof, because a screen render cannot tell you how a matte coat will look next to a spot gloss line under retail lighting in Chicago or Houston.
Approval Checkpoints That Matter
- Brief approval: the product specs, quantity, and pack format are locked.
- Dieline approval: the structure fits the container and the machine.
- Artwork approval: the copy, barcode, and brand elements are correct.
- Sample approval: the real pack is tested for fit, moisture, and handling.
- Production approval: the final run is released only after all corrections are closed.
After approval, production and delivery still need attention. Quality checks should confirm count accuracy, pallet configuration, carton strength, and label consistency. If the packaging ships to a co-packer, the receiving team needs the pallet height, case count, and PO details in advance. One bottling plant I worked with lost half a shift because the wrong pallet label was printed on the outside wrap, and the warehouse would not receive the load until the paperwork matched the physical shipment.
When the finished pack arrives, the best teams do one last line check before committing to the full run. They inspect a few cartons, sleeves, or cases under the same lights the product will live under, because a color that looks calm on the conference table may read gray in a cooler. I have learned that the most useful question is not "Does it look good?" but "Does it survive the route to the shelf?" That question keeps custom beverage packaging honest.
Common Mistakes in Custom Beverage Packaging
The most frequent mistake I see is designing for appearance only and forgetting the environment. Beverage packaging lives in cold rooms, damp trucks, warehouse dust, and fast-moving filling lines. A glossy label that photographs well may scratch on a spiral conveyor, and a fragile carton can collapse when stacked three-high on a warm dock. If your custom beverage packaging never sees actual plant conditions before approval, you are gambling with the launch.
Another common failure is weak specification work. Vague artwork instructions, missing copy approvals, or barcode placement that was never measured to spec can trigger reprints or delayed shipments. I watched a brand lose 2 weeks because the legal panel was built for a domestic SKU, then had to be rebuilt for a regional launch with different nutrition copy and recycling marks for Canada and the Northeast U.S. That kind of mistake is tedious, but it is also expensive, and custom beverage packaging does not forgive vague briefs.
Lead times are another trap. Teams underestimate how long custom die cuts, specialty coatings, imported substrates, or plate creation will take. A project that looks like a 10-day job can quickly become a 25-day job if the film has to be sourced overseas or the printer is waiting on signoff. I usually tell clients to build in one revision cycle, one sampling cycle, and one transit buffer, which often adds 7 to 12 business days before the product is safe to launch.
The final mistake is choosing a format that does not fit the business stage. I have seen start-ups order elaborate packaging because they wanted to look national on day one, then discover the unit economics could not support that look at 2,000 cases per month. A simpler pack that is easier to scale is often smarter in the first stage. Custom beverage packaging should support growth, not outpace it.
- Do not approve artwork before checking the real dieline dimensions.
- Do not assume a sample that looks fine at room temperature will behave the same in refrigeration.
- Do not bury freight, warehousing, and setup fees inside one blended quote.
- Do not choose premium finishes that slow the line more than they help the shelf.
One of my better factory-floor lessons came from a supplier negotiation over a carton board upgrade in Pennsylvania. The brand wanted a heavier sheet for a premium feel, but the converter showed us that the new board would add 6% to shipping weight and force a slower folder-gluer setting. We stayed with the lighter board, moved the money into a better matte varnish, and the result sold better than the heavier version would have. That is a classic custom beverage packaging lesson: spend where the consumer feels it and the machine still runs clean.
Expert Tips for Better Custom Beverage Packaging
My first tip is simple: test mockups in the real environment, not just on a desk. Put the carrier in a cooler for 30 minutes. Wipe the sleeve with a damp towel. Stack the shipper case on a pallet and leave it under warehouse lights for a few hours. If the material changes color, curls, or loses print legibility, the problem is there to see. That kind of check is cheap insurance for custom beverage packaging, and I wish more teams did it before they signed off.
Second, ask for samples, sample boards, and press proofs. A render tells you the concept; a proof tells you the ink spread, coating sheen, and readability. I remember a sparkling water client who loved a full-bleed blue background until the proof showed the barcode disappearing into the dark field. We raised the contrast by 18% and changed the shelf read completely. Strong packaging design is never only about aesthetics; it is also about the way the eye lands on the panel during a 3-second glance in a refrigerated case.
Third, design with line efficiency in mind. A beautiful pack that slows case packing, requires extra hand insertion, or demands a special glue setup can become a hidden cost. Ask the co-packer how many seconds each unit takes to assemble and whether the current line needs a new chute, guide rail, or applicator setting. I have seen a simple carrier change save 45 labor minutes on a 6,000-unit run at a plant in New Jersey, which is the kind of operational improvement that turns into real margin over time.
Fourth, keep sustainability grounded in real material choices. Recyclable substrates, recycled-content board, FSC-certified paper, and right-sized shipping cases all help, but the choice has to work for the product. I am not impressed by a green claim if the package fails in a cold chain or requires extra void fill because it was shrunk too far. The best sustainable option is the one that uses less material and still protects the drink, whether that means 18pt SBS, 350gsm C1S artboard, or a B-flute corrugated shipper with a 32 ECT rating.
In practice, I tell teams to ask three questions every time they review custom beverage packaging: Does it fit the line, does it survive the route, and does it make the brand easier to buy? If the answer is yes to all three, you are probably close. If one answer is no, the package probably needs another round of work. People skip that check because it feels too plain. It is not plain; it is useful.
For sustainability guidance and recycling language, the EPA resource at EPA recycling guidance can help you think through material claims and disposal language. I still verify every label claim with counsel, but having the right public reference points keeps the conversation practical and less emotional. That matters when custom beverage packaging is being reviewed by marketing, operations, and compliance at the same table.
If you are comparing formats for your next launch, the right answer may be a mix of structures: a retail carrier for the shelf, a shipper case for distribution, and a label or sleeve for the container itself. I have seen brands build stronger package branding that way because each layer had a clear job. You do not need the same finish on every surface; you need the right finish on the right surface, whether the work is being printed in Montreal, Dallas, or Suzhou.
Next Steps for Your Custom Beverage Packaging Project
The best next step is to gather the facts before you ask for quotes. Bring exact container dimensions, fill volume, closure type, target quantities, distribution conditions, and a few visual references that show the tone you want. If the product will ship by pallet, parcel, or refrigerated truck, include that too. A supplier can only price custom beverage packaging accurately when the brief is specific enough to answer the machine, the warehouse, and the retailer at the same time.
Then compare at least 3 suppliers on capability, lead time, and support. I would want to know who handles structural design, who can manage prepress cleanly, who can recommend the right board or film, and who will stay involved through sampling and production release. If one quote is 12% cheaper but the supplier cannot explain their testing process, I would treat that as a warning sign rather than a win. That is especially true for custom beverage packaging with cold storage, specialty print, or custom printed boxes that need to arrive flat and stack correctly.
Build your timeline backward from launch, not forward from the first call. Allow time for sampling, proof changes, transit, and one revision round that nobody planned for but almost always appears. A realistic schedule might be 10 business days for a straightforward label project, 3 weeks for a carton with tooling, or 4 to 5 weeks for a more complex retail pack with finish work. I have seen more beverage launches miss their window because the calendar was optimistic than because the packaging itself was difficult.
If you want a cleaner start, use a checklist and keep the conversation tied to the real production environment. Confirm the pack format, review the compliance details, test the sample in cold storage, and compare the quote against what it will actually cost to fill and ship. The brands that do this well usually spend less time firefighting later. That is the part people miss: custom beverage packaging is not just a creative task, it is a production decision that touches line speed, freight, shelf appeal, and customer perception all at once.
What is custom beverage packaging for bottled or canned drinks?
It is the tailored outer system around the drink, whether that means a label, sleeve, carton, tray, carrier, or shipping case. The best version of custom beverage packaging depends on container shape, fill line speed, retail display goals, and how far the product has to travel before it reaches the shopper. A 12-ounce can program in Texas may need a very different structure than a 750 mL bottle shipped from Ontario to New York.
How much does custom beverage packaging usually cost?
Cost depends on material, print method, order size, finishing, and whether the pack needs extra protection for cold-chain handling or shipping abuse. Smaller runs usually cost more per unit because tooling and setup are spread across fewer pieces, so a clean quote should separate the packaging price from freight, warehousing, and design or prepress fees. A 5,000-piece run might land at $0.15 per unit for a basic label, while a premium carrier with foil or varnish can push well past $0.25 per unit.
How long does custom beverage packaging take to produce?
Timelines vary by format, but most projects move through brief, design, proofing, sampling, and production before shipping. Custom shapes, specialty finishes, and multiple approval rounds can extend the schedule, so the safest plan is to work backward from launch and leave room for testing, corrections, and one unexpected revision. A straightforward label job may take 10 business days after proof approval, while a more complex carton can take 12 to 15 business days or longer.
What should I prepare before requesting a custom beverage packaging quote?
Have your container dimensions, fill volume, quantity target, material preference, print goals, and distribution conditions ready. If you include compliance details such as barcode placement, legal copy, and regional labeling needs, the quote and timeline for custom beverage packaging will be much more accurate from the first round. It also helps to specify whether you want 350gsm C1S artboard, 18pt SBS, or a corrugated shipper with a 32 ECT rating.
Can custom beverage packaging be sustainable without looking plain?
Yes, and I have seen plenty of brands do it well by using recyclable substrates, right-sized packaging, and clean typography instead of piling on heavy finishes. The trick is balancing shelf impact with real-world performance, because the strongest custom beverage packaging is the version that protects the drink, fits the line, and still feels distinct in the cooler. A plain-looking pack that uses FSC-certified board from Quebec can still stand out if the structure and copy are sharp.
The most useful move is to freeze the facts before the finishes: lock the container specs, cold-chain conditions, and line speed first, then build the artwork and materials around those realities so the package works in the plant as well as it does on the shelf.

