Buyer Fit Snapshot
| Best fit | custom electronics packaging for packaging buyers comparing material specs, print proof, MOQ, unit cost, freight, and repeat-order risk where brand print, material, artwork control, and repeat-order consistency matter. |
|---|---|
| Quote inputs | Share finished size, material target, print colors, finish, packing count, annual reorder estimate, and delivery region. |
| Proofing check | Approve dieline scale, logo placement, barcode or warning zones, color tolerance, and any recyclable or compostable wording before bulk production. |
| Main risk | Vague material claims, crowded artwork, or missing packing details can create delays even when the unit price looks attractive. |
Fast answer: Custom Electronics Packaging: Design, Cost, and Fit should be specified like a repeatable production item. The safest quote includes material, print method, finish, artwork proof, carton packing, and reorder notes in one written spec.
What to confirm before approving the packaging proof
Check the product dimensions against the actual filled item, not only the sales mockup. Ask for tolerance on folds, seals, hang holes, label areas, and retail display edges. If the package carries a logo, QR code, warning copy, or legal claim, reserve that space before decorative graphics fill the panel.
How to compare quotes without losing quality
Compare board or film grade, print process, finish, sampling route, tooling charges, carton quantity, and freight assumptions side by side. A lower quote is only useful if the supplier can repeat the same color, closure quality, and packing count on the next order.
Custom Electronics Packaging: Design, Cost, and Fit
Custom Electronics Packaging is one of those parts of manufacturing where a $4 insert can save a $400 shipment, and I have watched that tradeoff play out on factory floors more times than I can count. The first time I really felt the lesson was in Shenzhen, with 600 portable scanners on a pallet, a corner gap no one had flagged, and a truck-jostled carton that landed like a test from the universe. The box survived. The screens did not. I had a caliper in my pocket, a clipboard in my hand, and a room full of people insisting the damage was "minor." It wasn't. Once we switched to an EVA insert, the return rate fell from 6.8% to 0.9% on the next run. That is why custom electronics packaging usually pays for itself faster than the first spreadsheet suggests.
The job of Custom Electronics Packaging is bigger than wrapping a device in a nice-looking box. It has to hold the product, corral the accessories, protect surfaces, reduce movement, and survive whatever the shipping lane throws at it. Tablets, sensors, chargers, earbuds, dev kits, and anything with exposed ports or loose cables all punish generic mailers in predictable ways. They slide. They scuff. They crush corners. They slow pack-out too, which is the part people forget until the line backs up and nobody can find the cable pocket. In Dongguan, I watched 2,000 units stop for 25 minutes because a coiled cable was 12 mm too wide for the cavity. Small mistake, big headache. Packaging inserts, anti-static layers, and carton strength deserve the same attention as the product itself.
I have seen clients cut $0.38 per unit by replacing a decorative but flimsy carton with a tighter packaging spec. I have also seen them spend $1.10 more per unit on a prettier box that helped a $299 device sell better in Austin and Chicago. Both decisions were right. That is the uncomfortable truth. Custom electronics packaging has to balance protection, branding, labor, freight, and speed, or it turns into a compromise with a polished exterior. And yes, people do love to call an underbuilt box "good enough" right up until the first damage report lands in their inbox. Then the tone changes real quick.
What Custom Electronics Packaging Actually Solves
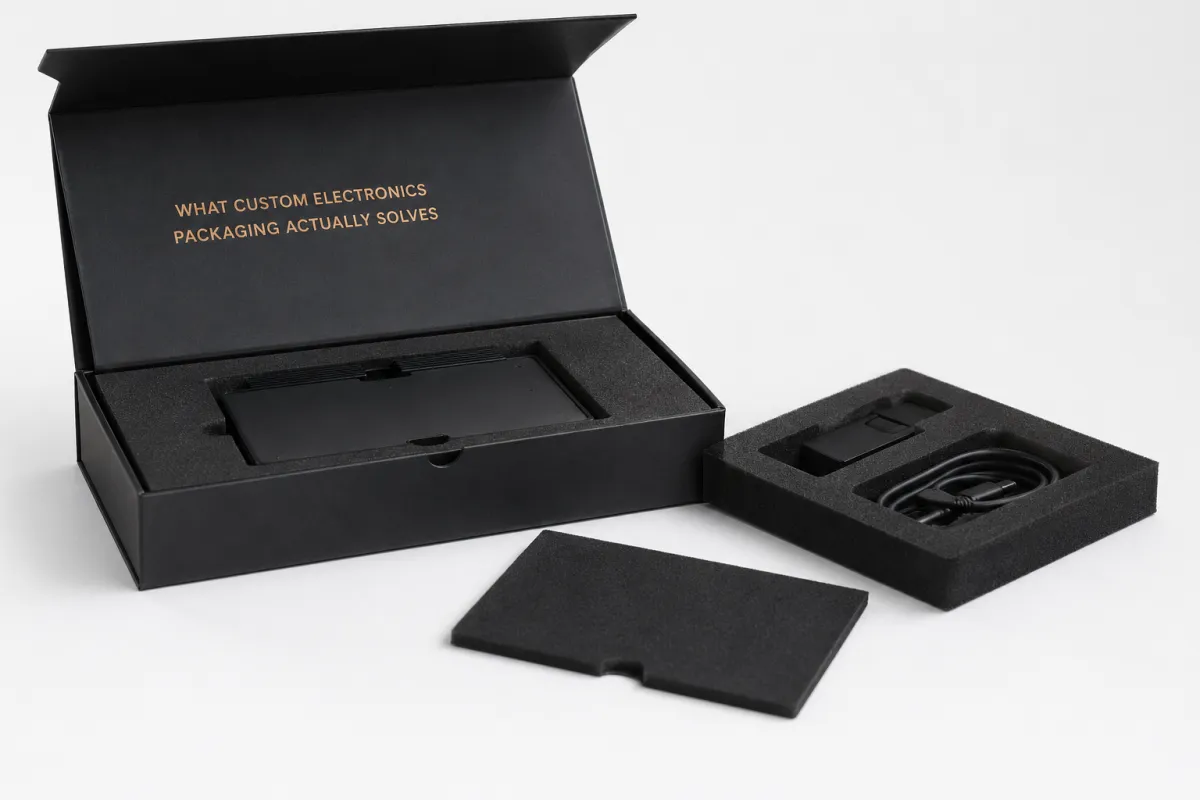
I still remember a small client in Shenzhen who brought in a batch of smart home hubs with 12,000 units already assembled. On paper, the outer cartons looked fine: 200 lb test, standard inserts, clean print, nothing alarming. Every unit had an exposed USB-C port, and the cable cavity was loose by about 8 mm. That gap mattered. During transit, plugs struck the cavity edge, and corner wear showed up on 17% of the first carton stack. A $4 insert solved a $400 shipment problem. Cheap fix. Expensive lesson. The correction took a 20-minute tooling adjustment, not a redesign, which made the whole thing even more annoying in hindsight.
Custom electronics packaging does more than absorb impact. It locks the device in place, separates accessories, shields sensitive surfaces, and gives the shipper a repeatable pack-out process. A package system often includes the outer carton, the insert, an anti-static layer or bag, a label plan, and sometimes a retail opening sequence. If a charger, manual, and cable sit loose inside a box, the package is not designed. It is simply containing hope. Hope is not a packaging spec, and it is definitely not enough for a 1.2 m drop test.
Generic mailers fail because electronics are not shaped alike. A tablet needs corner control and screen protection. A sensor may need ESD-safe handling and a smaller cavity. Earbuds usually need tiny compartments that keep the case from sliding around. Dev kits can include loose boards, headers, and adapter cards that demand custom electronics packaging with exact pocket depth. I once watched an $18 pair of earbuds ship in a box that looked premium and still arrive with a cracked hinge because the carton ignored the pressure point at the case lid. It was one of those moments where you want to ask, very politely, who thought that would survive a truck ride from Suzhou to Denver.
Another memory: a contract packer in Dongguan laid out three sample boxes for a battery-powered device, all based on the same dieline, all "approved" by email, and all failing the same corner drop. The only difference was foam density. One used 18 kg/m3 EPE, one used 24 kg/m3 EPE, and one used 35 kg/m3 EVA. The 35 kg/m3 version passed the 1.0 m edge drop, while the softer foam let the device bounce enough to scuff the screen bezel. That is why custom electronics packaging is a system, not a box. People hear that and nod, but the part they miss is that every layer has a job the others cannot do.
"We thought the carton was the problem. It turned out the cable pocket was the problem. One 9 mm change fixed it." - a client in an assembly meeting I sat through with a notebook, a caliper, and a very annoyed QA lead.
For brands that care about branded packaging and package branding, the packaging also does retail work. A clean opening sequence can make a $129 device feel like a $229 one. That does not mean every SKU needs a magnetic rigid box. It means the packaging design should match the product and the channel. A D2C fulfillment box, a retail shelf box, and a distributor shipper are three different jobs, and custom electronics packaging should reflect that reality. That is the point where a pretty carton stops being "nice" and starts being strategic in markets like Los Angeles, London, and Singapore.
If you are comparing box styles, look at Custom Packaging Products as a starting point. The right structure depends on the product size, the accessories, and the amount of handling between your warehouse and the customer's desk, whether that warehouse sits in Shenzhen, Guadalajara, or Newark.
How Custom Electronics Packaging Works
Custom electronics packaging starts before any artwork is printed. The first step is product prep: measure the device, list every accessory, and mark the delicate areas. I always ask for weight in grams, not just length and width, because a 520 g device behaves differently than a 180 g device inside the same carton. A 19 mm charging brick, a 1.2 m cable, and a quick-start card are not "small extras." They drive cavity size and pack sequence. I learned that the hard way on a launch where the "small extras" took up more room than the product itself, which is a deeply annoying kind of math.
The second step is protection. That may mean a plain poly bag, an ESD-safe bag, conductive foam, molded pulp, or an EVA/EPE insert. If the product has a bare PCB, exposed pins, or open connectors, anti-static handling matters. If the device is fully finished and sealed, the main goal may be cushioning and surface protection rather than full ESD control. I have seen teams overspend on conductive materials for finished consumer devices because someone assumed all electronics need the same treatment. They do not, and I say that with the kind of fatigue only packaging people and QA teams can appreciate after a 14-hour sample review.
The third step is structural design. A packaging engineer maps insert cavities, carton dimensions, and stacking strength around shipping behavior. Drop testing, vibration, compression, and warehouse handling all matter. A 300 g smart speaker packed for parcel delivery needs a different structure than the same speaker shipped on a pallet in 48-count master cases. I have watched a designer build to the outer carton size and forget that the accessory bundle needed 14 mm of clearance for a coiled cable. The box looked beautiful. The pack-out line hated it. So did the person who had to fix it on a Friday afternoon in a plant outside Ningbo.
The fourth step is presentation. That is the point at which Custom Printed Boxes, tray reveals, tissue, label placement, and opening order come into play. For retail packaging, you may want a clean front panel and a minimal product shot. For direct shipping, you may want a plain outer shipper with a branded inner box. For high-volume fulfillment, custom electronics packaging often works best when the layers stay simple: product wrap, insert, instructions, and one outer carton that can survive an ISTA-style test. The fewer unnecessary motions in the line, the fewer chances someone packs it wrong. I am not sentimental about pack-out lines; I have seen one extra fold turn a tidy process into a small operational riot in under 10 minutes.
Packaging is not guesswork. The industry has standards for a reason. I often point clients to the ISTA testing standards when we discuss drops, vibration, and transit risk, and I bring up the EPA guidance on sustainable materials management when they want to reduce waste without weakening the pack. Standards do not pick your materials for you, but they do kick weak ideas out of the room fast. Which, frankly, is useful when a meeting starts drifting into vibes instead of specs.
In practice, custom electronics packaging gets customized in six common places: cavity size, foam or pulp choice, print finish, tamper seal placement, accessory compartment layout, and the outer carton strength. I have negotiated insert changes with suppliers at $0.03 increments per unit, and that sounds tiny until you run 50,000 units. Then it is $1,500. That is why I push teams to think in total landed cost, not just "pretty box" pricing. I know that sounds annoyingly practical, but packaging has a way of punishing wishful thinking, especially on runs built in Suzhou or Ho Chi Minh City.
Key Factors That Shape Custom Electronics Packaging
The product itself is the first variable. A 1.8 kg desktop device with rounded corners is not the same as a 240 g handheld tool with a glass face and two loose cables. Weight changes drop energy. Surface finish changes scuff risk. Battery type changes compliance. Cable count changes cavity layout. If a device has exposed antennas, ports, buttons, or glass edges, custom electronics packaging has to protect those weak points first. The rest is secondary. I have seen teams obsess over spot UV while ignoring a sharp corner that would have shredded the insert on contact, which, yes, happened on a sample shipped from Kaohsiung.
Shipping channel matters just as much. Parcel shipping creates more individual handling events than palletized freight. Air freight can expose boxes to tighter weight limits and more compression from stacked cartons. Retail shelf display introduces a different requirement: the package has to sell before the customer touches the product. That is where retail packaging and package branding start pulling hard on the design. A box that works well for warehouse fulfillment may look dull on a shelf, and a gorgeous retail box may be too expensive for domestic e-commerce. I have argued that point in more than one meeting in Seoul and Portland, and people get emotional about shelf appeal when the math does not support it. You can practically feel the tension in the room.
Compliance and risk sit in the middle. Bare boards often need ESD-safe packaging. Lithium batteries need the right labeling and shipping review. Some products must pass transit testing before launch, especially when the cost of a bad shipment is high. FSC-certified paperboard can matter for brands with sustainability targets, and if that is your brief, ask the supplier for FSC documentation rather than trusting a logo on a PDF. If you need a reference, FSC standards and certification information are public and easy to verify. I have had buyers in London and Toronto ask for the certificate number before they even asked about print finish, which is exactly the right order.
Business priorities drive the final spec. I ask clients to choose the dominant goal before we draw anything: premium unboxing, lowest cubic weight, fastest pack-out, or the cheapest repeatable build. You can chase all four, but not equally. A luxury launch for a $499 audio device may justify a rigid set with a soft-touch finish. A mass-market charger sold at $24.95 probably should not. That sounds obvious, yet people still try to dress a $12 accessory in a $6 box and call it efficient. I usually pause there and let the silence do some work, especially if the forecast is only 3,000 units.
In one supplier meeting in Ningbo, a sales rep tried to push me toward denser foam because "it feels more premium." I asked for the added cost at 10,000 units. The answer was $0.27 per set, plus 18 seconds of extra assembly time. That ended the debate. Custom electronics packaging should earn its keep. If a material looks nice but slows the line or drives up freight volume, it is not automatically the right choice. A 2 mm tighter cavity and a 35 gsm paper wrap can sometimes beat a glossy finish and a fancier ribbon.
Here is the ugly little matrix I use with clients who want to compare options without getting lost in samples and sales language:
| Packaging option | Best for | Typical unit cost at volume | Pros | Trade-offs |
|---|---|---|---|---|
| Corrugated ship kit with EPE insert | Consumer devices, accessories, domestic shipping | $0.85 to $2.20 | Lightweight, fast to pack, strong parcel performance | Less premium feel, limited shelf appeal |
| E-flute printed carton with molded pulp | Eco-minded product packaging, moderate protection | $1.40 to $3.10 | Better sustainability story, decent print surface | May need more design work for fragile corners |
| Rigid box with EVA insert | Premium retail packaging, launch kits, gift sets | $2.80 to $6.50 | Strong branding, high-end unboxing, precise fit | Higher freight cost, slower assembly, higher MOQs |
| ESD-safe shipper with conductive materials | Bare boards, chip modules, repair kits | $1.10 to $4.00 | Better electrical protection, safer handling | More material constraints, fewer decorative options |
The table helps, but it does not tell the whole story. I have seen a $1.40 molded pulp solution outperform a $4.90 foam build because the pulp fit the device shape better and reduced movement by 70%. I have also seen the opposite happen on a device with sharp corners and a brittle screen. Custom electronics packaging should be judged by fit, damage rates, pack-out labor, and carton density, not by a single quoted number. Anyone selling you a one-number answer is either simplifying too much or hiding something.
Custom Electronics Packaging Cost and Pricing Factors
Pricing gets confusing because most quotes mix several things together. A clean custom electronics packaging quote should separate structural packaging, inserts, printing, tooling, sample builds, and freight. If those numbers are bundled, the quote can look cheaper than it really is. I have had suppliers quote a "box" at $1.12, only to discover later that the insert, setup charge, and final carton freight added another $0.68 before the product ever moved. That sort of thing makes me grumpy, and not in a cute way.
Structural packaging is usually the base. Corrugated board is cheaper than rigid board, and e-flute usually sits below heavier board grades. Insert choice changes the cost quickly. EPE is often less expensive than EVA. Molded pulp can be economical at larger runs, but it may need tooling and a little extra design work. Specialty finishes like soft-touch lamination, foil stamping, spot UV, or textured paperboard add cost fast. Low MOQs do the same. A 1,000-unit run almost never prices the same way as a 20,000-unit run, and pretending otherwise is how people end up annoyed at their sales rep in a conference room in Shanghai.
Custom electronics packaging also carries hidden labor costs. If a box requires five folds, one adhesive strip, two accessory inserts, and a hand-applied security label, the assembly line will feel that pain every single day. I once reviewed a launch kit that looked cheap at $2.15 per unit, but pack-out took 42 seconds per box. The alternate build cost $2.48 per unit and packed in 19 seconds. Over 30,000 units, the "cheaper" option cost more in labor than it saved in materials. That kind of spreadsheet surprise is exactly how budgets turn into folklore.
For readers trying to think in value tiers, I usually break custom electronics packaging into three bands. Basic ship kits are built for protection and efficiency. Mid-tier systems add better print, better fit, and a cleaner opening sequence. Premium kits are used for launch moments, retail displays, and branded packaging that must feel expensive before the product is even powered on. None of those are wrong. The wrong move is paying for premium features on a commodity SKU that ships in a plain mailer 90% of the time.
Here is the pricing logic I wish every buyer would use: ask for per-unit pricing at the target volume, then add sample costs, tooling, freight, and expected pack-out labor. If a supplier will not break out the numbers, push for clarity. A decent partner should be able to tell you whether the spec is closer to $0.90 or $4.90, and why. If they cannot explain the difference between a 28 gsm and 35 gsm paper wrap, or between 18 kg/m3 and 35 kg/m3 foam, I would slow down. I would slow down a lot, especially if the factory is quoting from an office in Dongguan or Xiamen without a sample photo.
I also tell teams to compare suppliers on repeatability. One plant may quote 8 business days, another 14 business days, but the 8-day option may need two extra sample rounds because the insert tolerances are loose by 2 mm. That is not a bargain. For custom electronics packaging, predictability often saves more money than the lowest sticker price, and a supplier in Shenzhen who can hold a 12 to 15 business day window from proof approval is often more useful than a cheaper option that drifts by a week.
Step-by-Step Custom Electronics Packaging Process and Timeline
The cleanest custom electronics packaging projects start with discovery, not design. I want product dimensions, full accessory lists, shipping method, branding goals, and the damage history if there is any. If the current pack has a 3% corner-crush issue or a 2% cable scuff problem, say it plainly. That history saves everyone time. The discovery step usually takes 1 to 3 business days if the product data is ready and 5 to 7 business days if the team is still hunting for drawings in a shared drive from 2021.
Next comes concept work. A supplier or packaging engineer builds dielines, insert CAD, and a structural mockup. I always ask for physical samples instead of only PDFs. A screenshot does not tell you whether a cable cavity is 6 mm too tight or whether the lid pressure point lands on a button. During one client meeting, we found that a supposedly centered accessory compartment actually sat 11 mm off to the left, which meant the power bank pressed into the device body. That problem would have cost a full reprint run if we had skipped the sample stage.
Then comes testing. Not every project needs formal lab certification, but every serious custom electronics packaging launch needs real handling checks. That means at least a few drop tests, some vibration exposure, a compression check for master cartons, and a pack-out timing review with real staff. I like to watch 10 boxes packed by someone who has never seen the system before. If they make the same mistake twice, the structure is too clever. Good packaging should forgive normal human behavior. Bad packaging, on the other hand, behaves like it has a personal grudge.
For larger launches, this is where packaging industry guidance from PMMI and Packaging World resources can help teams think through machinery, automation, and line efficiency. The goal is not to worship a standard. It is to avoid designing a box that only one person in the building knows how to pack. If only one person can assemble it, the process is fragile before the product even ships. I have seen that happen in a plant near Suzhou, and the overtime bill was not subtle.
After test approval, production planning starts. Specs get locked. Artwork is approved. Insert tooling is confirmed. Lead times are booked. Inventory targets are set. If there is a promotional launch, I recommend adding at least 7 to 10 days of buffer because a single color correction or die-cut adjustment can ripple through the schedule. For simple corrugated runs, you may be looking at 12 to 15 business days from proof approval. For more complex rigid or foam-based custom electronics packaging, 18 to 30 business days is more realistic, especially if the factory is running in Shenzhen, Dongguan, or Ningbo.
Here is the sequence I normally recommend:
- Measure the device, accessory kit, and protective clearance down to the nearest 1 mm.
- Choose the shipping method and define the failure mode, such as corner crush or cable scuff.
- Request dielines, insert drawings, and one or two physical samples.
- Run a small test batch of 25 to 100 units through real pack-out.
- Review damage, assembly time, and freight behavior before locking volume production.
That process may sound conservative. It is. I have seen a launch lose two weeks because nobody accounted for a 4 mm USB dongle that rattled inside the cavity and scratched the screen coating. A more disciplined custom electronics packaging workflow would have caught that on sample number one. I know because I was standing there holding the scratched unit while someone tried to explain that the issue was "rare." Rare is not a category customers care about when the replacement cost is $17.80 per unit.
One more practical note: if your project uses battery-powered devices, keep the compliance conversation early. Battery labels, documentation, and carrier requirements can change the outer shipper or the master case spec. I have had shipments held up because someone assumed a label that worked for a domestic parcel route would also work for air freight. It did not. The fix was simple. The delay was not, and the hold happened at a freight forwarder in Guangzhou on a Friday afternoon.
Common Mistakes in Custom Electronics Packaging
The biggest mistake is designing to the outer carton and ignoring the full product stack. A 210 x 140 x 55 mm box means very little if the device, charger, cable, warranty card, and tissue wrap actually need 230 x 155 x 68 mm. I have seen teams approve custom electronics packaging from a single product dimension sheet, then discover on the first pack-out day that the accessories had nowhere sensible to go. That is not an edge case. That is the default failure mode. It happens more often than anyone in the room wants to admit, especially on programs with three accessory colors and one rushed drawing.
Another common miss is overusing empty space. A box that is too loose lets the device move, but a cavity that is too tight can crush screens, press on ports, or deform antenna housings. It is a 2 mm problem more often than a 2 cm problem. I once watched a premium audio device pass visual QA and fail transit because the lid pressed against a volume knob in the insert. The customer did not care that the box looked elegant. They cared that the knob arrived crooked. So did the team, once the return photographs started rolling in from a warehouse in New Jersey.
Compliance mistakes create their own mess. Skipping ESD protection on bare boards is expensive. Skipping proper battery labeling is a very specific, avoidable kind of bad decision. Using a foam or bag material that does not suit the component can lead to static risk, scuffing, or chemical residue. If you are unsure, choose the safer material and test it. A few cents saved on custom electronics packaging can disappear in one damaged batch of inventory, and that is before you count the customer support time.
People also skip test shipments because they want to move fast. That feels efficient until the first 500 units are already in the carrier network and somebody notices an accessory pocket tears open on the second insertion. I have seen a team save 36 hours by skipping pilot tests and lose $8,000 in returns and rework. That is not speed. That is a very expensive bet. I still remember the warehouse manager looking at the return report like it had personally insulted his family, which, in a way, it had.
There is also the branding mistake, and it shows up often among growing brands. They invest heavily in the product itself, then use bland retail packaging or generic shippers that make the whole experience feel unfinished. Strong package branding does not have to mean glossy everything. It means the unboxing flow, print finish, and insert quality match the brand promise. If the product is supposed to feel engineered and precise, the packaging should not look like a random mailer from a warehouse supply catalog in Phoenix.
I have had clients ask whether molded pulp can replace foam in every project. Short answer: no. Sometimes yes, especially for Sustainable Product Packaging goals and lower-risk devices. But if the product has a sharp glass face, exposed corners, or a very specific fit requirement, molded pulp may need more development time than foam. The material choice depends on the device, the carrier, and the acceptable damage threshold. That is why custom electronics packaging is so project-specific. There is no magical material that fixes bad geometry, and a 35 gsm paper wrap will not save a poor cavity layout.
Expert Tips and Next Steps for Custom Electronics Packaging
If you want the process to go faster, build a one-page brief before talking to any supplier. Include product photos, exact dimensions, accessory counts, shipping route, target unit cost, and any branding requirements. Add one sentence about the failure mode you are trying to prevent, such as "ports cannot be pressed during transit" or "screen must not touch the lid." That brief cuts down back-and-forth and makes custom electronics packaging feel like a project instead of a mystery.
Ask for more than a polished quote. Request dielines, material specs, insert drawings, assembly-time estimates, and sample photos. If possible, ask for the carton ECT or board grade, the foam density, and the print finish. I have found that good suppliers are happy to talk in specifics because specifics reduce disputes later. Weak suppliers hide behind vague language like "good quality" and "standard packaging," which tells you almost nothing. It also tells you they are hoping you will not ask follow-up questions, which is not exactly comforting when the factory is 1,200 miles away from your office.
Run a pilot with 2 or 3 sample SKUs before you commit to volume. One good prototype is not a supply plan. I learned that the hard way after a client approved a beautiful launch box for a speaker kit, only to discover that the cable coil expanded 6 mm in humid storage and made the lid bow. The pilot would have caught it. A full production run did catch it. The accounting team still remembers the invoice, and I suspect they will for a while.
For teams balancing sustainability and durability, do not assume greener materials automatically reduce performance. FSC paperboard, molded pulp, and reduced plastic can work very well if the structure is designed properly. If sustainability is part of the brief, say so early and document the target. Good custom electronics packaging can support both protection and material reduction, but the design has to be honest about shipping conditions and product fragility. I would rather have an honest box than a pretty failure shipped out of a facility in Xiamen.
In my consulting work, I usually start every electronics packaging project with three decisions: what must never be damaged, what the customer should feel on opening, and what the pack-out line can actually handle in 15 seconds or less. That keeps the work grounded. It also avoids the classic mistake where everyone argues about the print finish while the insert still lets the device slide 9 mm side to side. I have been in that meeting. It is not my favorite genre, and it usually ends with someone asking for another sample.
If you are planning your next build, here is the sequence I recommend:
- Measure the product and accessories, including chargers, cables, manuals, and protective clearances.
- Request a sample set from at least 2 suppliers and compare fit, damage protection, and assembly time.
- Test one real shipping route with 10 to 25 units before you order volume.
- Lock the final spec in writing, including materials, print finish, insert density, and carton grade.
That process is not glamorous. It is also how you avoid expensive surprises. Custom electronics packaging works best when the Design, Cost, and Fit line up before production starts. Get those three right, and the rest becomes much easier, whether the run is 5,000 pieces or 50,000.
In my experience, the best results come from simple, measured decisions: a 1 mm cavity adjustment, a 0.2 mm board change, or a different foam density can matter more than a fancy coating or a louder print treatment. The right custom electronics packaging does not just protect the device. It cuts freight damage, speeds the line, and gives the customer a cleaner first impression. That is the job, and honestly, it is a pretty satisfying one when it works.
FAQ
How much does custom electronics packaging cost per unit?
A basic corrugated-and-foam setup often lands at $0.85 to $2.20 per unit at runs of 5,000 pieces, while premium rigid kits can climb to $4 to $7 depending on print, insert type, and assembly time. I always tell buyers to count tooling, sample builds, and freight separately so the quote does not look cheaper than it really is. The best comparison is landed cost plus pack-out labor, not the box price by itself. If a quote looks suspiciously tidy, I start asking questions, especially if the supplier is quoting from Shenzhen, Dongguan, or Ningbo.
What materials work best for custom electronics packaging?
Corrugated board works well for outer protection and shipping efficiency, especially for parcel-heavy programs. EVA, EPE, PU foam, and molded pulp are common insert choices depending on fragility and sustainability goals. If you are packing bare boards, chips, or other sensitive components, use ESD-safe bags or conductive foam, because a pretty box does not stop static damage. I wish it did, but packaging physics does not care about aesthetics, and neither does a board that fails after a 1.0 m drop.
How long does custom electronics packaging take to develop?
Plan on 1 to 3 business days for discovery, 5 to 7 business days for sample development, and typically 12 to 15 business days from proof approval for a straightforward corrugated run. Complex inserts, special print finishes, and compliance checks can extend the timeline to 18 to 30 business days. Leave extra time if you expect drop-test revisions or multiple sample rounds, because one revision is normal and two is not unusual. Three usually means somebody skipped a measurement by 2 to 4 mm.
Do all products need custom electronics packaging with ESD protection?
No, but anything with exposed boards, chips, or connectors usually does need it. Finished consumer devices may need cushioning more than full ESD control, depending on the build and the shipping route. If you are unsure, specify ESD protection early, because replacing damaged inventory costs far more than the added material. I would rather overprotect a little than explain a preventable failure later, especially if the shipment is headed through a humid route from Ho Chi Minh City or Guangzhou.
How do you size custom electronics packaging for accessories?
Measure the product, charger, cables, manuals, and protective clearance before choosing the cavity size. Keep the fit tight enough to stop movement but loose enough to avoid pressure on sensitive parts like screens, ports, or antenna housings. Verify the design with a physical sample and a real shipping test before locking the final spec, because a drawing cannot tell you how a cable behaves after 400 miles of handling. Cables have a way of becoming more dramatic when no one is watching, and a 19 mm charger block can turn into the main design variable overnight.

