A customer pulls a sleeve-style box from a shipping carton, slides the tray open, and judges the brand before touching the product. That is the job of custom drawer boxes packaging: control the first impression, protect the item inside, and make the reveal feel intentional rather than accidental.
Fair? Not really. Real? Absolutely.
Packaging is judgment in cardboard form. Drawer boxes make that judgment louder because the opening motion feels slower and more considered than a tuck flap, mailer lid, or standard folding carton. That extra second matters most for products sold as gifts, premium sets, cosmetics, jewelry, candles, tech accessories, stationery, and launch kits where the package is part of the perceived value.
What Custom Drawer Boxes Packaging Is Built to Do
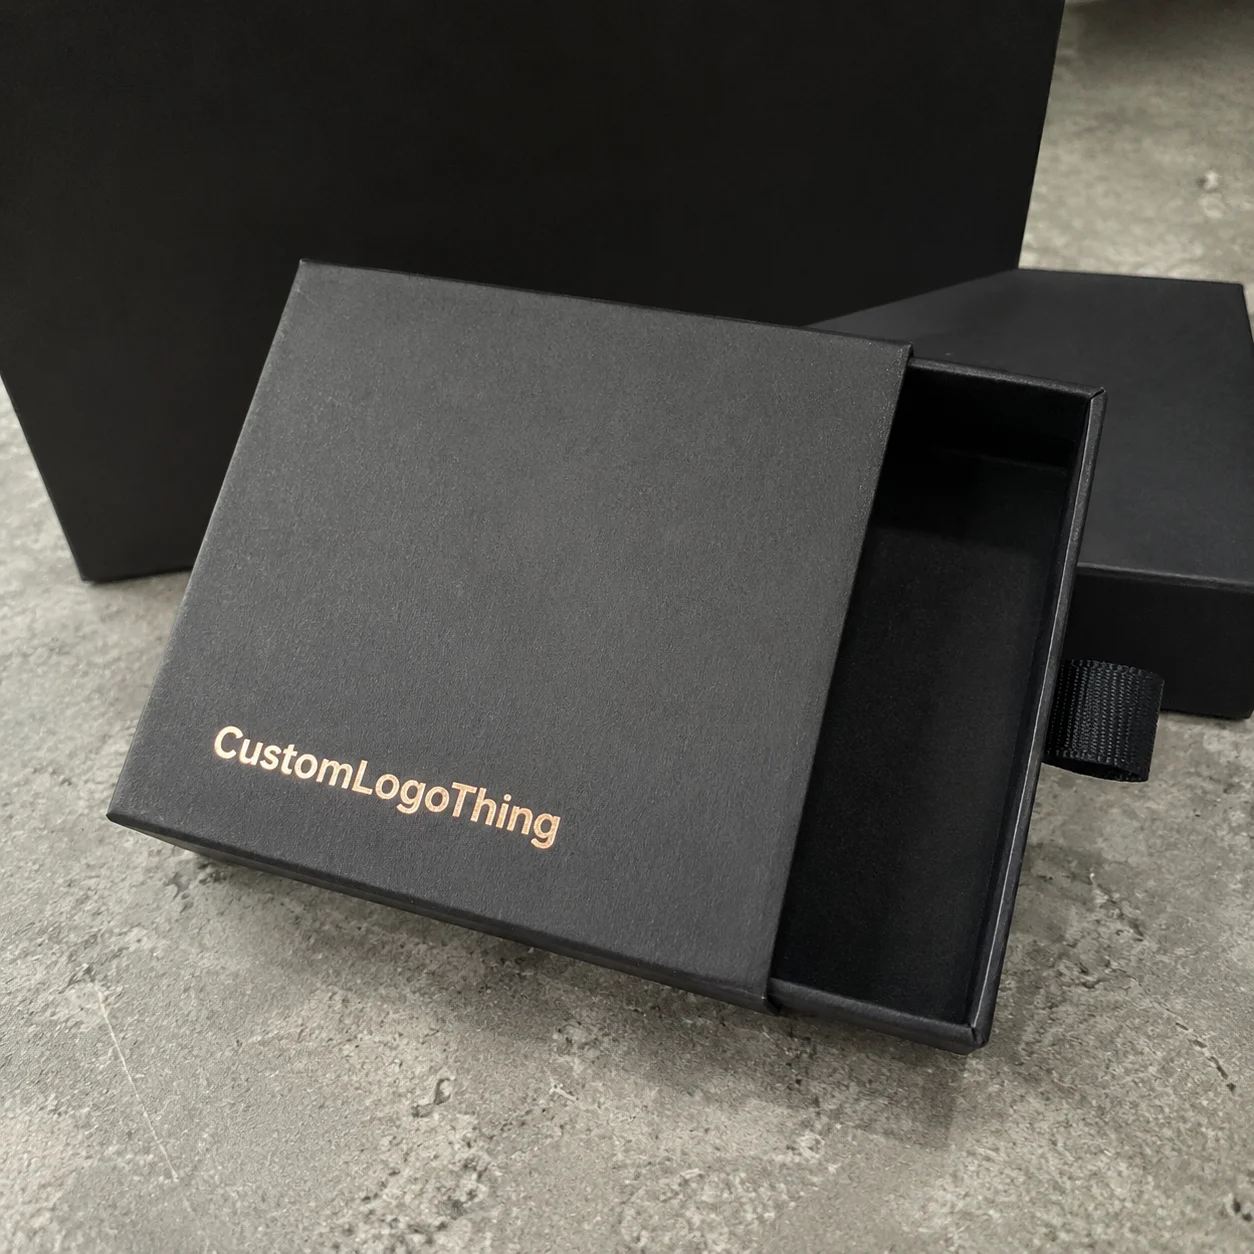
A drawer box is usually a two-piece structure: an outer sleeve and an inner sliding tray. The tray pulls out like a drawer, sometimes with a thumb notch, ribbon pull, paper tab, or snug friction fit. The format gives brands a controlled reveal, which is why it keeps appearing in retail displays, influencer mailings, subscription kits, and higher-margin product packaging.
It is not the same as a mailer box. A mailer is generally corrugated, transit-focused, and designed to survive shipping networks. A drawer box is presentation-first. It can protect the product when the board, insert, and closure are specified correctly, but many drawer boxes still need an outer shipper for e-commerce.
It is also different from a rigid setup box. A classic rigid box has a separate base and lid. A drawer box opens horizontally. Folding cartons are another category again: lighter, cheaper, faster to store, and often better for high-volume retail packaging, but without the same weight in hand or slow reveal.
Brands usually choose drawer packaging for a mix of seven reasons: presentation, unboxing control, product stability, insert compatibility, shelf appeal, gifting value, and repeatable brand experience. Repeatable is the quiet advantage. If every customer opens the package the same way, the brand moment becomes easier to remember and easier to photograph.
The tradeoff is cost. Drawer boxes use more board than basic cartons, require tighter tolerances, and often involve more assembly. Rigid versions add wrapped paper, thicker greyboard, and sometimes hand finishing. If the product sells for $12, a rigid drawer box may swallow too much margin. If the product sells for $80 and is bought as a gift, the math changes quickly.
Start with structure, not decoration. Product weight, sales channel, and how the box will be handled should decide the format before foil, texture, or ribbon enters the conversation. If you are comparing several formats, the broader Custom Packaging Products lineup can help separate presentation packaging from shipping packaging before specifications get tangled.
How Drawer Box Construction Works: Sleeve, Tray, and Fit
A drawer box has four practical parts: the outer sleeve, the inner tray, the pull feature, and, often, an insert. Rigid versions commonly use greyboard around 1.5 mm to 2.5 mm thick, wrapped with printed or specialty paper. Folding paperboard versions may use 300 gsm to 450 gsm SBS, kraft, or coated board. Those can ship flatter, which helps freight and storage.
The fit between the tray and sleeve is the whole mechanism. Too loose, and the tray slides open during handling. Too tight, and the customer has to wrestle with the box. Nobody wants packaging that needs a coach.
Good drawer packaging allows enough clearance for smooth movement after lamination, paper wrap, glue, coating, product weight, and normal production variation are included. That last phrase sounds dull. It is also where many projects fail. A sample that slides nicely before lamination may feel tight after wrap paper and finish are added.
Common opening details include thumb notches, ribbon pulls, paper tabs, friction-fit slides, belly bands, seals, and magnetic closures. Magnets can feel premium but add cost, weight, and recycling complications. Ribbons look elegant, yet they may slow packing if workers must align or tuck them by hand. A thumb notch is cheap, reliable, and easy to pack around, which is why it remains a practical choice even on attractive boxes.
Product weight changes the design. A 40 g necklace card does not need the same tray strength as a 12 oz candle jar. A tech kit with cords, adapters, manuals, and spare parts needs compartment planning more than a single cosmetic bottle does. For glass, candles, and bundled sets, the insert often does as much protective work as the outer box.
Insert options include paperboard dividers, molded pulp, EVA foam, cardboard platforms, satin-lined trays, and molded paper trays. Each solves a different problem. Paperboard is recyclable in many programs and cost-efficient for lighter products. Molded pulp can work well for heavier or fragile items, although tooling may affect cost and timing. Foam grips well but raises sustainability questions and can look out of step with natural or clean-label branding.
Sustainability claims need discipline. FSC-certified paperboard can support responsible sourcing claims when chain-of-custody documentation is available through the supplier. The Forest Stewardship Council explains certification requirements in more detail. Do not print “eco-friendly” just because the box is brown kraft. Brown paper is not a personality.
Practical callout: Drawer boxes can be excellent presentation packaging, but presentation strength is not the same as shipping strength. If the package will move through parcel networks, test the actual product, insert, drawer box, and outer carton together.
Key Specs to Decide Before You Ask for a Quote
Suppliers quote faster when they receive specifications instead of a mood board and a hopeful deadline. Prepare the inside dimensions, finished outside dimensions if shelf or shipper fit matters, product weight, quantity per box, insert needs, material preference, print method, finish, order quantity, and delivery location.
Use length × width × height, and label what was measured. Product size, tray interior, and finished box size are not interchangeable.
This is where many quotes go sideways. A product measuring 5 × 3 × 1 inches does not mean the finished box should measure 5 × 3 × 1 inches. Clearance is needed for the product, wrapping, insert walls, lift space, and manufacturing tolerance. For a snug insert, even 1–2 mm can change the fit.
Material choice should match price point and use. SBS paperboard gives a clean white base for crisp custom printing. Kraft paperboard creates a natural look but prints colors more muted. Greyboard wrapped with printed art paper gives the premium rigid feel most brands expect from custom drawer boxes packaging. Specialty papers, linen textures, dyed-through stocks, and metallic papers can look strong, but they should be sampled because texture changes ink laydown, foil sharpness, and scuff behavior.
Finishes are not interchangeable either. Matte lamination hides fingerprints better than gloss in many retail settings. Gloss makes color pop but can show scratches. Soft-touch coating feels expensive and photographs well, though it may scuff during rough handling. Aqueous coating is common for paperboard and often costs less than film lamination. Uncoated textured paper can feel refined, but heavy ink coverage may look uneven unless the artwork is planned for that surface.
Printing method affects both budget and consistency. Offset printing is strong for higher quantities, Pantone matching, and tighter color control. Digital printing works for short runs, prototypes, and speed, but reprint color can vary more. Foil stamping, embossing, debossing, and spot UV are premium signals. Use them where the customer notices first: the sleeve front, logo area, opening edge, pull tab, or top panel.
Artwork needs a dieline, bleed, safe zones, CMYK or Pantone callouts, barcode placement, and opening orientation checks. If the artwork wraps across a sleeve, confirm seam placement before approval. A beautiful logo cannot rescue a bad dieline. Structure first. Decoration second. Always.
| Box Type | Best Use | Typical Material Range | Cost Behavior |
|---|---|---|---|
| Folding paperboard drawer box | Light retail items, samples, lower-cost branded packaging | 300 gsm to 450 gsm SBS, kraft, or coated board | Lower unit cost, easier storage, lighter feel |
| Rigid drawer box | Cosmetics, jewelry, candles, gifts, premium launches | 1.5 mm to 2.5 mm greyboard with printed wrap | Higher unit cost, stronger presentation, more freight volume |
| Rigid drawer box with insert | Fragile products, kits, multi-piece sets, influencer boxes | Greyboard plus paperboard, foam, molded pulp, or platform insert | Highest cost, best control, slower packing if poorly designed |
Cost, Pricing, MOQ, and What Changes Unit Cost
Drawer box pricing depends on size, board thickness, material, print coverage, finish, insert type, order quantity, assembly requirements, freight volume, and packing method. A small rigid jewelry box is not priced like a candle gift set. Same format, different material usage and labor.
Small runs carry higher unit costs because setup, sampling, die cutting, printing, and labor are spread across fewer boxes. Larger runs usually reduce unit cost, but they tie up cash and storage. That gets ignored until 4,000 rigid boxes arrive and someone asks where they are supposed to live.
MOQ varies by supplier and production method. Digital or short-run paperboard drawer boxes may start around 100 to 500 units. Custom rigid drawer boxes with printed wraps, inserts, foil, embossing, magnets, or ribbons often make more sense around 500 to 2,000 units and up. Not always. But if a supplier offers 50 fully Custom Rigid Boxes with foil and a foam insert at a suspiciously low price, read the specification twice.
Setup charges may include cutting dies, foil stamping dies, embossing plates, structural engineering, sample fees, prepress, and proofing. Some suppliers roll those costs into the unit price. Others show them as separate line items. Neither method is automatically wrong. The trouble starts when one quote includes tooling and another hides it.
Finishes add cost because they add steps. Foil, embossing, debossing, spot UV, magnets, ribbons, specialty paper, and soft-touch coating look expensive because they are expensive. Use them selectively. A single foil logo on a matte sleeve often looks more premium than foil scattered across every panel.
Freight deserves more attention than it gets. Rigid drawer boxes do not collapse flat, so shipping and warehousing can become a meaningful part of landed cost. A box quoted at $1.25 per unit is not a $1.25 box after freight, customs, domestic delivery, storage, damaged cartons, and receiving labor are counted.
Quality expectations also affect cost. If the box must pass a retail buyer review, arrive scuff-free, hold a glass jar, or align foil within a tight tolerance, the supplier needs to know that before quoting. Better inspection, better packing, and tighter finishing control usually cost more than “standard acceptable” production.
For a clean quote, send dimensions, quantity, material preference, print specs, finish, insert needs, delivery location, target in-hand date, and reference photos. If the packaging will sit on shelves, say so. If it will ship directly to customers, say so. Different job, different structure.
Process and Timeline from Concept to Finished Boxes
A normal project moves through measurement, structural recommendation, quote, dieline creation, artwork placement, proofing, sampling if needed, approval, production, quality control, packing, and shipping. Skip steps if expensive surprises sound fun. Most brands disagree.
A physical sample is worth the money for any new structure, premium launch, tight insert fit, heavy product, retail presentation, or package using magnets, ribbons, textured paper, foil, embossing, or special coatings. A flat PDF proof can confirm artwork position. It cannot tell you whether a glass jar rattles in the tray or whether the ribbon pull feels flimsy.
Typical timing depends on complexity. A clear quote may come back within 1 to 3 business days. A digital proof can take a few days after the dieline is approved. A physical sample may take 5 to 15 business days depending on structure and finish. Bulk production commonly runs 10 to 30 business days for many Custom Printed Boxes, with longer schedules for complex rigid packaging, large orders, imported materials, specialty finishing, or peak-season capacity.
Buyer delays are painfully common. Product dimensions change after the dieline is built. Finish decisions shift after proofing. Barcodes arrive late. Artwork comes in low resolution. Someone notices the logo is upside down only after seeing the opening direction. These are not rare events. They are standard packaging chaos wearing a nicer shirt.
Build buffer time around holidays, retail launch windows, trade shows, and freight. Packaging delays are boring until they block a launch. Then everyone suddenly cares.
Use a simple approval sequence: approve dimensions first, approve the dieline second, approve artwork third, approve the physical sample fourth, then release bulk production. Basic? Yes. Basic saves money.
Quality control should include more than counting cartons. Check tray slide, sleeve fit, glue strength, corner wrapping, scuffs, color consistency, foil registration, insert fit, barcode scannability, and carton labeling. Pull samples from different cartons, not only the one sitting on top. If the packaging has a retail-facing finish, inspect under realistic light, not only under warehouse fluorescents.
If direct-to-consumer shipping is part of the plan, ask about transit testing. The International Safe Transit Association publishes procedures used across packaging and logistics. A full certified test may not be necessary for every launch, but drop testing the finished packed unit is not optional if breakage would damage margins.
Step-by-Step Buying Guide for Better Drawer Packaging
- Measure the actual product. Include bottles, jars, cords, manuals, cards, wraps, caps, labels, and any accessories that will sit inside the tray. Measure the final production version, not an early prototype.
- Define the packaging job. Retail display, gift presentation, influencer kit, subscription component, and e-commerce unboxing each require different priorities.
- Choose rigid or folding construction. Rigid feels premium and supports heavier products better. Folding paperboard costs less, stores flatter, and works for lighter retail packaging.
- Design the insert after the layout. Inserts should stop movement, present the product neatly, and avoid slowing fulfillment. A beautiful insert that takes 90 seconds to load per box can wreck packing math.
- Select print and finishing levels. Put premium finishes where customers see or touch them first: the top sleeve panel, logo area, opening edge, or pull feature.
- Request a dieline. Place artwork with bleed, safe zones, barcode rules, panel direction, and opening orientation checked before proof approval.
- Review proofs aggressively. Check spelling, color, logo position, sizing, barcode scan, sleeve direction, tray pull direction, and seam placement. Proofs exist so mistakes can die young.
- Approve only when everything lines up. Product fit, visual design, delivery date, budget, packing method, and sales channel should match the launch plan before bulk production starts.
For brands still comparing structures, browsing Custom Packaging Products can help separate presentation packaging from shipping packaging before specifications become messy. That one distinction saves more money than most people expect.
Common Mistakes That Make Drawer Boxes Look Cheap
Mistake 1: Designing before measuring. This leads to loose inserts, crushed corners, awkward empty space, and inflated shipping costs. Measure the real product, not the product listing, not the prototype, and definitely not someone’s memory.
Mistake 2: Choosing the thinnest board for a premium format. Drawer boxes should feel intentional, not like a cereal box wearing a tuxedo. If the product has weight, the board and tray structure must support it without bowing.
Mistake 3: Ignoring slide feel. A tray that jams, scrapes, or falls out too easily ruins the opening experience fast. Ask for a sample if the sleeve fit is central to the customer experience.
Mistake 4: Overdecorating every surface. Foil, embossing, spot UV, ribbons, and specialty paper can work beautifully. All at once, they can look loud and cost plenty. Strong package branding usually comes from restraint, not throwing the finishing catalog at the box.
Mistake 5: Forgetting the insert. A premium outer box with the product rattling inside is packaging malpractice. Paperboard inserts are fine for lightweight products. Foam, molded pulp, or rigid platforms suit heavier or fragile items.
Mistake 6: Ignoring seams and wrap edges. Artwork that looks perfect on a flat screen may land awkwardly once wrapped around corners. Keep logos, faces, claims, and barcodes away from seams, fold lines, and tray friction points.
Mistake 7: Treating the drawer box as the shipper. Presentation packaging and shipping packaging are not automatically the same thing. If the box ships alone, specify stronger board, secure closure, scuff-resistant finish, and testing.
Mistake 8: Starting too late. Custom packaging rewards boring early planning. Glamorous? No. Effective? Yes. Start before the product is ready to ship, not after marketing has announced the launch date.
Build a Spec Sheet Before Ordering
Before contacting suppliers or comparing quotes, create a one-page spec sheet. It does not need to be fancy. It needs to be clear.
Include product dimensions, product weight, quantity per box, target order quantity, preferred material, print colors, finish, insert type, delivery location, and target delivery date. Add whether the box is for retail display, gifting, e-commerce, or internal kits. The same drawer structure may need different closures, coatings, and packing if the sales channel changes.
Collect three reference images: one for structure, one for print style, and one for finish. Reference images speed up quoting, but they do not replace measurements. A photo of a luxury candle box tells a supplier the visual direction. It does not tell them jar diameter, tray clearance, board thickness, or how much the filled product weighs.
Ask for good-better-best options if the budget is still flexible. A good option might be a folding paperboard drawer box with one-color print. A better option could be a printed rigid drawer box with matte lamination. A best option might use a rigid sleeve, molded pulp or paperboard insert, foil logo, and textured wrap paper.
Comparing quotes only works when every supplier prices the same specifications. Otherwise, the cheapest quote may simply be missing expensive parts: insert, foil die, thicker board, sample fee, delivery, retail-ready packing, or proper inspection. Cheap quotes are fun until the boxes arrive wrong.
For high-value launches, tight product fits, retail presentations, influencer kits, or customer-facing promotions, request a dieline and sample before bulk production. If you need help matching the structure to the use case, start with Custom Packaging Products and build the specification from the product outward.
The smartest way to buy custom drawer boxes packaging is to lock the structure first, test the fit, then decorate it like a brand that knows what it is doing.
FAQ
What is the best material for custom drawer box packaging?
Rigid greyboard with a printed paper wrap is best for premium retail, gifts, cosmetics, jewelry, candles, and heavier products. Folding paperboard is better for lower cost, lighter weight, and easier storage. Kraft or textured paper works well for natural, handmade, or minimalist brands, but printed colors can look more muted than they do on white SBS paperboard.
How much does custom drawer boxes packaging cost?
Cost depends on size, material, quantity, print coverage, insert type, finish, assembly complexity, and freight. Rigid drawer boxes cost more than folding cartons because they use thicker board, more material, and more labor. To compare pricing fairly, ask every supplier to quote the same dimensions, quantity, material, finish, insert, packing method, and delivery terms.
What is the normal lead time for custom drawer packaging?
Lead time depends on sampling, artwork approval, material availability, order size, finishing methods, and shipping method. Simple paperboard drawer boxes can move faster than rigid boxes with foil, embossing, ribbons, magnets, or custom inserts. Build in extra time for proof revisions, sample approval, freight delays, and receiving checks before launch.
Do custom drawer boxes need inserts?
Use an insert when the product can shift, scratch, break, or look messy inside the tray. Paperboard inserts work for lightweight products, while foam, molded pulp, or rigid platforms suit heavier or more fragile items. Skip the insert only when the product already fits snugly and still presents cleanly.
Are drawer boxes good for shipping products directly?
Drawer boxes are usually presentation packaging first, not automatic shipping protection. For e-commerce, test the box with an outer mailer, shipper carton, or protective wrap before relying on it. If the drawer box must ship alone, specify stronger board, secure closure, scuff-resistant finish, and transit testing.


