Custom Hang Tags for Clothes Do More Than Show a Price
Many shoppers touch the hang tag before they inspect the seam, zipper, wash label, or fabric edge. That makes Custom Hang Tags for clothes part of the first quality judgment, not just a place to print the price. These small printed pieces can carry the brand name, size, SKU, retail price, barcode, care note, origin information, QR content, and a short product message in one compact format.
The tag sits in an odd but useful middle ground. It is packaging, sales material, inventory tool, and tactile cue at the same time. A flimsy tag on a premium denim jacket creates a mismatch the customer may not describe out loud, but still feels. A crisp logo, clean trim, readable barcode, and sturdy attachment send a different signal before anyone tries the garment on.
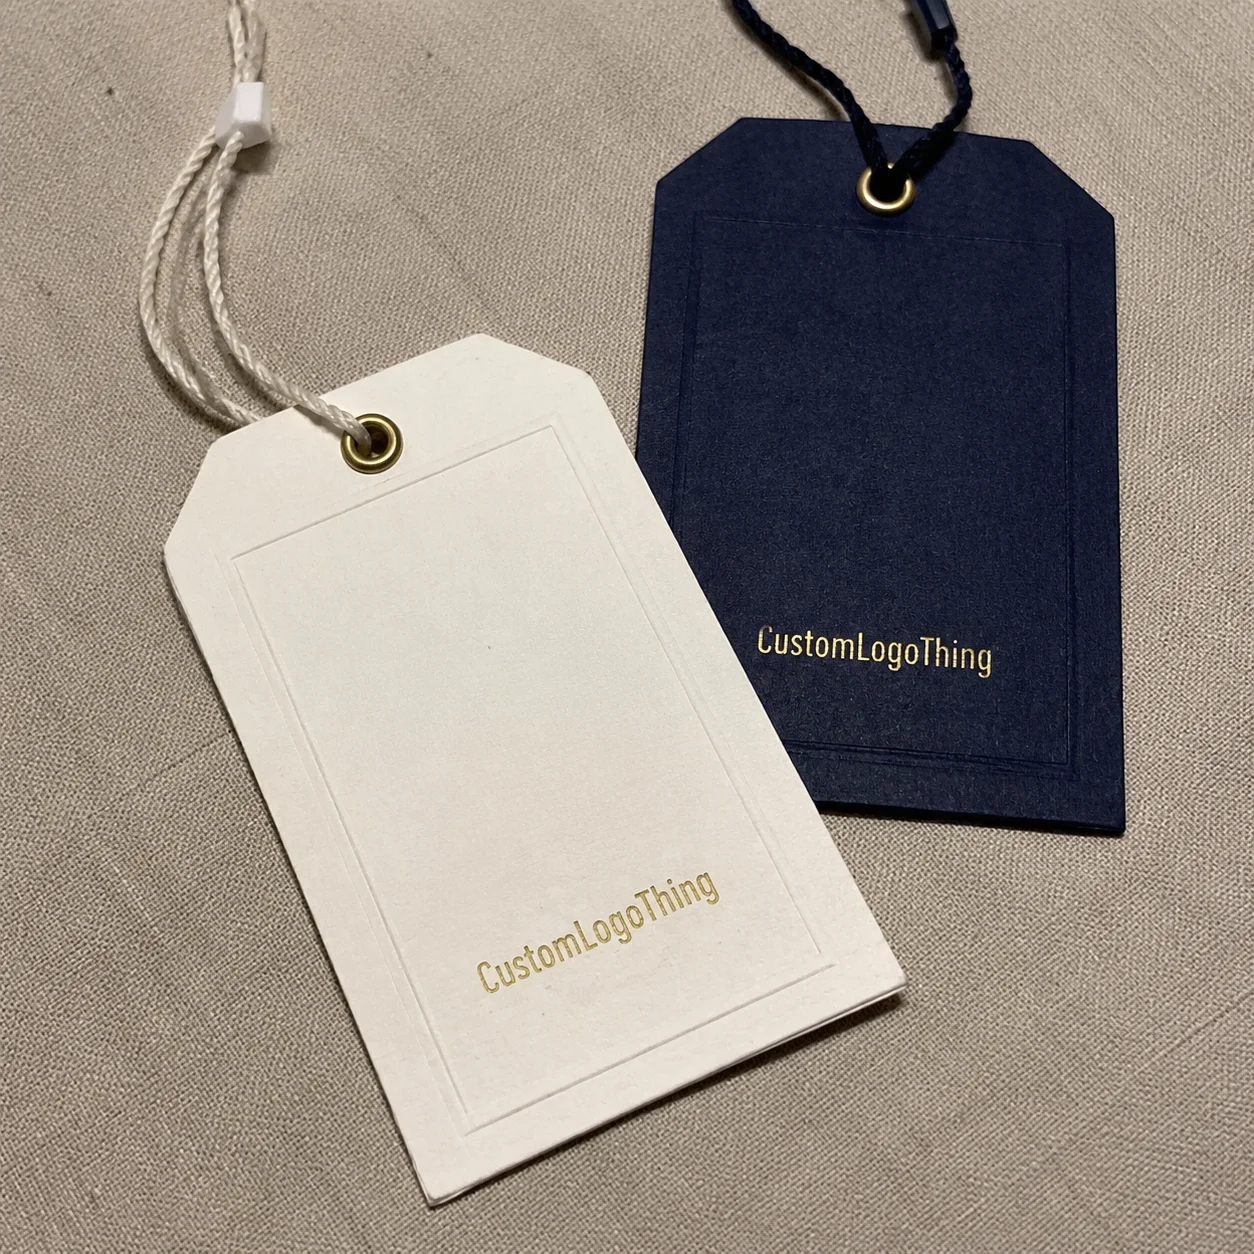
There is also a practical difference between a basic price ticket, a branded apparel tag, and a premium swing tag. A price ticket may be a small 2 inch by 1.25 inch card with a barcode and retail price. A branded tag might use 300gsm to 400gsm coated cardstock, full-color printing, and cotton string. A premium swing tag may add 600gsm duplex board, foil stamping, embossing, a metal eyelet, rounded corners, or a custom shape tied to the collection.
Practical rule: if the garment is meant to feel better than average, the tag should not feel like an afterthought. The material, print, attachment, and barcode area all need to fit the selling environment.
Apparel brands, boutiques, merch lines, uniform suppliers, and private-label teams tend to run into the same pressure points: artwork readiness, tag size, paper choice, attachment method, cost, turnaround, and how the tag will be applied on the production floor. Planning those details early prevents rushed decisions later, especially when garments are already packed, photographed, or queued for a retailer.
How Apparel Hang Tags Work From Artwork to Attachment
A hang tag system has more parts than first-time buyers expect. There is the printed tag, the hole punch, optional reinforcement, the string or fastener, and the garment location where the tag will sit. A common setup is a 2 inch by 3.5 inch tag, 350gsm C1S artboard, one 4mm or 5mm hole, and cotton string looped through a neck label, sleeve seam, waistband, or buttonhole.
Material drives the first impression. Coated cardstock gives crisp color and sharp logo edges, which helps with photography, gradients, small type, and bright brand colors. Uncoated paper has a softer fashion feel and less shine, although fine detail can lose a little sharpness. Kraft stock works well for natural, outdoor, handmade, or sustainability-focused branding, but white ink and low-contrast artwork need testing. Synthetic stocks, including PVC-free plastic or tear-resistant paper, can make sense for swimwear, outerwear, children’s gear, and items handled in damp retail environments.
Print method matters as much as paper. Digital printing suits short runs, quick SKU changes, and lower quantities such as 250, 500, or 1,000 pieces. Offset printing usually becomes more attractive as quantities rise because color consistency and sheet efficiency improve across larger runs. Specialty finishing sits on top of the printed base: foil for shine, embossing for raised texture, debossing for pressed detail, spot UV for selective gloss, and lamination for scuff resistance.
The attachment changes the retail feel. Cotton string feels classic and soft. Elastic cord stretches around buttons or hardware. Plastic loop fasteners are fast in warehouse tagging lines and usually cost less, but they feel more utilitarian. Safety pins suit some boutique, workwear, and vintage presentations. Ribbon, waxed cord, and seal locks can make the garment feel more giftable, though they may slow assembly.
The strongest tag designs usually give the front side room to breathe while the back side carries operational detail. A clean front might show only the logo, line name, and one short phrase. The back can hold a barcode, SKU, size, colorway, price, care note, URL, or QR code. For brands building broader retail packaging, the tag should also coordinate with tissue paper, mailers, stickers, and Custom Labels & Tags so the presentation feels intentional instead of assembled one piece at a time.
Key Specs to Decide Before You Request a Quote
Before requesting pricing, settle the core specifications as much as possible: size, shape, paper weight, print colors, printed sides, hole location, string type, quantity, finish, and packing method. A supplier can help refine details, but a quote based on “nice clothing tags” will not be useful. A quote based on “2 inch by 3.5 inch, 400gsm matte art card, full color both sides, 5mm hole, black cotton string, packed in bundles of 100” gives everyone a cleaner starting point.
Size is one of the most practical decisions. A small tag, such as 1.5 inch by 2.5 inch, can look sharp on babywear, socks, accessories, or minimalist fashion pieces, but it leaves limited room for barcode quiet zones and readable type. A larger tag, such as 2.5 inch by 4 inch or a folded 2 inch by 3 inch card, can carry a sustainability note, fit explanation, QR code, and short brand story without looking cramped. Print one at actual size before approval. Screens lie.
Paper thickness should match the garment and sales channel. Many clothing tags sit between 300gsm and 450gsm because that range feels sturdy without becoming clunky. Premium denim, outerwear, leather goods, and boutique apparel may step up to 600gsm duplex board or a mounted two-ply stock. Lightweight knits, lingerie, swimwear, and baby items often look better with a slimmer tag that hangs naturally and does not pull on the fabric.
Finishes should earn their place. Matte lamination gives a refined surface and helps protect heavy ink coverage. Gloss lamination adds shine but can feel too commercial for some fashion labels. Soft-touch coating feels smooth and upscale, though dark coverage can show fingerprints. Spot UV works nicely on logos or pattern details. Foil stamping adds metallic emphasis, and embossing or debossing adds depth. Rounded corners reduce edge wear. Die cutting creates a distinct silhouette. Reinforced eyelets improve hole strength and add a hardware detail.
- Artwork bleed: use at least 0.125 inch beyond the trim edge unless the printer specifies otherwise.
- Safe margin: keep text, QR codes, and barcodes at least 0.125 inch inside the trim and away from the hole.
- Color mode: provide CMYK files for print, not RGB artwork copied from a web layout.
- Logo files: vector AI, EPS, or PDF files usually print cleaner than low-resolution PNG files.
- Special finishes: foil, spot UV, emboss, and deboss areas should be supplied as separate clearly named layers.
Barcodes deserve special care. A UPC, EAN, or Code 128 symbol needs enough width, contrast, and quiet zone to scan after trimming and hole punching. If you are using QR codes, test them at printed size from several phone distances and under ordinary store lighting. Unreadable QR codes are one of the easiest mistakes to prevent and one of the most irritating to find after tags are already attached.
Cost and Pricing Factors That Change the Unit Cost
The unit cost for custom hang tags for clothes is shaped by quantity, material, size, print coverage, finish complexity, die-cut shape, attachment hardware, packing requirements, and variable data. Setup, proofing, plates, dies, and machine preparation have to be absorbed somewhere, so a 500-piece order usually has a much higher unit cost than a 5,000-piece order using the same specs.
For a plain reference point, simple rectangular tags in the 2 inch by 3.5 inch range, printed full color on 350gsm to 400gsm cardstock, may land around $0.08 to $0.22 per tag at moderate quantities, depending on region, supplier, paper, and print coverage. Add stringing, foil, embossing, eyelets, custom packing, or variable barcodes, and the range may move to $0.18 to $0.55 or more. These are planning ranges, not promises. Freight, exchange rates, paper markets, labor, and finishing setup can shift a real quote quickly.
| Tag Option | Typical Specs | Common Use | Cost Impact |
|---|---|---|---|
| Budget retail tag | Standard rectangle, 300gsm to 350gsm, full-color digital print, one hole | Merch drops, small boutiques, starter apparel lines | Lowest unit cost, especially without string attachment |
| Mid-range branded tag | 350gsm to 450gsm card, two-sided print, matte finish, cotton string | Fashion basics, uniforms, private-label clothing | Balanced cost with stronger shelf presentation |
| Premium swing tag | 600gsm board, foil or embossing, eyelet, specialty cord, custom shape | Denim, outerwear, boutique collections, giftable apparel | Higher cost due to materials, setup, and hand assembly |
| Variable data tag | SKU-specific barcode, size, colorway, price, or sequential numbering | Retail programs, inventory-controlled launches, multi-SKU collections | Higher prepress control and sorting requirements |
Budget-friendly choices are not automatically cheap-looking. A standard rectangle, common paper weight, one-hole punch, simple cotton string, and clean full-color print can look excellent if the layout is disciplined. The expensive mistakes are usually not the missing foil or the absence of a custom die. They are weak hierarchy, muddy color, poor trimming, and a tag that does not fit the garment.
Premium cost drivers include foil stamping, embossing, custom dies, extra-thick stock, metal eyelets, specialty strings, hand assembly, sequential numbering, and multiple tag sets tied together. If the tag needs to be attached before shipping, ask whether the quoted price includes stringing, knotting, looping, or only the printed card. That small detail can change both cost and labor planning.
Ask for at least two quantity breaks. If you need 1,000 tags now, price 1,000 and 3,000 or 5,000 with the same specs. The difference can be meaningful because setup spreads across the run. For buyers comparing tags with custom printed boxes, mailers, or other Custom Packaging Products, quantity planning also helps align package branding across the whole order instead of buying each component in isolation.
Process, Timeline, and Turnaround From Proof to Delivery
The usual production flow is simple on paper, but each step can add time if information is missing. Specs are confirmed first. Artwork is checked next. Then the supplier sends a digital proof showing layout, trim, hole placement, barcode position, finishing areas, and any notes about color or material. After proof approval, the job moves into printing, finishing, hole punching, stringing or bulk packing, quality control, and shipping.
Simple printed tags can often be produced in about 5 to 10 business days after proof approval, not including transit, if the material is available and the artwork is clean. More involved apparel hang tags with foil, embossing, die cutting, specialty paper, eyelets, or hand-tied strings may need 12 to 20 business days or longer. Large retail programs can require extra time for SKU sorting, barcode checks, carton labeling, and staged deliveries.
Proofs protect both sides. A digital proof confirms tag size, trim line, hole position, text, barcode location, QR destination, and finishing placement. It does not always guarantee exact color, especially across coated, uncoated, kraft, or specialty stocks. If color is critical, ask about a drawdown, printed sample, or material swatch before the full run. For broader packaging programs, organizations such as the International Safe Transit Association publish testing resources that help teams think through how packaging and shipped goods perform beyond the tag itself.
Physical samples make sense for premium tags, new brand color standards, unusual materials, custom die cuts, or high-volume retail programs. They also help when the tag must coordinate with woven labels, stickers, tissue, cartons, or branded packaging. If sustainability claims are part of the message, be careful with wording and material documentation. The Forest Stewardship Council is one recognized source for paper sourcing certification, but the exact claim you print depends on the certified material and chain-of-custody requirements.
Quality control should be specific, not just a quick glance at the top of a stack. Check trim accuracy, hole position, edge cracking, scuffing, color consistency, string length, knot strength, barcode scanning, QR destination, and count accuracy. For variable data jobs, sample across the run rather than only the first bundle. Sorting mistakes are expensive because they often surface at the warehouse, not at the print table.
Build buffer time into apparel launch dates. Tags are often needed before garments can ship, which creates pressure around photoshoots, influencer kits, relabeling projects, retailer delivery windows, and warehouse intake. A one-day delay in proof approval can easily turn into a missed tagging slot if the garments, decorators, and fulfillment team are already scheduled.
Common Mistakes That Make Clothing Tags Look Cheap
The first mistakes are usually visual. Crowded layouts, weak contrast, tiny type, low-resolution logos, and barcodes placed too close to the hole make a tag look underplanned. A tag is small, so every element needs a job. If five messages are fighting for the front panel, none of them will read well from a rack.
Material mismatches are just as damaging. A thin 250gsm tag on a heavy wool coat can feel disposable. A thick rigid tag on delicate babywear, swimwear, lingerie, or lightweight knits can pull awkwardly and look out of scale. The tag should hang with the garment, not fight it. For most apparel lines, ordering a few material swatches before committing to custom hang tags for clothes is a low-cost check that prevents expensive regret.
Retail details get forgotten more often than they should. SKU, size, price area, care note, country of origin, barcode quiet zone, QR destination, and reorder identification all matter once the product moves past the design desk. A beautiful tag that cannot be scanned at checkout creates friction. A QR code that points to a dead page makes the brand feel careless.
Production file problems can also create disappointing results. Missing bleed may leave white edges after trimming. RGB artwork can shift when converted for print. Unoutlined fonts can reflow. Unclear foil layers can put metallic finish in the wrong place. A hole placed through artwork may cut off a logo, letter, or barcode. These issues are ordinary in prepress, but they should be caught before production.
Attachment mistakes show up later. A string that is too short can make the tag sit awkwardly against bulky fabric. A plastic fastener can snag delicate knits. A hole placed too close to the edge can tear during handling. A metal eyelet may look premium, but it can be unnecessary weight on lightweight garments. The best choice depends on the fabric, retail rack, shipping method, and who is doing the tagging.
Brand consistency is the final piece. Hang tags do not need to match every package component exactly, but they should feel related to woven labels, care labels, poly mailers, Custom Printed Boxes, tissue paper, stickers, and the larger packaging design system. Repeating one paper tone, one type family, one icon style, or one finish can make a mixed set of materials feel coordinated without making everything identical.
Next Steps Before You Order Your Apparel Tags
Before ordering, make a short pre-flight checklist. Choose the tag size. Pick the material. Confirm the quantity. Decide whether tags need strings, cords, loops, pins, or no attachment. Finalize the front and back content. Gather vector logo files, barcode artwork, QR links, SKU lists, and any required compliance copy. That preparation can remove days of back-and-forth.
Then make a rough physical mockup. Print the tag at actual size on office paper, cut it out, punch a small hole, and hold it against the garment. Check scale, readability, hang angle, and whether the tag covers a design detail. Try it on the smallest and largest garment sizes in the line. A 2.5 inch by 4 inch tag may look balanced on an adult hoodie and oversized on an infant bodysuit.
Prepare two quote versions if budget is still open. The standard version might use 350gsm or 400gsm cardstock, full-color printing, matte finish, one hole, and cotton string. The premium version might add soft-touch coating, foil stamping, embossing, a thicker board, rounded corners, or a reinforced eyelet. Comparing both options on the same quantity breaks gives you a real cost decision instead of a vague “premium costs more” discussion.
- Loose tags: best if your factory, decorator, or warehouse already has a tagging process.
- Pre-strung tags: useful for boutiques, fulfillment teams, or smaller apparel runs with hand attachment.
- Bundled counts: ask for packs of 50, 100, or 250 if multiple team members will tag garments.
- SKU sorting: needed when each color, size, or style has unique barcode or price information.
- Direct shipment: helpful when tags need to go to a sewing contractor, printer, warehouse, or fulfillment partner.
The best starting point is usually a clean spec sheet and a finished artwork file rather than a long list of uncertain preferences. Decide what the tag must do at retail, what it should feel like in the customer’s hand, and how it will be attached before production starts. Custom hang tags for clothes work best when design, material, cost, and production timing are settled before the order is placed, because one of the smallest packaging pieces often carries a surprising amount of the brand.
FAQ
What information should custom clothing hang tags include?
Include the brand name, logo, size or fit note, price or barcode area, SKU, website, QR code if useful, and any short product story or care message. Keep the front clean for branding and place operational details on the back so the tag feels polished while still working for retail scanning and inventory.
What is the best paper thickness for apparel hang tags?
Many clothing brands use medium-to-heavy cardstock in the 300gsm to 450gsm range because it feels sturdy without becoming bulky on the garment. Premium fashion, denim, outerwear, and boutique items often benefit from thicker stock, while lightweight garments may need a slimmer tag that hangs naturally.
How much do custom hang tags for garments usually cost?
Pricing depends on quantity, size, paper, print method, finishes, hole punching, strings, hand assembly, and variable data. Simple cardstock tags may cost only a few cents each at higher volumes, while foil, eyelets, specialty stock, or SKU-specific data can raise the unit cost significantly.
How long does it take to produce custom apparel swing tags?
Simple printed tags often take about 5 to 10 business days after proof approval, depending on capacity and material availability. Foil, embossing, die cutting, specialty paper, attached strings, sorting, and quality checks add production time, so buyers should allow extra room before a launch or retail delivery date.
Do I need strings or fasteners with my clothing hang tags?
Not always. Some brands order loose tags for their own tagging process, while others request cotton string, elastic cord, ribbon, plastic loops, or safety pins. The best choice depends on the garment fabric, retail presentation, security needs, and whether the tags will be attached by hand, in a warehouse, or at the factory.