Custom Clothing Stickers: The Small Label That Does Big Brand Work
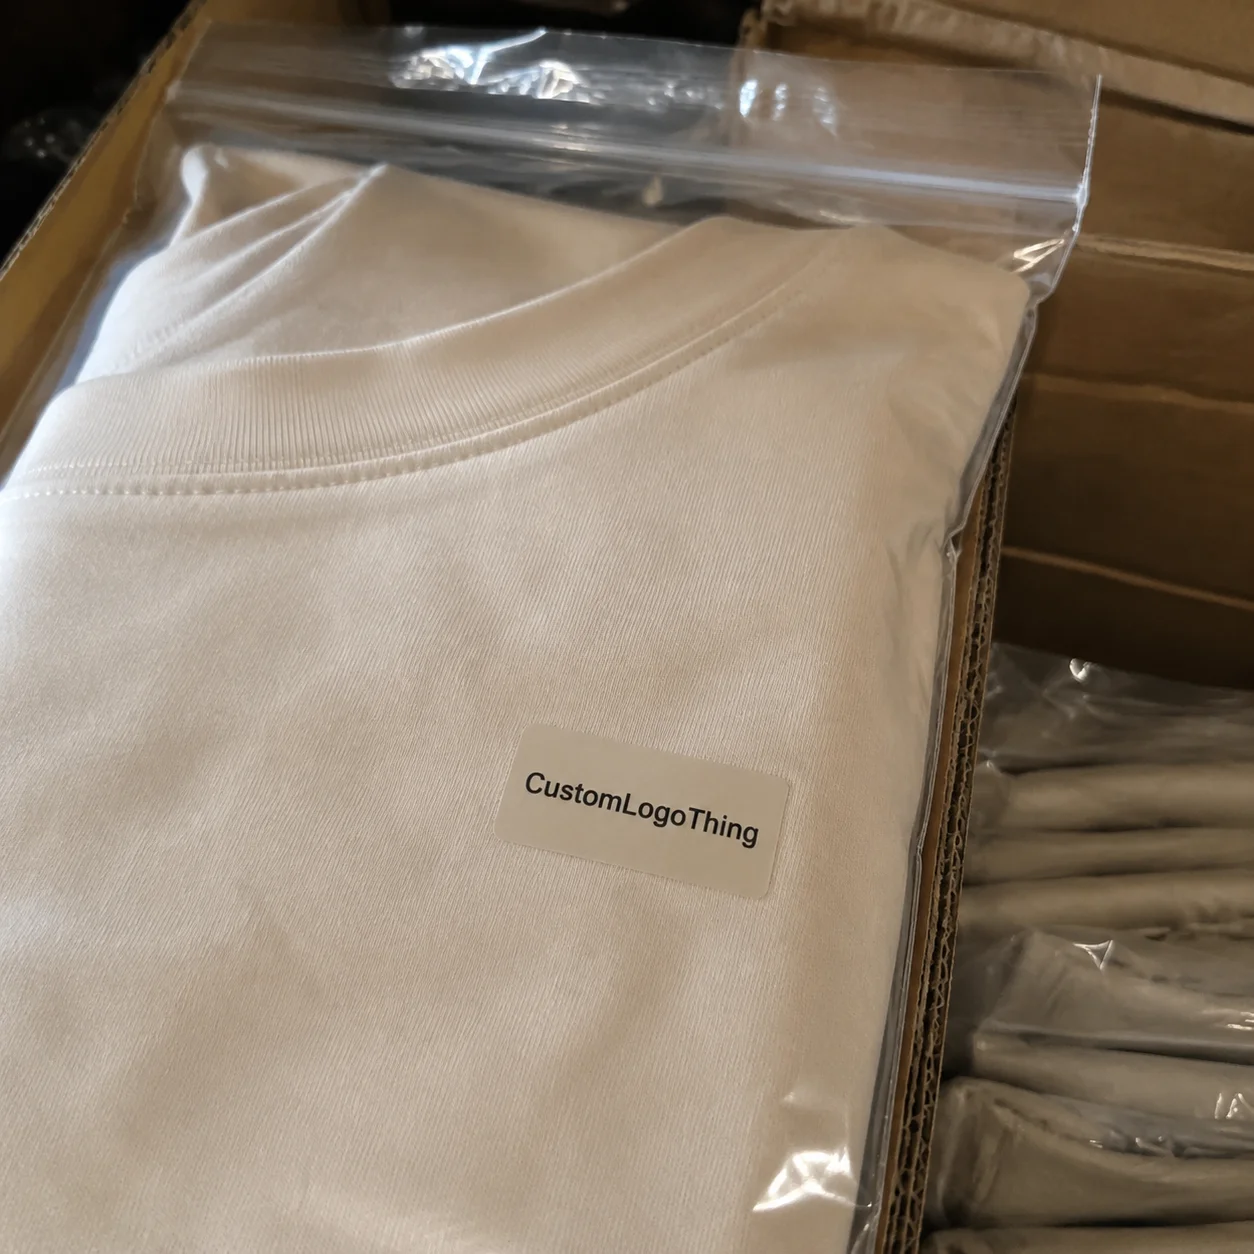
Picture two folded T-shirts leaving a warehouse in identical kraft mailers. One arrives with a crisp size sticker, a short care note, a scannable barcode, and a neat branded seal holding the tissue closed. The other arrives clean but unfinished. That tiny difference matters because custom clothing stickers are often treated as decoration, yet they quietly handle sizing, inventory, compliance cues, promotions, and the first few seconds of unboxing.
Shoppers may touch a garment for only a moment before deciding whether it feels organized, cheap, premium, thoughtful, or rushed. Oddly enough, the sticker is often the first branded element they see on tissue wrap, a clear poly bag, a hang tag, folded fabric, or a mailer flap. Apparel impressions are rarely built from one dramatic feature. They accumulate from small, repeatable signals.
Custom apparel stickers are adhesive labels designed for packaging, temporary garment marking, retail presentation, size identification, brand storytelling, QR codes, barcode tracking, and promotional inserts. They are not the same as woven labels, sewn-in tags, heat-transfer neck labels, patches, or permanent fabric branding. They can sit beside those items, though, especially where the job is communication rather than decoration alone.
Why do apparel buyers use them? Low setup friction. Flexible design changes. Fast seasonal updates. Easier SKU control compared with printing every new message onto mailers or boxes. A size dot can change next week. A collection launch sticker can run for 500 units. A return-instruction label can be revised after customer service sees the same question 30 times.
- Common uses: size dots, garment seals, boutique logo stickers, care reminders, barcode labels, e-commerce thank-you labels, collection decals, and return-instruction stickers.
- Best buyer mindset: define the operational job first, then design the label around that job.
How Apparel Label Stickers Work Across Fabric, Bags, and Boxes
A clothing sticker looks simple because the useful engineering is hidden. The construction usually includes face stock, adhesive, ink or toner, protective coating, release liner, and optional finishing such as lamination, foil, matte varnish, soft-touch coating, or kiss-cut shaping. Change one layer and the sticker may behave differently on cotton, tissue, poly mailer film, glassine, or corrugated board.
Placement changes the specification. A temporary sticker on a folded sweatshirt needs a different adhesive conversation than a permanent logo seal on a shipping box. Clear bags need labels that scan cleanly and resist rubbing. Tissue paper needs enough tack to stay closed without shredding the wrap during opening. Retail packaging may need a richer finish because the label sits beside hang tags, cartons, and shelf displays.
Adhesive behavior comes down to plain physics: initial tack, peel strength, surface energy, dwell time, temperature, moisture, and residue after removal. Low-surface-energy plastics can be stubborn. Textured fabrics reduce contact area. Coated papers may hold labels beautifully, while a garment treated with softener, dye, silicone wash, or water-repellent finish may reject the same adhesive.
Material choice does much of the visible work. Paper is cost-effective for short-term packaging labels. BOPP film handles moisture and scuffing better than standard paper. Vinyl is durable but often more than an apparel pack-out needs. Kraft feels natural but warms and mutes color. Textured stocks can look boutique, although fine type and QR codes need extra proofing.
| Material | Typical Use | Practical Watchout |
|---|---|---|
| White paper | Size dots, thank-you labels, tissue seals | Lower moisture and scuff resistance unless coated |
| BOPP film | Poly bags, mailers, barcode labels | Higher cost than basic paper, but better durability |
| Kraft paper | Natural-looking branded packaging | Colors print warmer and less saturated |
| Textured stock | Boutique retail packaging | Small text and QR contrast need proofing |
Print methods vary. Digital printing suits short runs, seasonal drops, and multiple designs. Flexographic or offset production can make sense for larger, repeatable volumes. Thermal transfer is common for operational labels such as barcodes, SKUs, and inventory stickers. If a code drives fulfillment, test it after printing, not only on the design screen.
Direct fabric contact deserves caution. Many clothing stickers are intended for packaging or short-term placement, not long-term adhesion to textiles. Test on the exact fabric, dye, finish, and storage condition. A removable adhesive that behaves well on white cotton may act differently on black fleece, garment-washed denim, rib knit, or coated athletic fabric.
For buyers thinking beyond graphics, QR codes and barcodes can turn a small label into an inventory tool, care-instruction hub, authentication marker, or post-purchase engagement point. The International Safe Transit Association is a useful reference for broader distribution testing discipline, especially if stickers are part of a shipping system that will be rubbed, stacked, and handled repeatedly.
Key Specs That Decide Whether Clothing Labels Look Premium or Cheap
Size is the first quality signal. A 1-inch size dot, a 2-inch logo seal, and a 3-by-4-inch care sticker solve different problems. They should not share the same layout logic. A barcode needs quiet zones. A care reminder needs readable text. A logo seal needs breathing room.
Shape carries meaning too. Circles feel simple and fast. Rectangles handle barcodes, SKUs, and multi-line copy. Custom Die Cuts add recognition, especially for boutique drops, but they may require tooling and tighter artwork control. Kiss-cut sheets are often easier for packing stations because staff can peel labels quickly without fighting the liner.
Adhesive choice is where attractive labels become expensive mistakes. Removable adhesives are generally safer for garment contact and temporary size marking. Permanent adhesives suit mailers, cartons, and box seals. Freezer-grade or high-tack adhesives should be specified only if the supply chain demands them, such as cold storage, rough corrugated, or long warehouse dwell time.
Finish changes perception. Matte feels editorial and fashion-forward. Gloss increases contrast and can make colors pop. Soft-touch can elevate premium apparel, although it may scuff depending on handling. Laminate adds protection when stickers rub against mailers, tissue, or other garments during transit.
Color accuracy is not automatic. Brand colors can shift across white BOPP, kraft paper, clear film, uncoated paper, and textured stocks. A black logo on white paper may look sharp; the same logo on kraft may feel softer and more heritage. Neither is wrong. The problem is discovering the difference after 10,000 labels have been printed. For sustainability claims or fiber sourcing questions in paper-based packaging, the Forest Stewardship Council offers a useful framework for understanding certified materials.
Packaging buyer rule: if the sticker carries a barcode, care claim, size, or return instruction, treat readability as a production requirement, not a design preference.
Brand tier should guide spend. Budget basics may need clean, functional labels at low unit cost. Boutique drops may justify richer stocks, shaped seals, foil, or short-run art changes. A luxury hoodie sold at $120 has more room for tactile packaging design than a multipack tee sold primarily on price.
Pricing, MOQ, and Unit Cost Factors Buyers Should Expect
Sticker pricing is driven less by the word “custom” and more by material, size, shape, quantity, adhesive, finishing, artwork complexity, and variable data. That sounds obvious until quotes arrive. Then buyers discover that a small paper circle and a laminated custom-shape film label live in different cost neighborhoods.
As a practical range, simple digitally printed paper stickers in several thousand units may land around $0.03 to $0.12 each, depending on size and finish. Smaller boutique runs can be higher, sometimes $0.18 to $0.45 per piece for shaped, specialty, or low-quantity work. Larger roll-label orders can drop unit cost sharply, but only if the design remains stable long enough to use the inventory.
Minimum order quantities depend on production method. Small digital runs suit testing, pop-ups, influencer mailers, and capsule collections. Higher quantities usually reduce unit cost, yet they increase storage needs and design-change risk. A growing apparel brand is often better off buying 2,000 well-specified labels than 20,000 outdated ones sitting in a stockroom after a size system changes.
The hidden economics are less glamorous. A cheaper sticker that peels off in transit, smudges a barcode, or leaves residue on fabric can cost more through returns, repacking labor, customer service tickets, and delayed wholesale shipments. If one repack takes 90 seconds and warehouse labor is $18 per hour, 500 problem units can burn roughly 12.5 labor hours before anyone counts replacement materials.
| Cost Lever | Why It Changes Price | Buyer Tip |
|---|---|---|
| Size | Larger labels use more material and ink | Mock up at final size before quoting |
| Shape | Custom die cuts may add tooling or setup | Use standard circles or rectangles for operational labels |
| Material | Films and textured stocks cost more than basic paper | Match material to handling risk, not wishful thinking |
| Variable data | Barcodes, SKUs, and versions add file control | Send clean spreadsheets and naming rules |
| Format | Rolls and sheets fit different workflows | Confirm dispenser, core size, and roll direction early |
Ask for price breaks at realistic quantities: 500, 1,000, 2,500, 5,000, and 10,000 pieces, for example. Compare unit cost against inventory risk. Rolls often suit high-volume packing and label dispensers. Sheets can work well for boutique teams, mixed sticker sets, and small batches. For related materials, buyers can review Custom Labels & Tags alongside broader Custom Packaging Products to keep package branding consistent.
Process and Timeline From Artwork to Finished Sticker Rolls
A clean sticker order follows a predictable chain: brief, quote, artwork check, proof, material confirmation, print setup, production, finishing, quality control, packing, and shipping. The process is not complicated. The delays usually come from vague decisions made early.
Missing bleed is common. So are low-resolution logos, unclear size requirements, untested adhesive assumptions, late proof approvals, and last-minute SKU changes. A barcode batch with 40 versions needs tighter file control than a single logo seal. A custom die-cut label needs a dieline. A metallic finish needs realistic expectations about fine detail.
Proofing comes in layers. Digital proofs check layout, copy, scale, and versioning. Physical samples or press proofs help evaluate color, material feel, adhesive behavior, and scuff resistance. For Premium Retail Packaging, screen color alone is not enough, especially on kraft, clear film, textured paper, or soft-touch finishes.
Quality control should be specific, not ceremonial. Check label count, unwind direction, core size, cut accuracy, print registration, scuffs, adhesive ooze, spelling, SKU versions, barcode grades where relevant, and whether labels peel cleanly from the liner. For removable garment stickers, test residue after dwell time. A label that peels cleanly after five minutes may behave differently after three days under pressure in a packed carton.
Lead time depends on the spec. Simple paper label orders can often move through production faster than specialty finishes, custom shapes, multi-version runs, or barcode-heavy batches. A realistic working assumption is several business days for proofing and artwork cleanup, plus production and transit time. Material availability, freight distance, order volume, and approval speed all matter.
Apparel launch calendars make timing sharper. Stickers may be needed before garment folding, photography, retail packing, influencer mailers, warehouse receiving, or wholesale routing. If labels arrive after the packing team starts, someone either pauses fulfillment or reworks finished units. Both choices cost money.
Application format also affects timing. Roll direction, core size, sheet layout, label gap, and dispenser compatibility should be decided before production. A label facing the wrong way on a roll can slow packers by seconds per unit. Multiply four lost seconds across 8,000 garments and the “minor” detail becomes nearly nine extra labor hours.
Build in a buffer for transit delays, proof revisions, and real-world testing, especially when custom clothing stickers touch fabric or carry scannable operational data. That buffer is not waste. It is insurance against launching with Labels That Look right but fail on the packing table.
Step-by-Step Guide to Ordering Apparel Stickers Without Guesswork
The best orders start with a practical brief, not a mood board. Design matters, but the sticker has a job to do. Use this sequence before asking for a quote.
- Define the job. Is the sticker for branding, size marking, tamper indication, care education, barcode scanning, return handling, or unboxing presentation?
- Choose the placement surface. Cotton fabric, tissue, poly bag, kraft mailer, folding carton, hang tag, glassine sleeve, and corrugated shipper all behave differently.
- Select size and shape. Base this on viewing distance, copy length, packer handling, removal needs, and barcode requirements.
- Match material and adhesive. Consider humidity, heat, long storage, rubbing, direct fabric contact, and whether the label must peel cleanly.
- Prepare artwork properly. Include bleed, safe margins, vector logos, readable type, correct color values, and tested QR or barcode files.
- Review the proof like a buyer. Check scale, spelling, SKU accuracy, scanability, and whether the sticker fits the garment price point.
- Confirm production details. Approve quantity, roll or sheet format, delivery location, packing instructions, and who applies the stickers in the workflow.
That sixth step is where many teams get too casual. A designer may love the label at 200% zoom. A packer sees it at arm’s length under warehouse lighting. A customer sees it for three seconds while opening the package. A returns team sees whether the SKU is clear enough to process quickly.
For stickers with QR codes, print a proof and scan it under normal conditions. Try an older phone. Try low light. Try the sticker on the final substrate. Small codes can work, but they need contrast, quiet space, and enough printed resolution to survive production tolerances.
Common Mistakes That Make Clothing Stickers Fail in Real Use
The first mistake is choosing a beautiful adhesive label without testing it on the actual fabric, dye, coating, or packaging surface. Textile chemistry is messy. Garment washes, softeners, coatings, lint, and texture can all change adhesion.
The second mistake is designing for a screen instead of a packing table. Tiny type, crowded icons, weak contrast, and QR codes that fail under warehouse lighting are not rare. They are predictable. If the label must be read fast, print it at final size and put it on a real packed garment.
The third mistake is using permanent adhesive where a removable sticker is expected. Residue complaints can damage the customer experience, especially on delicate, dark, textured, or premium fabrics. Permanent adhesive is useful on boxes and mailers; it is risky on garment contact unless tested carefully.
The fourth mistake is ignoring roll direction and application method. Packers should not rotate every label by hand. Across hundreds or thousands of units, seconds become labor cost, and labor cost becomes margin pressure.
The fifth mistake is over-customizing too early. Brands still changing size names, care claims, SKU structures, or launch titles should be cautious with large orders, foil dies, and highly specific printed copy. Flexibility has value.
The sixth mistake is treating stickers as isolated graphics instead of part of a full packaging design system. Tissue, hang tags, mailers, inserts, cartons, and Custom Printed Boxes should feel related. Not identical. Related. The sticker may be small, but it can tie the whole product packaging experience together.
The seventh mistake is skipping reorder planning. Batch-to-batch color shifts, emergency freight, and material substitutions become painful right before a drop, wholesale delivery, or seasonal promotion. Keep approved art files, substrate notes, adhesive specs, and reorder quantities in one place.
Build a Sticker Brief Your Supplier Can Price Accurately
A useful supplier brief should include garment type, packaging surface, sticker purpose, preferred dimensions, quantity range, artwork files, finish preferences, adhesive expectations, delivery location, and deadline. Add photos of the current pack-out if you have them. Suppliers quote better when they can see the job the label must perform.
Create three versions of the brief. The must-have version controls budget: standard shape, practical stock, clean print, correct adhesive. The preferred version adds brand impact: better finish, stronger material, improved color control, or custom shape. The premium version is reserved for retail packaging, special drops, gift sets, or influencer mailers where presentation carries more commercial weight.
Before a full run, test a small application batch. Apply the labels. Wait 24 to 72 hours if the launch calendar allows. Peel if removal matters. Rub against tissue, poly bags, or mailers. Scan every code type. Photograph the unboxing under normal light, not studio light. Honest testing catches problems that a polished mockup hides.
- Ask suppliers about: material samples, adhesive recommendations, roll direction, proofing, price breaks, reorder consistency, shipping options, and barcode or QR verification.
- Connect specs to goals: faster packing, cleaner shelf presentation, fewer sizing errors, better returns handling, stronger brand recall, or measurable QR engagement.
- Keep records: final dielines, color notes, material names, adhesive type, quantity ordered, reorder point, and approved proof files.
The smartest buyers treat custom clothing stickers as tiny pieces of operational infrastructure. They can make branded packaging look sharper, but their real value appears when design, material, adhesive, cost, and launch timing are tied into one practical specification.
FAQ
Can custom clothing stickers go directly on fabric?
They can be used on some fabrics for temporary sizing or presentation, but the adhesive must be tested on the exact textile, dye, and finish. Removable adhesives are usually safer for garment contact than permanent adhesives, especially for delicate, dark, textured, or coated fabrics. For long-term garment branding, woven labels, printed neck labels, or heat transfers may be more appropriate than adhesive stickers.
What is the best material for custom apparel stickers?
Paper works well for cost-effective packaging labels and boutique presentation when moisture resistance is not critical. BOPP or other film labels are better for poly bags, mailers, and stickers that may face rubbing, humidity, or scuffing. Kraft and textured stocks can feel more premium or natural, but color accuracy and fine detail should be proofed carefully.
How much do clothing label stickers cost?
Cost depends on size, quantity, material, adhesive, shape, finish, number of designs, and whether the order includes variable data such as barcodes. Simple paper stickers may cost only a few cents each at higher quantities, while short-run specialty labels can cost several times more. The most useful quote request includes dimensions, quantity, surface, adhesive need, artwork count, roll or sheet preference, and deadline.
How long does custom sticker production usually take?
Timeline depends on proof approval, material availability, print method, finishing, order size, and shipping distance. Simple digital sticker orders can move faster than specialty finishes, custom die cuts, or multi-version barcode batches. Buyers should build in time for artwork revisions, material testing, proof approval, and transit before the apparel packing date.
What artwork files are needed for custom clothing sticker printing?
Vector files are preferred for logos, icons, dielines, and sharp text, while high-resolution raster files may work for photographic designs. Artwork should include bleed, safe margins, clear cut lines, correct color values, and readable type at the final printed size. QR codes and barcodes should be supplied at adequate resolution and tested after proofing to confirm scan reliability.