If a shopper only gives a product two or three seconds of attention, the tag matters more than many brands expect. Custom Hang Tags with die cutting can change that first read by making the product feel more deliberate before anyone studies the copy, pricing, or feature list. A square tag says “included.” A shaped tag says someone thought about the details.
That detail is not cosmetic fluff. The outline can suggest luxury, craft, performance, playfulness, or technical precision without changing the rest of the packaging system. For apparel, candles, bags, bottles, and accessories, a custom silhouette often becomes the smallest part of the package that does the heaviest branding work.
Still, shape alone is not enough. Buyers who source packaging repeatedly know that the best result comes from matching the silhouette to the stock, the print method, the hole placement, and the way the tag will be handled during packing and shipping. If those pieces do not line up, the tag may look good on a screen and awkward in production.
Why shape changes how a product is read
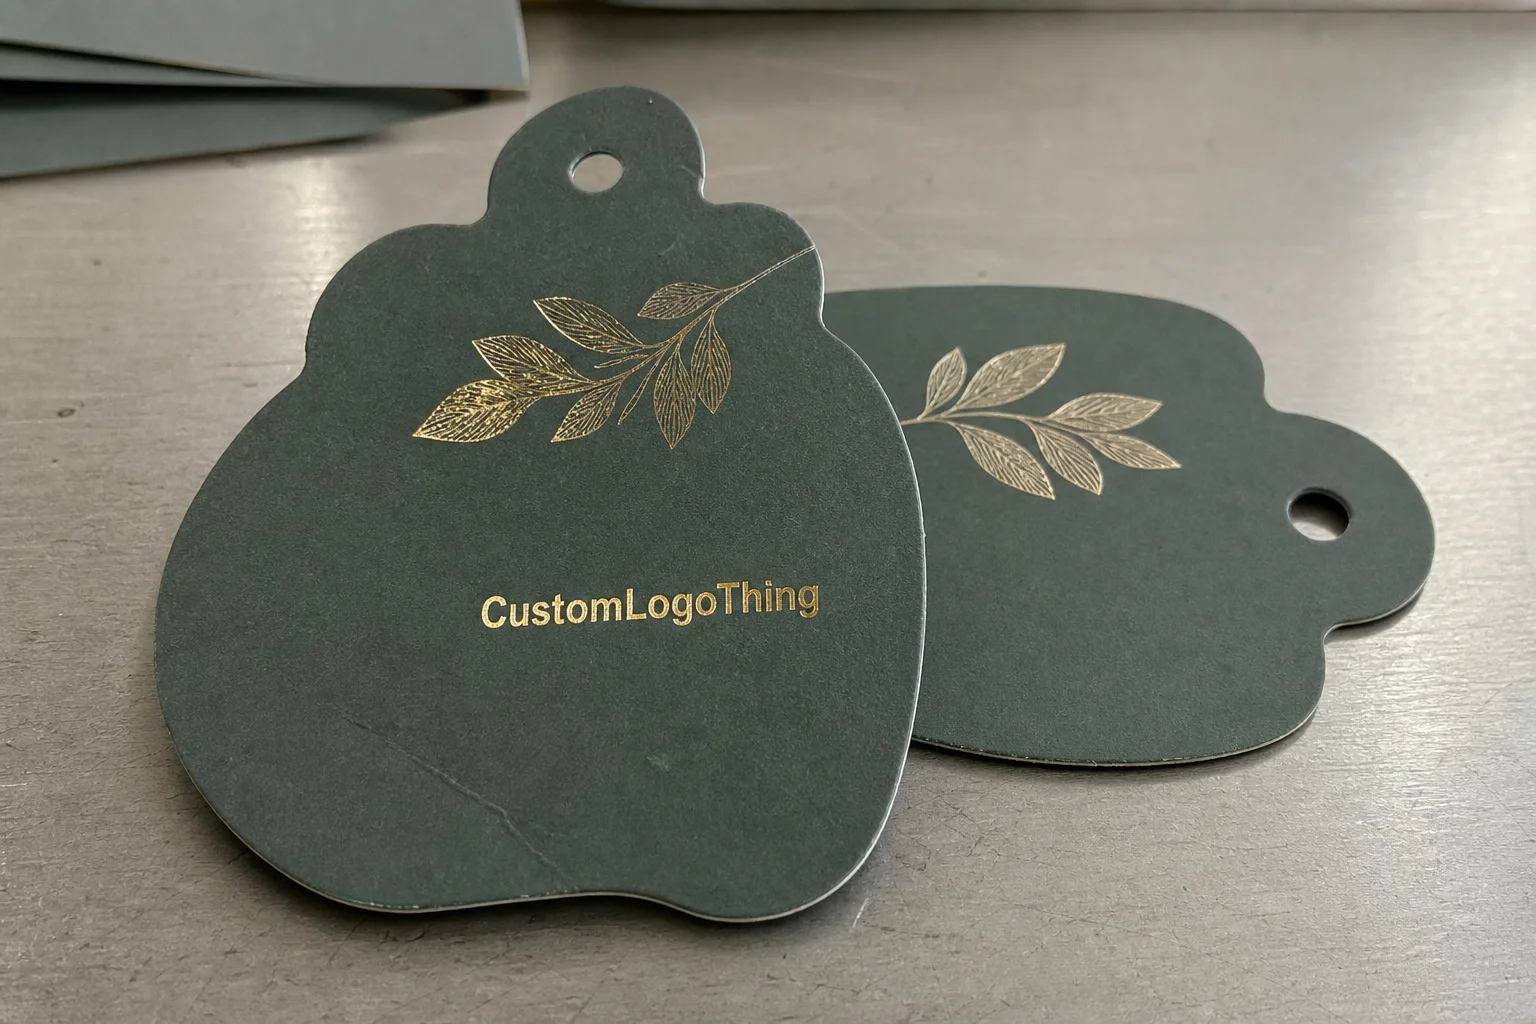
A standard rectangle is efficient, but it rarely creates a strong memory. A die-cut contour changes the visual rhythm of a shelf, a peg hook, or a product photo. That small shift can make a product feel more considered, especially when the tag echoes another element in the brand system such as a logo mark, label shape, or box window.
There is a practical side to this. Shoppers may not describe a tag as “well engineered,” but they notice when the edges, hole, and typography feel aligned. In retail packaging, coherence is often what separates an ordinary item from one that looks slightly more premium. A custom outline can reinforce that coherence without adding another layer of decoration.
Different shapes communicate differently. A soft curve usually feels calmer and more refined. A sharp or angular contour can read as modern, athletic, or technical. A tag that mirrors an icon or emblem often feels more branded, because the shape itself becomes part of the identity rather than a neutral backing card.
The common mistake is to chase novelty. A strange outline may look interesting in a mockup and still fail on the shelf if it distracts from the product or makes the copy hard to scan. The strongest tags usually do one thing very well: they support the product story and stay out of the way.
A well-shaped tag should feel integrated with the product, not bolted on as an afterthought.
That is why Custom Hang Tags with die cutting tend to work best when the visual idea is simple, the structure is practical, and the shape has a reason for existing. Decorative for the sake of decorative is expensive. Purposeful is easier to approve and easier to manufacture.
How die cutting turns artwork into a real tag
The dieline is the core document. It defines the outer cut, any internal windows or holes, and the safe area around text and graphics. If the dieline is off by even a small amount, print registration, trimming, and hole placement all become harder to control. In packaging production, that can turn a simple concept into a rework.
The usual workflow is straightforward: the artwork is checked, the dieline is approved, files are prepared for press, the cutter is set up, and the tags are printed, die cut, inspected, and packed. A simple rounded shape may move quickly. A more detailed contour with tight corners or internal cutouts usually needs more careful proofing and setup.
For Custom Hang Tags with die cutting, the cut method matters almost as much as the design itself. Rounded corners and simple contours can often be handled efficiently. Intricate silhouettes, deep notches, or complex internal windows may require a dedicated cutting form or a more exact digital cutting setup. That usually affects both cost and lead time.
Prepress has a few jobs that are easy to overlook if you have not ordered this type of work before. The print must sit cleanly against the cut line, the hole needs to land where the string or fastener will balance the tag, and any fine rules must stay far enough from the edge to survive trimming. A file that looks tidy on a screen can still hang crooked if the cut path and artwork were not planned together.
For brands running broader Custom Labels & Tags programs, it pays to treat the die line as part of packaging design rather than a technical footnote. Once the shape is locked early, the rest of the layout can be built around real print and cut limits instead of guesswork.
Stock, finish, and structure that affect durability
Stock choice changes the entire feel of the tag. A 14pt or 16pt cover stock is often enough for light retail use. Heavier board, such as 18pt stock or around 400gsm, gives more stiffness and usually feels more substantial in hand. Coated papers tend to print with sharper detail and better scuff resistance, while uncoated stocks feel warmer and more tactile.
Shape and strength are linked. A long narrow tab, a pointed extension, or a design with internal cutouts needs enough material around it to hold up through stringing, bundling, packing, and shipping. If the silhouette is too delicate, the tag can bend, chip, or tear at the cut edge before it reaches the sales floor.
Finishes also affect how the tag performs. Matte coatings reduce glare, which helps when products are viewed under bright retail lighting. Aqueous coating is often a practical middle ground because it adds some protection without pushing cost too far. Soft-touch can make a tag feel richer, but it also raises the price and may show wear more quickly in high-contact areas.
The finish should support the artwork rather than fight it. Small type, fine lines, and detailed logos need legibility first. A finish that looks impressive in a sample box but dulls the copy under store lights is not helping the package.
A few technical details make a real difference:
- Hole placement needs enough paper margin to prevent tearing under string tension.
- Rounded internal corners are usually safer than sharp inside angles on heavier board.
- Safe spacing from the cut edge keeps logos and type from feeling cramped after trimming.
- Attachment choice should match the tag weight; thin string, cotton cord, elastic loop, and plastic fasteners all behave differently.
If embossing, foil, or a specialty varnish is part of the plan, the stock must support it. Not every paper takes deep embossing well, and not every detailed contour can survive heavy finishing without weakening near the die line. That is especially true for narrow bridges or small internal cutouts.
Buyers often compare Custom Packaging Products as a system rather than ordering tags in isolation. That approach usually produces a better match between the tag, the label, the carton, and the rest of the brand presentation.
Cost, MOQ, and what drives the quote
Pricing for die-cut tags is driven by a few specific variables: size, print coverage, stock weight, finish, hole count, shape complexity, and whether the cut requires a custom tool. The quote is usually not mysterious once those factors are separated.
For a common run, a simple printed hang tag may land around $0.10 to $0.18 per unit at 5,000 pieces. A more complex version with a custom contour, heavier board, or specialty finish can move into the $0.18 to $0.35 range or higher. Small orders nearly always cost more per piece because setup, proofing, and cutting time are spread across fewer units.
MOQ deserves a direct conversation. A fully custom outline can make sense at moderate quantities, but at very low volumes the setup cost can outweigh the visual benefit. In those cases, a cleaner rectangular form with rounded corners may leave more budget for better print quality, a heavier stock, or a stronger attachment method.
That is the tradeoff buyers run into constantly: a dramatic shape does not always produce dramatic shelf value. Sometimes the extra money is better spent on a nicer paper, more accurate color, or a tag that hangs better on the product. The best-looking option on a proof sheet is not always the smartest option for the launch budget.
| Option | Typical cost impact | Best fit |
|---|---|---|
| Standard rectangle with rounded corners | Lowest setup and cutting cost | Large runs, tight budgets, faster approvals |
| Simple custom contour cut | Moderate setup increase | Brands wanting a more distinct silhouette |
| Highly detailed shape or internal cutouts | Higher setup, more proofing, more waste risk | Premium launches and lower-volume programs |
| Contour plus specialty finish | Highest overall cost | Giftable, high-touch, or luxury retail packaging |
Ask for a line-item quote. Printing, cutting, finishing, and assembly should be separated so you can see which element is driving the number. That also makes it easier to compare one option against another without relying on vague bundle pricing.
For buyers managing multiple formats, reviewing Manufacturing Capabilities before signing off can save time. It helps confirm whether the supplier can handle simple contour work, more intricate die cutting, and related packaging components in the same production environment.
Production steps and lead time after approval
Once the proof is approved, the job usually moves through prepress checks, press setup, printing, die cutting, inspection, and packing. On a clean order, that sequence is predictable. On a job with late changes, the cutter often becomes the bottleneck because shaped work demands more setup attention than a basic rectangle.
Lead time depends on file quality, stock availability, finish selection, and cut complexity. A standard tag with a clean shape and ready-to-run artwork may move in roughly 12 to 15 business days after proof approval. More intricate Custom Hang Tags with die cutting can take longer, especially if the stock is special order or the finish needs extra drying or curing time. Shipping is separate, so the production window should be planned ahead of the launch date, not against it.
Late dieline changes are one of the fastest ways to slow a project down. Even a minor shift in hole placement or a small change to an internal notch can force another round of setup checks. That is why the smoothest jobs usually come from file discipline rather than speed alone.
Quality control matters at the end of the line, not just in the file. Buyers should ask how the supplier checks trim accuracy, hole centering, color consistency, and edge condition. If the tags will be packed with other products inside outer cartons, transit conditions matter too. Packaging groups often reference standards aligned with internal QC or transit testing such as ISTA, and the broader context for packaging handling can be reviewed through ISTA and EPA.
Mistakes that make a shaped tag look cheaper
The most common mistake is also the easiest to prevent: placing text, logos, or fine rules too close to the cut edge. If the trim lands slightly off, the layout starts to feel cramped. On a shaped tag, the eye reads the outer contour first, so weak margins become obvious very quickly.
Another problem is choosing a silhouette that is too fragile for real handling. Thin tabs, narrow necks, and sharp interior angles can fail during stringing or packing. A shape can look polished in a PDF and still become a production headache once the board is cut. Good packaging design respects the material; it does not pretend the material is stronger than it is.
Several issues show up again and again:
- The hole is off-center, so the tag hangs crooked.
- The string or fastener is too weak for the board weight.
- The stock is too thin for the chosen silhouette.
- Small text sits too close to the trim line and loses clarity.
- No physical proof was reviewed before full production.
Skipping a physical proof, or at least a careful final layout check, can be expensive. Digital proofs are useful, but they do not always show how coated stock, thick board, or a complex edge will behave after cutting. That matters more with shaped tags because the whole effect depends on the accuracy of the outline.
One more caution: not every product needs a more complex cut. Sometimes a cleaner contour, a better board, or a different finish produces a better result than adding more geometry. The goal is not to impress prepress; it is to create a tag that looks correct after production and still feels good in the hand.
How to spec the job cleanly
The fastest way to get a usable quote is to prepare the basics up front: artwork, target size, quantity, stock preference, finish request, attachment style, and where the tag will connect to the product. With those details in place, prepress can usually tell whether the shape is straightforward or whether the design needs to be simplified.
Ask for the dieline before finalizing the layout. That single step prevents a lot of avoidable problems because the silhouette, hole placement, and safe area are locked before the artwork is polished. If the team is still choosing between a few directions, compare two or three versions instead of forcing one complex idea to work. A slightly wider base, a gentler curve, or fewer internal cutouts can improve durability and lower waste without sacrificing identity.
For brands building a wider package system, the tag should sit inside the same visual language as the rest of the product packaging. The same logic should carry across labels, hang tags, inserts, and any custom printed boxes that are part of the line. Consistency does more for perceived quality than isolated embellishment.
Before approval, confirm five things: the cut line, finish, quantity, stock, and schedule. If those are aligned, the chance of a clean production run goes up quickly. If they are vague, the risk of mismatch rises just as fast.
Sustainability can be part of the spec too. If it matters to the brand, ask about FSC-certified papers and how trim waste is handled during cutting and finishing. Material sourcing and waste reduction are not just marketing language; they affect cost, consistency, and the practical footprint of the job.
The strongest results usually come from simple specs, realistic expectations, and a shape that supports the product instead of competing with it. That is the real value of Custom Hang Tags with die cutting: a cleaner presentation, fewer production surprises, and a tag that feels intentional from the first glance to the final packed carton.
FAQ
What file should I prepare for custom hang tags with die cutting?
Editable vector artwork is the safest starting point because it keeps the cut line, logos, and text crisp at production scale. Include the tag size, bleed, hole placement, and any internal cutouts so prepress can verify what belongs inside the safe area. If the shape is still being developed, request the dieline first and build the layout around it rather than guessing at the final cut path.
How do custom hang tags with die cutting affect price?
Price usually rises with more complex shapes, thicker stock, specialty finishes, and lower quantities because setup is spread across fewer pieces. A simple contour cut is generally less expensive than a detailed silhouette or a design with internal windows. A clear quote should separate printing, cutting, finishing, and assembly so the cost drivers are visible.
What is the usual turnaround for die-cut hang tags?
Turnaround depends on artwork readiness, proof approval, stock availability, and cut complexity. Clean files and a standard shape usually move faster than custom silhouettes that need extra setup or revision. Shipping time should be added to the production schedule so the tags arrive before the launch window.
Can I order a small MOQ for custom shaped hang tags?
Yes, but smaller runs usually carry a higher per-unit cost because setup and cutting time are divided across fewer tags. If the quantity is very low, a simpler shape or standard tooling may be more economical than a fully custom outline. Ask about the minimum based on the cut method, stock, and finish so you can choose the most efficient path.
Which finishes work best for custom die-cut hang tags?
Matte finishes are strong for readability and a softer premium feel, while coated finishes can improve scuff resistance and help color stay sharper. Soft-touch can increase tactile appeal, but it usually adds cost and should match the brand position. The right finish depends on handling, shelf visibility, and how much wear the tag will take in packing and retail display.