A hockey stick can touch the ice hundreds of times in a single game. Yet up close, one of the first details people notice is often the graphic on the shaft: a player name, sponsor mark, team logo, or small identification label. That is why custom hockey stick stickers deserve more attention than they usually get. They are small, exposed, handled constantly, and expected to stay sharp under rough rink conditions.
From a packaging buyer’s point of view, stick decals sit in an odd middle ground. They are not full product packaging, but they follow many of the same rules: substrate choice, adhesive behavior, color contrast, finishing, proofing, and repeatable production. Treat them like ordinary paper stickers and they disappoint. Treat them like performance labels, and they can solve real team, retail, and branding problems without changing the stick itself.
Custom Hockey Stick Stickers: What They Are and Why Teams Use Them
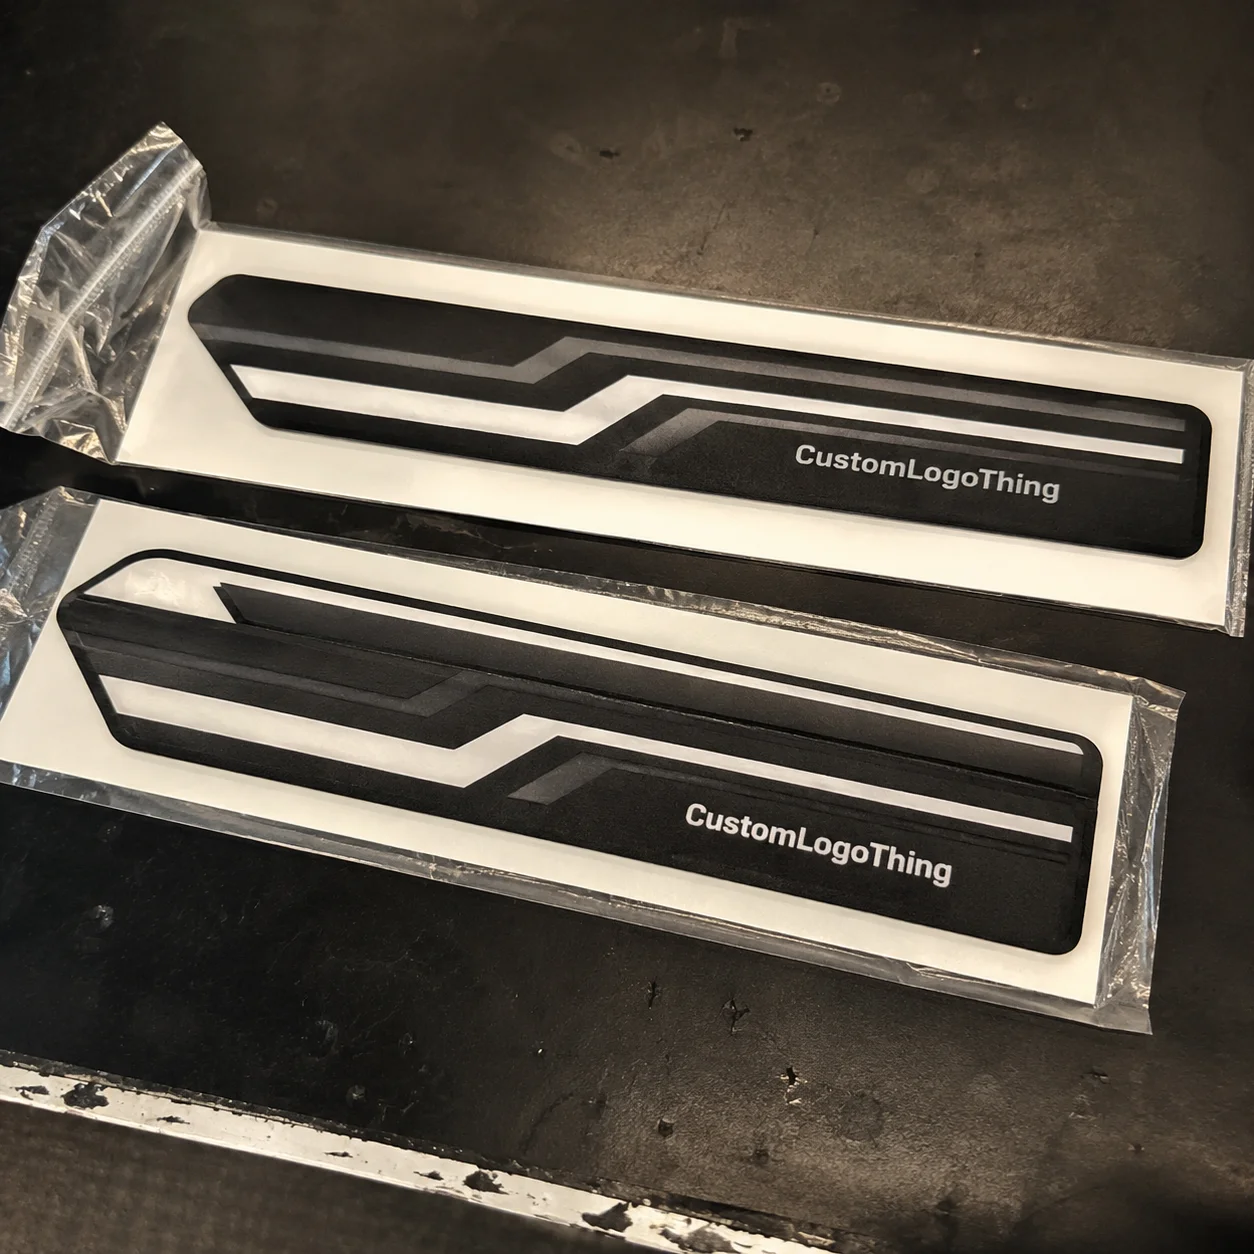
Custom hockey stick stickers are adhesive graphics made for sticks and related gear. Some are narrow name strips for player identification. Some are sponsor decals placed on the upper shaft. Others are small labels for butt ends, equipment bags, retail stick packaging, training camp giveaways, or team-branded merchandise kits.
The buyer list is wider than people assume. Youth teams order player name decals so sticks do not disappear into a pile after practice. School athletic departments use them to make equipment look consistent. Tournament organizers print event logos for welcome packs. Pro shops add brand marks to retail displays. Parents order personalized labels when two players in the same house own nearly identical sticks.
These are not the same as basic paper labels. A hockey stick decal may face cold rink air, sweat, glove friction, tape residue, flexing carbon-fiber surfaces, and repeated handling from bags, benches, and locker rooms. A paper sticker with a light adhesive can look fine on a laptop but fail quickly on a stick shaft. That failure is rarely mysterious. The material was simply asked to do a job it was not built for.
The better versions use a flexible face stock, clean printing, a pressure-sensitive adhesive, and often a protective laminate. Rounded corners help too. A square corner creates a tiny pick point where gloves, tape, or a player’s hand can start lifting the edge. Small detail, big consequence.
The value is practical before it is cosmetic. Decals reduce equipment mix-ups, create a consistent team look, add sponsor impressions, and make merchandise feel more finished. For brands selling sticks, tape, training aids, or camp kits, the decal becomes part of package branding. A neat, durable label can make a modest item feel more intentional.
Smart ordering rule: think of hockey stick decals as small-format performance labels, not casual giveaways. Surface, placement, and handling conditions should drive the spec.
How Stick Decals Work on Curved, Taped, and High-Contact Surfaces
A durable stick decal has several layers. The face stock is the visible material, usually vinyl, polyester, or another film-style label stock. The printed ink layer carries the logo, name, number, sponsor mark, or graphic. The adhesive bonds the decal to the stick. A laminate, when used, sits over the print to resist scuffs. The finished piece is then die-cut, digitally cut, or kiss-cut on a sheet for easier removal.
Hockey sticks are difficult surfaces. They are narrow. Many have textured finishes. They flex under load. They are handled with gloves, dragged out of bags, wrapped with tape, and exposed to cold air. A decal that bonds well on a flat retail package may behave differently on a curved composite shaft that bends during a slapshot.
Placement changes the job. Upper shaft decals usually get the best visibility and the least abuse. Lower shaft decals receive more contact from gloves, boards, bags, and tape. Blade heel decals can look interesting but face heavy abrasion and moisture. Butt-end labels help identify sticks, though they may be hidden by tape or grip material. Retail hang-tags and stick packaging decals have a different assignment: they need to look clean at purchase, not survive months of play.
Material should match that assignment. Vinyl bends well and is often forgiving on slightly curved shafts. Polyester holds shape and can be useful where dimensional stability matters, especially on flatter label zones. BOPP-style films are common in product labeling and can work for controlled applications, but buyers should confirm flexibility and adhesive suitability before using them on high-contact gear. Laminated options cost more, but they fight scuffs better.
Adhesive selection is the quiet variable. Too weak, and the sticker lifts at the edge. Too aggressive, and removal may leave residue or disturb finishes. One adhesive is not “best” for every order. A temporary event decal, a season-long nameplate, and a retail display label may need three different adhesive choices.
Decals under tape can last longer because the tape protects the edge, but visibility drops. Decals over tape are easier to replace, yet tape texture and adhesive residue can reduce bond strength. Before asking for a quote, decide whether the sticker is decorative, informational, sponsor-facing, or expected to survive repeated game use. That one decision narrows the material conversation fast.
Key Specs That Decide Durability, Fit, and Print Quality
Size is the first technical decision. A narrow player name strip might be 0.5 to 0.75 inches tall and 2.5 to 4 inches long. A sponsor shaft decal may run 1 by 4 inches or 1.25 by 5 inches, depending on the stick profile and logo shape. Circular helmet-style marks can be repurposed for sticks, but a 2-inch circle may feel bulky on a narrow shaft. Small butt-end labels may be closer to 0.75 to 1 inch across.
Shape follows size. Rectangles are usually cheaper and simple to apply. Rounded rectangles resist peeling better than sharp-corner labels. Contour cuts look more custom because the cut follows the logo shape, but tiny cut details can create vulnerable edges. Sheeted sets are efficient for teams because one sheet can hold a player name, jersey number, sponsor mark, and bag label.
Finish affects both appearance and wear. Gloss makes color pop and works well for bold team marks. Matte reduces glare and can look more premium on dark composite sticks. Clear decals can disappear nicely on certain surfaces, but they may need white ink behind the logo so colors do not sink into a black background. Metallic and holographic films attract attention for Events and Retail promotions, though they may not suit every school or sponsor brand. Lamination is the practical upgrade when abrasion is expected.
| Spec Choice | Best Use | Buyer Watchout |
|---|---|---|
| Gloss laminated vinyl | Team logos, player names, sponsor decals | Can show glare under bright rink lighting |
| Matte laminated film | Premium branding and darker sticks | May mute very bright colors slightly |
| Clear film with white ink | Minimal look on composite shafts | Needs proper artwork setup for opacity |
| Unlaminated economy sticker | Giveaways, short events, packaging inserts | Not ideal for high-contact stick areas |
Color contrast is where many designs stumble. A logo that looks crisp on a white screen can vanish on a black carbon-fiber stick. White tape, black tape, colored shafts, and glossy finishes all change the read. If a decal goes on a dark stick, consider a white ink layer, a light outline, or a solid background panel. For sponsor logos, test legibility at actual size. A 6-point tagline may be technically printable and still functionally unreadable.
Artwork quality matters. Vector files such as AI, EPS, or clean PDF logo files are best for sharp edges. Raster images need enough resolution, commonly 300 dpi at final print size. Bleed prevents thin white slivers at the edge after cutting. Cut lines should be realistic, not full of tiny spikes or hairline shapes. The same principles apply across Custom Labels & Tags, especially where the label is small and the viewing distance is close.
Cold alone does not automatically ruin a sticker. Poor adhesive choice, dirty surfaces, rushed application, or flex-heavy placement can make a good material look bad. Ask specific questions before buying: Will these be laminated? Are the corners rounded? Is the adhesive suitable for composite sticks? Can I review a physical or digital proof? Those questions separate decorative stickers from true equipment labels.
Pricing, MOQ, and Unit Cost: What Actually Drives the Quote
Sticker pricing is not just square inches. The quote is shaped by material, finish, print coverage, cut complexity, order quantity, setup time, proofing, packaging method, and whether the stickers are sheeted, rolled, or individually cut. A simple one-color rectangle ordered in bulk may be economical. A full-color, contour-cut, laminated decal with five player versions and individual sorting will cost more, even if the sticker is small.
For general planning, small custom decal orders can land around $0.40 to $1.25 per sticker depending on size, finish, and setup. Mid-size team runs often drop into the $0.18 to $0.45 range when the artwork is clean and the shapes are standardized. Larger bulk runs can go lower, but usually only when specs are consistent and production is efficient. These are planning ranges, not promises. Materials, rush timing, specialty finishes, and sorting requirements can shift the math quickly.
MOQ, or minimum order quantity, exists because setup work does not disappear on small runs. Someone still checks artwork, builds a proof, sets up print files, loads material, calibrates cutting, removes waste, and packs the order. Digital printing reduces some barriers, but it does not eliminate labor. A 40-sticker order can require almost as much prepress attention as a 400-sticker order.
Buyers should prepare six details before requesting a quote: dimensions, quantity, number of designs, intended use, finish preference, and delivery deadline. Add adhesive notes if the decal will go on composite sticks, tape, bags, retail packaging, or mixed surfaces. If the stickers support a larger branded kit with tape, apparel, or Custom Printed Boxes, mention that too. Coordinating artwork across items can reduce back-and-forth and keep the brand system cleaner.
There are practical ways to lower unit cost without making the sticker flimsy. Standardize sizes across age groups. Put multiple player labels on sheets. Order sponsor decals and name decals together. Choose rounded rectangles instead of complex contour cuts. Limit specialty finishes to the decal that matters most. One well-chosen finish beats five expensive effects fighting for attention.
Do not compare quotes unless the specs match. A cheaper sticker may be unlaminated, printed on thinner stock, cut with square corners, packed loose in bulk, or designed for indoor promotional use only. A quote that includes lamination, sorted team sheets, and proofing is not equivalent to a bargain decal with no protective finish.
| Order Scenario | Typical Cost Logic | Best Fit |
|---|---|---|
| Simple rectangle, bulk quantity | Lower setup complexity and faster cutting | Names, numbers, basic team marks |
| Laminated contour cut | Higher finishing and cutting time | Sponsors, retail graphics, premium decals |
| Individually named sheets | More proofing, sorting, and quality control | Team packs and school programs |
| Specialty metallic or holographic | Higher material cost and design constraints | Tournaments, launches, limited editions |
The smart-buyer takeaway is blunt: the lowest unit cost only helps if the decal arrives on time, applies cleanly, and still looks sharp after real rink use. If a sponsor paid for visibility, a peeling label is not a savings story.
Process and Timeline From Artwork to Finished Stickers
A typical order follows a predictable path: define the use case, choose the size and placement, submit artwork, review the proof, approve production, print, laminate if needed, cut, weed, pack, and ship. The order may sound simple. Most delays happen before the press starts.
Proofing is the control point. The manufacturer checks logo clarity, color setup, cut lines, bleed, text size, and whether the proposed shape makes sense for the stick area. If player names are included, proofing also catches spelling errors, number mismatches, duplicate names, and roster formatting issues. For school and tournament orders, this step is not clerical. It protects the whole job.
Timeline depends on decision speed as much as factory speed. A straightforward repeat order with approved artwork can move quickly, sometimes within several business days after proof approval depending on capacity and shipping. New custom shapes, specialty films, high quantities, or individually named team packs take longer. Ten to fifteen business days from proof approval is a reasonable planning range for many custom label jobs, but buyers should confirm current production timing before committing to a tournament date.
Samples or prototypes make sense when the stakes are higher. If the decal carries a sponsor logo, supports a retail product launch, or will be ordered in thousands, a small test can prevent an expensive redo. Even one sample sheet can reveal whether the size feels right in a player’s hands, whether the white ink is opaque enough, and whether the finish matches the broader retail packaging presentation.
The production language is simple once the jargon is stripped away. Printing lays down the design. Lamination protects it. Cutting shapes it. Weeding removes the extra material around the decal. Packing decides whether coaches receive one mixed stack, sorted player sheets, or labeled bundles by team level. That last choice matters more than expected on distribution day.
For higher-volume programs, packaging standards can also shape shipping decisions. The International Safe Transit Association publishes testing protocols for transport packaging; teams shipping decals with other merchandise can review broader transit principles through ISTA. For paper-based backers, inserts, or branded sleeves, buyers who care about responsible sourcing may also ask about FSC-certified materials and review certification basics at FSC.
The planning rule is simple: confirm roster names, sponsor logos, stick placement, and brand colors before production begins. After approval, even a small change can mean new proofs, new cut files, wasted material, and a reset clock.
Common Ordering Mistakes That Make Stick Decals Peel, Blur, or Arrive Late
The most common failure starts at application. A sticker is applied to a dusty, oily, wet, cold, or freshly taped surface. Then the edge lifts, and the decal gets blamed. Surface prep is not glamorous, but it is often the difference between a clean bond and a complaint. Wipe the area, let it dry, apply with firm pressure, and avoid immediate heavy handling if the adhesive needs time to build strength.
Sizing mistakes are almost as common. A decal that looks impressive on a laptop mockup may wrap awkwardly around a narrow stick shaft. A player may dislike it if the edge lands under the main grip point. A sponsor logo may become unreadable once reduced to fit between tape zones. Print a paper rectangle at actual size, tape it to the stick, and have someone hold it with gloves. That five-minute test is surprisingly revealing.
Artwork problems create a different kind of disappointment. Low-resolution logos print soft. Tiny sponsor text fills in. Thin outlines disappear. Missing bleed creates awkward white edges. Dark colors vanish on black sticks. If the brand mark also appears on jerseys, banners, or Custom Packaging Products, the decal file should not be rebuilt from a screenshot. Use the cleanest source artwork available.
Material mismatch is another quiet trap. Paper labels or basic indoor stickers may be perfectly acceptable for giveaways, envelope seals, or short-term event packets. They are usually the wrong choice for high-contact equipment branding. This is where many teams lose money while trying to save it: they compare sticker prices without asking what the sticker is built to survive.
Timeline mistakes follow a pattern. The tournament is next weekend. The roster is still changing. A sponsor logo arrives as a tiny JPEG. Someone requests a new shape after proofing. Then the buyer assumes custom-cut stickers ship like blank stock labels. They do not. Custom work needs decisions, proofing, production time, and shipping time.
Overcomplication can hurt too. A complex contour cut may look premium, but it can raise cost, slow production, and create delicate edges. Specialty finishes are similar. Metallic, holographic, clear, gloss, matte, and laminate all have uses, but not every decal needs every effect. Good packaging design is often restraint plus clarity, and the same applies to stick graphics.
If stickers fail, investigate before blaming one cause. Check surface prep, placement, application temperature, material, laminate, adhesive, stick texture, tape residue, and handling. Failure analysis sounds formal, but the process is basic: change one variable at a time and see what improves.
Next Steps: Build a Sticker Spec Your Team Can Actually Order
Before asking for pricing, write a short spec. It does not need to be technical at first. It needs to be clear. Include intended use, stick placement, sticker size, quantity, number of versions, finish preference, durability expectations, and required delivery date. If the order includes player names, add the roster format and whether each player needs one decal, two decals, or a sheet of several labels.
- Use case: player identification, sponsor visibility, retail display, giveaway, or equipment branding.
- Placement: upper shaft, lower shaft, blade heel, butt end, bag, or packaging insert.
- Size: final width and height, tested on a real stick if possible.
- Quantity: total pieces, versions, extras, and replacement needs.
- Finish: gloss, matte, clear, metallic, holographic, laminated, or economy.
- Deadline: event date, ship-to location, and proof approval target.
Make a placement test before production. Print a rectangle at the proposed size, cut it out, and tape it to the stick shaft or blade area. Ask a player to hold the stick with gloves. Check whether the decal interferes with grip, tape habits, or hand placement. A 1 by 5-inch sponsor graphic may sound modest until it curves around a junior stick.
Gather clean assets early. That means vector logos, sponsor approvals, roster names, jersey numbers, brand colors, and any rules from the team, school, or league. Missing assets are the silent delay in many custom jobs. So are last-minute spelling corrections.
Choose two or three priority specs instead of trying to optimize everything. A youth team may care most about durability, fast turnaround, and easy distribution. A retail launch may prioritize color match, premium finish, and alignment with broader branded packaging. A tournament giveaway may favor cost control and simple application.
Ask for a quote that tells you more than a unit price. Request material, finish, adhesive type, proofing process, packaging method, estimated production time, and whether a sample is recommended. If the order supports product packaging, team kits, or sponsor commitments, ask how the decals will be packed so they arrive easy to sort and apply.
Before ordering custom hockey stick stickers, confirm where they will go, how long they need to last, and what proof you need to approve with confidence. The smartest decal is not always the fanciest one. It is the one that fits the stick, survives the job, and shows up ready to use.
FAQ
What material is best for custom hockey stick decals?
Vinyl is often a strong choice for stick shafts because it flexes and conforms well to slightly curved surfaces. Polyester can work for flatter areas where dimensional stability matters. For game-use decals, a protective laminate is usually worth considering because gloves, tape, bags, and rink handling can scuff unprotected print.
How long do hockey stick stickers usually last?
Lifespan depends on placement, surface prep, adhesive, laminate, and how often the stick is used. A decal on a clean upper shaft generally lasts longer than one near the blade, heavy tape area, or main glove contact point. For longer wear, prioritize rounded corners, suitable adhesive, and scuff-resistant finishing.
Can custom stick stickers go over hockey tape?
They can, but tape texture and adhesive residue may reduce bond strength. Stickers placed over tape are easier to replace, but they are more likely to lift at the edges. For better wear, apply decals to a clean stick surface or plan tape placement so it protects the graphic without hiding it completely.
What size should custom hockey stick stickers be?
The best size depends on the stick area. Name labels are usually narrow, while sponsor or team graphics may need a longer shaft format. Test the size with a paper mockup before production, and check small text at actual printed size because readable screen artwork can become too tiny on a stick.
How can teams lower the cost of custom hockey stick stickers?
Teams can lower cost by ordering larger quantities, standardizing sticker sizes, and combining multiple player labels on sheets. Rounded rectangles are often more budget-friendly than complex contour cuts. Complete artwork and roster details also help avoid rush fees, reproofing, and production delays.


