Buyer Fit Snapshot
| Best fit | Custom Insert Sleeves for Subscriptions projects where brand print, material claims, artwork control, MOQ, and repeat-order consistency need to be specified before quoting. |
|---|---|
| Quote inputs | Share finished size, material target, print colors, finish, packing count, annual reorder estimate, ship-to region, and any compliance wording. |
| Proofing check | Approve dieline scale, logo placement, barcode or warning zones, color tolerance, closure strength, and carton packing before bulk production. |
| Main risk | Vague material claims, crowded artwork, missing packing details, or unclear freight terms can make a low unit price expensive after revisions. |
Fast answer: Custom Insert Sleeves for Subscriptions: Material, Print, Proofing, and Reorder Risk should be specified like a repeatable production item. The safest quote records material, print method, finish, artwork proof, packing count, and reorder notes in one written spec.
Production checks before approval
Compare the actual filled-product size with the drawing, then confirm tolerance on folds, seals, hang holes, label areas, and retail display edges. Reserve space for logos, QR codes, warning copy, and material claims before decorative graphics fill the panel.
Quote comparison points
Review material grade, print process, finish, sampling route, tooling charges, carton quantity, and freight assumptions side by side. A quote is only useful when the supplier can repeat the same color, closure quality, and packing count on the next order.
Custom Insert Sleeves for Subscriptions: Design Tips That Actually Work
Custom Insert Sleeves for Subscriptions: Design Tips
Custom insert sleeves for subscriptions do a lot with very little. They hold products in place, clean up the opening sequence, and make a box feel designed instead of improvised. Customers notice that difference fast. If the contents slide around, tilt, or land in a clumsy pile, the package feels cheaper than the product inside.
For packaging buyers, sleeves are one of the easiest ways to tighten product packaging without jumping straight to a molded insert or a heavy custom tray. They can wrap, band, or cradle products so the unboxing moves in a clear order instead of dumping everything at once. That works for skincare kits, candle sets, apparel accessories, beauty samples, coffee programs, pet subscriptions, and recurring boxes that need polish without excess material.
They also sit in a useful middle ground between structure and branding. A sleeve can separate SKUs, carry a hero message, hold a bundle together, or create a clean reveal for a subscriber who has seen the outer mailer a dozen times already. That is why sleeves often pull more weight than people expect in branded packaging. Small piece. Big effect.
Compared with a full insert, a sleeve is usually easier to justify. Compared with tissue alone, it looks more deliberate. Compared with foam, it tends to create fewer headaches. Foam in subscription packaging usually starts arguments, and not the fun kind. The real job is straightforward: keep the product where the packer put it, make the opening feel intentional, and support the brand story without bloating the box.
Teams building a subscription program or refreshing Custom Packaging Products should treat the sleeve as a design choice, not an afterthought. That one shift changes the work. Once the sleeve sits inside packaging design instead of the “just make it fit” bucket, the material, print, and structure decisions get a lot easier to defend.
What Custom Insert Sleeves for Subscriptions Actually Do
A custom sleeve has one obvious job and a few quieter ones. The obvious job is holding items together. The quieter jobs are usually the ones that decide whether the box feels clean or sloppy. Sleeves keep products aligned, reduce movement, and set up a tidy opening sequence. That sounds simple. It rarely is. A box with multiple items can look polished or messy depending on whether the contents survive transit in the same position they left the pack line.
Most subscription boxes mix sizes. One item is tall, another is flat, and a third has an odd shape because the bonus sample needed a spot. Without a sleeve or wrap system, those items shift in transit and arrive off-center, tilted, or scuffed. Customers rarely call that a packaging failure. They say the box felt sloppy. Same problem, less polite wording. It shows up in returns, complaints, and the retention notes nobody enjoys reading.
Sleeves often beat more expensive-looking solutions because they do the visual work without overcomplicating the build. They can create the same sense of order as a larger insert if the layout stays simple. They also let the pack line build a repeatable presentation without juggling a pile of loose components. If the sleeve is sized right, fulfillment moves faster and the result looks cleaner.
Common uses include:
- Holding a small product bundle flat inside a mailer or rigid box
- Separating two SKUs so they do not scuff each other
- Wrapping a hero item with a seasonal message or tier label
- Creating a pull-tab reveal in place of a full insert tray
- Helping a subscription box feel curated instead of crowded
A lot of subscription complaints come from movement and presentation, not from dramatic shipping damage. The item still works. The customer still notices the rattling. That gap matters. It turns into “the brand cut corners” pretty quickly. Sleeves fix a lot of that without turning the box into a display case.
A sleeve should make the pack-out faster and the reveal cleaner. If it only looks good in a mockup, it is not finished.
There is also a merchandising angle. A sleeve can flag tier level, flavor, collection, or season. That matters for retail packaging too, especially if the same item later moves into stores or event kits. The sleeve becomes part of the visual system, not just a structural piece. Subscription brands need that flexibility because recurring shipments, limited runs, and special drops rarely follow the same format twice.
One practical example: a monthly coffee subscription may ship a flat bag of beans, a tasting card, and a promo insert. A printed belly band can keep the stack tidy inside the box and mark roast level without adding a full tray. A beauty box with glass vials may need a folded carrier or a die-cut sleeve with tighter retention. Same category. Very different handling needs.
How Custom Insert Sleeves for Subscriptions Work
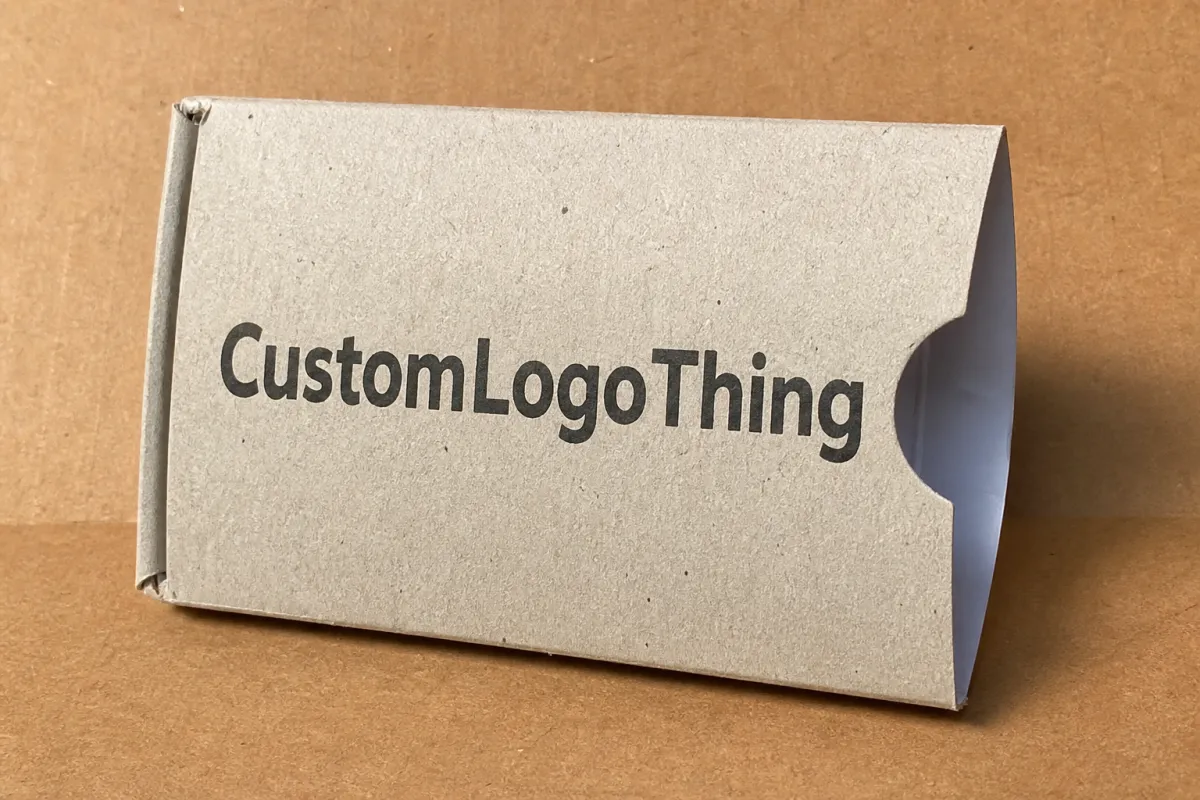
At the simplest level, a sleeve wraps, bands, or pockets the product so it sits where it should. The structure can be a plain folded paperboard wrap or a die-cut carrier with locking tabs and a display window. The right format depends on the product shape, the way it packs, and how much handling it takes before it reaches the customer.
Several formats show up often. A wrap sleeve covers most of the item and usually works well for flat bundles, books, sample sets, or cartons. A belly band uses less material and fits cases where you only need to hold a stack together or add a branded band around a box, jar, or pouch. A folded carrier adds more structure and helps fragile products stay put. A die-cut sleeve with tabs or slots works better when the item has an unusual profile and needs to sit in one exact position.
Each format changes the customer experience. A simple band opens fast, but it may not feel as polished as a printed wrap with a crisp fold. A more structured sleeve can look expensive, but if it slows pack-out, the fulfillment team will start filing complaints by week two. That tradeoff shows up fast in real production. The pretty option is not always the operationally sane option.
A good packaging system lets the sleeve work with the mailer, tray, tissue, and filler instead of fighting them. A slim sleeve can hold a bundle aligned while the outer box carries the main graphics. The sleeve can also carry the brand while the mailer stays plain and economical. That split is common in subscription packaging because not every surface needs the same amount of ink.
The first touch matters. A customer opens the mailer, sees the sleeve, and decides right away whether the box feels organized. Centered, crisp, easy to remove. That reads as intentional. Crooked, crushed, or cut down from another project. That reads as leftover inventory. Good design usually stays quiet. Bad design announces itself in about three seconds.
That is why the best sleeves start with the product and the pack-out process, then move to artwork. Artwork matters, of course. A beautiful sleeve that slides around inside the box is still a bad sleeve. Structure leads. Print supports structure. That order saves time and money.
Brands that already use custom printed boxes can either match the sleeve graphics to the box or use the sleeve as a contrast layer. Matching keeps the system tight. Contrast can call out the product or mark a seasonal shift. Both can work. The sleeve still needs a reason to exist beyond decoration. Otherwise it becomes one more line item with a nice mockup and weak utility.
For recurring programs, think about how the sleeve behaves across months, not just in the launch kit. If the contents change from one shipment to the next, the sleeve should either flex with those variations or stay generic enough to avoid reprints every cycle. That kind of planning saves a lot of awkward “we need a new insert for next month” conversations.
Key Factors That Make the Sleeve Work
Size comes first. Measure the finished product, the packed state, and any wrap or tissue that sits around it. Do not size from the flat product alone. That is how people end up with sleeves that look fine in a deck and fit like a bad suit. A sleeve needs enough tolerance to pack smoothly, but not so much room that it wanders around once assembled.
Material choice matters just as much. Paperboard is the most common option because it prints well, folds cleanly, and gives a premium feel without overbuilding the structure. Kraft works for natural or eco-leaning branding, especially when the rest of the box uses earthy tones and minimal ink. Heavier board or corrugate makes sense when the product needs more stiffness or when the box takes a beating in transit. For delicate or premium items, a 14pt to 24pt board range is common, though the right stock still depends on the sleeve format and the product weight.
Finish decisions are not decoration trivia. They change how the sleeve reads and what it costs. Matte and uncoated stock feel quieter and more tactile. Gloss makes color pop, but it also shows fingerprints and handling marks more easily. Soft-touch feels premium, though it adds cost and can scuff if the sleeve rubs against other components. Spot UV and foil can help logos or tier labels stand out, but these are not free extras. They work best when the brand has a clear reason to use them.
Other factors that matter in real production:
- Logo size and placement, so the brand mark is visible without overpowering the surface
- Color accuracy, especially if the sleeve must match existing branded packaging
- Typography scale, so small text does not disappear in a fold or crease
- Open edges and tabs, which affect how easily the sleeve can be assembled
- Friction against the product, which determines whether it sits snugly or drifts
Product behavior matters more than buyers expect. A sleeve for a rigid candle box can be looser than one for a coated cosmetic carton. A soft pouch needs different handling than a glass jar. Weight, surface finish, and fragility all change how much grip the sleeve needs. If the product is temperature sensitive or prone to scratching, the structure and stock should reflect that.
Brand consistency counts too. The sleeve should feel like part of the larger package branding system, not a random piece dropped in from another campaign. Color palette, icon style, spacing, and copy tone should all line up with the subscription box, the website, and any retail packaging the brand already uses. When those pieces match, the package feels considered. When they do not, it looks stitched together.
For brands that care about responsible sourcing, paper options with FSC certification are worth discussing. FSC is a widely recognized standard for forest management and chain of custody, and it can support sourcing claims when the materials are actually certified. You can read more at FSC. If transit performance is the bigger worry, testing against published distribution methods beats guessing. The ISTA resources help there, especially if the box ships through multiple carriers or includes fragile components.
One honest caveat: certifications and test standards help, but they do not replace the real-world sample. A sleeve can pass a spec sheet and still feel wrong in a subscriber's hands. The box has to live through fulfillment, shipping, and unboxing. That is the whole point.
Custom Insert Sleeves for Subscriptions: Process and Lead Time
The process usually starts with dimensions and ends with production, but the quality of the middle steps decides whether the job moves cleanly or gets stuck. First, gather the actual packed measurements. Then define the sleeve format, because a wrap, band, and die-cut carrier do not behave the same way. After that comes the dieline, artwork, proofing, sample review, and final approval. Simple on paper. Less simple in practice.
Late changes cause most delays. Vague size specs, artwork that arrives after the structure is already approved, unusual folds, specialty finishes, and repeated sample tweaks all add time. Good vendors keep asking boring questions for a reason. They are not being difficult. They are trying to avoid a production surprise that eats a week and forces a reprint.
Timelines vary by method. Short-run digital jobs can move quickly because setup is lighter and smaller quantities are easier to schedule. Offset runs usually need more prep, more proofing, and more planning. Specialty finishes can add extra setup, especially if foil, embossing, or multiple coatings are involved. Shipping has its own clock too, so even a fast run can miss a launch if nobody budgets for transit.
A realistic timing breakdown often looks like this:
- Proofing: 1-3 business days if the brief is complete
- Sample or prototype: 5-10 business days, sometimes longer for complex structures
- Production: about 10-20 business days after approval, depending on quantity and finishes
- Freight: separate from production, and often the part that gets forgotten
Sample review deserves real time, not a rushed thumbs-up over email. One test fit usually reveals whether the sleeve is too tight, too loose, too slick, or too slow to pack. A prototype also shows issues that renderings never catch, like how the tabs behave after the third assembly or whether the printed surface scuffs when rubbed against the product.
Lead time is a design variable, not just a factory problem. Simpler structures are easier to approve and easier to repeat. That matters for recurring subscription programs because the first order is only the first order. If the sleeve is too complicated to remake every month or quarter, it turns into a recurring headache. Keep the structure smart enough to look custom, but simple enough that a pack line can repeat it without drama.
If the box also contains inserts, sample cards, or layered promotional pieces, map the sequence before signing off. The sleeve should fit into the pack-out order, not force the team to work around it. A great-looking sleeve that creates assembly confusion is not a great-looking sleeve. It is a bottleneck with print on it.
For launch planning, build a buffer around holidays, seasonal spikes, and carrier slowdowns. A sleeve that looks on schedule in August can turn into a problem in November. Packaging timelines do not care about your campaign calendar.
Custom Insert Sleeves for Subscriptions: Cost and Pricing
Pricing for custom sleeves depends on quantity, stock, print coverage, finish complexity, and structure. A simple folded sleeve in a common board can be relatively affordable. A die-cut design with foil, soft-touch, and multiple folds will cost more, and it should. Extra complexity takes more setup, more labor, and more chance of misalignment.
MOQ matters too. Lower quantities usually mean higher unit costs because setup gets spread across fewer pieces. Larger runs bring the per-unit price down. That is not a mystery. It is just print economics. For a buyer running a pilot, a lower MOQ can be worth the premium. For a recurring program, larger volume usually makes more sense once the structure is proven.
Here is a practical way to think about pricing tiers for subscription sleeves:
| Format | Best For | Typical Material | Approx. Unit Cost at 1,000 | Approx. Unit Cost at 5,000 |
|---|---|---|---|---|
| Simple wrap sleeve | Flat products, sample kits, bundle wraps | 14pt-18pt paperboard | $0.22-$0.48 | $0.10-$0.24 |
| Belly band | Light bundling, tier labels, seasonal wrap | Uncoated or coated paper stock | $0.12-$0.30 | $0.06-$0.16 |
| Die-cut sleeve with tabs | Odd shapes, premium reveal, tighter fit | 16pt-24pt board | $0.30-$0.70 | $0.14-$0.34 |
| Folded carrier | Heavier items, more structure, better protection | Thicker paperboard or light corrugate | $0.40-$0.95 | $0.20-$0.48 |
Those numbers are directional, not a promise. Print coverage, finishing, and assembly can move them up or down quickly. A full-bleed design costs more than a light one-color print. Spot UV and foil raise the price. Extra die cuts raise the price. Rush timing raises the price. Packaging never forgets to charge for excitement.
The cheapest quote is not always the best deal. A better sleeve can reduce damage, lower the need for filler, and make the box faster to pack. It can also support retention by making the subscription feel more deliberate. That is real value, even if it does not show up neatly on the line item. The right comparison is not sleeve versus sleeve. It is sleeve versus the cost of a weak unboxing experience.
Ask for quotes broken into structure, print, and finishing. Then you can see whether the cost jump comes from the board, the coating, or the shape. If one version is wildly more expensive, you will know exactly why. That makes the buying decision much easier, especially for teams balancing launch budgets with long-term package branding.
For companies building out a whole subscription program, it helps to compare the sleeve against other product packaging components instead of treating it as a standalone purchase. If the sleeve lets you remove foam, reduce tissue, or simplify the box interior, the total system may actually cost less even if the sleeve itself is more expensive. Packaging math gets weird like that. Still math.
One more practical point: unit price only matters if the sleeve performs. If it slows assembly, causes mispacks, or needs a rush reorder after the first launch, that low quote was not a bargain. It was just cheap paper with a calendar problem.
Common Mistakes With Subscription Insert Sleeves
The most common mistake is sizing from flat artwork alone. That is almost always wrong because the packed product has thickness, coatings, and real-world movement. A sleeve designed from a flat render can look fine in a PDF and fail the minute it meets an actual pack-out line. Measure the item as it will ship, not as someone hopes it will look in a presentation deck.
Another mistake is overloading the sleeve with copy. If every panel is packed with product claims, instructions, and promotional text, the piece starts to read like a discount flyer. Premium packaging needs space. White space is not wasted space. It gives the eye a place to land and makes the brand look more confident.
Overcomplicated structures cause their own problems. A sleeve that takes too many folds, tabs, or alignment steps slows down fulfillment. A subscription box may ship on a recurring schedule, which means small assembly delays add up fast. If one packer needs ten extra seconds per box and you ship thousands of units, the math gets ugly in a hurry.
Mismatched materials create trouble too. A stock that looks beautiful but scuffs easily can leave the box looking tired before the customer even opens it. A glossy finish might photograph well but show every handling mark. A soft-touch coating can feel expensive but rub badly against other components. Material selection should match the shipping environment, not just the mockup table.
Do not ignore the unboxing sequence. A sleeve that looks great sitting flat may feel awkward when someone has to remove it, turn it, or peel back another layer first. The opening should make sense in the hand. If the reveal is clumsy, the customer remembers the clumsiness more than the graphic design. That is not a cute surprise. It is friction.
Finally, never skip the physical sample. Screenshots do not show fit, friction, board stiffness, or the way a sleeve behaves after a little handling. A prototype tells the truth. It is the cheapest truth you will buy all project, which is why skipping it makes no sense. Test the sample in the full box, with the full product, under actual packing conditions.
If the brand also ships through retail channels, the same mistakes can show up there too. A sleeve that works in a direct-to-consumer mailer may be too delicate for store handling or too plain for a retail shelf. That is why branded packaging should be tested in the channel where it will actually live. Context changes everything.
One more trap: assuming a sleeve can solve a bad product mix. If the assortment is too varied, a sleeve may only hide the issue, not fix it. Sometimes the right move is a sleeve plus a different box layout. Sometimes the right move is a simpler SKU mix. Packaging can only do so much.
Expert Tips and Next Steps for a Better Launch
Start with the product and the pack-out process. Then build the sleeve around those constraints. That order matters more than most teams want to admit. If the packaging concept starts with the artboard before the box dimensions are settled, the project tends to drift into revisions and compromise. Let structure lead first. Artwork can make a smart structure look better.
Test two or three structural options side by side if the program matters. Compare assembly speed, presentation, and protection under real conditions. One format may look prettier, but another may pack faster and ship better. The correct choice is usually the one that balances all three, not the one that wins a mockup contest.
A sample kit or prototype run is worth the time. Check it with the full product, the full subscription box, and the actual motion of shipping. Shake the box a little. Slide the sleeve in and out. Look at the edges after handling. These are small checks, but they save money later. Packaging failures are expensive because they repeat.
Use the sleeve to support the subscription story. A tiered box can use color changes or label differences to distinguish levels. A seasonal drop can carry a special message. A repeat shipment can use the sleeve to make the box feel new without rebuilding the entire package. That is useful for recurring programs that need fresh presentation without reworking every structural component.
Create a launch checklist. Keep it simple and concrete:
- Confirmed product dimensions in packed form
- Chosen sleeve format and board thickness
- Approved print method and finish
- Dieline and artwork approval date
- Sample review and pack-out test completed
- Production and freight dates mapped out
- Reorder trigger point tied to inventory levels
That checklist looks basic because it is basic. Basic systems work. Fancy ones fail in the details. If your team already has custom printed boxes in the pipeline, the sleeve should be integrated early so the interior and exterior packaging work as one system. If you are still choosing between insert styles, ask for a quote on the sleeve alongside other options so you can compare value, not just unit price.
For brands needing help with structure selection or a broader packaging refresh, browsing the right Custom Packaging Products first can save a round of back-and-forth. Once you know the materials, formats, and finishes available, the conversation gets sharper fast. That is usually where real progress starts.
Custom insert sleeves for subscriptions are worth doing well because they affect both protection and perception. Get the size right, choose the material with the shipping path in mind, and keep the structure simple enough for fulfillment to repeat without trouble. That is how custom insert sleeves for subscriptions turn a box from merely shipped into properly presented. If you need one decision to anchor the whole project, make it this: validate the sleeve with a real packed sample before you approve production.
Frequently Asked Questions
How do I size custom insert sleeves for subscriptions correctly?
Measure the product in its packed state, not just the bare item, and include any tissue, wraps, labels, or inserts that add thickness. Leave enough tolerance for easy assembly, but not so much that the sleeve slips or looks loose in the box. Always confirm the fit with a physical sample before ordering the full run.
What material works best for custom insert sleeves for subscriptions?
Paperboard is the most common choice because it gives a clean premium look and prints well. Kraft works well for natural or eco-leaning brands, while heavier board or light corrugate helps when the sleeve needs more structure. The best material depends on product weight, handling, and the finish you want.
Are custom insert sleeves for subscriptions expensive?
They can be very affordable at scale, but small runs often carry higher unit costs because setup is spread across fewer pieces. Complex die-cuts, specialty finishes, and rush timing raise the price faster than simple print changes. Ask for pricing at multiple quantities so you can see where the unit cost starts making sense.
How long does production take for custom insert sleeves for subscriptions?
Timeline usually includes proofing, sample approval, production, and shipping, so the total depends on how fast approvals move. Simple jobs can move quickly, while specialty finishes or structural revisions add time. Build in extra buffer if the sleeve has to arrive before a subscription launch or seasonal drop.
What MOQ should I expect for custom insert sleeves for subscriptions?
MOQ varies by printing method and structure, but short-run options often start lower than offset or highly customized jobs. Lower MOQ is useful for pilots, while larger quantities usually make more financial sense for recurring subscription programs. The smartest move is to ask for stepped quotes so you can compare pilot volume against your expected reorder size.
Do custom insert sleeves for subscriptions need special testing?
Yes. A sleeve should be tested inside the full pack-out, not just as a loose component on a table. Check fit, assembly speed, scuffing, and how it behaves after shipping vibration. If the product is fragile, oily, coated, or temperature sensitive, test that version specifically instead of assuming one sample covers everything.

