Buyer Fit Snapshot
| Best fit | Custom Lamination for Mailers projects where brand print, material claims, artwork control, MOQ, and repeat-order consistency need to be specified before quoting. |
|---|---|
| Quote inputs | Share finished size, material target, print colors, finish, packing count, annual reorder estimate, ship-to region, and any compliance wording. |
| Proofing check | Approve dieline scale, logo placement, barcode or warning zones, color tolerance, closure strength, and carton packing before bulk production. |
| Main risk | Vague material claims, crowded artwork, missing packing details, or unclear freight terms can make a low unit price expensive after revisions. |
Fast answer: Custom Lamination for Mailers: Film, Print, MOQ, and Carton Packing should be specified like a repeatable production item. The safest quote records material, print method, finish, artwork proof, packing count, and reorder notes in one written spec.
Production checks before approval
Compare the actual filled-product size with the drawing, then confirm tolerance on folds, seals, hang holes, label areas, and retail display edges. Reserve space for logos, QR codes, warning copy, and material claims before decorative graphics fill the panel.
Quote comparison points
Review material grade, print process, finish, sampling route, tooling charges, carton quantity, and freight assumptions side by side. A quote is only useful when the supplier can repeat the same color, closure quality, and packing count on the next order.
Custom Lamination for Mailers: What to Know Before Buying
Custom lamination for mailers can turn a plain printed envelope into something people notice before they even read the logo. That first touch carries a lot of weight. A smooth matte face, a glossy hit of color, or a soft-touch surface tells the customer something about the brand before the mailer is opened, and that impression is often stronger than buyers expect.
In practical terms, custom lamination for mailers does two jobs at once: it improves appearance and it protects the print from scuffs, moisture, and the rough handling that happens during packing, shipping, and receiving. If the piece is part of branded packaging, a subscription kit, or a promotional send, the finish is not decoration alone. It becomes part of the packaging story, and that is why the spec deserves the same attention as size, substrate, and print method.
Custom lamination for mailers: the first impression people feel
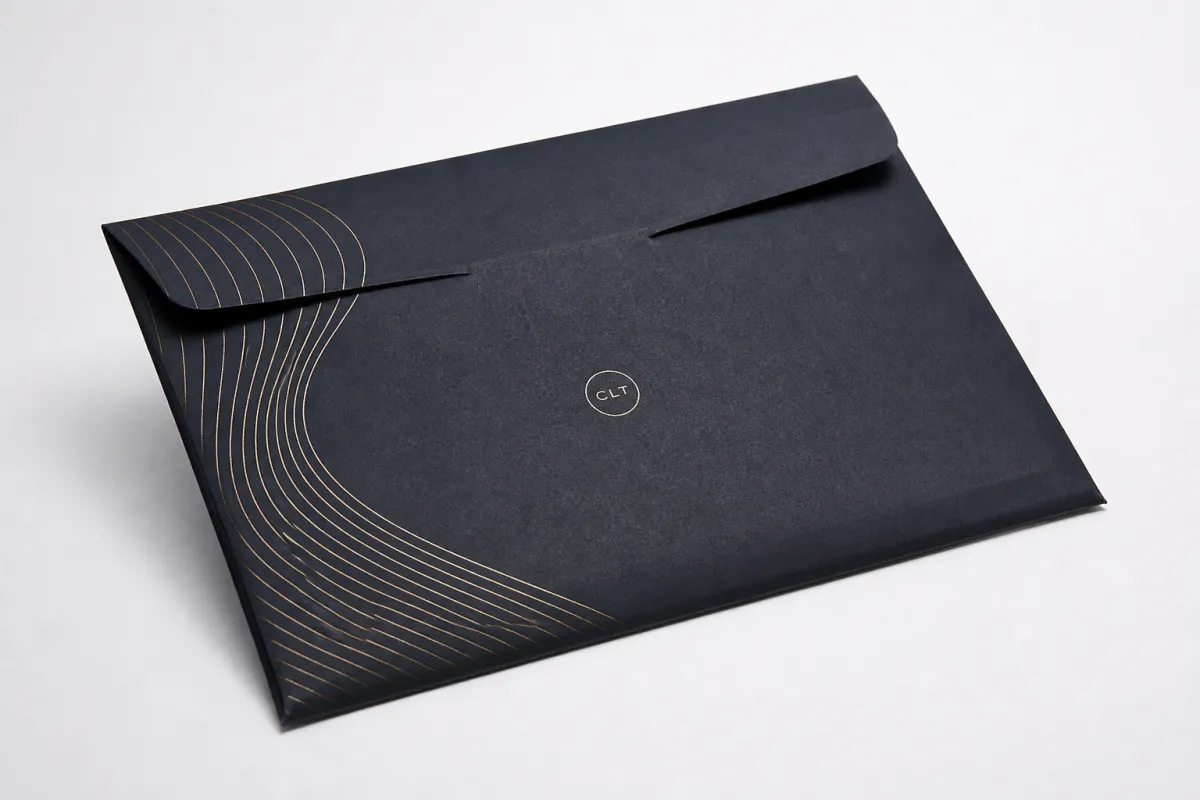
People often judge a mailer by touch before they ever judge it by text, and that is exactly where custom lamination for mailers earns its keep. A bare paper surface can feel ordinary, even when the artwork is strong. Add the right finish, and the same piece can feel tighter, cleaner, and more intentional in the hand. That matters for subscription kits, influencer mailers, event packets, retail packaging inserts, and any send where the package is doing brand work before the contents are seen.
Custom lamination for mailers also changes how the surface behaves under real handling. A good laminate can reduce abrasion from stacking and sorting, help keep dark solids from showing finger marks, and give a degree of moisture protection if a parcel sits on a dock, gets delivered in wet weather, or rides in a carrier bag. It is not waterproofing, and it should never replace proper transit packaging, but it does give the printed face a tougher skin. I have watched a beautiful uncoated mailer pick up rub marks after one short press check, and that sort of thing makes the value of the finish pretty clear.
That protection is only part of the story. The finish affects color depth, reflectivity, and the way the mailer presents under bright retail lighting or a phone camera. Gloss can make saturated color feel louder and more energetic. Matte can calm the design down and make text easier to read. Soft-touch can create a quiet, premium feeling that works well for beauty, apparel, membership programs, and upscale branded packaging. Buyers often underestimate how much the finish changes the emotional read of the piece.
For a mailer, the finish is not an afterthought. It is part of the package branding, and it can make a modest design feel considered or make a strong design feel flat if the wrong surface is chosen.
Custom lamination for mailers should be treated as both a design choice and a manufacturing choice. A finish that looks attractive in a digital mockup can become too reflective, too muted, or too expensive once it is translated to a real substrate. The best result usually comes from balancing the visual goal with the realities of folding, die cutting, glue lines, shipping abuse, and the final budget. If the mailer is also tied to Custom Packaging Products, the finish needs to fit the broader line, not just one hero sample.
From a packaging buyer's point of view, the real question is simple: does custom lamination for mailers support the story you want the package to tell, and does it hold up once it enters the field? If the answer is yes, the finish earns its place. If the answer is no, the money is usually better spent on better board, stronger print contrast, or a cleaner structure.
How custom lamination for mailers works
At its simplest, custom lamination for mailers means adding a thin film or coated layer to the printed surface so the mailer looks better and survives handling better. In most production lines, the print is completed first, then the film is bonded to the sheet with heat, pressure, or adhesive, and only then does the job move into die cutting, creasing, folding, and gluing. That order matters because the lamination has to be planned around the final structure, not added after the design is already locked.
The most common film choices are gloss, matte, soft-touch, and satin. Gloss gives you a higher shine and can make imagery feel crisp and saturated. Matte cuts reflection and gives the design a calmer, more editorial look. Soft-touch adds a velvety hand feel that many buyers associate with higher-end product packaging. Satin sits between gloss and matte, keeping some lift in the color without the mirror-like surface of a full gloss. In custom lamination for mailers, the finish choice usually changes both appearance and touch in a way that a simple swatch card cannot fully show. A swatch is helpful, sure, but it is not gonna tell you how a full panel catches the overhead lights once the mailer is folded and handled a few times.
The substrate matters just as much as the film. A 350 gsm artboard will behave differently from a 12 pt SBS or a kraft base, and the adhesive system has to match the print chemistry and the flex points in the mailer. If the board is too weak, the finish can telegraph wrinkles. If the stock is too dense at the folds, the laminate may crack or whiten when the mailer is creased. That is one reason custom lamination for mailers should be part of early packaging design conversations, not a late-stage add-on after the dieline has already been approved.
Print method also affects the result. Digital prints may react differently than offset or flexographic work, and heavy ink coverage can change how well the laminate lays flat. Dark solids, high-contrast photography, and metallic elements can all respond differently under the same finish. With custom lamination for mailers, the safest approach is to look at the full stack: substrate, ink load, adhesive, film, fold count, and the travel path of the package after it leaves the facility.
Custom Printed Boxes and mailers share similar issues in that respect. A laminate that performs well on one format may not behave the same way on another because the geometry and crease pattern change how the surface flexes. Even a strong retail packaging finish can misbehave if the mailer has tight folds, a narrow flap, or a closure area that gets repeatedly opened and closed.
For teams comparing options, custom lamination for mailers often sits alongside other surface treatments such as aqueous coating, UV varnish, foil stamping, embossing, or a light texture pattern. Those are not identical processes. A varnish changes the surface in a different way than a film laminate, and embossing adds dimension rather than a protective skin. The best spec depends on what the mailer has to do, how far it has to travel, and how much tactile impact the brand wants to build into the unboxing moment.
If you are sourcing alongside Custom Poly Mailers, the comparison can be useful. Poly mailers are often chosen for shipping efficiency and moisture resistance, while paper-based Mailers with Custom lamination for mailers are usually chosen for presentation, print quality, and a more elevated brand feel. Both can work. They just solve different problems.
Custom lamination for mailers cost and pricing factors
Cost is where many projects get decided, and custom lamination for mailers has a pricing structure that rewards planning. The main drivers are size, substrate, print coverage, film type, coverage area, quantity, and finishing complexity. A small mailer with simple one-side matte lamination will almost always cost less than a large folded mailer with soft-touch film, full-bleed graphics, tight tolerances, and extra handwork at packing.
At moderate volumes, a typical custom lamination for mailers project might land in the range of $0.08 to $0.18 per unit for standard gloss or matte work on a 5,000-piece run, depending on size and coverage. Soft-touch often pushes higher, sometimes into the $0.14 to $0.30 range per unit, especially if the job needs specialty stock or extra handling. Those numbers can move quickly with quantity. Once a run gets larger, setup is spread across more units, and the per-piece cost usually drops in a way buyers can feel. These are planning ranges, not quotes, but they help frame the conversation before anyone spends time chasing the wrong spec.
The table below gives a practical way to think about the cost tradeoffs. These are not hard quotes, because every custom lamination for mailers project is shaped by size and finishing detail, but they are useful for comparing options before you ask for pricing.
| Finish | Typical look and feel | Relative cost | Best fit |
|---|---|---|---|
| Gloss | Bright, reflective, high color pop | Lower to moderate | Bold branding, vivid photography, retail-style presentation |
| Matte | Low glare, clean, controlled appearance | Lower to moderate | Editorial layouts, calm luxury, easier reading under lights |
| Soft-touch | Velvety, premium, tactile | Moderate to higher | Luxury mailers, membership kits, high-touch branded packaging |
| Satin | Balanced sheen with softer reflections | Moderate | All-purpose mailers that need visual lift without heavy glare |
Minimum order quantity is another factor that affects custom lamination for mailers. Many converters and packaging suppliers prefer runs in the 500 to 1,000 piece range or higher because lamination setup, proofing, and trimming all take time. Smaller quantities are possible on some jobs, but the unit cost usually rises because the setup burden does not shrink with the order. If a buyer is comparing a 1,000-piece run to a 10,000-piece run, the larger order often looks better on a per-unit basis even when the total spend is higher.
Quote structure matters too. A clean quote for custom lamination for mailers should show whether the price includes print, film application, die cutting, creasing, folding, packing, and outbound cartons. If it does not, ask. Hidden extras often appear in proof charges, custom color matching, special packing requirements, additional finishing passes, or unusual die complexity. I would also ask whether the spec assumes single-side or double-side coverage, because that can shift the number more than some teams expect.
There is one more financial point worth making. A slightly higher price for custom lamination for mailers can still be the better buy if it prevents scuff complaints, returns, or damaged first impressions. Packaging damage is expensive in ways that do not always show up in the first invoice. If the mailer is part of a launch, a press send, or a premium retail packaging campaign, the cost of looking cheap can be much higher than the cost of a stronger finish.
Production steps and timeline for custom lamination for mailers
The production path for custom lamination for mailers is usually straightforward, but only if the decisions are made early. It begins with artwork review and dieline confirmation, then moves into substrate selection, print approval, lamination, die cutting, creasing, folding, glue application if needed, and final inspection. Each of those steps can introduce a delay if one detail is off, which is why the best projects treat finishing as part of prepress rather than as a decoration on top of the job.
For a standard job, proof approval might take one to three business days, production another seven to twelve business days, and shipping time whatever the carrier needs on top of that. So a realistic lead time for custom lamination for mailers is often 12 to 18 business days after approval, and longer if the job needs custom tooling, specialty film, or a physical sample round. If the schedule is tighter than that, it is possible to compress pieces of the workflow, but the buyer should expect fewer finish options and less room for revision.
Custom lamination for mailers can slow down if the fold lines are too close to solid coverage, if the die line is not sized correctly, or if the design requires precise alignment between artwork and crease. A missed detail there can cause cracking on the fold, an off-center image, or a flap that does not close cleanly. That is why early approval of the proof is worth more than a rushed sign-off. One small error in the line work can echo through the whole schedule.
For projects that include transit validation, it can help to think about the package as a shipping system, not just a printed object. If the mailer is going into a distribution route with rough handling, a quick review against ISTA test methods can be valuable. That does not mean every mailer needs formal lab testing, but it does mean the package should be judged against the kind of movement, compression, and vibration it will actually experience. On paper-based programs, teams may also check whether the material chain needs to support FSC claims, especially if the mailer is part of a broader sustainability story.
When custom lamination for mailers is part of a larger launch, coordination matters just as much as technical detail. Design teams, print vendors, fulfillment groups, and purchasing should agree on the final spec before the job is released. That includes the final size, whether the finish runs to the edge or stops at a safe zone, how barcodes or shipping labels will interact with the surface, and whether the mailer must fit inside another shipper. If the team waits until after print approval to ask those questions, the schedule usually pays the price.
There is also a practical difference between proof time and production time. Proof time is about confirming the design, the finish, and the structure. Production time is about making the actual run. Shipping time is the last step, and it should never be blended into the estimated lead time without saying so clearly. Buyers who keep those pieces separate are much better at planning launch dates and avoiding last-minute stress.
Key factors that decide the right lamination finish
Durability is the first filter. Custom lamination for mailers needs to survive sorting belts, pallet stacking, postal handling, and repeated touches from the person receiving it. If the design uses dark solids, full-bleed photos, or high-contrast type, the finish should resist abrasion without whitening at the folds or showing rub marks too early. Gloss can tolerate a lot visually, but it also shows scratches more clearly. Matte hides glare better, yet some matte films can mark if the surface is too soft. Soft-touch feels excellent, but it is not always the best answer if the package will be heavily handled.
Brand feeling is the second filter. A glossy finish can make custom lamination for mailers feel lively, sharp, and a little more retail-facing. Matte usually reads as calm, modern, and restrained. Soft-touch sits in a more luxurious lane and often pairs well with premium product packaging, membership kits, and direct mail that needs to feel memorable on opening. None of those choices are wrong by default. The right one depends on the tone of the campaign and the people receiving it.
There is a third filter that buyers sometimes miss: practical usability. If the mailer will be stacked in large volumes, the finish should not cause blocking or sticking. If fingerprints are a concern, especially on dark graphics, the surface should hide them better. If the mailer needs to be recyclable in a specific waste stream, the laminate, adhesive, and base material all need review together. That conversation is especially important if the program is tied to a corporate sustainability statement or an FSC-certified paper chain.
Design and finish need to be planned together. Heavy ink coverage, photography, metallic accents, and special effects like embossing all interact with the surface in different ways. For example, custom lamination for mailers can help protect a foil accent, but if the foil sits too close to a tight fold, the package may crack there sooner. The same is true for die cutting: a beautiful cut line can be ruined if the laminate is too stiff for the fold geometry. Good packaging design always respects how materials move, not just how they look flat.
A useful habit is to compare the mailer to other package formats in the same brand family. If the company already uses custom printed boxes or another laminated carton, the new mailer should feel related, not identical. A slightly different finish can help the mailer feel lighter and more utility-driven while still staying in the same brand world. That is often better than forcing every item to look exactly the same.
If the job is part of retail packaging or product packaging, ask whether the customer will be touching it in a store, unboxing it at home, or just receiving it through a fulfillment path. That one answer can change the finish choice more than any mood board. A mailer that must impress in a showroom should not be spec'd the same way as a mailer whose only job is to protect an insert and arrive clean.
Common mistakes with custom lamination for mailers
One of the biggest mistakes with custom lamination for mailers is picking a finish from a tiny sample card and assuming it will behave the same at full scale. It will not. Small swatches do not show how a large mailer will catch light across a full panel, how the fold will behave under pressure, or how the finish looks once the package is handled by multiple hands. A sample card is useful, but it is not the whole story.
Another common mistake is ignoring the folds. Custom lamination for mailers has to work around crease lines, tuck flaps, and glue areas. If the finish is too stiff or the score is not deep enough, the laminate can crack, whiten, or lift at the edges. That is especially common when teams try to push very dark colors over a tight fold or combine a laminate with embossing, foil, or other layered effects. The surface may look elegant on the screen and fail at the bend line in real life.
Some buyers overspend. Others underspend. Both paths create trouble. A premium finish that does not match the audience can feel self-conscious or unnecessarily expensive. A budget finish on a high-end campaign can make the mailer feel thin, even if the print itself is good. Custom lamination for mailers should match the message and the audience. If the goal is premium beauty packaging, a basic finish may feel underdeveloped. If the goal is a high-volume promotion, a luxury laminate may not pay back the cost.
Proofing is another place where trouble sneaks in. Teams sometimes approve artwork without checking color shift, glare, edge quality, or whether the finish changes the readability of small text. On a bright gloss laminate, type can feel sharper but reflections may be stronger. On a matte laminate, the image may look calmer, but some colors can appear slightly softened. That is normal. The problem is not the shift itself. The problem is discovering it after the run has already been produced.
Finally, some projects treat custom lamination for mailers as if it has no effect on the rest of the package system. It does. It can change folder thickness, affect how labels adhere, alter the feel of a glued seam, and even influence how the piece nests in a carton. If the mailer is only one part of a larger fulfillment workflow, the finish should be checked against the actual packing method and not just against the design mockup.
- Do not choose a finish from a small swatch alone.
- Do not ignore fold lines, die lines, and score strength.
- Do not approve color without checking finish-related shift.
- Do not pick a premium effect unless the audience will feel the value.
- Do not forget how the mailer fits into the full shipping process.
If you are still weighing options, it can help to compare the finish against the rest of your branded packaging line. A mailer that shares the same visual language as bags, cartons, inserts, and labels usually feels more intentional than a one-off piece that only looks expensive in isolation. That is one reason custom lamination for mailers should be reviewed with the whole campaign in mind, not as a standalone print decision.
Expert tips and next steps for custom lamination for mailers
The best starting point is a brief that tells the supplier exactly how the mailer will be used. Include size, board or paper type, print method, distribution path, target feel, and budget range. Once those basics are clear, custom lamination for mailers becomes much easier to spec because the decision is grounded in real use instead of vague preference. A good brief saves time, and it usually produces a better quote.
Physical samples are still the most reliable way to judge the finish. Ask for gloss, matte, and soft-touch pieces under the same lighting you expect in the real environment. Handle them with clean hands, rub them lightly, and fold them if the structure allows it. Touch and reflectivity are difficult to judge on a screen. They are much easier to judge when you can feel the surface and watch how it behaves under overhead light. That is especially true for custom lamination for mailers, where the customer experience is tactile from the first second.
It also helps to bring design, print, and fulfillment into the same conversation early. If the mailer needs to fold around a product, accept a label, sit inside a larger shipper, or line up with a barcoded insert, the laminate should support those tasks instead of fighting them. Production discipline matters here. A strong finish that compromises assembly is not a good finish. In a real packing line, convenience and structure matter just as much as visual appeal.
For brands that are comparing different substrates, custom lamination for mailers is often one piece of a larger decision tree. Paper-based mailers may be the best fit for presentation, while Custom Poly Mailers may win on moisture resistance or shipping lightness. If the campaign is broader, you may also want to compare with Custom Packaging Products so the mailer does not feel disconnected from the rest of the line.
One rule of thumb has held up across many projects: if the mailer will be touched, photographed, or judged before it is opened, the finish deserves more thought. That is true for direct mail, retail packaging inserts, press kits, and subscription drops. It is also true for high-volume fulfillment where damage complaints can erode trust quickly. Custom lamination for mailers is not only about making a package look polished. It is about making the whole brand experience survive the trip.
Here is a simple action plan that keeps the process grounded:
- Define the use case, quantity, and budget for custom lamination for mailers.
- Request samples of gloss, matte, and soft-touch finishes on similar stock.
- Ask for a quote that shows MOQ, unit cost, setup, and lead time separately.
- Confirm whether print, lamination, cutting, folding, and packing are all included.
- Review a production proof before releasing the full run.
If you are building a premium send, custom lamination for mailers should be part of the first conversation, not the last. The best jobs usually come from a clear spec, a realistic timeline, and a finish chosen for the way people actually handle the package. Get those pieces right, and custom lamination for mailers will do exactly what it should: protect the print, sharpen the presentation, and make the mailer feel worth opening.
What does custom lamination for mailers actually do?
It adds a protective surface layer that helps the mailer resist scuffs, light moisture, and everyday handling during shipping. It also changes the look and feel of the printed piece, so the same artwork can read sharper, softer, or more premium depending on the finish. In many projects, custom lamination for mailers is chosen as much for brand perception as for protection.
Is custom lamination for mailers worth the added cost?
It is often worth it when the mailer is part of a premium brand experience or has to survive rough handling. The value is strongest when custom lamination for mailers reduces damage complaints, preserves print quality, or supports a more upscale presentation. For very short runs or low-touch mailers, a simpler finish may make more financial sense.
Which finish is best for custom lamination for mailers?
Gloss is best when you want stronger shine, vivid color, and a bold retail-style look. Matte works well for a more refined, low-glare appearance and can be easier to read under bright light. Soft-touch is often chosen for luxury or high-end mailers because the tactile feel is memorable, and it can make custom lamination for mailers stand out in a crowded inbox.
How long does custom lamination for mailers take?
Lead time depends on artwork approval, material availability, finish type, and whether custom tooling is required. Simple custom lamination for mailers projects usually move faster than specialty jobs that need samples, proofs, or extra finishing steps. Shipping time should always be added separately so the launch date reflects the full production timeline.
What should I ask for in a quote for custom lamination for mailers?
Ask for unit cost, MOQ, finish options, setup charges, and any extra costs tied to proofing or special handling. Confirm whether the quote includes printing, lamination, cutting, folding, and packaging so there are no surprises later. It also helps to ask how the quote changes at different quantities so you can compare run sizes clearly for custom lamination for mailers.
The practical takeaway is simple: decide how the mailer will be handled, then choose the finish that protects the print without fighting the fold, the budget, or the brand tone. If you lock in those basics before pricing, custom lamination for mailers becomes a production choice instead of a guess, and that usually leads to a cleaner piece on press and a better result in the hand.

