Learn how custom made PVC patches are designed, priced, and produced so you can Choose the Right thickness, backing, and timeline without overbuying or flattening the artwork.
Custom Made PVC patches are a practical choice when a logo needs to stay sharp on gear, bags, uniforms, or packaging. Molded PVC holds clean edges and solid color blocks better than many stitched or printed options, which is useful when the design needs to survive bending, handling, moisture, and abrasion.
The order is more than a decoration decision. Size, thickness, backing, and artwork complexity all affect cost and legibility. Treating the patch as a small manufacturing project usually produces a better result than treating it as an add-on.
Why PVC patches stand out on packaging and gear
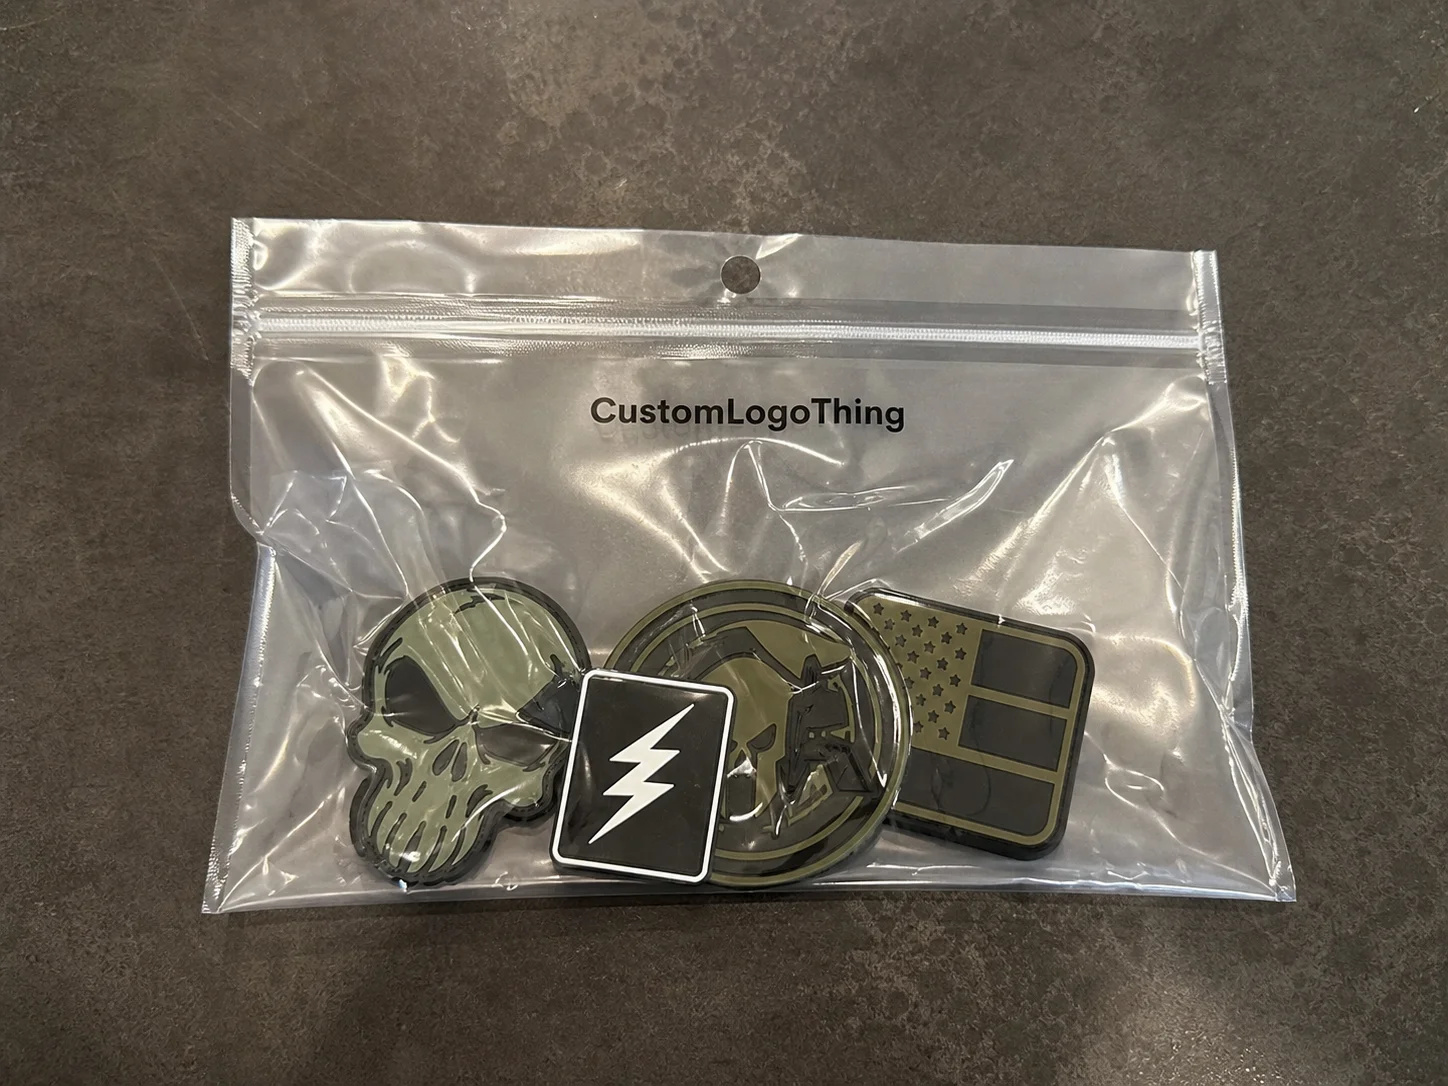
PVC is formed in a mold, so the design is built as raised and recessed shapes rather than individual stitches. That lets the patch preserve sharper corners, cleaner outlines, and separated color areas. For logos with small symbols or layered shapes, that difference is important.
The material also performs well on surfaces that move or get handled often. A duffel, pouch, tool roll, or reusable merch bag can flex without breaking down the graphic. On packaging, the same durability helps the patch feel more permanent and less fragile.
For many buyers, the main advantage is control. A molded patch gives you more consistency in edge definition, depth, and readability than many textile methods. That is why it appears on outdoor gear, sports merchandise, tactical-style products, and branded packaging systems that need a tougher finish.
“If the surface bends, gets damp, or needs small details to stay readable, molded material usually wins the comparison.”
How the molding process turns artwork into a finished patch
Clean vector artwork is the best starting point. A supplier will separate the design into color zones, check line weights, and simplify any details that are too fine to mold reliably. Hairline borders, tiny text, and crowded symbols are the first things that usually need adjustment.
Once the artwork is approved, it is translated into a mold and filled layer by layer. After curing, the patch is trimmed, inspected, and finished with the selected backing. That backing matters because the same molded face can behave very differently depending on whether it will be sewn on, attached with hook-and-loop, or fixed with adhesive.
Proofing is where buyers should slow down. You are not approving a flat print; you are approving a physical object with thickness, edge depth, and tactile separation between colors. A proper proof should show scale, border thickness, placement of text, and overall shape. If the design is detailed, allow time for revisions before the mold is cut.
Lead time usually depends on artwork readiness, mold complexity, color count, and quantity. Simple runs can often move in about 10 to 15 business days after proof approval. More complex shapes or multiple revision rounds extend that window.
The quality checks that matter most are practical: underfilled color areas, excess flash on the edges, uneven layer height, and text that has lost internal space. For buyers managing Custom Packaging Products, the patch should be coordinated with the rest of the build so the timeline does not slip across the entire project.
What affects cost, pricing, and MOQ
Pricing for custom made PVC patches usually follows the same logic as other tooling-based products: size, color count, mold complexity, backing, and quantity determine the quote. Larger patches use more material and take longer to cure and trim. More colors mean more separation work. Sharp corners, tiny cutouts, and layered shapes are harder to mold cleanly than a simple circle or rectangle.
MOQ means minimum order quantity. In practice, it is the point where setup costs start to make sense for the supplier. For basic patches, many vendors begin around 100 to 300 pieces. Smaller runs are useful for samples or pilot launches, but the unit cost usually rises quickly because the mold and setup cost are spread across fewer pieces.
Here is a practical comparison for a typical 2 to 3 inch patch with moderate detail:
| Quantity | Typical unit price | Setup or mold cost | Best fit |
|---|---|---|---|
| 100 to 299 | $1.60 to $3.20 | $40 to $120 | Samples, pilot runs, small team needs |
| 300 to 999 | $0.85 to $1.80 | Often lower per piece impact | Brand launches, uniforms, event kits |
| 1,000 to 4,999 | $0.45 to $1.05 | Usually absorbed better | Ongoing merch, retail packaging, promotions |
| 5,000+ | $0.25 to $0.65 | Minimal per unit effect | Repeat programs, broad distribution |
The lowest quote is not always the best value. One supplier may include mold work, digital proofs, and standard backing, while another may charge separately for revisions or specialty edges. Ask what is included before comparing only the unit price.
If the patches are part of a kit or retail package, compare them the way you would compare the other branded components. The patch should fit the economics of the full package, not just look good in isolation.
Material, size, color, and backing choices that change the result
Thickness changes the feel immediately. A thinner patch, around 2 mm, sits lower and bends more easily on curved surfaces. A thicker patch, around 3 to 4 mm, has more depth and a more substantial hand feel, but it can also feel bulky on lightweight apparel. For bags and pouches, a mid-range thickness is often the safer middle ground.
Size matters just as much. A design that looks balanced at 3 inches can become crowded at 1.5 inches if the text is too small or the border is too thin. If the art includes a slogan, subline, or icon, the patch needs enough surface area to carry it clearly.
Color strategy should be practical. Strong contrast usually beats a long list of shades. Two to five colors often gives cleaner legibility than seven or eight, especially if the patch will be viewed from a few feet away. Brand-matched tones still matter, but if a near match adds complexity without improving recognition, the extra cost may not be worth it.
Backing choice should follow the use case. Sew-on backing is the most durable and works well for permanent attachment. Hook-and-loop backing is useful for uniforms, tactical gear, and anything that needs to be swapped or removed. Adhesive backing is better for short-term display or light-duty application, but it should not be treated as a long-term solution on heat, moisture, or heavily handled surfaces. Magnetic attachment is niche and usually belongs on display items rather than wearable goods.
For packaging-oriented orders, the patch also needs to match the larger system. If the outer box uses a muted paper finish and the patch uses a bright gloss, the mismatch can feel accidental. The same is true for cards and inserts. A strong package branding system usually works because the textures, color temperature, and material weight all feel related, even when the components are different.
If the project touches sustainability claims, keep them specific. A PVC patch itself is not a paper-based item, so environmental messaging should focus on the full package rather than assuming the patch can carry that claim alone. For the outer carton or insert, chain-of-custody standards such as FSC remain a relevant reference point for paper sourcing: FSC.
Step-by-step ordering and approval process
The cleanest orders follow the same sequence: send a clear brief, get a quote, review the proof, approve the build, and ship the finished patches. Any vague step can slow the process.
- Send vector artwork if possible, along with the target finished size.
- State the quantity, preferred backing, and intended use, such as bags, uniforms, or retail packaging.
- Provide color references, Pantone notes if you have them, and any non-negotiable details.
- Review the digital proof slowly, especially the border thickness, line weights, and tiny text.
- Approve only after confirming the art, shape, and attachment method all match the job.
- Ask for production timing in business days from approval, not from inquiry.
If the patch will sit on a curved bag panel, be washed on a uniform, or coordinate with product packaging solutions, say that up front. The supplier can only recommend the right build if the use case is clear.
A useful decision path is simple. First, confirm the logo can survive at the target size. Second, choose the backing based on how the item will be used. Third, decide whether the patch should feel soft and flexible or thick and badge-like. If those three questions are answered before requesting a quote, the order is much easier to manage.
Common mistakes that create weak detail or delays
The most common mistake is sending artwork that was never meant to be molded. Low-resolution files, tiny lettering, hairline borders, and crowded subtext all create problems. A patch can only hold so much detail before the design starts to collapse visually.
Another frequent problem is approving the proof too quickly. Buyers often fixate on color first and miss the real issues: a border that is too thin, a letter counter that is too small, or a backing choice that does not suit the fabric. Once production starts, correcting those details takes longer than pausing for a careful review.
Timeline trouble also appears when the buyer requests changes after the mold or sample is already underway. A small text adjustment can be cheap early and expensive later. That is especially true when the change affects the cavity layout or the depth of the relief.
For packaged kits, vague instructions create a different kind of failure. If the supplier does not know whether the patch will be sewn onto denim, attached to a coated bag, or displayed inside a promo kit, the recommended construction may be wrong. For anything shipping at scale, it helps to think the way packaging engineers do. ISTA publishes test procedures used to evaluate vibration, drop, and compression risks: ISTA.
One practical quality check is to ask how the supplier handles flash trimming, color fill inspection, and final backing alignment. Those are small details, but they are the difference between a piece that looks finished and one that feels rushed.
What to do next before you request a quote
If you want a Fast, Accurate Quote, gather six things first: vector art, finished size, quantity, backing preference, intended surface, and deadline. That removes most of the back-and-forth and helps the supplier tell you whether the artwork needs simplification before tooling.
- Confirm the final dimensions in inches or millimeters.
- Choose sew-on, hook-and-loop, adhesive, or a special attachment.
- State whether the patches will be used outdoors, on uniforms, or in retail packaging.
- Check whether the logo needs Pantone matching or just close visual matching.
- Ask for a proof that shows scale and border thickness clearly.
It helps to compare at least two quote options. One version may be slightly larger with fewer details and a lower reject risk. Another may be tighter and more expensive, but better for a premium launch. That comparison shows where the real cost sits.
If the patches need to match an existing brand system, keep the same logic across the whole presentation. The patch, the carton, the insert card, and any custom printed boxes should feel like one family of materials, not separate purchases.
“The best order is the one that fits the artwork first, not the one that only hits the lowest unit price.”
How long do custom PVC patches usually take to produce?
Timing depends on artwork readiness, mold complexity, quantity, and whether revisions are needed after the first proof. Simple orders often move in about 10 to 15 business days after approval, while more complex builds can take longer. Rush schedules are possible, but they work best when the design is already clean and the buyer keeps changes to a minimum.
What size works best for custom made PVC patches?
The best size is the one that keeps the logo readable without forcing tiny details into a space that is too small. Larger patches show more texture and detail, while smaller patches can work if the design is bold and simple. If the patch will sit on a bag, sleeve, or curved surface, size should also account for flexibility and placement.
Are custom PVC patches waterproof and durable enough for bags?
PVC patches are a strong choice for bags because they handle moisture, handling, and frequent use better than many soft decorative options. They hold detail well on surfaces that flex or get rubbed often, which makes them practical for travel products and outdoor gear. Backing choice still matters, so the attachment method should match the fabric and the expected wear.
What affects the price of custom made PVC patches the most?
The biggest price drivers are quantity, size, color count, mold complexity, and the selected backing method. Special shapes, 3D effects, and very fine detail can increase setup effort and raise the quote. Comparing unit price without checking setup costs can hide the real cost of a small run.
What artwork should I send for a PVC patch quote?
Send vector artwork whenever possible, along with the finished size, preferred backing, quantity, and any color references you want matched. If the logo has fine lines or small text, mention that early so the supplier can tell you whether the design needs simplification. A clear brief reduces proof revisions and usually shortens the ordering process.