Most shipping damage and disappointing unboxings are not caused by the box alone. They happen because the box, insert, tissue, label, product position, and packing method were treated as separate decisions. That is why experienced buyers compare custom mailer box kits, not just a printed carton price.
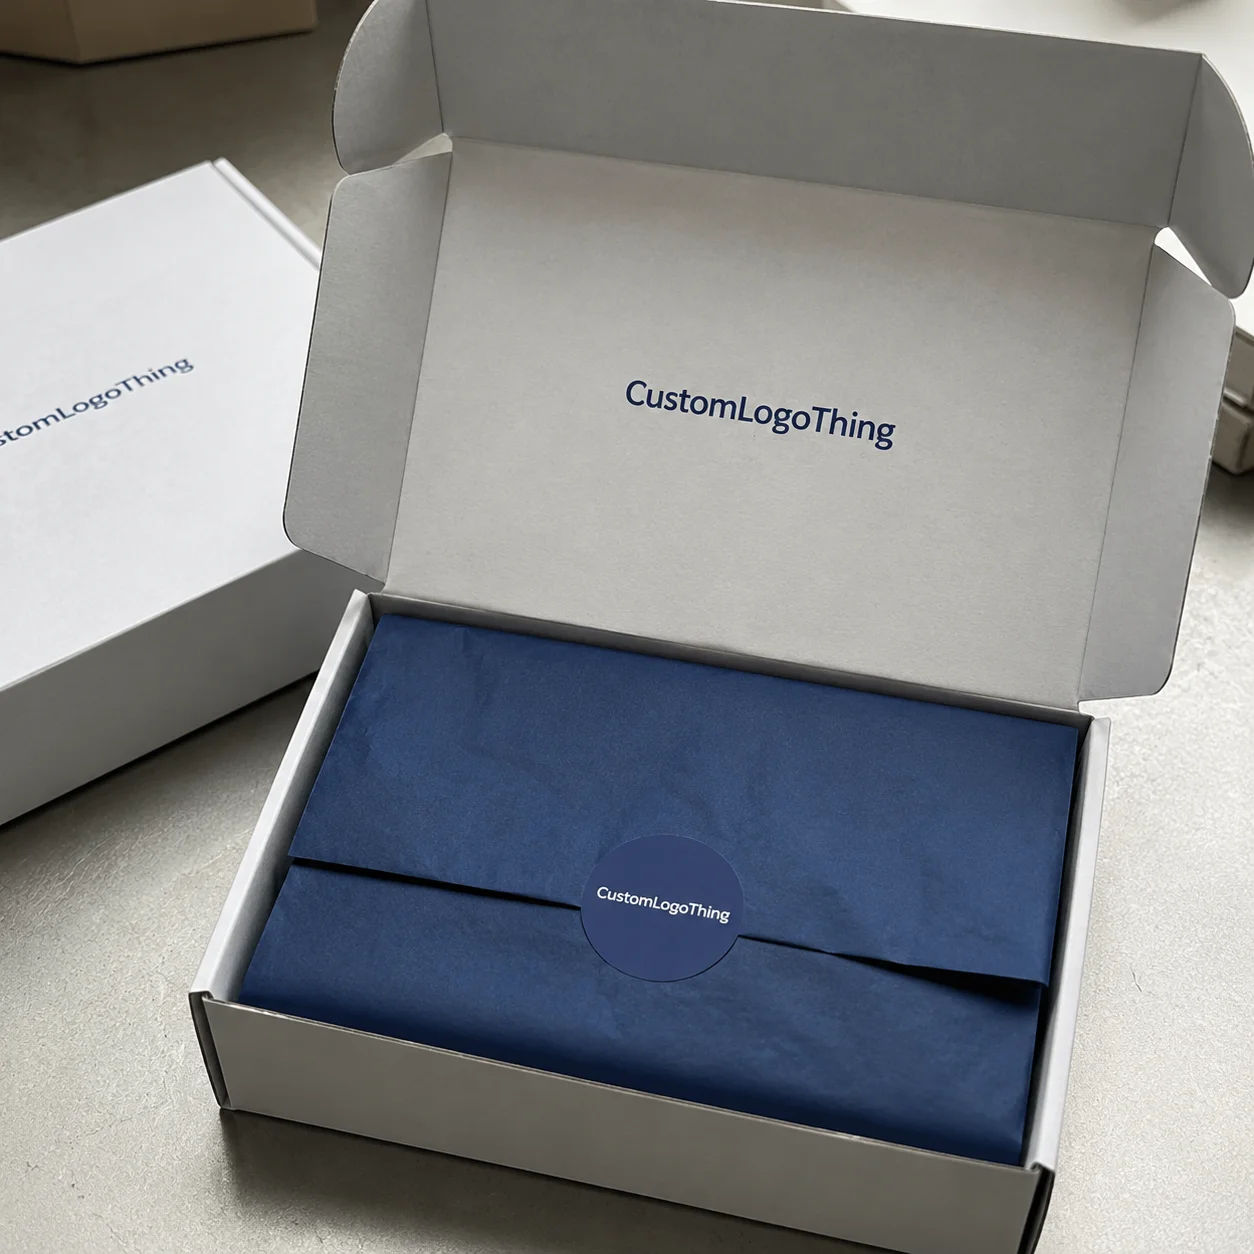
A mailer kit is a bundled packaging setup built around a branded corrugated mailer, often paired with inserts, void fill, stickers, product cards, sleeves, dividers, labels, or retention features sized for a specific product arrangement. The customer never experiences “a box” in isolation. They experience the full packout: how it arrives, how the lid opens, whether anything rattles, whether the brand feels intentional, and whether fulfillment staff can repeat the same result 200 or 20,000 times.
What Custom Mailer Box Kits Really Include
Custom mailer box kits differ from a simple run of printed boxes because the buyer is planning protection, presentation, warehouse workflow, and brand communication at the same time. The outer box carries the brand. The insert controls movement. Tissue manages first impression. A card explains the offer or return process. A label or sticker may help close the pack quickly without extra tape.
Common uses include subscription boxes, ecommerce launches, influencer seeding, retail sample packs, employee onboarding kits, premium gift shipments, and product bundles where two or more items need to arrive in a deliberate layout. A skincare set with three glass bottles has a different packaging job than a folded apparel bundle, even if both technically fit into a 9 x 6 x 3 inch mailer.
The early questions are practical: what box style fits the product, what board grade protects it, what print method suits the artwork, what order quantity is realistic, and what timeline can the team live with? Many packaging problems begin because those questions get answered after the launch date, product photography, and artwork have already been approved.
Packaging floor truth: a beautiful mailer that takes too long to pack, leaves fragile corners exposed, or ships half-empty is not finished packaging. It is a good-looking prototype that still needs engineering.
A complete kit may include only three parts: box, insert, and card. It may also include printed tissue, a belly band, a QR insert, custom tape, divider cells, product sleeves, return labels, or pre-applied SKU labels. More pieces do not automatically mean better packaging. Each component should either protect the product, clarify the experience, improve packing speed, reduce damage, or support a measurable brand requirement.
How Mailer Box Kit Components Work Together
A strong mailer kit has five working layers: the outer mailer, the internal fitment, the presentation pieces, the closure method, and the fulfillment accessories. Each part has its own job, but the packout only works if those parts are designed around the same board thickness, product dimensions, and handling conditions.
The outer mailer is usually a roll-end corrugated structure with tuck-front locking tabs, dust flaps, and scored panels that fold into a rigid shipper. Roll-end construction gives the side walls extra stiffness because the corrugated board wraps around itself at key edges. That matters more than it looks on a screen. A weak side wall can let the insert twist, even if the printed panel looks perfect.
Board grade affects print, protection, and freight. E-flute is thin, neat, and useful for detailed branding; it is often around 1/16 inch thick. B-flute is closer to 1/8 inch and provides more cushioning and stacking strength, though fine artwork may not print as sharply. C-flute is less common for small branded mailers but can make sense for larger shippers. Heavier applications sometimes use combinations such as EB flute when product weight or shipping lanes demand more resistance.
Inside the mailer, inserts and dividers do the quiet work. These may be corrugated trays, paperboard sleeves, molded pulp, recyclable paper cushions, die-cut retention panels, or foam alternatives where extra shock absorption is required. For fragile products, the insert should limit movement in at least two directions. For Premium Retail Packaging, it should also present the product cleanly when the lid opens.
Presentation pieces have a different job. Printed tissue, belly bands, thank-you cards, QR inserts, branded stickers, return instructions, and branded tape can make the package feel complete. They do not all protect the product. Tissue adds softness and theater; it will not stop a glass jar from moving inside a loose cavity. A card can build loyalty; it does not reinforce a weak tab.
Dimensions should be engineered around the product plus protection, not guessed from the product alone. A few extra millimeters can change insert grip, shipping rates, master carton count, pallet density, and assembly speed. A candle may need a snug die-cut well and corner clearance. An apparel bundle may need tissue and a belly band, but no rigid insert. A small tech accessory may need a retention panel with a finger notch so the customer can remove it without tearing the tray.
Key Specs to Decide Before You Request a Quote
Before contacting a supplier, gather product dimensions, product weight, number of items per shipment, desired presentation, shipping method, expected order quantity, and any seasonal demand spikes. If the item is fragile, liquid-filled, sharp-edged, unusually heavy, heat sensitive, or sold as a set, say so early. Those details affect structure more than artwork does.
Board choice is one of the first real decisions. E-flute is common for ecommerce mailers because it offers a smoother print surface and compact profile. B-flute gives better cushioning and stacking strength. C-flute can be useful for larger shippers. The right choice depends on product weight, box span, print expectations, storage conditions, and parcel handling risk.
Print decisions should be defined before quote comparison. Outside-only print usually costs less than two-sided print. A one-color flexographic logo is not priced like full-color litho-laminated artwork. Flood coat color, spot colors, varnish, aqueous coating, and soft-touch finishes all change cost and production path. Digital print is often practical at lower quantities because it avoids some plate costs. Larger runs may price better with flexo or litho, depending on ink coverage and artwork quality.
Structural choices deserve the same attention. Decide whether you need a standard tuck-front mailer, stronger locking tabs, a tear strip, a tamper-evident closure, finger notches in the insert, or openings shaped to each item. A kit built for fast fulfillment may use fewer loose pieces and one-direction assembly. A premium reveal may accept slower packing in exchange for layered presentation.
- Measure every item: length, width, height, weight, cap height, fragile edges, and orientation requirements.
- Define artwork needs: dieline, bleed, safe zones, barcode placement, QR testing, and inside panel graphics.
- Confirm material claims: recycled content, recyclability, coating choice, right-sizing, and material reduction.
- Plan fulfillment: manual packing, semi-automated lines, outsourced kitting, seasonal batch assembly, or pre-kitted delivery.
For sustainability language, stay specific. “Eco-friendly” is too vague to carry much weight and can create risk if the claim is not supported. Ask whether the board is recyclable in common paper streams, whether coatings interfere with recycling, whether material is FSC certified, and whether the kit reduces filler or ships in a smaller dimensional-weight tier. The Forest Stewardship Council is a useful reference for responsible fiber sourcing, while the EPA waste management hierarchy gives helpful context on source reduction and material choices.
Custom Mailer Box Kit Pricing, MOQ, and Unit Cost
Pricing for custom mailer box kits is driven by structure, board grade, box size, print coverage, number of components, setup requirements, finishing, packing labor, shipping destination, and order quantity. The printed mailer may be the largest visible piece, but inserts, cards, tissue, labels, freight, storage, and assembly time can move the real cost more than buyers expect.
Minimum order quantity depends heavily on the production method. A simple digitally printed mailer may be practical at 100 to 250 units, especially for a pilot run or event. Offset, flexographic, litho-laminated, or specialty-finished work often makes more sense at 1,000, 2,500, or 5,000 units because plates, tooling, setup, and makeready are spread across more kits. Custom inserts also affect MOQ, especially if they require dedicated dies or multiple SKU layouts.
The ranges below are planning numbers, not universal pricing. Freight, board market conditions, size, artwork, labor, and component sourcing can move the quote in either direction. Still, they help separate a realistic budget from a wish list.
| Kit Type | Typical Quantity Range | Common Components | Planning Unit Cost |
|---|---|---|---|
| Starter ecommerce kit | 100-500 units | Digitally printed E-flute mailer, stock tissue, sticker | $2.75-$6.50 per kit |
| Mid-volume branded kit | 1,000-5,000 units | Printed mailer, die-cut insert, card, label or belly band | $1.40-$3.80 per kit |
| Premium launch kit | 2,500-10,000 units | Two-sided print, custom insert, tissue, card, specialty finish | $2.25-$7.00 per kit |
| Protective multi-item shipper | 1,000-10,000 units | Stronger board, dividers, retention panels, instruction card | $1.85-$5.50 per kit |
Small runs carry more setup cost per box. Larger runs spread tooling, print setup, and material purchasing across more units, which usually lowers the per-kit price. The trap is overbuying. If product dimensions may change in eight weeks, buying 10,000 units of a tight custom insert can turn a lower unit cost into dead stock.
There are sensible ways to control cost without making the package feel cheap. Simplify artwork. Use one universal insert instead of three SKU-specific inserts. Choose stock accessories where they are not central to protection. Reduce oversized dimensions. Skip finishes that do not affect the customer’s decision. Move a decorative detail from a full flood print to a smaller label. Ask for good-better-best tiers: a practical shipper, a stronger protective version, and a more premium reveal. That comparison is cleaner than chasing one perfect quote.
Process and Timeline From Sample to Production
A sensible packaging development path runs in this order: discovery, product measurement, structural recommendation, dieline creation, artwork placement, prototype review, quote approval, production, quality checks, and delivery. Reorders can move faster. First orders need more care because the box, insert, artwork, and packing method are being proven together.
Typical timing for a first order might be 2-5 business days for discovery and measurement, 3-7 business days for dieline and structural work, 5-12 business days for a blank or printed sample depending on method, and 12-25 business days for production after proof approval. Freight adds time, especially for bulky corrugated cartons. Rush work is sometimes possible, but it usually limits material choices and leaves less room for fit corrections.
The sample stage has three useful levels. A blank structural sample checks fit, closure, and insert grip. A printed sample reviews brand color, panel layout, copy, barcode readability, and package branding. A production sample, when available, gives a closer view of the final board, print method, and finish. Not every project needs all three, but fragile, high-value, or launch-critical packaging usually benefits from more than a flat PDF proof.
Test the packout physically. Load the real product, close the mailer, shake it gently, check whether the insert releases, feel the closure pressure, and watch how the lid opens. Then ask someone who did not design it to pack the same kit. If they hesitate, flip an insert the wrong way, or need three hands to close the box, fulfillment will feel that friction on a busy shipping day.
Production is not mysterious, but it is unforgiving. Corrugated sheets are printed directly or laminated with a printed top sheet, then die-cut, scored, stripped, folded or packed flat, bundled, inspected, carton-packed, and prepared for freight. Inserts follow a similar die-cutting and stripping path. Quality checks typically look at print registration, color range, scoring depth, glue or lock performance, board defects, count accuracy, carton labeling, and whether the finished pieces match the approved sample.
For heavier or fragile shipments, ask about transit testing. The International Safe Transit Association publishes test procedures widely used for parcel packaging evaluation. ASTM standards are also commonly referenced for compression, drop, and material testing. Testing does not guarantee zero damage. It gives the team a better way to compare structures than guessing from a desk.
Common Mistakes That Make Box Kits Harder to Ship
The most common mistake is choosing the box size before confirming the full product arrangement, insert thickness, tissue fold, and protective clearance. A product that measures 6 x 4 x 2 inches may not belong in a 6 x 4 x 2 inch cavity. The insert needs board thickness, the product may need finger access, and a fragile edge may need 1/4 inch or more of controlled clearance depending on material and risk.
Overbuilding can be just as expensive as underbuilding. Oversized or overly complex kits raise material cost, freight cost, warehouse space, and assembly time without always improving protection. A 10 x 8 x 4 inch mailer may look generous, but if the product floats inside and the insert is weak, the larger box only gives the item more room to build momentum during drops.
Artwork errors are another regular trouble spot. Critical logos placed across folds can distort. Low-resolution images can print soft. Inside panels are easy to miss during proofing. Screen color will not match printed corrugated exactly, especially on kraft board or uncoated surfaces. Safe zones matter because scores, folds, and die-cut tolerances are physical events, not design-layer suggestions.
Fulfillment mistakes show up when the kit has too many loose pieces, a confusing pack order, Inserts That Fit only one way, stickers that slow closure, or accessories that create bottlenecks. If a warehouse associate must fold tissue, place three cards, align a belly band, peel a sticker, and fight a tight tab on every shipment, the labor cost may exceed the savings from a cheaper component.
Protection mistakes are often hidden by good photography. Tissue paper does not stop movement. A beautiful insert with shallow cavities may not retain a heavy bottle. A mailer that survives a gentle office shake may still fail after conveyor drops, truck vibration, and sorting equipment. Liquids, glass, ceramics, electronics, and multi-piece kits deserve real physical review, and in some cases ISTA-style testing.
Ordering too close to a launch date compounds every problem. Rush schedules can reduce board options, increase freight cost, limit sampling, and force approval before the product fit is truly proven. If the first full production run is also the first real fit check, the brand is accepting avoidable risk.
Next Steps to Spec and Order With Confidence
Start with the product, not the artwork. Gather physical samples, measure every item, weigh the full shipment, decide how the customer should open the kit, and divide components into must-have and nice-to-have groups. A locking insert for a glass bottle may be essential. A second sticker that looks good but slows packing may not be.
Create a simple packout brief before asking for final pricing. Include photos, product dimensions, shipment weight, quantity targets, shipping method, brand colors, launch date, storage limits, and fulfillment style. If orders will be packed by hand, say so. If an outsourced fulfillment center needs flat-packed components labeled by SKU, include that requirement before sampling.
Ask for a structural recommendation before final artwork. The dieline should match the real board thickness, insert layout, closure style, and shipping requirements. Artwork built on a guessed dieline often needs rework, especially around fold panels, dust flaps, QR codes, and barcode placement.
If you are comparing packaging paths, review Custom Packaging Products for broader formats and consider whether paper mailers, rigid boxes, sleeves, or corrugated shippers fit the product better. For soft goods or lightweight apparel, Custom Poly Mailers may be more cost-efficient than a box, especially when crush protection is not required.
Review samples with the people who approve branding, pack orders, manage budget, and handle customer complaints. Each group catches different problems. The brand team may notice color. The warehouse may notice pack time. Finance may notice freight. Customer service may notice that return instructions are missing.
Compare quote options by total landed cost per shipped kit, not just the printed box price. Include inserts, accessories, freight, kitting fees, storage, assembly time, damage reduction, and reorder consistency. The best mailer kit is not always the most decorated one. It is the one that protects the product, packs at the expected speed, ships at the intended cost, and still feels deliberate when the customer opens it.
FAQ
What are custom mailer box kits used for?
They are used when a brand needs more than a plain shipping box, such as subscription kits, ecommerce launches, gift sets, sample boxes, influencer mailers, and product bundles that need both protection and presentation. The kit usually combines a printed corrugated mailer with inserts, tissue, cards, labels, or other components that make packing repeatable and the unboxing experience more polished.
How much do branded mailer box kits cost?
Cost depends on box size, board grade, print method, order quantity, insert complexity, accessories, finishing, freight, and whether components arrive flat, bundled, or pre-kitted. Early planning ranges often run from about $1.40 to $7.00 per kit, but buyers should compare total landed cost per usable kit because inserts, labor, storage, and damage rates can change the real number.
What is the best material for a custom mailer kit?
Corrugated board is the usual choice for the outer mailer because it balances printability, stiffness, cushioning, and parcel durability. E-flute is often used when a smoother print surface and compact profile matter, while heavier or fragile products may need stronger flutes, reinforced structures, or a better internal insert.
How long does it take to produce custom shipping box kits?
Timeline depends on artwork readiness, sampling, production quantity, print method, material availability, finishing, and whether the kit includes multiple custom components. A first order commonly needs several weeks from measurement to delivery because the structure, dieline, insert fit, color expectations, and packout process all need approval before production.
Do custom mailer box kits need inserts?
Not every kit needs an insert, but inserts are useful when products are fragile, heavy, oddly shaped, premium-priced, or likely to shift during shipping. A good insert can reduce movement, improve presentation, speed up packing, and prevent the buyer from using excess filler to compensate for a loose box.


