Buyer Fit Snapshot
| Best fit | Custom Presentation Boxes projects where brand print, material claims, artwork control, MOQ, and repeat-order consistency need to be specified before quoting. |
|---|---|
| Quote inputs | Share finished size, material target, print colors, finish, packing count, annual reorder estimate, ship-to region, and any compliance wording. |
| Proofing check | Approve dieline scale, logo placement, barcode or warning zones, color tolerance, closure strength, and carton packing before bulk production. |
| Main risk | Vague material claims, crowded artwork, missing packing details, or unclear freight terms can make a low unit price expensive after revisions. |
Fast answer: Custom Presentation Boxes: Material, Print, Proofing, and Reorder Risk should be specified like a repeatable production item. The safest quote records material, print method, finish, artwork proof, packing count, and reorder notes in one written spec.
Production checks before approval
Compare the actual filled-product size with the drawing, then confirm tolerance on folds, seals, hang holes, label areas, and retail display edges. Reserve space for logos, QR codes, warning copy, and material claims before decorative graphics fill the panel.
Quote comparison points
Review material grade, print process, finish, sampling route, tooling charges, carton quantity, and freight assumptions side by side. A quote is only useful when the supplier can repeat the same color, closure quality, and packing count on the next order.
Custom Presentation Boxes: What They Are and Why They Matter
Custom Presentation Boxes do far more than hold a product still. They shape the first physical impression, set expectations around value, and quietly tell the buyer whether the item inside feels ordinary or carefully considered. A box often begins selling before the product is even lifted out, which is why custom presentation boxes have such a strong role in product packaging and package branding.
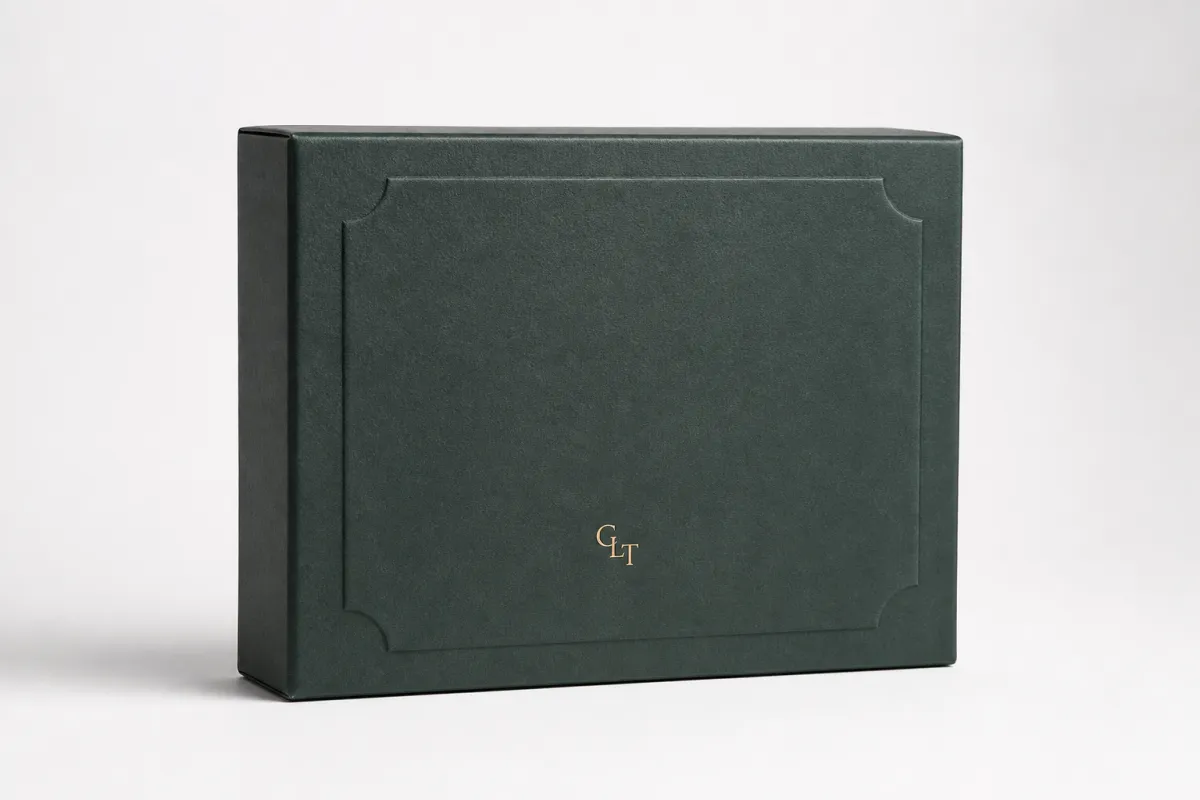
At their best, presentation boxes make the opening feel deliberate. That can mean a rigid setup box with a lift-off lid, a magnetic closure, a shoulder-neck style, a drawer format, or a folding structure paired with a custom insert. The job is different from a shipping carton, which exists first to survive handling and freight. It is also different from a mailer, which usually serves e-commerce packing needs, and different again from a standard folding carton, which is often selected for shelf efficiency. A well-built presentation box sits closer to premium retail packaging or a gift set than to a plain outer shipper.
That difference matters most when perception and protection both carry weight. Cosmetics, skincare kits, jewelry, consumer electronics, awards, spirits, subscription kits, and corporate gifting programs all benefit from custom presentation boxes. A fragrance bottle in a plain carton may still sell the formula, but a rigid box with a fitted insert sells the experience too. A tech accessory in a simple sleeve may feel purely functional; the same item in a printed box with layered compartments feels finished and intentional.
A good presentation box does three jobs at once: it protects the product, it signals value, and it creates a reveal that people remember.
That is why structure, print, and finishing need to work together rather than being treated as separate decisions. A textured wrap paper, a precise foil stamp, and a clean opening sequence can turn custom printed boxes into a strong brand asset. The reverse happens just as quickly: a beautiful print job on a poorly fitted box feels disappointing the moment the lid comes off. Buyers looking at Custom Packaging Products usually find that the best results come from matching the structure to the product first, then building the appearance around that fit.
I have seen more than a few projects stall because the packaging was chosen from a render instead of from the actual item. The mockup looked polished, sure, but the sample told a different story once weight, clearance, and insert pressure entered the picture. My view is simple: custom presentation boxes are not just containers. They are part of the product story, and when they are planned with care, they make a product easier to display, easier to ship, and easier to sell.
How Custom Presentation Boxes Work in Production
The production path for custom presentation boxes starts with a dieline and ends with a packed carton of finished goods, but most of the important decisions happen in between. A dieline defines the geometry: length, width, depth, wrap allowances, glue areas, folds, and any openings needed for a window or insert. Once that outline is approved, the artwork can be mapped to the structure so the print lands on the correct panels, edges, and closures.
Most presentation boxes use two distinct material layers. The outer layer is the wrap paper or printed surface that carries the brand look. The inner layer is the board that gives the box strength. That board may be grayboard, chipboard, paperboard, or a similar rigid substrate depending on the structure and price point. The wrap can be coated paper, uncoated stock, textured specialty paper, or a printed sheet finished with lamination. Separating those layers gives packaging design more room to work, since the visual surface and the structural core do not need to be the same material.
Inside the box, inserts often decide whether the packaging feels tailored or generic. Foam inserts work well when protection needs to be precise, though many buyers prefer paperboard trays or molded pulp because they reduce plastic use. Dividers are common in multi-item sets, especially when a kit includes bottles, accessories, or samples. Custom cutouts can cradle a product so it stays in place during transit. In custom presentation boxes, the insert is rarely an afterthought; it is part of the fit and part of the presentation.
Print and finishing choices are what turn a formed structure into branded packaging. Offset printing can deliver fine detail and tighter color control on larger runs. Digital printing is often the better fit for shorter runs or artwork that changes more often. After printing, the box may receive foil stamping, embossing, debossing, spot UV, soft-touch lamination, matte or gloss coating, or specialty textures. Each choice changes appearance and cost, and each one should support the product’s position rather than compete with it.
Sample approval is where careful buyers save money later. A sample lets you check color accuracy, board stiffness, insert fit, closure strength, and the feel of the opening sequence. A printed proof can show layout, but a physical sample shows whether the box actually performs in hand. For custom presentation boxes, that matters even more when a lid must close cleanly, a magnet must align, or a product has to sit centered and secure. That part is not glamorous, but it is where the real packaging decisions live.
If the box will move through parcel networks, ask about testing aligned with ISTA test standards. If you need a stronger forest stewardship story, ask whether paper components can be specified with FSC certification. Those details matter more than many buyers expect, and they are part of why custom presentation boxes should be treated as a packaging system rather than a printed shell.
For buyers comparing Custom Packaging Products, one useful question is straightforward: does the structure support the reveal, or does the reveal fight the structure? Good production resolves that tension before the first full run is ever made.
Key Factors That Shape Custom Presentation Boxes
Three things usually decide the right build for custom presentation boxes: the product itself, the brand goal, and the way the box will move through storage and shipping. A lightweight jewelry set does not need the same board thickness as a glass bottle set. A luxury gift program does not call for the same finish choices as a retail shelf pack. A box that will sit in a warehouse before use needs different assembly planning than one that ships flat to a fulfillment center.
Product size, weight, and fragility are the first technical questions. A heavy item needs stronger board and better support at the corners. A fragile item needs retention, not just padding. Stackability matters too. If boxes will be palletized or displayed in secondary cartons, the design should resist crush and avoid rounded shapes that waste space. For custom presentation boxes, the interior dimensions matter just as much as the outside profile, because a loose insert can make an expensive box feel cheap the moment the product shifts.
Branding goals come next. Some brands want restrained luxury: quiet colors, minimal copy, soft-touch lamination, and one foil accent. Others want bold retail packaging that catches attention from a distance. The same box can be tuned either way, but the choices change. A dark uncoated paper with blind embossing creates a very different feeling than bright printed art with spot UV and metallic foil. Neither is right in every case. The right direction depends on how the product should be perceived at first glance.
Sustainability now belongs in the decision set, not off to the side. Recyclable board, paper-based inserts, reduced plastic windows, and water-based coatings can improve the environmental profile, though they may also change texture or cost. Buyers sometimes assume greener materials always cost more, and that is not consistently true. A paperboard insert can replace molded plastic at a similar or even lower cost in some runs, especially when the geometry is simple. The key is to specify the material around the product, not around a generic sustainability label.
Assembly and storage realities matter more than many first-time buyers expect. A rigid box may arrive fully formed, which simplifies packing but increases freight volume. A folding presentation style may ship flat, which saves space but adds assembly steps. If a team has to build hundreds of boxes on a deadline, labor can become the hidden cost. That is why custom presentation boxes should be judged as part of the full workflow, not only by the finished sample.
Regulated or sensitive products bring their own requirements. Spirits may need neck supports or age-related labeling. Tech items may need ESD-safe considerations. Cosmetic sets may need compliance copy placed carefully so it does not interrupt the design. Long-transit products may need stronger closure methods and packaging tests. Buyers who need a broader packaging architecture can use Custom Packaging Products to separate the outer reveal from the shipping plan. That is often the difference between attractive packaging and packaging that performs.
The simplest way to think about it is this: custom presentation boxes balance appearance, protection, and operational ease. If any one of those gets ignored, the box usually costs more than it should, whether through production, damage, or labor.
Custom Presentation Boxes Cost, Pricing, and MOQ
Pricing for custom presentation boxes comes from several moving parts, and the biggest mistake buyers make is looking only at the quoted unit price. Board grade, wrap paper, insert type, print coverage, finishing steps, and hand assembly all affect the final number. Freight, sample charges, storage, and packaging for shipment can move the total as well. A box that looks simple on screen can become much more complex once it is engineered for an insert, wrapped in specialty paper, and finished with foil or embossing.
Minimum order quantity, or MOQ, matters because setup costs have to be spread across the run. A die, a print plate, machine setup, and sampling work do not disappear just because the order is small. That is why smaller orders usually carry a higher unit price. In many production scenarios, a straightforward paperboard build may be practical at a few hundred units, while a more custom rigid build may become more efficient at 500 to 1,000 units or more. The exact number depends on the structure, the vendor’s capability, and how much hand assembly is involved.
The table below gives a practical sense of the pricing ladder. These are rough ranges, not promises, because custom presentation boxes can move up or down quickly depending on materials, quantity, and finish complexity.
| Box Style | Best For | Typical Features | Rough Unit Cost |
|---|---|---|---|
| Printed folding presentation carton | Lightweight retail kits and promotional sets | Printed paperboard, tuck or sleeve format, limited finishing | $0.85-$1.75 |
| Rigid setup box without insert | Premium gifting and basic product reveal | Thicker board, wrapped exterior, cleaner closure, higher perceived value | $2.10-$4.50 |
| Rigid box with custom insert | Cosmetics, tech accessories, spirits, and multi-item kits | Paperboard or foam insert, better retention, stronger presentation value | $3.75-$6.50 |
| Premium rigid with specialty finish | Luxury launches and high-touch branded packaging | Foil, embossing, soft-touch lamination, magnetic closure, refined print control | $5.50-$8.50+ |
Those ranges are helpful because they show where the cost changes. A better board may add only a small amount, but a more complex insert, a magnetic closure, or a soft-touch finish can raise the price quickly. Hand labor matters too. If a box has to be assembled, wrapped, inserted, and packed step by step, labor can outweigh material cost. That is one reason custom presentation boxes are often quoted as a system rather than as a material-only line item.
Buyers sometimes wonder why a simple black rigid box costs more than expected. Usually the answer is that black exposes everything. Any edge inconsistency, any dust under a soft-touch film, any print defect, and any misaligned wrap seam is easier to see. In premium packaging, quality control becomes part of the price. Technical references such as ASTM board testing methods, FSC sourcing documentation, or package performance standards help everyone speak the same language about the result.
A realistic budget for custom presentation boxes should leave room for samples, freight, and a small revision buffer. If the box is tied to a launch, do not budget so tightly that there is no room to approve a physical sample. That usually creates more expensive rush work later. Honest quoting is better than a bargain number that grows once print coverage, inserts, or shipping are clarified. From a packaging buyer’s point of view, the cleanest quote names the structure, finish, insert, quantity, and delivery location clearly.
If you are comparing suppliers or reviewing Custom Packaging Products internally, ask for apples-to-apples specs before comparing cost. A cheaper quote may leave out an insert, use thinner board, or assume fewer finish steps. For custom presentation boxes, the real comparison is not just the price tag. It is the price tag plus how well the box performs once it is in a customer’s hands.
Custom Presentation Boxes Process and Timeline: From Quote to Delivery
The ordering process for custom presentation boxes is usually straightforward when the first inquiry includes the right information. A good quote starts with dimensions, product weight, quantity, finish preferences, insert needs, and the shipping destination. If the product is fragile, say so. If the box needs to travel flat, say that too. The more exact the input, the less back-and-forth later.
The typical production path begins with concept and quoting. After that come structure development, artwork placement, sampling, revision, final approval, production, quality checks, packing, and freight booking. On a simple program, those steps can move in a few weeks. On a premium program with custom inserts and specialty materials, the timeline stretches because each approval stage matters. Custom presentation boxes reward patience at the proof stage; rushing past it often creates expensive rework.
Here is a practical version of the workflow:
- Confirm the product dimensions, including any caps, closures, sleeves, or protective components.
- Choose the box style and decide whether the structure should arrive flat or fully formed.
- Specify the print approach, finish, and insert style.
- Review the dieline, artwork proof, and sample or prototype.
- Approve final production and confirm the delivery schedule.
- Track packing, carton count, and freight booking before the shipment leaves.
Delays tend to come from the same few places. Artwork changes after proofing can push everything back. Measurements based on guesswork can create fit problems. Specialty papers may have longer sourcing times than expected. If the approval process sits in someone’s inbox for a week, the schedule slips just as surely as if the press had a problem. That is why custom presentation boxes work best with a single decision-maker or a clearly defined approval chain.
Lead time should also be planned around the use case. A trade show pack, a holiday launch, or a retailer rollout has a fixed date, and the box should not be treated as a last-minute accessory. For many projects, it is safer to build in extra time for proofing and freight than to assume everything will move at the fastest possible pace. A reliable plan for custom presentation boxes often begins earlier than the marketing team thinks it needs to.
When buyers want a broader sense of structure choices, the options on Custom Packaging Products can help define whether the project belongs in a folding carton family, a rigid setup family, or a hybrid build. That distinction matters because the process for each one is a little different, and the price structure follows the process.
My practical advice is direct: approve the box only after you have confirmed the product fit, print position, finish feel, and the way the box opens. A presentation box can look perfect in a digital mockup and still fail in hand if the magnet catches too hard or the insert is too tight. Custom presentation boxes are physical objects, and physical objects need physical approval.
Step-by-Step Guide to Ordering Custom Presentation Boxes
The cleanest way to order custom presentation boxes is to start with the product, not the packaging. Measure the item with any protective components it will actually travel with. A bottle in a foam sleeve is not the same as a bottle on its own. A kit with cables, cards, or accessories needs room for all of those pieces, not just the main item. If the product is fragile, note the contact points that need protection.
Next, define the presentation goal. Do you want the opening to feel formal, playful, minimalist, or highly refined? Should the box present the product flat and centered, or staged in layers? Should the inside be white and clean, or dark and dramatic? Those choices shape the packaging design as much as the exterior print. A strong brief for custom presentation boxes should describe the tone, not just the dimensions.
Then gather technical specs before asking for pricing. That means width, depth, height, target quantity, print coverage, finish preferences, insert material, and destination. If the supplier has to guess at any of those, the quote will be less reliable. A proper spec sheet also makes it easier to compare options across suppliers because everyone is quoting the same structure. That is especially helpful if you are balancing retail packaging needs against shipping efficiency.
Before approving anything, review the mockup and the sample with a critical eye. Check the closure. Check the insert fit. Check whether the logo lands where it should. Check how the box feels when it opens and closes. If the box is meant to be reused, test it more than once. Custom presentation boxes should look good on day one and still behave well after several open-close cycles if they are likely to be handled repeatedly. That kind of check saves a lot of head-scratching later.
A good approval checklist usually includes these items:
- Product dimensions confirmed against the actual item and any insert.
- Artwork checked for spelling, placement, and edge alignment.
- Finish confirmed under the lighting where the box will be viewed.
- Closure tested for strength and repeatability.
- Packaging method confirmed for carton packing and freight.
- Delivery address and deadline verified before production starts.
Approve production only after the quantities, carton counts, and secondary packing requirements are clear. If the boxes are going to a warehouse, a retail chain, or a marketing event, the outer packing method may matter as much as the box itself. That is one reason custom presentation boxes are better treated as part of the whole packaging system rather than as a decorative add-on.
For buyers who are still sorting through structure choices, Custom Packaging Products can be a practical starting point because it helps separate the presentation role from the shipping role. The best order process is the one that keeps both of those jobs visible from the start.
Common Mistakes and Expert Tips for Better Custom Presentation Boxes
One of the most common mistakes with custom presentation boxes is ordering from rough estimates. A product that is “about this size” can become a fit problem as soon as the insert is added or the closure is tightened. Another recurring issue is under-specifying the insert. If the product can rattle, tip, scratch, or tilt, the box will never feel fully premium, even if the print looks excellent.
Another trap is choosing a finish because it looks impressive in a sample photo rather than because it suits the product and the production environment. Soft-touch lamination feels elegant, but it can mark if handled badly. High-gloss surfaces create visual punch, but they may show fingerprints or scuffs. Foil can lift perceived value, but crowded layouts can make it feel busy. The same goes for embossing and debossing. These are strong tools, but they work best with restraint.
Storage and assembly are easy to ignore until the boxes arrive. A stacked rigid box may need more warehouse space than planned. A box that ships flat may require labor at the packing stage. A magnetic closure may feel premium but can slow packing if every lid has to be checked manually. Custom presentation boxes should always be judged in the context of the team that has to use them, not only by the marketing team that approved the artwork.
Here are a few practical Tips That Save time and money:
- Design the insert around the actual product plus protective allowances, not around the product alone.
- Test the box under real handling conditions, including drop handling if the product will ship through parcels.
- Keep high-detail branding away from folds, seams, and the most handled edges.
- Ask for material samples if color, texture, or touch feel is central to the brand story.
- Plan the box with your fulfillment process in mind so the pack line does not become the bottleneck.
From an expert point of view, the best custom presentation boxes are the ones that do not create extra work downstream. They fit, they open the way they should, they stack cleanly, and they arrive with enough consistency that the team can trust them. A box that looks beautiful but slows down packing is not a win. A box that protects the product but misses the brand story is also a compromise.
Sampling is where many of those problems show up early, and that is a good thing. The sample stage is not there to make the project feel slow. It is there so the finished run does not create unpleasant surprises. For custom presentation boxes, a single well-reviewed sample is often cheaper than a full production mistake.
If the project is tied to a launch, seasonal promotion, or event gifting, plan earlier than you think you need to. That extra cushion lets you refine the packaging design, approve the sample, and handle freight without panic. More than once, the difference between a smooth launch and a scrambled one has been a two-week buffer.
Expert Tips and Next Steps for Custom Presentation Boxes
The smartest next step for custom presentation boxes is to define the product, the quantity, and the presentation goal before asking for quotes. That keeps the conversation specific and keeps pricing comparisons honest. A short spec sheet is usually enough to move the project forward: dimensions, product weight, branding notes, finish preferences, insert requirements, and the delivery timeline you are working toward.
Then decide where the box needs to do the heavy lifting. Is it mostly about gifting? Shelf impact? Transit protection? A premium reveal? The answer changes the structure. A drawer box with a ribbon pull may be perfect for one project and awkward for another. A magnetic rigid box may feel upscale, but if freight volume matters, it may not be the right trade. Custom presentation boxes work best when the design is shaped around the actual job, not around a trend.
Ask for at least one sample or proof review if the fit is critical, the finish is premium, or the launch date matters. A physical sample is the easiest way to spot issues that a digital mockup hides. Also ask how the boxes will be packed for shipping. A carefully made presentation box can still arrive damaged if the secondary packing is weak.
Compare options by more than unit price. Look at protection, assembly time, freight efficiency, and how the box supports the brand story. That broader view is what separates a pretty package from a good packaging program. If you are comparing options, a starting point like Custom Packaging Products can help you frame the structure first and the decoration second.
My final advice is straightforward: well-planned custom presentation boxes are easier to quote, faster to approve, and far more likely to arrive looking the way you pictured them. They also tend to produce fewer surprises in packing, fewer complaints in transit, and a stronger reaction when the customer opens the lid. For a brand that cares about branded packaging, that combination is hard to beat.
If you are ready to move from idea to spec sheet, start with the product details, choose the presentation level you want, and let the packaging support the story rather than distract from it. That is the simplest route to custom presentation boxes that feel polished, practical, and worth the investment.
FAQ
What should I know before ordering custom presentation boxes?
Measure the product with its protective components, not just the item by itself. Decide whether the box needs inserts, a luxury finish, or better shipping efficiency. Have quantity, delivery timing, and branding files ready before asking for a quote so the first estimate is useful.
How do custom presentation boxes differ from rigid gift boxes?
Presentation boxes are designed around the reveal, branding, and product fit, not just the outer shell. Rigid Gift Boxes are one common style, but custom presentation boxes can also use different structures and inserts. The right choice depends on protection, budget, and the kind of unboxing experience you want.
What affects the cost of custom presentation boxes the most?
Material grade, print coverage, finish complexity, and insert design usually drive the biggest price swings. Lower quantities typically raise unit cost because setup costs are spread across fewer boxes. Freight, sampling, and hand assembly can also move the budget more than buyers expect.
How long does it take to produce custom presentation boxes?
Timing depends on structure complexity, sample approval speed, and whether specialty materials are involved. Simple builds move faster than premium boxes with custom inserts or advanced finishing. The safest approach is to build in extra time for proofing, revisions, and freight.
Do custom presentation boxes need inserts?
Not always, but inserts are often the difference between a nice box and one that truly protects the product. Use inserts when the product could shift, scratch, tip, or arrive with visual damage. The insert can be paperboard, foam, molded pulp, or another material based on the product and budget.

