Buyer Fit Snapshot
| Best fit | Custom Presentation Boxes with Logo projects where brand print, material claims, artwork control, MOQ, and repeat-order consistency need to be specified before quoting. |
|---|---|
| Quote inputs | Share finished size, material target, print colors, finish, packing count, annual reorder estimate, ship-to region, and any compliance wording. |
| Proofing check | Approve dieline scale, logo placement, barcode or warning zones, color tolerance, closure strength, and carton packing before bulk production. |
| Main risk | Vague material claims, crowded artwork, missing packing details, or unclear freight terms can make a low unit price expensive after revisions. |
Fast answer: Custom Presentation Boxes with Logo: Design, Cost, Timing should be specified like a repeatable production item. The safest quote records material, print method, finish, artwork proof, packing count, and reorder notes in one written spec.
Production checks before approval
Compare the actual filled-product size with the drawing, then confirm tolerance on folds, seals, hang holes, label areas, and retail display edges. Reserve space for logos, QR codes, warning copy, and material claims before decorative graphics fill the panel.
Quote comparison points
Review material grade, print process, finish, sampling route, tooling charges, carton quantity, and freight assumptions side by side. A quote is only useful when the supplier can repeat the same color, closure quality, and packing count on the next order.
Custom Presentation Boxes with Logo: Design, Cost, Timing
Custom presentation boxes with logo can shape how a product is judged before anyone lifts the lid. The weight of the board, the feel of the wrap, the way the closure closes, and the place the logo occupies on the panel all send quiet signals about care, value, and whether the package was planned with intention.
That is one reason custom presentation boxes with logo keep showing up in premium gifting, retail packaging, launch kits, and recognition programs. They do more than hold an item. They frame the reveal, set the tone, and make the whole presentation feel considered instead of improvised.
From a packaging buyer's point of view, the box is never just a shell. It belongs to the product story, it carries the unboxing moment, and it helps package branding feel physical rather than pasted on. A structure that works well, paired with the right material and finish, supports the item inside instead of competing with it.
A good presentation box does not have to shout; it only has to make the customer feel that the contents were worth planning for.
What Custom Presentation Boxes with Logo Actually Do
Custom presentation boxes with logo are display-focused boxes made to present a product, gift, award, or sample in a more polished and intentional way than a plain mailer or folding carton. Put simply, they are designed to feel substantial in the hand, open with purpose, and make the contents feel at home in a premium setting.
That matters because buyers are not only purchasing the product itself. They are buying reassurance. They are buying the sense that the brand paid attention to the details. A well-made box gives that feeling before the item is touched, which explains why custom presentation boxes with logo show up so often in client gifts, influencer kits, onboarding sets, retail packaging, and internal recognition programs.
The logo does more than decorate the surface. It acts as a cue. On a structured box, the mark can reinforce trust, make the package easier to remember, and help the entire presentation feel like part of the brand rather than an afterthought. That effect matters even more when the box is photographed, shared, or kept after the contents are removed.
I have opened enough samples over the years to know that the box shape and surface finish start talking long before anyone reads a line of copy. A soft-touch black rigid box with a clean foil logo says something entirely different from a glossy printed sleeve, even if both contain the same item. The difference is physical, visual, and immediate, and people feel it right away even if they do not say so out loud.
Common use cases for custom presentation boxes with logo include:
- Luxury retail launches where presentation supports premium pricing.
- Corporate gifting where the box needs to feel polished and reusable.
- Onboarding kits where branded packaging sets the tone for the experience.
- Influencer and media mailers where package branding should photograph well.
- Awards and recognition programs where the reveal matters as much as the item.
The strongest results usually come from designing the box around the product instead of forcing the product into a generic container. Measurements, insert planning, and closure style matter for that reason. A presentation box can look expensive in a render and still fail if the item rattles, shifts, or takes two hands to remove.
There is also a subtler point that gets missed in rushed projects: the logo should be scaled for the viewing distance, not just for the mockup. A mark that feels elegant on screen can disappear on a textured wrap or read too softly under retail lighting. That is the kind of detail that separates a box that looks good online from one that actually performs on a shelf or in a client handoff.
How Custom Presentation Boxes with Logo Are Made
Most premium custom presentation boxes with logo start with rigid board or specialty paperboard, then get wrapped in printed paper, textured stock, or laminated cover material. The outer wrap creates the visual finish, while the board gives the box shape and stiffness. If you pick up a well-made rigid box, that firmness is doing a lot of the perceived-value work for you.
The build usually brings together three layers: the outer wrap, the structural board, and the interior. The inside may be plain paperboard, foam, molded pulp, or a fabric-lined insert depending on how the product sits and how much protection it needs. For fragile items, the insert matters nearly as much as the exterior because it controls movement and shapes the reveal.
Branding can be applied several ways, and each one changes the finished feel:
- Direct print for full-color graphics or bold visual branding.
- Foil stamping for metallic highlights that catch light in a crisp, clean way.
- Embossing or debossing for raised or recessed tactile detail.
- Spot UV for a contrast effect on selected areas.
- Label applications for short runs or projects with flexible artwork needs.
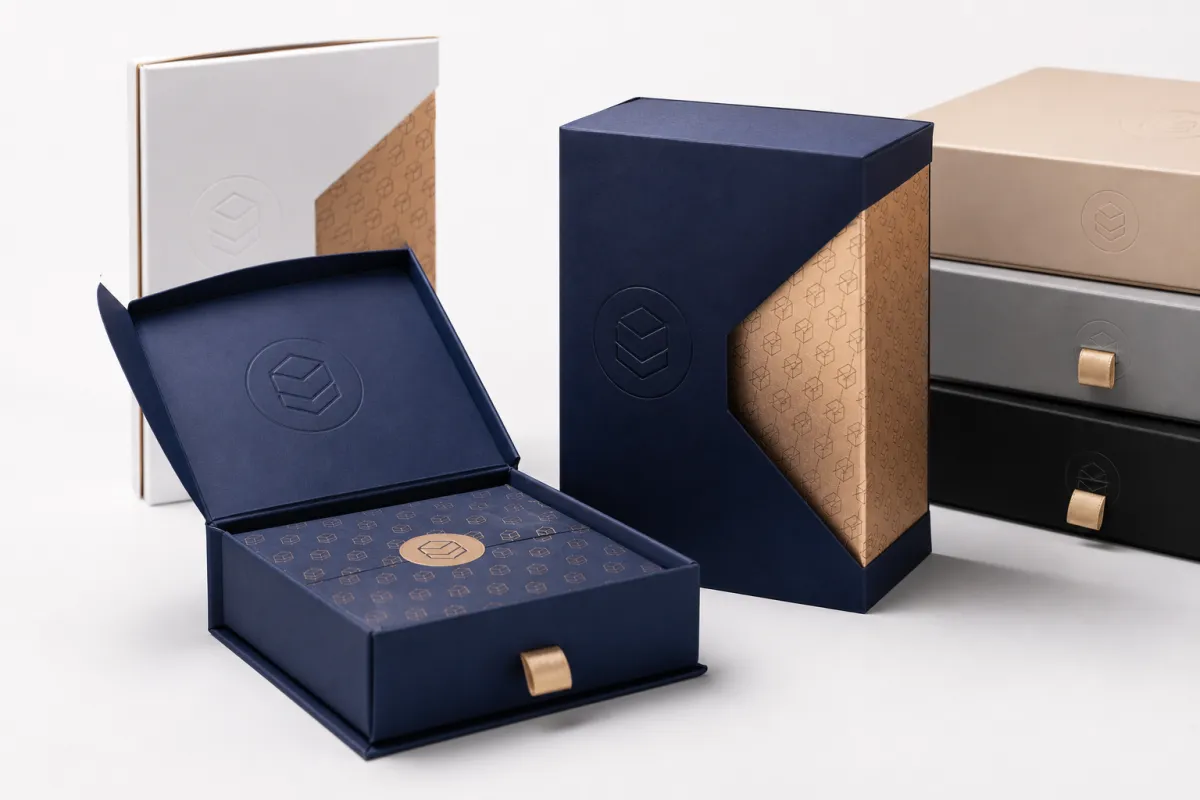
Structure choice changes both presentation and use. A two-piece lift-off lid feels formal and familiar. A magnetic closure box creates a more controlled reveal and often feels a step up in perceived value. Drawer styles are popular for kit-style product packaging because they create a slow, deliberate pull. Hinged book-style boxes can feel elegant and are often used for sets, awards, and premium retail packaging.
Custom presentation boxes with logo also benefit from inserts chosen with care. A die-cut paperboard insert is light and economical. Foam offers a more secure fit for delicate products, while molded pulp is often a stronger option for teams trying to reduce mixed-material waste. Fabric-lined inserts can soften the reveal and make the experience feel more luxurious, though they add cost and complexity.
Proofing deserves more attention than many teams give it. Digital proofs confirm artwork placement, dielines, and general copy accuracy, but a physical sample shows the details that matter in real use: how the board bends, how tight the closure feels, whether the logo reads clearly under room light, and how much pressure it takes to remove the product. Those checks save money later.
For teams that want a broader handle on packaging terminology and industry basics, the educational resources at packaging.org are useful. If the box needs to survive parcel handling, it also makes sense to review testing expectations through ISTA, especially when the project includes shipping rather than display alone.
Cost and Pricing Factors for Custom Presentation Boxes with Logo
The price of custom presentation boxes with logo depends on a few practical variables: size, board thickness, print coverage, logo treatment, insert complexity, and order quantity. Box style matters, but it rarely drives cost by itself. In many jobs, the finishing and setup work move the number more than the base structure does.
Small runs usually cost more per unit because the setup is spread across fewer boxes. A cutter has to be set, wrap material has to be prepared, tooling may be required for foil or embossing, and the line still needs to be checked. At 200 pieces, that effort is divided thinly. At 2,000 pieces, the same work is spread across many more units, so the unit price usually settles down.
Material choice matters just as much. A 1200gsm rigid board wrapped in 157gsm art paper will feel and price differently from a lighter board wrapped in a simple printed stock. Soft-touch lamination, linen-texture papers, and specialty metallic wraps can improve the look, but they also add cost and sometimes add lead time. For custom presentation boxes with logo, the point is not to pick the most expensive surface. It is to choose the one that fits the product and matches the buyer's expectation.
A useful way to think about the tradeoffs looks like this:
| Box Style | Best For | Typical Build | Indicative Price at 500 Units |
|---|---|---|---|
| Two-piece rigid lift-off lid | Gift sets, awards, premium retail | Rigid board, wrapped exterior, paperboard insert | $2.50-$5.50 each |
| Magnetic closure box | Launch kits, executive gifts, luxury product packaging | Rigid board, hidden magnets, wrap paper, optional ribbon | $3.25-$7.00 each |
| Drawer style box | Controlled reveal, sample sets, branded packaging | Sleeve and tray, pull tab, die-cut insert | $2.75-$6.25 each |
| Book-style hinged box | Premium launches, commemorative sets | Rigid board, wrap, concealed hinge, foam or pulp insert | $4.00-$8.50 each |
Those ranges are not fixed quotes, and they should not be read like catalog pricing. They are there to help with budgeting. A heavily printed box with full-wrap artwork and a multi-part insert can land above the table, while a simpler one-color design with a standard insert can come in below it. Quantity changes the outcome too: 1,000 units often price better than 250 because production efficiency improves.
Finishing is where a lot of buyers either overspend or underspec. Foil stamping, embossing, and debossing create strong brand cues, but each one adds setup. A soft-touch coating feels pleasant in hand, although it can show marks more easily than a matte aqueous coating. Spot UV gives a sharp contrast, yet it only makes sense if the rest of the design stays quiet enough to let it stand out.
If sustainability is part of the brief, the right questions need to be asked early. FSC-certified paper wraps can support responsible sourcing goals, and mixed-material inserts should be reviewed with end-of-life in mind. The EPA's recycling basics at epa.gov can help buyers think through what can and cannot be recovered easily. Sometimes the smartest packaging choice is the one that removes unnecessary layers before they become a recycling problem.
For buyers comparing custom presentation boxes with logo, I always recommend asking for a quote that separates the structure, print, finishing, insert, and freight. That makes it much easier to see whether the money is going into visible value or getting lost in hidden complexity. A clean quote helps you compare options fairly instead of guessing why one supplier seems cheaper.
There is another budget trap worth calling out: a low unit price that hides later rework. If the insert is wrong or the logo placement is off, the cheapest quote can become the most expensive order pretty fast. A little discipline up front usually saves more than trying to trim a few cents after the structure is already locked.
Step-by-Step Guide to Ordering Custom Presentation Boxes with Logo
The cleanest way to order custom presentation boxes with logo is to start with the product, not the artwork. Measure the item carefully, note the weight, check for fragile corners, and decide whether the box has to protect the item in transit or only present it on arrival. A box that supports display only can be built very differently from one that must also handle shipping stress.
Once the product is understood, choose the structure that matches the audience. A premium retail launch may call for a magnetic closure box because the reveal feels more refined. A curated sample kit may work better as a drawer box because it lets the buyer pull the item out in one clean motion. A gift or award often benefits from a classic lift-off lid because the form feels formal and timeless.
Then prepare the artwork with the same care you would give to any important branded packaging project. Confirm the logo file format, color values, clear space rules, and minimum type size. If the brand team has standards for foil color, paper color, or logo placement, gather them before the quote stage. The more specific the brief, the less back-and-forth later.
- Measure the product and define how much room the insert needs for safe handling.
- Choose the box structure based on the opening experience and the product's weight.
- Confirm materials and finishes so the look matches the budget and brand tone.
- Prepare the artwork with proper dielines, logo files, and color references.
- Review the proof and sample before full production begins.
- Schedule production around launch dates, events, or customer delivery windows.
That proof-and-sample step saves a lot of projects. A digital proof can show a logo in the right place, but it cannot show whether the insert sits too tight or whether the lid closes with the right resistance. For custom presentation boxes with logo, those physical details matter because they shape how polished the box feels in the hand.
If you need a broader starting point while comparing structures and budgets, the Custom Packaging Products page is a practical place to review formats before locking the design. It is often easier to narrow the options after seeing how different box types change the experience.
Process and Timeline for Custom Presentation Boxes with Logo
A realistic production plan for custom presentation boxes with logo starts with intake, then moves through specification review, artwork prep, proof approval, sampling, production, finishing, packing, and shipment. Simple projects can move quickly if the artwork is ready and the structure is standard. More complex builds need more attention because every extra feature adds another place where the project can slow down.
Timing usually depends on how prepared the customer is at the start. Late artwork changes, missing dieline approvals, unclear insert dimensions, and color corrections can delay the schedule more than the manufacturing itself. In many cases, the factory is waiting on people rather than waiting on machinery.
For a straightforward rigid box with standard print and a basic insert, production often lands around 12-15 business days after proof approval. If the project includes foil stamping, embossing, magnetic closures, or a more detailed insert, it is safer to plan on 20-30 business days after approval, especially if sampling is part of the process. Those ranges can stretch during peak periods or if freight needs extra coordination.
The schedule checkpoints usually look like this:
- Discovery and quoting: 1-3 business days if the brief is complete.
- Dieline and artwork prep: 2-5 business days depending on revisions.
- Sample approval: 3-7 business days for most physical samples.
- Production: 12-30 business days depending on complexity and quantity.
- Packing and shipping: 2-7 business days, depending on destination and freight mode.
Quantity affects timing in a predictable way. A larger order takes more machine time, more inspection time, and more packing labor. If you need custom presentation boxes with logo for a trade event or product launch, work backward from the event date and build in a cushion. A rushed box can still be good, but a rushed correction is rarely cheap.
For shipping-sensitive work, some teams ask for transit planning similar to ISTA distribution testing methods or relevant ASTM packaging standards. That does not mean every presentation box needs full lab validation. It does mean the box should be judged against how it will actually travel, not only how it looks on a table.
My practical advice is simple: set an internal review date, a proof approval date, a sample approval date, and a ship date. Once those checkpoints are fixed, custom presentation boxes with logo become much easier to manage, because the whole team can see where the time is going and where it should not be wasted.
One more timing reality check: holiday seasons, end-of-quarter launches, and show schedules can tighten lead times faster than people expect. If your deadline is tied to a public event, it is smarter to assume the box will take longer than the perfect-case estimate. That extra buffer usually feels boring until the week you need it.
Common Mistakes to Avoid with Custom Presentation Boxes with Logo
The most common mistake is designing only for appearance. A box can look beautiful in a mockup and still fail in real life if the product shifts, the insert is too shallow, or the closure feels weak. With custom presentation boxes with logo, the structure has to support the product first and the visual story second. If those two things drift apart, the box will not hold up under handling.
Weak logo placement causes trouble too. Too close to the edge, too small for the viewing distance, or too low in contrast, and the brand mark loses its impact. That can happen easily on dark wraps, metallic papers, or textured stocks. It helps to check the mark at actual size, not only at mockup size, because packaging design often looks cleaner on screen than it does in hand.
Material mismatch creates a lot of frustration as well. A finish that looks premium on a sample board may not behave well on a box that will be stored, stacked, or shipped. Soft-touch lamination can pick up marks. Gloss surfaces can show fingerprints. Thin board can bow if the item is heavy. The right choice depends on the use case, not just on the mood board.
The mistakes I see most often are these:
- Skipping a physical sample and trusting the render alone.
- Adding too many finishes until the box becomes expensive and fussy.
- Choosing an insert that looks neat but does not secure the item properly.
- Ignoring freight and storage conditions when selecting materials.
- Using branding that looks fine in theory but disappears on the chosen surface.
Overcomplication deserves its own warning. It is easy to stack foil, embossing, spot UV, special paper, ribbon pulls, and multiple inserts into one project because each element sounds premium. The strongest custom presentation boxes with logo often do the opposite. One good material choice and one clean logo treatment can feel more expensive than five competing effects.
If your box is meant to be kept or reused, think about durability and recovery together. A presentation box with a single-material insert and a recyclable paper wrap is easier to explain and often easier to dispose of responsibly than a box built from too many mixed layers. For broader guidance on material recovery, the EPA recycling resources are a smart reference point, especially if your buyers care about end-of-life decisions.
I also tell clients not to over-correct after the first round of feedback. If three people on the team each add one small change, the project can drift away from the original purpose before anyone notices. A stronger approach is to decide which single detail deserves to carry the premium feeling, then keep the rest disciplined.
Expert Tips and Next Steps for Custom Presentation Boxes with Logo
Use the box as a brand tool, not just a container. For many custom presentation boxes with logo projects, one or two premium touches do more than a crowded list of finishes. A foil logo on a textured wrap can carry the whole look. A clean emboss on a quiet matte surface can feel restrained and expensive. The key is to let one detail lead.
Match the interior to the product with the same care you give the outside. Inserts, tissue, ribbon, and printed liners should support the item's shape and weight so the reveal feels intentional from the moment the lid opens. A good interior does not only protect the product. It also helps the buyer understand where to look and how to remove it without guessing.
Think about the full unboxing path. The outer lid, the reveal, the insert, and the final product lift should feel coordinated rather than assembled from unrelated parts. In premium retail packaging, that path matters because the customer experiences it in seconds, but remembers it much longer. That is one reason custom presentation boxes with logo work so well when structure, print, and insert all speak the same language.
A clear brief saves time and money. Before you request quotes, gather these details:
- Final product dimensions and weight.
- Quantity target and any future reprint expectations.
- Preferred box style and opening direction.
- Logo files, color references, and brand rules.
- Finish preferences such as foil, emboss, or soft-touch coating.
- Insert requirements and any shipping or storage constraints.
If you are comparing formats, it often helps to review a few starting points on Custom Packaging Products before asking for a recommendation. That makes the first conversation more useful, because the discussion can move straight to structure, presentation value, and budget tradeoffs instead of spending time on the basics.
My final piece of advice is to treat custom presentation boxes with logo as part of the product strategy. They are not an accessory. They shape perception, protect the contents, support retail packaging, and reinforce package branding in a way that cheaper packaging simply cannot. If you start with measurements, Choose the Right structure, and stay honest about the budget, the result usually looks better and performs better too.
So the practical takeaway is this: define the product first, choose one design element that carries the premium impression, and ask for a sample before production starts. That one habit prevents most expensive mistakes and gives your final box a much better shot at looking the way it should in the hand.
Frequently Asked Questions
What are custom presentation boxes with logo used for?
They are used for premium product reveals, gift sets, awards, onboarding kits, retail displays, and branded presentations where the first impression matters. In practice, custom presentation boxes with logo support both protection and perception, helping the item feel more valuable before anyone opens it.
How much do custom presentation boxes with logo cost?
Price depends on size, quantity, board material, print coverage, logo finish, and whether inserts or specialty closures are included. Small runs usually cost more per box, while larger quantities spread setup and production costs more efficiently, which is why custom presentation boxes with logo often price better at higher volumes.
How long do custom presentation boxes with logo take to make?
Timing depends on artwork readiness, proof approval, sampling, and the complexity of the structure and finishes. Simple builds move faster, while foil stamping, rigid construction, and custom inserts add steps that extend the schedule for custom presentation boxes with logo.
What materials work best for custom presentation boxes with logo?
Rigid board is common for premium presentation because it holds shape well and feels substantial in the hand. Wrapped paperboard, textured specialty papers, and soft-touch laminates can raise perceived value when they match the brand and the product weight, which is exactly why material choice matters so much in custom presentation boxes with logo.
Can custom presentation boxes with logo include inserts or special finishes?
Yes, inserts can be made from paperboard, foam, molded pulp, or fabric-lined materials to hold the product securely. Special finishes such as foil, embossing, debossing, spot UV, and magnetic closures are common when the goal is a stronger premium impression, and they are often the details that make custom presentation boxes with logo feel complete.
What should I prepare before requesting a quote?
Have the product dimensions, quantity, logo files, target finish, insert needs, and delivery timeline ready before you ask for pricing. The more complete the brief, the easier it is to get a realistic quote for custom presentation boxes with logo and avoid late revisions that cost time.
What is the smartest way to keep the box premium without overspending?
Pick one strong focal point, such as a foil logo or a textured wrap, and keep the rest of the build clean and functional. That approach usually gives custom presentation boxes with logo a higher-end feel without piling on features that add cost but not much extra value.

