Buyer Fit Snapshot
| Best fit | Custom Product Labels with Foil Stamping projects where brand print, material claims, artwork control, MOQ, and repeat-order consistency need to be specified before quoting. |
|---|---|
| Quote inputs | Share finished size, material target, print colors, finish, packing count, annual reorder estimate, ship-to region, and any compliance wording. |
| Proofing check | Approve dieline scale, logo placement, barcode or warning zones, color tolerance, closure strength, and carton packing before bulk production. |
| Main risk | Vague material claims, crowded artwork, missing packing details, or unclear freight terms can make a low unit price expensive after revisions. |
Fast answer: Custom Product Labels with Foil Stamping: Material, Adhesive, Artwork, and MOQ should be specified like a repeatable production item. The safest quote records material, print method, finish, artwork proof, packing count, and reorder notes in one written spec.
Production checks before approval
Compare the actual filled-product size with the drawing, then confirm tolerance on folds, seals, hang holes, label areas, and retail display edges. Reserve space for logos, QR codes, warning copy, and material claims before decorative graphics fill the panel.
Quote comparison points
Review material grade, print process, finish, sampling route, tooling charges, carton quantity, and freight assumptions side by side. A quote is only useful when the supplier can repeat the same color, closure quality, and packing count on the next order.
Custom Product Labels with Foil Stamping: What to Know
Custom product labels with foil stamping do a lot with a very small move. On a packed receiving dock, in a warehouse pick bay, or on a retail shelf full of near-identical SKUs, a narrow strip of metallic shine can help one item register faster than the rest. That is usually the point. The label has to pull attention without wrecking the practical side of product packaging: clear text, clean scan zones, solid adhesion, and a finish that survives handling that is less gentle than the mockup on your desk.
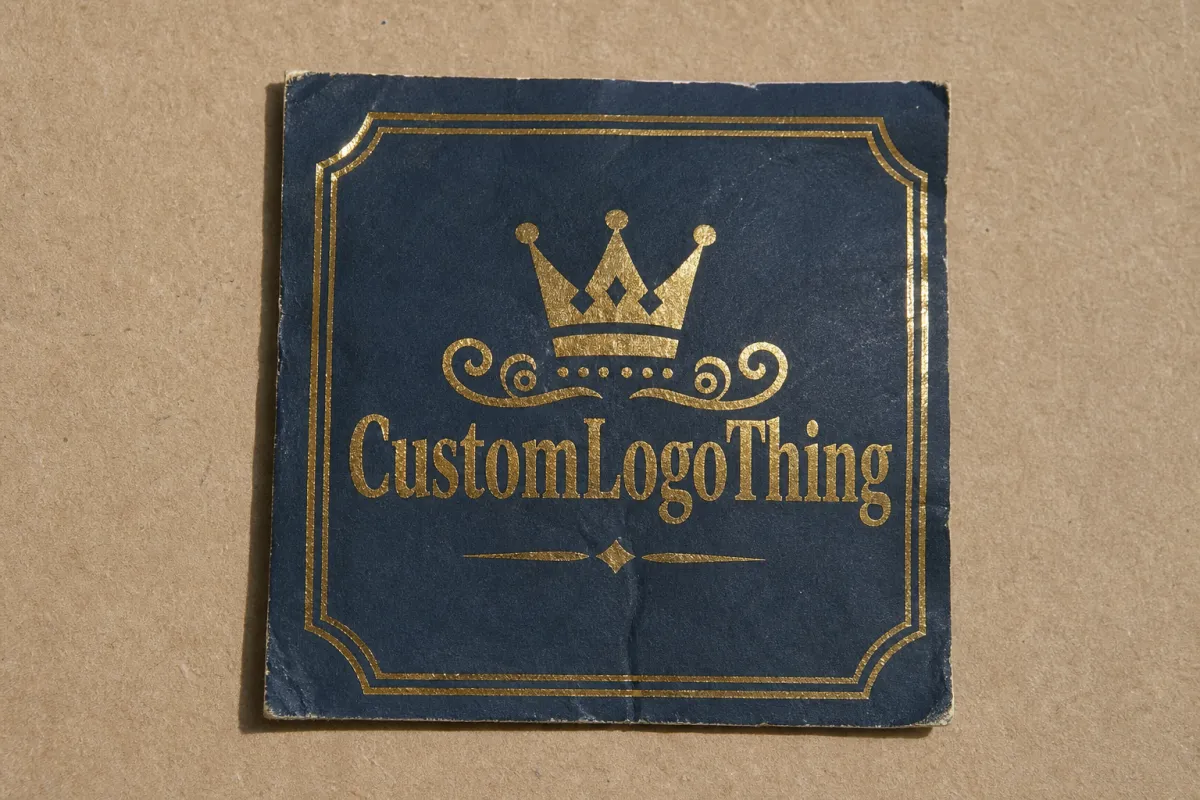
Foil stamping is easy to describe and more specific in practice. Heat and pressure transfer a thin foil film onto the label surface, leaving behind a metallic or pigmented effect without relying on ink alone. Gold, silver, copper, black, red, and specialty hues all live in that world. It is decorative, sure, but it can also be useful when a label needs to stand out without losing legibility in shipping, warehousing, or retail packaging.
For buyers comparing options, the real questions usually come down to material choice, adhesive performance, turnaround, minimum order size, and whether the finish matches the package surface. A premium effect on a smooth glass jar behaves very differently from the same finish on textured corrugate, a chilled bottle, or a curved plastic tube. The label has to look right. It also has to stay put.
Why custom product labels with foil stamping stand out on crowded shelves
Walk down any busy retail aisle and the first thing you notice is rarely the full label copy. It is the signal. A metallic accent, a sharp edge on a logo, or a foil band around a neck label can help a product register faster, especially when the aisle is full of the same colors, the same bottle shapes, and the same general noise. That visual signal matters in retail packaging, and it matters earlier in the chain too, where a receiving clerk or stock associate may be scanning a pallet in seconds instead of reading each unit like it is a novel.
That is why custom product labels with foil stamping are not just about looking expensive. They create a clear hierarchy on the package. A foil hit on the brand name can pull the eye where you want it. A foil border can frame a limited-edition SKU. A small accent can make a private-label item feel more intentional without turning the label into a billboard. Used well, foil supports package branding instead of fighting it.
The process also plays nicely with other print methods. Foil stamping can sit beside standard process-color printing, spot varnish, embossing, and die cutting. It does not replace those tools; it works with them. In practical packaging design, that usually means a buyer can reserve the metallic treatment for the parts that matter most, such as a logo, a seal, a product line name, or a premium callout, while keeping the rest of the label readable and cost-conscious.
A label should earn its space. If the finish looks expensive but slows application, hides a code, or lifts in transit, it turns into a packaging problem fast.
For teams managing product packaging across multiple SKUs, the decision is less about "Can we make it shine?" and more about "Can this label still do its job after printing, application, shipping, and stocking?" That is the useful question. The best foil-stamped label looks premium and still behaves like a production part, not a display sample with delusions of grandeur.
If you are building a broader packaging lineup, it helps to think about labels alongside the rest of the system. A coordinated set of Custom Labels & Tags can keep product families visually aligned, while Custom Packaging Products can tie the label back to cartons, mailers, inserts, and other branded packaging components. That consistency is usually what makes a shelf presence feel deliberate instead of noisy.
Production process and timeline for foil-stamped labels
Foil stamping has a more involved setup than plain digital printing, and that is where the timeline usually starts to widen. A straightforward label with standard print can move quickly once the artwork is approved. A foil-stamped label adds steps because the supplier has to prepare tooling, Choose the Right foil film, and make sure the substrate can take the impression cleanly. That extra setup is normal. It is part of why the finish looks crisp when it is done well.
The production sequence often looks like this:
- Artwork review - confirm dimensions, bleed, safe areas, foil placement, barcode zones, and any small type that needs to stay sharp.
- Tooling or plate creation - prepare the die or plate that transfers the foil impression.
- Foil selection - match the color, reflectivity, and release behavior to the label stock and press setup.
- Substrate preparation - check whether paper, film, or a coated stock will accept the finish without cracking, smudging, or over-polishing.
- Stamping - apply heat and pressure to transfer the foil to the chosen areas.
- Inspection - confirm registration, coverage, edge sharpness, and legibility.
- Trimming and finishing - slit, die cut, or sheet the labels as specified.
- Packaging and shipment - protect the finished stack so the foil surface does not scuff in transit.
Lead time usually grows in the places where a buyer expects it to grow: tooling, proof approval, specialty material sourcing, and extra finishing. A simple repeat order with established specs may move in about a week to a week and a half after approval, while a first run with new tooling, custom shapes, or protective lamination can stretch into two to four weeks without much trouble. That range depends on the supplier, quantity, and how many questions need answers before the press starts.
Foil stamping differs from standard label printing in one important way: the setup stage matters more. Digital printing can often absorb late edits with less friction. Foil work is less forgiving because small changes in foil position, coverage, or die layout can affect registration and finish quality. That does not make it fragile. It just means the front end needs more attention. A clear proof, accurate dieline, and complete specs can save days later.
Repeat orders usually move faster because the reference points already exist. The supplier has the prior art, approved foil, verified substrate, and known press settings. First-time jobs usually spend more time in proofing and sample review because nobody wants to discover a placement issue after thousands of labels have already been stamped. That is why a good launch plan builds in time for one or two proof cycles and, if possible, a real sample on the actual package.
For sourcing teams, the safest habit is to treat the first run like a testable production event, not a design exercise. If the label is going onto retail packaging, into a fulfillment center, or across multiple distribution points, the proof should answer more than "Does it look good?" It should answer "Will it stay attached, scan cleanly, and survive the trip?"
For teams that want a broader context on shipping and packaging standards, two helpful references are the ISTA test methods often used to simulate transit stress and the FSC framework for responsibly sourced paper products. Those are not the only standards that matter, but they are useful anchors when a label has to perform in a supply chain, not just on a mockup.
Materials, adhesives, and durability factors that matter in transit
The most common material decision is between paper and film. Paper can be a strong fit for dry goods, short distribution runs, and indoor use where moisture is limited. It often prints beautifully, accepts foil well, and keeps costs sensible. Film stocks, such as BOPP or polyester, usually hold up better where the label sees water, refrigeration, handling abrasion, or longer storage. The right answer depends on the package surface and the environment the product will face after it leaves the print room.
Adhesive choice matters just as much as face stock, and sometimes more. A label that looks perfect on a flat proof can still fail on a dusty corrugate carton, a glossy glass bottle, a curved plastic tube, or a chilled container with condensation. Permanent adhesive is common for most retail packaging, but some products need freezer-grade adhesive, high-tack formulas, or a removal profile that leaves no residue. The key is matching the adhesive to the actual package, not to a generic material description.
Surface texture changes the equation too. Lightly textured kraft boxes may need more aggressive tack than smooth SBS cartonboard. Curved containers bring edge lift risk with them. Cold-chain products can create condensation during distribution, and that moisture can defeat an under-specified label fast. If the label will see repeated friction in a warehouse or during fulfillment, the surface finish and lamination choice become part of the durability story.
Foil stamping itself interacts with coatings and laminates in subtle ways. A gloss laminate can preserve a bright, reflective look, while a matte laminate may soften the shine and create a more restrained premium effect. Varnishes can help with rub resistance, but they need to be chosen carefully so they do not muddy the foil edge or reduce visual contrast. Protection is useful, but every added layer changes the final appearance.
That tradeoff is easy to miss if you are looking only at a rendered proof. The sample may look excellent on screen, yet the real package can behave differently once the label is wrapped around a bottle shoulder, applied over a seam, or stacked against other units on a pallet. That is why many experienced buyers ask for a sample on the actual package surface before locking the full run. It is a small step that can prevent a lot of waste.
There is also a difference between a label that looks premium and a label that is durable enough for logistics. You want both. A foil accent that rubs off in the case pack or a label that peels at the corner after a temperature swing does not help the brand. Durable product packaging is built from compatible parts: substrate, adhesive, coating, and application method all working together.
Practical rule: if the product will spend time in a cool room, a humid dock, a freezer case, or a long-haul distribution lane, test the exact label build on the exact package. That includes the carton board, plastic resin, glass finish, or film wrapper, because the combination matters more than any single spec.
Cost, pricing, and MOQ factors for custom product labels with foil stamping
Pricing for foil-stamped labels is driven by a small group of variables, and once you know them, the quote gets easier to read. Quantity is usually the biggest one. Setup costs do not vanish just because the order is small, so lower runs tend to carry a higher unit price. Label size matters too, because more material and more press area generally mean more expense. After that come foil coverage, number of foil colors, substrate choice, finishing steps, and whether new tooling is required.
MOQ, or minimum order quantity, is especially important for custom product labels with foil stamping. Some suppliers will accept small runs, but the unit cost can rise quickly because the same setup work gets spread across fewer pieces. Others prefer larger runs to keep production efficient. A buyer planning a product launch should ask early whether the supplier is quoting by sheet, by roll, or by finished label count, because those differences can change the economics and the packing method.
Design choices also affect the price. A small logo accent is usually easier to produce than full-bleed foil coverage. Simple shapes are easier than custom contours that require additional die cutting. Labels that need special handling, special liners, or unusual finishing can add more cost than expected. None of that is strange. It just means the design and the production method should be discussed together instead of being treated like separate puzzles.
Here is a practical way to think about typical pricing pressure. The numbers below are broad ranges, not fixed quotes, but they can help a buyer frame a budget conversation for a run around 5,000 pieces:
| Label Build | Best For | Typical Relative Cost | Notes |
|---|---|---|---|
| Paper stock with one foil accent | Dry products, shelf-ready cartons, short to mid-size runs | About $0.08-$0.18 per unit | Usually the most budget-friendly foil option when coverage is limited. |
| BOPP film with foil and standard laminate | Moisture exposure, refrigerated goods, handled frequently | About $0.12-$0.28 per unit | Higher material cost, but better durability in transit and storage. |
| Special shape with heavier foil coverage | Premium retail packaging, limited editions, gift sets | About $0.18-$0.40 per unit | More setup time, more finishing, and more waste risk from the custom contour. |
| Multiple foils or complex finish stack | High-end brand lines, layered visual systems, launch kits | Often above $0.25 per unit | Costs rise as registration, tooling, and finishing complexity increase. |
Those ranges move with order size, coverage, and market conditions, so they should be treated as planning figures rather than promises. A 20,000-piece reorder can look materially different from a 2,500-piece first run. The larger order spreads setup more efficiently, but the smaller order can still make sense if you are testing a product line or launching in stages.
Value is not the same as the lowest price. A buyer can save money by stripping foil coverage back to an accent, choosing a standard stock, or simplifying the shape, but the goal is not to remove all visual interest. The goal is to place the premium effect where it actually improves shelf appeal. A small, well-positioned foil element often does more for package branding than a huge reflective field that makes text harder to read or raises the cost without improving the shelf result.
If you are weighing labels against other branded packaging elements, compare the spend to the product line as a whole. A slightly higher label cost can be justified if it makes the SKU easier to find, faster to stock, or more recognizable beside competitors. That is especially true for products that already use custom printed boxes, coordinated hang tags, or seasonal pack graphics, because the label becomes part of a larger visual system rather than a one-off accessory.
Step-by-step planning for custom product labels with foil stamping
The cleanest orders start with the use case, not the artwork. Before you request a quote, define what the label has to do. Is it sitting on a glass jar, a corrugate mailer, a shrink-sleeved bottle, or a textured carton? Will it travel through ambient storage, refrigerated storage, or a frozen chain? Is it being applied by hand, on a semi-automatic line, or by a high-speed applicator? Those details shape the right material and adhesive more than any style preference does.
Once the use case is clear, gather the specs that a supplier needs to price and produce the job accurately:
- Dimensions - width, height, bleed, and any wrap or seam considerations.
- Artwork files - editable source files, outlined fonts, and linked images.
- Foil color - gold, silver, copper, black, or a specialty tone.
- Finish - gloss, matte, soft-touch, spot varnish, or laminate.
- Barcode requirements - quiet zones, contrast, and placement.
- Quantity - total run and any planned reorders.
- Delivery date - the actual date the labels need to be in hand.
A clean approval workflow usually follows a predictable path: request quote, review proof, test a sample on the actual package, confirm any scan or adhesion concerns, then approve production. The sample stage is not optional if the package is unusual. A flat proof cannot fully predict how a label behaves around a shoulder, a seam, a textured board, or a chilled bottle. A real package test can.
If your label sits within a larger launch package, coordinate it with the rest of the materials early. That means packaging, inventory, fill dates, and ship dates should all line up before production begins. A label that arrives late can hold up fulfillment, and a label that arrives too early can become an inventory burden. Neither situation helps the launch.
For teams juggling multiple components, a simple project brief keeps things moving:
- State the product name and SKU count.
- Describe the package surface and storage conditions.
- List the label size and shape.
- Specify foil color and finish.
- Include barcode or variable data requirements.
- Share quantity, target delivery date, and any reorder expectation.
That brief may look short, but it saves a surprising amount of back-and-forth. It also helps the supplier spot issues earlier, such as a barcode sitting too close to a foil field, a label shape that needs tighter die cutting, or a finish stack that may not suit the line speed.
If you are comparing label options across product lines, this is also the moment to ask whether the foil treatment belongs on every SKU or only on select tiers. A premium accent on a hero product often delivers more impact than applying the same finish across a low-margin line that will not benefit from the extra spend.
Common mistakes that cause weak results or delays
The most common mistake is choosing the wrong material for the environment. A label can look excellent on paper, then fail on cold, dusty, curved, or moisture-prone packaging. That is especially true if the product is stored in refrigeration, handled often, or shipped through variable temperatures. The lesson is simple: do not let the proof trick you into thinking the material choice is settled. The proof only shows one part of the picture.
Another frequent issue is crowding too much foil into areas that need clear contrast. Barcodes, lot codes, ingredients, compliance copy, and small product text should not compete with a reflective field. Foil is powerful, but it should not fight the code that has to scan or the fine print that has to be read in a hurry. Keep the foil where it supports the hierarchy, not where it makes the data harder to use.
Rushed approvals create their own problems. Missing dielines, last-minute art changes, and vague foil placement instructions can all push production back. Once a tooling change is needed, the schedule moves. Once registration has to be rechecked, the press time moves. That is why good artwork prep matters so much. A clean file is not just easier to print; it is easier to approve.
Skipping line testing is another avoidable mistake. A label that looks excellent on a flat sample may still cause trouble on the production line. It may wrap too stiffly, release too slowly from the liner, or stick too aggressively to one surface and not another. It may also lift after the product is boxed and shipped. The only way to know is to test it on the actual package under the actual application method.
There is also a subtle operational mistake that shows up often in branded packaging projects: treating foil as purely decorative and ignoring the whole system. The label should fit the box, the bottle, the mailer, or the carton as part of a larger package branding plan. If the label is fighting the typography on the box, clashing with the cap color, or making the shipping panel harder to read, the design has drifted away from the job it was supposed to do.
One more caution: do not assume every foil effect behaves the same. Different foils, substrates, and laminates react differently under pressure and heat. If the order is especially sensitive, ask for a sample and inspect the result under the lighting your customer will actually see. Warehouse fluorescent light, boutique retail light, and daylight through a storefront window can reveal very different things about sheen and contrast.
Best practice: build one test loop before the full run. Check adhesion, barcode readability, corner lift, and visual appearance on the real package. That short step can prevent reprints, repacking, and schedule slips.
Expert tips and next steps for a smoother order
The best foil applications are usually the restrained ones. Use the metallic finish as a strategic accent rather than covering every inch of the label. That approach often improves readability, keeps the budget under control, and leaves room for the rest of the design to breathe. A small foil hit on a logo or product name can do more than a full reflective field that overwhelms the rest of the artwork.
Test the label on the actual package material before you commit to the full run, especially if the product will face refrigeration, friction, or long transit times. A paper stock that works on a mockup may need a different adhesive once it meets a chilled glass surface. A glossy film that looks perfect on a render may reflect so much light that it hides copy in store lighting. Real testing is the cleanest way to answer those questions.
It also helps to align packaging, inventory, and ship dates early. That matters whether the project is a single launch or a recurring replenishment cycle. If the labels are part of a larger system that includes custom printed boxes, inserts, tags, or overwraps, schedule the whole pack together so one component does not hold up the others. Good planning makes the finish look better because the rest of the package arrives ready for it.
If you are preparing a brief for custom product labels with foil stamping, gather these details first:
- Exact dimensions and shape.
- Product type and storage conditions.
- Label material preference, if any.
- Foil color and coverage goals.
- Finish preference, including laminate or varnish.
- Quantity and reorder expectation.
- Barcode, lot code, or variable data requirements.
- Target in-hand date and application method.
With that information in hand, a quoting conversation gets much sharper. The supplier can suggest the right adhesive, the right stock, and the right amount of foil without guessing. That usually means fewer revisions, fewer delays, and a better final result.
For buyers balancing cost and presentation, the real win is not the flashiest label. It is the label that supports sales, fits the production line, and survives the trip from press to warehouse to shelf. That is the kind of packaging work that pays off quietly, which is often the best sign that it was done well.
So if you are ready to plan custom product labels with foil stamping, start with the package surface, the storage environment, and the amount of visual emphasis the SKU truly needs. From there, the rest of the job becomes much easier to shape, and the final label has a better chance of doing what a good label should do: look sharp, stay put, and help the product sell.
FAQ
What materials work best for custom product labels with foil stamping?
Paper stocks can work very well for dry or indoor products, while film stocks are usually a better fit for moisture, refrigeration, or rough handling. The adhesive matters just as much as the face stock, so it should be matched to corrugate, glass, plastic, or textured containers. Before approving the full run, ask for a sample on the actual package surface, because that is the only way to see how the build behaves in real use.
Do foil stamped product labels hold up during shipping and storage?
They can, but durability depends on the base material, adhesive, and whether a protective coating or laminate is added. Abrasion, condensation, and temperature swings are the main risks during transit and warehousing. A quick packaging test on the real package is the best way to confirm performance before production starts.
What affects the cost of custom product labels with foil stamping the most?
Quantity, foil coverage, material choice, and setup or tooling requirements usually drive the biggest swings in price. Smaller runs tend to have a higher unit cost because setup is spread across fewer labels. Complex shapes, multiple foils, and extra finishing steps can also raise the quote.
How long does production usually take for foil stamped labels?
Timing depends on artwork approval, tooling, material availability, and press scheduling. First-time orders usually take longer than repeat runs because there is more setup and proofing involved. Build in time for samples and shipping so the labels arrive before the packaging line needs them.
Can foil stamping be used with barcodes or variable data?
Yes, but keep foil away from barcode and variable data zones unless the layout has been tested for scanability. Leave clear quiet spaces around codes and verify the contrast after finishing. Always check the final printed and stamped label on the actual package before production.

