Buyer Fit Snapshot
| Best fit | Custom Reinforced Mailer Boxes projects where brand print, material claims, artwork control, MOQ, and repeat-order consistency need to be specified before quoting. |
|---|---|
| Quote inputs | Share finished size, material target, print colors, finish, packing count, annual reorder estimate, ship-to region, and any compliance wording. |
| Proofing check | Approve dieline scale, logo placement, barcode or warning zones, color tolerance, closure strength, and carton packing before bulk production. |
| Main risk | Vague material claims, crowded artwork, missing packing details, or unclear freight terms can make a low unit price expensive after revisions. |
Fast answer: Custom Reinforced Mailer Boxes: What They Are and Why should be specified like a repeatable production item. The safest quote records material, print method, finish, artwork proof, packing count, and reorder notes in one written spec.
Production checks before approval
Compare the actual filled-product size with the drawing, then confirm tolerance on folds, seals, hang holes, label areas, and retail display edges. Reserve space for logos, QR codes, warning copy, and material claims before decorative graphics fill the panel.
Quote comparison points
Review material grade, print process, finish, sampling route, tooling charges, carton quantity, and freight assumptions side by side. A quote is only useful when the supplier can repeat the same color, closure quality, and packing count on the next order.
The first time I watched custom reinforced mailer boxes fail in a warehouse test, the carton didn’t explode dramatically or anything cinematic like that. It just folded. Quietly. A stack of 18 units sat on top of it for 40 minutes, the bottom panel caved by about 9 mm, and the product inside got that ugly corner dent that ruins a customer review in about three seconds. I’ve seen the same thing happen on a supplier visit in Dongguan, Guangdong, when a buyer insisted a standard mailer would “probably be fine.” Probably is a funny word to build a packaging budget around.
Custom reinforced mailer boxes exist for one reason: regular mailers are not always enough. If your product is heavier, fragile, premium, or shipping through carriers that treat parcels like they’re auditioning for a demolition derby, reinforcement changes the math. Done right, custom reinforced mailer boxes protect the item, reduce claims, and still look sharp enough for branded packaging and retail packaging programs. Done badly, they’re just expensive cardboard with a nicer attitude.
I’m Sarah Chen. I spent 12 years in custom printing and packaging, and I’ve negotiated board grades, sample costs, and freight quotes down to the penny. I’ve sat at factory tables in Shenzhen and Suzhou where a 0.4 mm change in flute thickness added $0.06 per unit on a 5,000-piece run, and a stronger linerboard spec moved the price by another $0.03 to $0.05 per unit. That sounds tiny until you multiply it by volume and realize you just burned a few hundred dollars because nobody asked the right question early enough. Honestly, that’s the part that still annoys me most. Not the packaging. The preventable waste.
What Custom Reinforced Mailer Boxes Are
Custom reinforced mailer boxes are mailer-style cartons built with extra strength in the structure. That can mean thicker corrugated board, double-wall zones, stronger corner panels, structural inserts, or locking features that keep the box from collapsing under load. They still open like a mailer. They still fold flat for shipping. The difference is the box has a spine, not just a pretty face. In most factory specs I review, that means board upgrades like 350gsm C1S artboard laminated to E-flute or B-flute corrugated, depending on the target weight and shipping route.
Standard mailers are usually fine for lightweight apparel, small accessories, and soft goods. A reinforced version makes sense when you’ve got a heavier item, a fragile component, or a shipment that will be stacked in transit or in a fulfillment center. I once toured a contract packout line in Dongguan where a cosmetics client was using plain E-flute mailers for glass jars. The boxes looked beautiful. The returns report looked like a disaster spreadsheet. They switched to custom reinforced mailer boxes with corner strengthening and a tighter internal fit, and damage claims dropped fast enough that the ops manager actually smiled. Rare event. Worth remembering.
Here’s the plain-English difference:
- Standard mailer box: Light to medium protection, usually single-wall corrugated, good for low-risk shipments.
- Custom reinforced mailer boxes: Better compression resistance, stronger corners, more stable under stacking and impact.
- Shipper carton: Usually built for pure transit protection, less focused on presentation or branded packaging.
Use cases for custom reinforced mailer boxes are pretty clear once you’ve been burned a few times. Subscription boxes with multiple SKUs. Premium ecommerce products that need a polished unboxing. Fragile items like candles, ceramics, skincare glass, electronic accessories, and small home goods. Heavy products. Bulk-shipped kits. Anything that gets tossed onto pallets, stacked in bins, or squeezed by an overpacked courier bag. In other words: the stuff that tends to teach you lessons the expensive way. A 2.5 lb candle set shipped from Yiwu to Los Angeles is a very different problem from a 6 oz T-shirt bundle in Chicago.
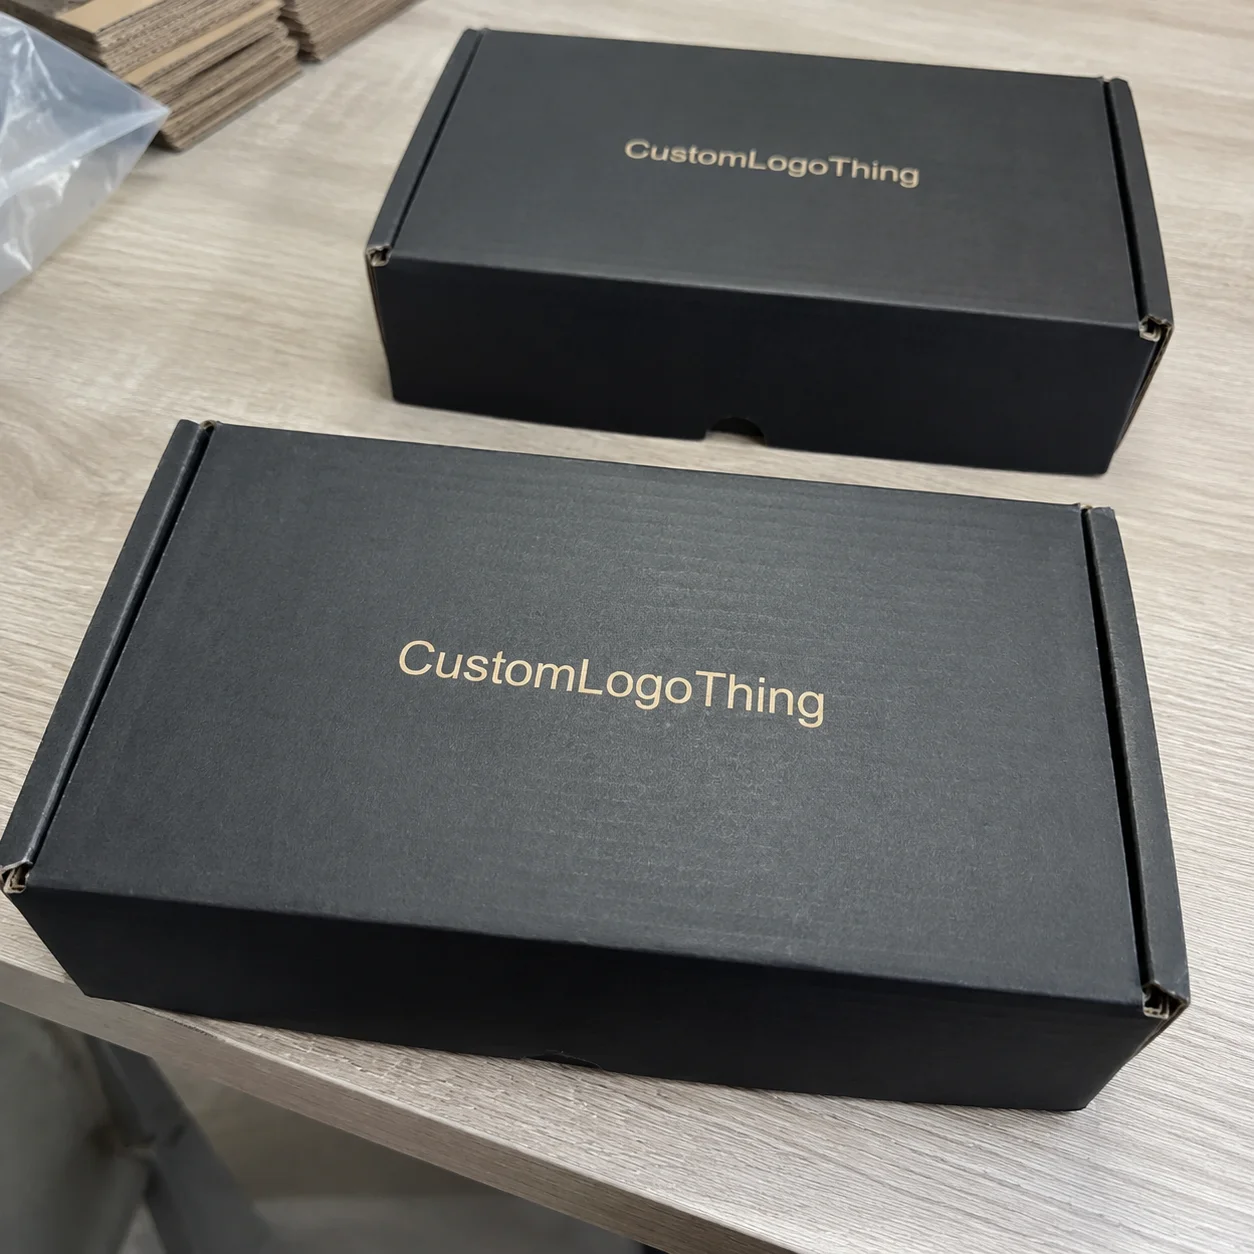
And no, reinforcement does not mean ugly. That’s one of the biggest misconceptions I hear from buyers. You can print the outside in full color, keep the inside clean and branded, and still get a box that looks premium when opened. I’ve seen custom reinforced mailer boxes with matte finishes, crisp logo placement, and tight registration that looked better than some luxury retail packaging I’ve reviewed in-person. Strength lives in the structure. Style lives in the print.
“We thought the product was fine. The box was the problem.” That’s what a fulfillment manager told me after a 2,000-unit run started arriving dented on the corners. We rebuilt the carton spec with a 2 mm wider internal tolerance and a stronger bottom lock, and the returns rate fell by about 38% in the next cycle.
How Reinforced Mailer Boxes Work
The strength of custom reinforced mailer boxes comes from how the board is built and how stress moves through the structure. Corrugated board has liners and fluting. The liners are the flat faces. The fluting is the wavy middle layer that gives the board its crush resistance. Once you understand that, the rest makes sense pretty quickly. More flute depth, stronger linerboard, smarter fold geometry, and better corner design all improve performance. A 350gsm C1S artboard outer layer laminated to a 1.5 mm or 3.0 mm corrugated base changes how the box handles compression in a way plain paper never will.

In practical terms, reinforcement is added in a few ways. Some boxes use a heavier single-wall board, such as B-flute or a stronger E-flute specification with better liner stock. Others use double-wall sections in the panels most likely to get crushed. Some add internal inserts or folded reinforcement tabs at the corners. I’ve also seen die-cut locking points used to keep the box from popping open under vibration, which matters more than people think during carrier movement and conveyor handling. In a factory in Suzhou, a client’s switch from standard E-flute to reinforced B-flute with corner tabs added roughly $0.07 per unit on a 10,000-piece order, but it cut edge crush failures by nearly half in a 6-drop test series.
Custom reinforced mailer boxes distribute pressure better than standard mailers. Stacking load presses down from above. Vibration from trucks shakes the contents side to side. Drops create short, sharp force spikes on the corners and edges. Good reinforcement spreads those forces across the panel instead of letting one weak spot absorb the hit. That’s why a box can look fine on the outside and still fail in the middle if the structure wasn’t designed properly. A parcel traveling from Shenzhen to Dallas can get handled 10 to 14 times before it reaches the customer, and every handoff matters.
Here’s the simple comparison I use with clients:
- Plain mailer: Best for light, non-fragile products and short shipping lanes.
- Custom reinforced mailer boxes: Best for moderate to high-risk shipments where branding still matters.
- Ship carton: Best for maximum transit protection, especially when the product needs outer packing or additional dunnage.
Structural details matter. A crash-lock bottom can save packing time and improve base strength. Tuck flaps help keep the top stable. Inserts stop product movement, which is half the battle. If your item slides even 6 or 7 mm inside the box, the protection gets worse immediately because the product can build momentum before impact. That’s not theory. I watched a ceramic candle brand test three prototypes in our Shenzhen facility, and the version with the tightest insert fit survived 10 drop cycles while the looser design chipped on the third. One design used a 1.2 mm spacer gap and failed. The tighter one used a 0.5 mm buffer and held.
Print placement also matters. If your graphics run across a fold or glue zone without planning for the structure, the box can look warped or the print can crack. Good packaging design starts with the dieline, not after the pretty art file is already “final.” I’ve had clients send me artwork with logos placed directly over a critical fold line. Sure, it was visually centered. It was also mechanically dumb. Custom reinforced mailer boxes need the artwork and the structure to work together, not wrestle each other. That means allowing at least 3 to 5 mm of safe zone around folds and glue flaps on the production file.
If you want to understand the standards side of it, look at the testing frameworks used across the industry. The ISTA methods are commonly used for transit testing, and ASTM packaging references are widely used for board and performance checks. For sustainability claims and recyclability context, the FSC site is useful if you’re sourcing certified fiber. And if you’re trying to Reduce Packaging Waste in your operation, the EPA has solid guidance on material reduction and waste prevention. Not glamorous reading. Very useful, though.
Custom Reinforced Mailer Boxes: Key Factors That Affect Strength, Price, and Performance
The price of custom reinforced mailer boxes is driven by board grade, size, print coverage, quantity, and how much structural work the box needs. That’s the honest version. The sales version is usually “pricing varies.” Which is technically true and almost useless. I’ve seen a 4x4x2 inch mailer spec come in at $0.31/unit on 10,000 pieces with simple one-color print, while a larger reinforced mailer with full-color outside and inside print, a matte finish, and a custom insert landed closer to $0.78/unit at the same volume. Different build. Different outcome. On a 5,000-piece run, the same style of upgrade can move from $0.15 per unit for a basic reinforced blank to $0.62 per unit once you add print, coating, and an insert.
Board grade and thickness are the first things to look at. E-flute is thin, clean, and good for presentation, but it’s not always enough on its own. B-flute gives better cushioning and compression resistance. Single-wall corrugated is common and economical. Double-wall gets you more strength, but it also adds weight, cost, and bulk. For custom reinforced mailer boxes, the sweet spot depends on the product weight and how bad the shipping environment is. A 12 oz apparel bundle doesn’t need the same spec as a glass kit or a 3 lb boxed accessory set. If your packed item is over 1.5 lb, I usually start looking at B-flute or a reinforced single-wall spec with corner supports.
Sizing and fit might be the most underestimated factor in packaging design. Oversized boxes waste board and create product movement. Tight boxes reduce filler and improve protection. I’ve sat through enough supplier negotiations to know a bad size choice can cost you more than a better board grade. If the product rattles, you end up paying for void fill, extra labor, and more breakage anyway. A box that fits properly is not a luxury. It’s math. If you can reduce the internal empty space by 8 mm on each side, you often remove a chunk of filler cost and speed up packing by a few seconds per order.
Printing and finishing change both the feel and the cost. Full-color printing costs more than a one-color logo. Soft-touch lamination, aqueous coating, spot UV, embossing, and foil all add expense. On custom reinforced mailer boxes, I usually tell clients to spend where the customer can feel the difference, not where the file looks cool in a mockup. If the box ships by the thousands and lands in a noisy environment, a clean matte print with strong branding often beats a fancy finish that adds $0.12 to $0.20 per unit and does nothing for protection. In Guangzhou, I reviewed one run where spot UV increased the unit cost by $0.09 and delayed production by 3 business days because the curing line was booked.
Order quantity and tooling can shift your unit price a lot. Higher quantities spread out setup, plate, and die costs. A prototype or sample may run $35 to $150 depending on complexity. Die charges and plates can add a few hundred dollars more, especially with multi-color printed Custom Printed Boxes. I’ve seen small brands get sticker shock because they compared only the per-unit cost and ignored the setup line. That’s how people end up thinking a quote is “cheap” until the invoice shows up with the rest of the story. A 5,000-piece order might look expensive up front, but the per-unit cost usually drops enough to justify the tooling if you plan to reorder in 90 days.
Sustainability is part of the conversation too. More material is not automatically better. A well-engineered custom reinforced mailer box can sometimes use less total filler and reduce damage while staying recyclable. FSC-certified board is worth asking for if your brand needs certified fiber. Recycled content can also help, but you still need enough strength to do the job. I’ve had clients choose a lower-grade recycled board to save money, then spend more on returns. That’s not sustainability. That’s a bill with better branding. If you’re sourcing in Vietnam or the Pearl River Delta, ask for recycled liner options and the exact basis weight before you approve a quote.
Typical cost ranges depend on print and structure, but here’s a realistic ballpark from the jobs I’ve reviewed:
- Simple reinforced mailer, single-color print: roughly $0.22 to $0.40/unit at medium volumes.
- Full-color custom reinforced mailer boxes: often $0.45 to $0.90/unit depending on board and finish.
- Highly engineered versions with inserts or special coatings: can move above $1.00/unit quickly.
That does not mean you should panic. It means you should compare total landed cost, not just the sticker price. Freight from Asia, local delivery, import duty, and warehouse handling all matter. A box that costs $0.08 less but causes a 4% increase in breakage is not cheaper. It’s just wearing a fake mustache. On a 10,000-unit shipment, that kind of damage rate can erase $800 or more in savings before you even count replacement labor.
Step-by-Step Process to Order the Right Box
If you want custom reinforced mailer boxes That Actually Work, start with product data, not artwork. I know designers want to jump to visuals. I get it. Pretty mockups are fun. Broken products are not. You need exact dimensions, weight, fragility, and the shipping method before anyone can recommend the right board structure. If the packed product weighs 820 grams and ships by courier from Shenzhen to Texas, that tells me more than a brand deck ever will.
Step 1: Define the product. Measure length, width, height, and weight of the packed item, not just the product itself. If the product includes an insert, a sleeve, tissue, or a bundled accessory, count all of it. A box spec that ignores the final packed configuration is just a guess with a ruler. I want measurements down to the millimeter, ideally with the product packed exactly as it will ship on the line.
Step 2: Choose the Right structure. Test the likely board options against real shipping conditions. If your product is light but fragile, you may need stronger corners rather than thicker everything. If it’s heavy, compression resistance becomes the main focus. I’ve worked on programs where the factory recommended double-wall, but a smarter reinforced single-wall with internal supports saved $0.11/unit and still passed drop testing. Good engineering beats brute force more often than buyers expect. A factory in Dongguan once quoted a double-wall build at $0.68/unit; we moved to a reinforced B-flute at $0.57/unit and kept the same drop performance after 8 tests.
Step 3: Decide on branding. Do you need full outside print, inside print, or both? Do you want a matte finish, a gloss finish, or a natural kraft look? For branded packaging and package branding, the inside experience matters. A plain brown interior is fine for some products. For premium ecommerce, an inside message or a clean print can improve the unboxing moment without adding much cost. Custom Packaging Products often make more sense when the box is part of the customer experience, not just a transport container. If you’re ordering 5,000 units, inside printing might add $0.04 to $0.10 per box, which is often cheaper than a separate insert.
Step 4: Request dielines and samples. Never approve custom reinforced mailer boxes from a picture alone. Ask for a dieline, a structural recommendation, and a sample or prototype. Better yet, ask for a production-like sample with the actual board and print method. I’ve had one client approve a white mockup that looked perfect, then discover the real board stiffness changed how the flaps closed. The correction cost them a week and a reproof fee. Cheap sample shortcuts have a weird way of becoming expensive later. A proper sample cycle usually takes 3 to 7 business days, and production samples should match the final glue pattern and board grade.
Step 5: Check artwork against structure. Make sure glue areas, fold lines, and reinforcement zones are not compromised by graphics or critical text. If there’s a logo at the crease, the crease wins. If there’s a barcode near a fold, the scanner may hate you. Good Custom Printed Boxes are built around the folding pattern, not just the art board. I usually leave 5 mm clear around critical folds and 8 mm around glue tabs if the print is dense.
Step 6: Confirm production details. Lock down carton count, packing method, master carton size, pallet configuration, and shipping terms. A box packed 50 per carton is easier to handle than 100 per carton if the weight becomes awkward. I’ve seen fulfillment teams curse a “cheap” box because the master carton was too heavy to lift safely. Efficiency matters. So does not injuring your staff. In one plant outside Shenzhen, switching from 120 units per master carton to 80 reduced lift strain and sped up packing by 14%.
Step 7: Review timeline honestly. A simple sample-to-production path might take 12 to 18 business days after artwork approval, depending on factory workload and freight method. More complex custom reinforced mailer boxes with custom inserts, multiple print layers, or special finishes can take longer. Add time for revisions. Add time for freight. Add Time for Customs if the shipment is crossing borders. If a supplier promises perfection in 5 days with no questions asked, I’d be suspicious. Packaging rarely behaves that politely. In my experience, typical production is 12-15 business days from proof approval for a straightforward run in Guangdong or Zhejiang, then another 3 to 10 business days for air or ocean freight depending on destination.
Step 8: Test a small batch. Ship it through the same channels you’ll use at scale. If you sell ecommerce, send samples through actual courier routes. If you ship to retailers, test pallet stacking and warehouse handling. I once saw a subscription brand skip this step and go straight to 20,000 units. Their outer box passed visual inspection. Their internal tray failed because the product shifted under vibration. They paid for a second run. That lesson cost more than a proper prototype ever would have. Test 50 to 100 units before committing to the full run, especially if you’re using a new supplier in Dongguan or Ningbo.
If you need something lighter duty for simpler shipments, compare options with Custom Poly Mailers. Not every product needs a reinforced corrugated box. Sometimes the right answer is the lighter, cheaper one. Crazy concept, I know.
Common Mistakes Buyers Make
The biggest mistake with custom reinforced mailer boxes is choosing a box that looks premium but fails under compression. Buyers fall in love with the print, then ignore the structure. That’s backwards. Your customer won’t care how pretty the lid is if the product arrives crushed, dented, or scraped. I’ve watched this happen with high-end skincare and artisan food brands more times than I can count. One brand in Los Angeles spent $0.14 extra per unit on gold foil and still lost $3,200 in damaged jars because the bottom panel was underbuilt.
Another common mistake is ordering too much empty space. If the product is floating around inside the box, people try to solve the problem with tissue, foam, or extra paper filler. Sometimes that works. Often it just hides a sizing problem. A better fit in custom reinforced mailer boxes usually costs less than endless filler and gives a cleaner unboxing. If the void space is more than 10 mm on each side, I usually start questioning the dieline before I question the filler.
People also ignore the shipping environment. If the box travels cross-country, gets stacked in a warehouse, or goes through automatic sorting equipment, that matters. A carton that survives a hand-carry demo in the office may collapse after a few hundred miles on a truck. That’s why I always ask where the box is going, how many hands will touch it, and whether it will sit on top of other freight. Details like that change the spec fast. A route from Shenzhen to Berlin is not the same as local delivery in Taipei, and the carton should not pretend otherwise.
Skipping prototypes is a classic move. “The dieline is fine” is not a test. It’s a hope. And hope is not a production method. I’ve seen custom reinforced mailer boxes go into production only to discover the insert was 2 mm too tight and the fulfillment team needed twice as long to pack each order. That’s not just annoying. It costs labor every single day. In one case, the packout time jumped from 18 seconds to 31 seconds per unit because the insert slit was undersized.
Underestimating hidden costs is another favorite. Sample fees, plate charges, setup charges, freight, customs brokerage, import duty, and local delivery can all shift the true price. If your quote does not break those out clearly, ask for it in writing. I’d rather see a supplier quote $0.62/unit honestly than $0.49/unit with a surprise pile of extras in the fine print. A $180 plate fee and a $95 sample fee are not “small stuff” if nobody told you they existed.
Finally, some buyers forget the warehouse side. The box must be easy to pack. If the assembly sequence takes 14 steps and the flaps are fussy, labor cost goes up. I’ve stood on a packing line in a Guangdong facility while workers demonstrated how a “premium” box slowed their output by 18%. That’s a problem. Packaging should help operations, not fight them. If it makes the team grumble before lunch, that’s usually a bad sign. A box that saves 4 seconds per order can matter just as much as a stronger board.
Expert Tips for Better Protection and Lower Total Cost
If I were spec’ing custom reinforced mailer boxes for a new brand, I’d start with structure before thickness. Smart design usually beats adding more board. A better fold, tighter fit, or small reinforcement tab can save money and improve performance at the same time. People love to solve everything by making cardboard thicker. That’s lazy engineering, not smart buying. In a 5,000-piece run, a smarter fold can save $0.03 to $0.08 per unit without hurting protection.
Standardize sizes wherever possible. If you can run three box sizes instead of seven, your inventory gets easier, your ordering gets cleaner, and your supplier can hold steadier pricing. That matters if you’re planning custom reinforced mailer boxes across multiple SKUs or seasonal product lines. Less complexity usually means fewer mistakes, and fewer mistakes usually means fewer losses. Amazing how that works. A supplier in Ningbo once cut a client’s tooling headaches in half just by reducing the range from seven dielines to three.
Ask suppliers for multiple board options in the same quote. I want to see the difference between an E-flute version, a B-flute version, and a reinforced single-wall spec whenever the product allows it. Then compare actual performance, not just the render. Ask for compression data if the factory has it. Ask whether they can show drop-test results. A supplier who can discuss ISTA-style testing with specifics is more credible than one who only sends glossy mockups. If they can tell you the board basis weight, flute type, and sample lead time in one sentence, you’re on better footing already.
Negotiate on total landed cost. That means unit price, packaging cost, freight, warehousing, duty, and damage rate. I had a client once save $1,800 on the box order and lose more than $6,000 in damage claims over the next quarter. That’s not a win. That’s a very expensive lesson in arithmetic. Custom reinforced mailer boxes should reduce total cost, not just move it around. If the factory quote is $0.52/unit FOB Shenzhen, but your landed cost becomes $0.71 after freight and duty, that changes the decision fast.
Build a small budget for prototype changes. Even the best packaging design gets adjusted once real products touch real board. I usually expect one or two rounds of tweaks when a brand is serious about performance. The extra $80 to $250 spent on revisions is cheap insurance compared with a full production mistake. If a factory says your first sample will be perfect, I’d ask them whether they’ve ever actually packed a customer order. I’m only half joking. A good sample process in Shanghai or Dongguan usually includes one structural sample, one print proof, and one packing test.
One more thing: if branding matters, keep the exterior clean and the inside intentional. The outside should handle shelf appeal, ecommerce photos, and brand recognition. The inside should protect the product and create a controlled unboxing moment. That’s where custom reinforced mailer boxes can really shine. They give you protection without forcing you to sacrifice the look of Custom Printed Boxes or the feel of polished product packaging. A matte exterior with a one-color inside message can do more for perceived value than a noisy design with five finishes.
And if your business sells a mix of fragile and non-fragile items, don’t force every SKU into the same structure. Use the right box for the job. I know that sounds almost too practical, which is probably why so many companies ignore it until the returns dashboard starts blinking red. Then everyone suddenly becomes very interested in “root cause analysis.” Funny how that happens. The SKU that ships 2,000 units a month and only weighs 180 grams does not need the same board as the ceramic set leaving from Foshan.
Next Steps: How to Put the Right Box Into Production
The fastest way to move forward with custom reinforced mailer boxes is to create a one-page spec sheet. Include product dimensions, packed weight, fragility level, shipping method, branding goals, finish preference, and expected annual volume. Keep it simple, but precise. A supplier can’t quote properly if you hand over vague adjectives and a mood board. If you want an accurate quote from a factory in Shenzhen or Xiamen, give them millimeter dimensions, the target board spec, and your target order quantity.
Then gather three quotes from packaging suppliers and compare them side by side. Look at board grade, print method, sample cost, tooling Cost, Lead Time, and freight assumptions. If one vendor is 20% cheaper but can’t explain the structure, the savings may disappear the moment the first shipment gets crushed. I’ve been in those meetings. The lowest quote always looks brilliant until you start asking about the part nobody priced correctly. Ask for FOB pricing, sample turnaround, and the number of proof revisions included before you sign anything.
Order a prototype and run a real shipping test before full production. Use your actual packing team. Use your actual carrier. Use the same inserts, fillers, and pack sequence you’ll use at scale. Then check the pass/fail results against a simple checklist:
- Crush resistance: Did the corners hold under load?
- Fit: Did the product move inside the box?
- Print quality: Were colors, registration, and finish correct?
- Fulfillment speed: Could the packing team work efficiently?
Once the box passes, lock in the spec as your internal standard. Keep the dieline, board callout, print notes, and carton pack method in one place so every reorder matches the approved version. That reduces drift over time. Drift is how good packaging turns into random packaging. Random packaging is how brands end up confused, annoyed, and paying for another round of fixes. A saved PDF in a shared drive is not a spec system. Use a version number, a date, and one named owner.
If you’re building a broader packaging lineup, it can help to coordinate custom reinforced mailer boxes with your other Custom Packaging Products so the whole system shares a consistent look and packout logic. That’s especially useful if you want your branded packaging to feel intentional across ecommerce, subscriptions, and retail packaging channels. A 4-color mailer in one product line and a plain kraft box in another can work fine if the whole set still follows the same brand system.
My practical advice? Start with one SKU that matters. The one with the highest damage rate, the highest margin, or the most important customer experience. Prove the box there first. Then scale the design to the rest of the line if it performs. That approach saves money and keeps the team focused on evidence instead of opinions, which is always a pleasant change. A 1,000-unit pilot in April is a lot smarter than a 20,000-unit leap in June.
Custom reinforced mailer boxes are worth the effort when product protection, brand presentation, and shipping durability all matter at the same time. They cost more than basic mailers, yes. But if they cut damage, reduce labor headaches, and make the unboxing feel intentional, they usually pay for themselves faster than people expect. I’ve seen it happen on small batches, and I’ve seen it happen at scale. The trick is buying the right structure, not just the prettiest carton. So the next move is simple: write a real spec, test one pilot run, and let the drop results decide whether the box earns a spot in production.
Custom Reinforced Mailer Boxes: decision table
| Decision area | Best fit | What to verify | Risk if skipped |
|---|---|---|---|
| Board or flute choice | Product protection, stacking strength, and shipping distance | Caliper/flute, crush resistance, and sample fit | Weak structure or oversized cartons increase damage and freight cost |
| Print and finish | Retail presentation, unboxing, and shelf recognition | Color proof, coating, scuff resistance, and logo placement | A good dieline can still look cheap if finish and color drift |
| Packing method | Hand packing, ecommerce fulfillment, or retail-ready cartons | Inner count, master carton, label position, and warehouse handling | Good packaging slows operations if pack-out is ignored |
FAQ
What makes custom reinforced mailer boxes different from regular mailer boxes?
They use stronger board, better structural design, or added reinforcement to resist crushing and impact. They’re better for heavier, fragile, or premium products that need more protection in transit. Regular mailers are fine for lighter items, but custom reinforced mailer boxes are the safer pick when damage would cost more than the upgrade. A standard E-flute mailer might work at 250 grams; a reinforced version is a better call once you’re shipping 800 grams or more.
How much do custom reinforced mailer boxes usually cost?
Pricing depends on size, board grade, print coverage, quantity, and any special finishes. In my experience, custom reinforced mailer boxes usually cost more than standard mailers, but the extra protection can reduce damage-related losses enough to justify the premium. A quote of $0.32/unit and a quote of $0.68/unit can both be right, depending on the structure. For a 5,000-piece order, a simple reinforced blank may start around $0.15 per unit before print and finish.
How long does it take to make reinforced mailer boxes?
Timeline usually includes sampling, artwork approval, production, and shipping. Simple jobs move faster. Complex printed or highly customized jobs take longer, especially if revisions are needed. For custom reinforced mailer boxes, I usually tell clients to expect 12 to 18 business days after proof approval for straightforward runs, with extra time for freight and changes. In many factories in Dongguan, the typical production window is 12-15 business days from proof approval, then 3 to 10 more business days for freight depending on the route.
Can custom reinforced mailer boxes Still Look Premium?
Yes. Reinforcement is structural, not visual, so the box can still have full-color printing, clean finishes, and strong branding. Good packaging design hides strength inside the structure while keeping the outside polished. That’s one of the main reasons brands choose custom reinforced mailer boxes for ecommerce and subscription packaging. A matte laminated exterior with a 350gsm C1S artboard face can look polished and still hold up in transit.
What products should use reinforced mailer boxes?
Use them for fragile items, heavier goods, subscription products, luxury packaging, or anything that gets stacked and shipped often. They are especially useful when product damage would cost more than the upgrade in packaging. In practice, custom reinforced mailer boxes make the most sense for products where protection, presentation, and carrier abuse all matter at once. If your item is glass, ceramic, electronic, or over 1 lb packed weight, start there.