Buyer Fit Snapshot
| Best fit | Custom Retail Display Boxes projects where brand print, material claims, artwork control, MOQ, and repeat-order consistency need to be specified before quoting. |
|---|---|
| Quote inputs | Share finished size, material target, print colors, finish, packing count, annual reorder estimate, ship-to region, and any compliance wording. |
| Proofing check | Approve dieline scale, logo placement, barcode or warning zones, color tolerance, closure strength, and carton packing before bulk production. |
| Main risk | Vague material claims, crowded artwork, missing packing details, or unclear freight terms can make a low unit price expensive after revisions. |
Fast answer: Custom Retail Display Boxes: Design, Cost, and Timeline should be specified like a repeatable production item. The safest quote records material, print method, finish, artwork proof, packing count, and reorder notes in one written spec.
Production checks before approval
Compare the actual filled-product size with the drawing, then confirm tolerance on folds, seals, hang holes, label areas, and retail display edges. Reserve space for logos, QR codes, warning copy, and material claims before decorative graphics fill the panel.
Quote comparison points
Review material grade, print process, finish, sampling route, tooling charges, carton quantity, and freight assumptions side by side. A quote is only useful when the supplier can repeat the same color, closure quality, and packing count on the next order.
A shopper does not linger in a crowded aisle for long. Eye-tracking research on retail behavior keeps pointing to the same uncomfortable truth: first impressions are made in seconds, not minutes. That is a tiny window for a product to earn attention, and it is exactly why custom retail display boxes matter so much. They have to pull the eye, explain the offer, and make the brand feel credible before the customer even reaches for the item. Packaging design stops being decoration the moment it hits the shelf; it becomes a sales tool with cardboard edges.
From a packaging buyer's perspective, these displays sit at the intersection of branding, logistics, and store execution. They are not shipping cartons. They are not ordinary product boxes either. They are built to face a shopper, carry a message, and still survive distribution, handling, and weekly replenishment. That balance is the real story behind custom retail display boxes, and it is why the cheapest-looking option is rarely the cheapest once the store opens.
For launches, seasonal programs, and promotional windows, the difference between a weak display and a well-built one shows up fast. A clean structure can support product packaging, reinforce package branding, and reduce restocking friction for store staff. A sloppy structure creates extra work, hides the product, and makes the display look tired before the campaign is halfway through. I have seen good products get buried behind bad execution, and that is a painful lesson because the fix was not marketing spend. It was structure. The sections below break down the design choices, pricing levers, production steps, and mistakes that matter Before You Order custom retail display boxes.
Custom Retail Display Boxes: Why Shelf Space Decides Sales
Shelf space is expensive real estate, even when the retailer never sends a separate invoice for it. A display gets a narrow window to prove itself. In many stores, the decision happens in the time it takes a shopper to read a header, check a price, and compare one item against a small cluster of alternatives. That is why custom retail display boxes are less about decoration than about being noticed before attention drifts.
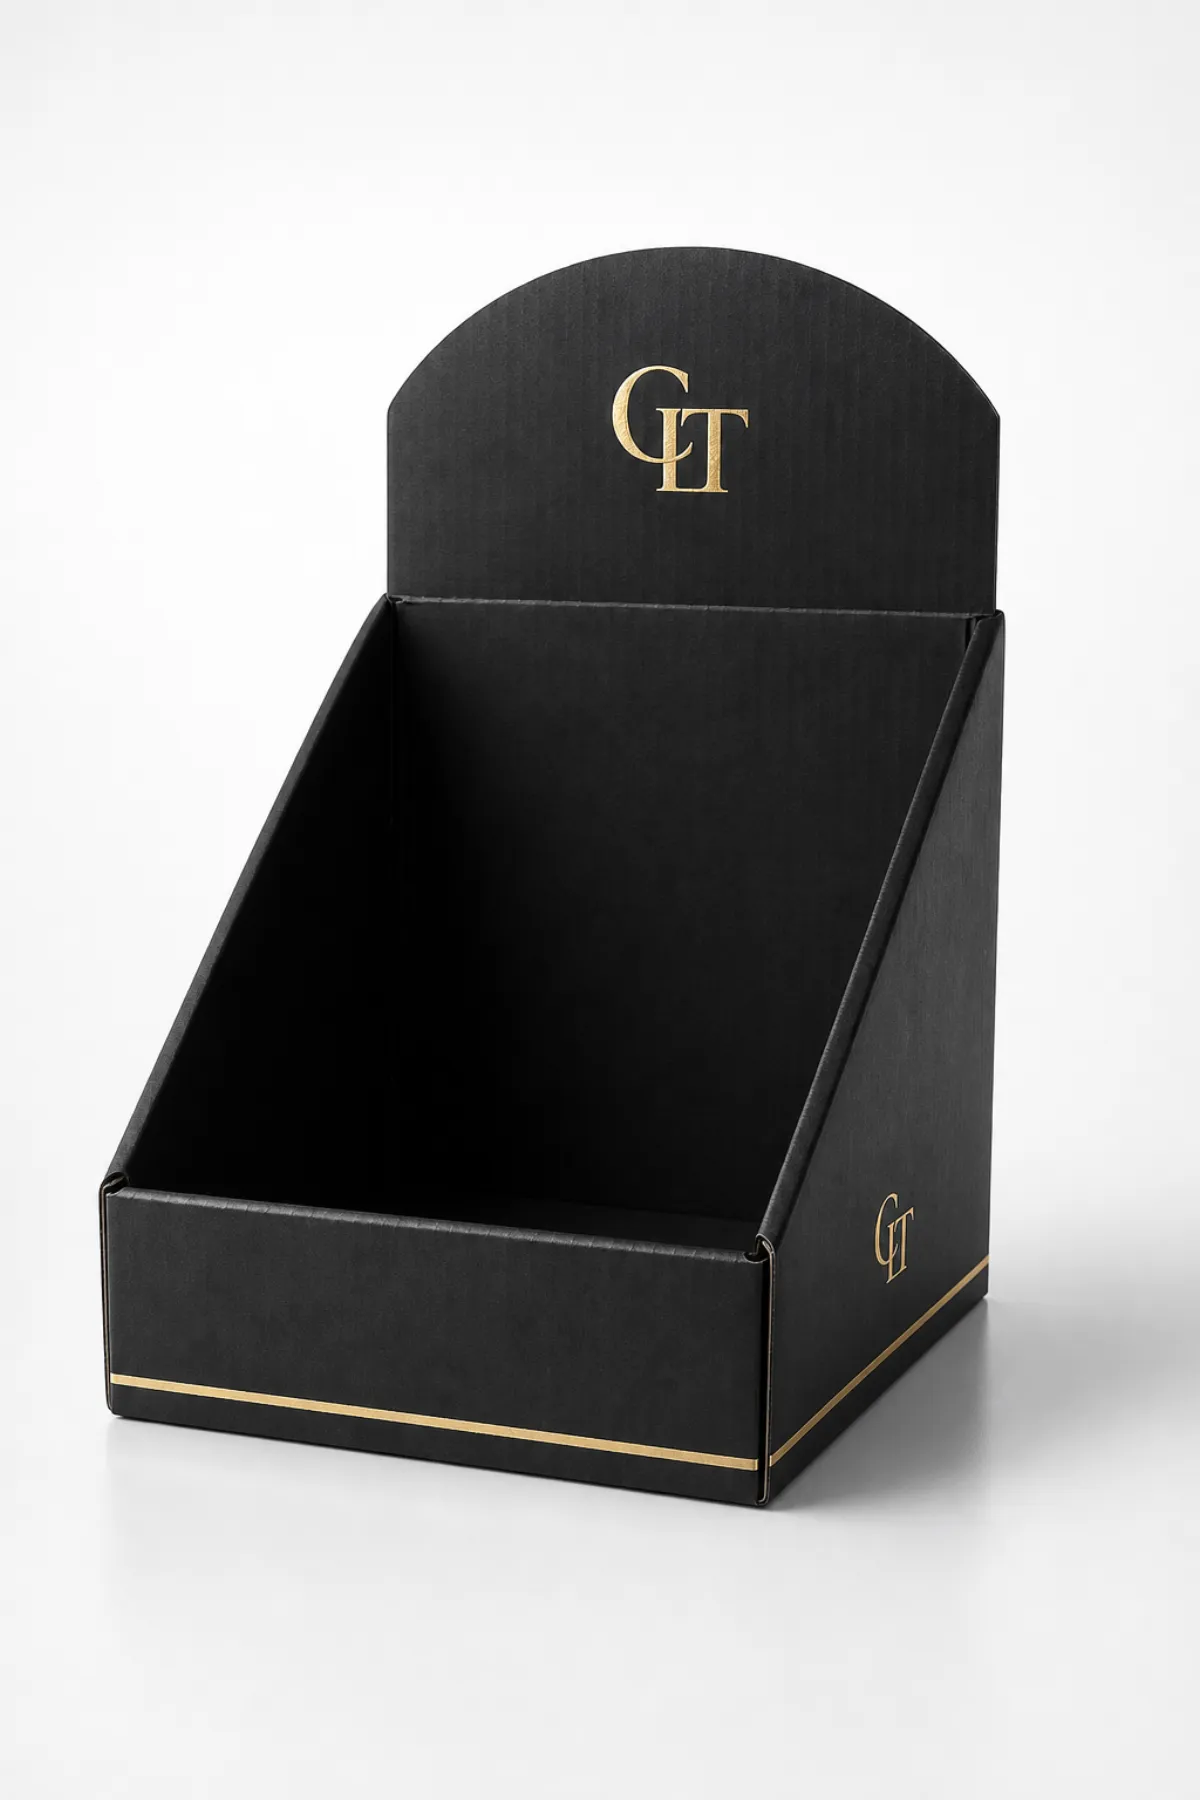
In practical terms, these boxes present products so they are easy to spot and easy to shop. They often sit on countertops, endcaps, sidekicks, floor stacks, or shelf-ready placements near related items. A shipping carton is built for transit. A standard carton box is usually built for protection. Custom retail display boxes are built for visibility, access, and speed. The front edge may be open. The header may rise above the product. The tray may angle forward so the facings still look full after several units sell through.
That structure matters because crowded aisles compress decision-making. If the display does not communicate the offer quickly, the product gets ignored. A strong display can signal premium positioning with crisp print and a taller profile, practical value with simple messaging and organized facings, or a promotion-first message with bold color contrast and a sharp callout. The box shape becomes part of the brand language, and in retail that language has to be understood at a glance.
Honestly, a lot of teams still treat retail packaging as a print job. That misses the operational side. Good branded packaging on the sales floor must also speak the retailer's language: quick replenishment, clean shelf presentation, compact footprint, and low risk of damage. If your custom retail display boxes ignore those realities, they may look polished in a render and fail in the aisle.
It also helps to separate the formats. Shelf-ready packaging is usually built to move from shipper to shelf with minimal handling. Counter Display Boxes tend to be smaller, lighter, and placed near checkout zones or service counters where impulse buying is highest. Floor displays are larger and often carry more inventory. Custom retail display boxes can cover all of those formats, but the structure should match the job. A cosmetics launch does not need the same board strength as a bottled beverage program, and a snack promotion does not need the same footprint as a hardware bundle.
There is a simple test I use when reviewing a concept: if a store associate can figure out the display in under a minute, the structure is probably on the right track. If the unit needs instructions that read like a puzzle, it is gonna create friction. The best displays lower the number of decisions a shopper and a staff member have to make.
Retail truth: if the display is hard to stock, hard to read, or hard to trust, the shopper keeps moving. A good display lowers friction at the exact moment the buyer decides whether to pause.
That is the business problem these displays solve. They help a product stand out in a crowded aisle, create a recognizable brand block from a distance, and turn temporary space into a selling surface. For many launches, custom retail display boxes are among the least expensive forms of in-store media because they reach the buyer at the point of purchase rather than after the fact. A billboard cannot do that. A social ad cannot either.
How Custom Retail Display Boxes Work on the Sales Floor
A display earns its keep in stages. First comes the glance. Then recognition. Then comparison. Then pickup. Custom retail display boxes are built to support each step, and the strongest designs make those steps feel natural instead of forced.
At the first glance, height and color do most of the work. A header card, a shaped top, or a bold open-face cutout can separate the brand from the visual noise around it. At the recognition stage, the shopper should know what the item is without reading a paragraph. A face panel with a clear product name, one strong claim, and a readable price zone usually beats a crowded wall of text. During comparison, the structure and print quality matter together: the product should feel legitimate, organized, and easy to evaluate. Finally, pickup depends on access. If the product is easy to reach, the shopper is more likely to touch it, and touch often precedes purchase.
Placement changes the result. Endcaps work well because they catch traffic from two directions. Counter displays suit areas with longer dwell time and a higher share of impulse decisions. Floor stacks can carry larger inventory and create stronger branding blocks. Secondary placements near complementary products can be even more efficient, especially if the display fits a known shopping mission. Custom retail display boxes should be sized for that exact setting, not for a generic store mockup that looks good in a photo and nowhere else.
The best structures also make retail execution easier. Tear-away panels can convert a closed shipper into a display in minutes. Trays and dividers keep separate SKUs organized. Inserts stop smaller items from shifting during transport. Stackable bases help stores use pallet space efficiently. If a store associate can open, place, and restock the unit without guesswork, the display is already doing part of the sales job before the customer even arrives.
Print and structure need to work as a pair. A clean die-cut window can reveal product color or texture. A header can lift the brand above surrounding clutter. An open-face layout can reduce the feeling of bulk while keeping the display accessible. Too much print can make the structure look busy and cheap. Visual hierarchy is the point: the shopper should see the brand first, then the product, then the supporting message. That is packaging design discipline applied to retail packaging, and it separates competent displays from forgettable ones.
There is also a logistics side that buyers sometimes underestimate. Custom retail display boxes can help staff replenish stock faster if the tray depth and facing count are right. A display that holds 12 units in a neat row is easier to manage than one that demands constant re-stacking. That difference matters in busy stores, where one rushed refill can decide whether the display looks full or tired by noon.
Placement, structure, and graphics are not separate choices. They form one system. If the display is meant for checkout, the visual language should be immediate and short. If it is meant for an endcap, it can carry more brand story. If it is a floor unit, it may need a heavier base and more protection from cart traffic. The most effective custom retail display boxes are the ones that fit the store environment instead of fighting it.
Custom Retail Display Boxes Cost: What Drives Pricing?
Pricing for custom retail display boxes is shaped by far more than artwork. Material grade, size, print coverage, finishing, reinforcement, and quantity all move the number on a quote. A small counter unit with one-color print can cost dramatically less than a reinforced floor display with spot UV, die-cut windows, and separate inserts, even if both carry the same product line.
Order quantity is the first major lever. Minimum order quantity, or MOQ, matters because setup costs are spread across the run. A larger order usually lowers the per-unit price, even if the total purchase grows. That is why a quote for 250 displays can look expensive on a per-box basis, while 2,000 displays may look efficient. The math is not mysterious: die setup, press setup, cutting setup, and labor all become easier to absorb as the run grows.
Material selection comes next. Corrugated board is common for heavier products and for displays that need to move through distribution channels without collapsing. Paperboard works better for lighter items and more refined branding, especially if the load is modest. Reinforced hybrids sit between those poles, often using a thicker base, laminated wrap, or internal support pieces. The stronger the structure, the higher the cost, though not always linearly. A few small design changes can add more cost than a larger footprint would suggest.
Print complexity also changes pricing. One-color flexographic print is usually more economical than full-color offset or high-coverage digital work. Add foil, spot gloss, aqueous coating, or soft-touch lamination and the unit price moves again. Some displays need a specific finish to survive handling, which means the surface choice is not only aesthetic. It is functional. On retail packaging, glossy coatings can lift color but may show scuffs. Matte can look more premium, but it may need the right ink treatment to avoid dulling the graphics.
Hidden costs are where projects often drift. Prototype rounds add time and money. Shipping weight can matter more than expected if the display is bulky. Warehousing becomes a factor if the displays arrive before the promotion window opens. Assembly labor on the retailer's side can be significant too, especially if the display ships flat and requires manual setup. A structure that saves a few cents in production but takes ten extra minutes to assemble may not be a savings at all. It may be a hidden liability.
Here is a practical decision rule: spend more where the display needs strength, visibility, or brand impact; save money where the design can stay minimal without harming sell-through. That usually means reinforcing the base on heavy products, keeping graphics crisp and simple, and avoiding decoration that does not help the shopper decide. For many projects, the smartest cost control comes from structural discipline, not from trimming the print budget until the box loses its edge.
The table below gives a rough comparison. These are planning ranges, not fixed quotes, and actual pricing changes with volume, material, finishing, and region.
| Display Type | Typical Material | Best Use | Typical Unit Cost at 1,000 Units | Cost Notes |
|---|---|---|---|---|
| Counter display | Paperboard or light corrugated | Impulse buys near checkout | $0.85-$1.80 | Lower structure cost, but it still needs careful artwork and clean folding |
| Shelf-ready tray | Corrugated or reinforced paperboard | Retail replenishment and shelf presentation | $1.10-$2.60 | Often a strong value for multi-SKU programs |
| Floor display | Corrugated with header and base support | Launches, promotions, and larger product blocks | $4.50-$9.50 | Structure and shipping size drive price more than print alone |
| Reinforced premium floor unit | Heavy corrugated with inserts and coating | Premium retail packaging programs | $7.00-$14.00 | Higher cost, but better for heavier loads and longer store runs |
Those ranges show a pattern many buyers miss: structure often changes the price more than artwork does. Two displays with the same print file can fall into very different cost brackets if one needs extra weight support, deeper trays, or more complex die-cutting. That is why custom retail display boxes should be quoted with full product specs, not just a rough size estimate. If you want a quote that is actually useful, the supplier needs the load, the footprint, and the way the unit will be handled after delivery.
Production Process and Timeline for Custom Retail Display Boxes
The production path for custom retail display boxes usually starts with the brief. That brief should include product dimensions, unit weight, quantity per display, retailer requirements, shipping method, and the exact floor or shelf footprint. If any of those pieces are missing, the risk of revision goes up. Revisions are what push timelines around, and once a promotion calendar is fixed, timing becomes expensive.
After the brief comes the dieline. The dieline is the structural template that maps folds, scores, glue points, and cut lines. A good supplier should be able to adapt an existing format or build a new one around the product load and store environment. This is where packaging design shifts from concept to engineering. If the display needs a custom insert, a reinforced bottom, or a header that rises above the facings, those decisions are locked in here.
Then comes artwork preparation. Brand files, product information, legal copy, barcodes, and retailer-specific details need to be aligned. Small errors at this stage are expensive later. A font that is too thin may disappear in print. A barcode placed too close to a fold can become unreadable. A bleed that is too short can leave a white edge on the panel. Those are not glamorous issues, but they matter more than a polished render in a slide deck.
Proofing and sampling follow. For simple custom retail display boxes, a digital proof may be enough to confirm layout and copy. For anything that must hold weight, survive freight, or represent a premium brand image, a physical sample is the safer move. A sample reveals what the mockup never can: how the board bends, how the tabs lock, how the display stands after handling, and whether the product fits without forcing the structure. I have watched a brand team celebrate a beautiful proof, then go quiet the minute the sample arrived and the base sagged. That kind of lesson is cheap only once.
Once approved, production begins. Depending on quantity and complexity, a typical run can move through print, cutting, gluing, and finishing in roughly 10-15 business days after proof approval for straightforward work, or 15-25 business days for more complex units. That is only the factory side. Freight, customs if applicable, retailer receiving windows, and store setup time still need to be added. If the display is tied to a seasonal launch, you want the structure in hand before the merchandising window opens, not on the day it begins.
There are a few things that slow the schedule down faster than almost anything else:
- Incomplete specs, especially missing product weight or pack count.
- Late artwork changes after the dieline is already approved.
- Structural revisions that require a new sample.
- Delay in signoff from marketing, operations, or purchasing.
- Special finishes that need extra setup or curing time.
A realistic timeline helps avoid panic. For a simple promotion, build in at least two weeks for sampling and approval, then another two to three weeks for production and freight. For a larger rollout, the buffer should be wider. Custom retail display boxes are not just printed objects; they are part of a retail event, and retail events never care about factory optimism.
Best practice: lock the product dimensions, unit count, retail footprint, and brand files before you ask for final pricing. That one move prevents most of the delays that happen later.
Key Factors That Shape Effective Custom Retail Display Boxes
Product type decides a lot. Lightweight cosmetics, lip balms, or travel-size items can usually live in a more delicate structure, while bottled beverages, hardware packs, or bulk snack formats need more support. If the display is expected to move through a warehouse and then sit on a busy sales floor, the board choice must reflect that reality. Custom retail display boxes that look fine in a studio can sag under a product load that was underestimated by even a few ounces per unit.
Material selection is the next major call. Corrugated board is a workhorse because it balances printability and strength. Paperboard gives a smoother surface and can support more polished branded packaging, especially for lightweight goods. Reinforced hybrids combine the best traits of both, often using inner supports or layered board to stop bowing. For higher-traffic programs, this is where standards matter. Transport testing under ISTA protocols and load planning that respects basic ASTM methods can save a great deal of frustration once the units leave the warehouse. The display should survive vibration, stacking pressure, and regular handling, not just a photo shoot.
Branding choices should be practical, not decorative for the sake of it. Color contrast helps the offer read from a distance. Typography should prioritize the product name and one primary benefit. A secondary message can support the story, but too many claims create clutter. On retail packaging, clarity usually beats cleverness. If the customer has to decode the display, the display is doing too much.
There is also a sustainability angle that buyers cannot ignore. FSC-certified board can support responsible sourcing goals, and it gives purchasing teams a clearer paper trail for audits. If you are deciding between multiple board options, check the chain-of-custody claim and whether the supplier can document it. You can review certification details through the Forest Stewardship Council. That does not answer every sustainability question, but it is a meaningful step for brands trying to keep packaging design aligned with sourcing policies.
Retailer rules matter too. Shelf dimensions, pallet constraints, planogram requirements, and replenishment workflow can all change the final structure. A display that overhangs its footprint by a few millimeters may be rejected. A floor unit that blocks access to adjacent SKUs can create friction for store staff. A tray that is too deep may hide the last facing and make the unit look half-empty too soon. None of these are dramatic on paper, but they can decide whether the display actually gets used.
In the end, effective custom retail display boxes sit on a narrow line between aesthetics and function. They need to look intentional, but they also need to ship, stack, open, fill, and survive customer handling. That is why the strongest projects are usually the ones where packaging, operations, and retail teams agree on the same three things: what the shopper must see, what the store must do, and what the product can physically support.
If you are building a broader packaging program, review Custom Packaging Products early rather than after the structural spec is frozen. That way, the display, the carton, and any supporting inserts can be designed as one system instead of three separate pieces. It sounds small. It usually saves money and a fair bit of stress.
Common Mistakes With Custom Retail Display Boxes
The most common failure is designing for the mockup instead of the shelf. A display can look fantastic on a clean rendering and still fail in a store because it is too tall, too wide, too fragile, or too awkward to stock. Retail conditions are messier than a presentation deck. Custom retail display boxes need to be judged against the actual environment, not the ideal one.
Overloading the graphic panel is another mistake. It is tempting to cram in claims, badges, legal copy, QR codes, promotions, and product details all at once. The result is usually weaker, not stronger. The shopper cannot read everything in one glance, so the display ends up saying nothing clearly. Good package branding uses hierarchy. One headline, one product image or shape cue, and one support point are often enough.
Ignoring weight is dangerous. A tray that holds six lightweight items may fail completely when the shipper arrives packed with twelve heavier units. Corners crush. Bases bow. Glue tabs open. The display may survive the first store setup and collapse by the third restock. That is a planning error, not a print problem. For custom retail display boxes, the load test should be treated as seriously as the artwork review.
Skipping samples is another expensive habit. A physical sample reveals issues that digital proofing cannot show: how much effort it takes to open the unit, whether the lock tabs hold under pressure, whether the header stands upright, and whether the product actually fits in the cavity. I have seen programs save a few days by skipping sampling and lose far more time when the first shipment had to be corrected. That is not drama; it is just how manufacturing behaves.
There is also a coordination mistake that shows up in nearly every rushed rollout: marketing approves the look, operations approves the footprint, purchasing approves the price, and nobody confirms that the same version is being produced. That is how projects drift. A clear signoff process prevents a lot of pain. For multi-store programs, one version control sheet can save a surprising amount of rework.
Finally, some teams treat custom retail display boxes as a one-off expense instead of a reusable system. The smartest buyers look at repeatability. Can the same structure support a second flavor? Can the same tray hold a different count? Can the same base be adapted for another campaign with a new header only? That kind of thinking turns a display purchase into a packaging asset rather than a disposable cost.
Useful rule: if a display only works in the mockup, it is not ready. If it works on a pallet, opens cleanly, and still looks organized after a few stock cycles, then you have something worth running.
Expert Tips and Next Steps for Custom Retail Display Boxes
Start with one goal. Do you want trial, promotion support, stronger brand recognition, or easier replenishment? Pick the primary job first, because custom retail display boxes cannot optimize everything equally. A display built for impulse purchase will not look the same as one built for premium storytelling or replenishment speed. The best outcomes come from disciplined priorities, not vague ambitions.
Gather the full brief before you request quotes. That means product dimensions, unit weight, total count per display, store footprint, target placement, print objectives, and the delivery deadline. If possible, add a photo of the store environment and a reference sample from your current retail packaging. A supplier can usually give a much better structure recommendation when the brief includes real-world context instead of just a rough sketch.
Order a sample if the display carries weight, travels far, or represents a higher-end brand image. A prototype may add time, but it can prevent a failure in the market. For custom retail display boxes, that is often the cheapest insurance available. A small investment upfront is easier to absorb than a nationwide correction.
Compare suppliers on more than price. Look at dieline support, print consistency, structural guidance, communication speed, and how clearly they explain trade-offs. If a supplier only talks about unit cost and never mentions store handling or transit, that is a warning sign. Strong vendors ask practical questions about use, not just aesthetic ones. If you are still gathering options, reviewing the full range of Custom Packaging Products can help you understand where your display fits inside the broader packaging system.
Here is a simple launch checklist that keeps projects moving:
- Confirm the product load and exact dimensions.
- Choose the retail placement and footprint.
- Lock the structural style and board grade.
- Approve the artwork hierarchy before print.
- Request a prototype for any heavy or premium display.
- Build freight and receiving time into the schedule.
- Set a store-setup and replenishment plan before launch.
The better teams treat custom retail display boxes as part of the product launch itself, not as an afterthought. That shift changes the economics and the results. It improves cost control because the structure is sized correctly. It improves timeline accuracy because proofing starts with the right brief. It improves retail performance because the display matches shopper behavior and store operations. In a category where attention is short and competition is dense, those small advantages stack up fast.
If you are ordering custom retail display boxes for a new promotion, the smartest next move is simple: audit the store environment, define the product load, request a prototype, and set a launch checklist before production begins. Do those four things well, and the display has a much better chance of doing what it was built to do: earn a glance, hold the product, and turn shelf space into sales. That is the part nobody wants to hear, but it is the part that saves money.
What are custom retail display boxes used for?
They present products in-store so they stand out, stay organized, and encourage shoppers to pick them up. They can support promotions, seasonal launches, and secondary placements such as checkout counters or endcaps. They also help staff restock faster when the structure is built around the product and retail environment.
How much do custom retail display boxes cost?
Cost depends on material, size, print coverage, finishing, quantity, and how much structural support the display needs. A larger order usually lowers unit cost, while sampling, shipping, and assembly requirements can raise the total project budget. The best quote is the one that matches the store conditions and product load, not just the lowest upfront price.
What details do I need before requesting a quote for custom retail display boxes?
Provide product dimensions, unit weight, pack count per display, target retail placement, and your preferred quantity. Share brand files, print goals, any retailer restrictions, and the deadline for launch or shipment. If possible, include a reference sample or a photo of the store environment so the supplier can recommend the right structure.
How long does production usually take for custom retail display boxes?
Timeline varies by complexity, but the biggest variables are sampling, artwork approval, material availability, and order size. Simple designs move faster than multi-piece displays with custom inserts, specialty finishes, or reinforced structures. A realistic schedule should include extra time for revisions, freight, and any retailer-specific approval steps.
Which materials work best for custom retail display boxes in busy stores?
Corrugated board is common when the display must support heavier products or survive repeated handling. Paperboard can work well for lighter items or premium branding when the load is minimal and the display is mostly visual. For high-traffic retail, choose materials that balance print quality, strength, and resistance to crushing during shipping and stocking.

