Buyer Fit Snapshot
| Best fit | Custom Rigid Display Boxes projects where brand print, material claims, artwork control, MOQ, and repeat-order consistency need to be specified before quoting. |
|---|---|
| Quote inputs | Share finished size, material target, print colors, finish, packing count, annual reorder estimate, ship-to region, and any compliance wording. |
| Proofing check | Approve dieline scale, logo placement, barcode or warning zones, color tolerance, closure strength, and carton packing before bulk production. |
| Main risk | Vague material claims, crowded artwork, missing packing details, or unclear freight terms can make a low unit price expensive after revisions. |
Fast answer: Custom Rigid Display Boxes: Design, Cost, Process should be specified like a repeatable production item. The safest quote records material, print method, finish, artwork proof, packing count, and reorder notes in one written spec.
Production checks before approval
Compare the actual filled-product size with the drawing, then confirm tolerance on folds, seals, hang holes, label areas, and retail display edges. Reserve space for logos, QR codes, warning copy, and material claims before decorative graphics fill the panel.
Quote comparison points
Review material grade, print process, finish, sampling route, tooling charges, carton quantity, and freight assumptions side by side. A quote is only useful when the supplier can repeat the same color, closure quality, and packing count on the next order.
Custom rigid display boxes are packaging with posture. They hold their shape, hold attention, and do not slump into the sad little pancake act that cheaper cartons pull off after a few days on the floor. If a box cannot stop a shopper for two seconds, present the product cleanly, and survive real retail handling without looking beaten up, it is dead weight.
That sounds harsh because retail is harsh. Buyers do not hand out points for effort. They care about how the packaging looks, how it protects the product, and whether it makes life easier for store staff. Compare Custom Printed Boxes, counter displays, and other retail packaging formats and the rigid option sits in a very specific lane: more premium than folding cartons, sturdier than lightweight displays, and usually more expensive than both. Sometimes that tradeoff makes perfect sense. Sometimes it is just an expensive way to feel fancy.
For brands building branded packaging around launches, gift sets, cosmetics, electronics accessories, or seasonal promos, the real question is not whether custom rigid display boxes look good. They do. The question is whether they earn their keep through better presentation, fewer damaged units, and a cleaner retail story. If you are comparing formats before you commit, the Custom Packaging Products page is a decent place to start.
What custom rigid display boxes actually do on a shelf
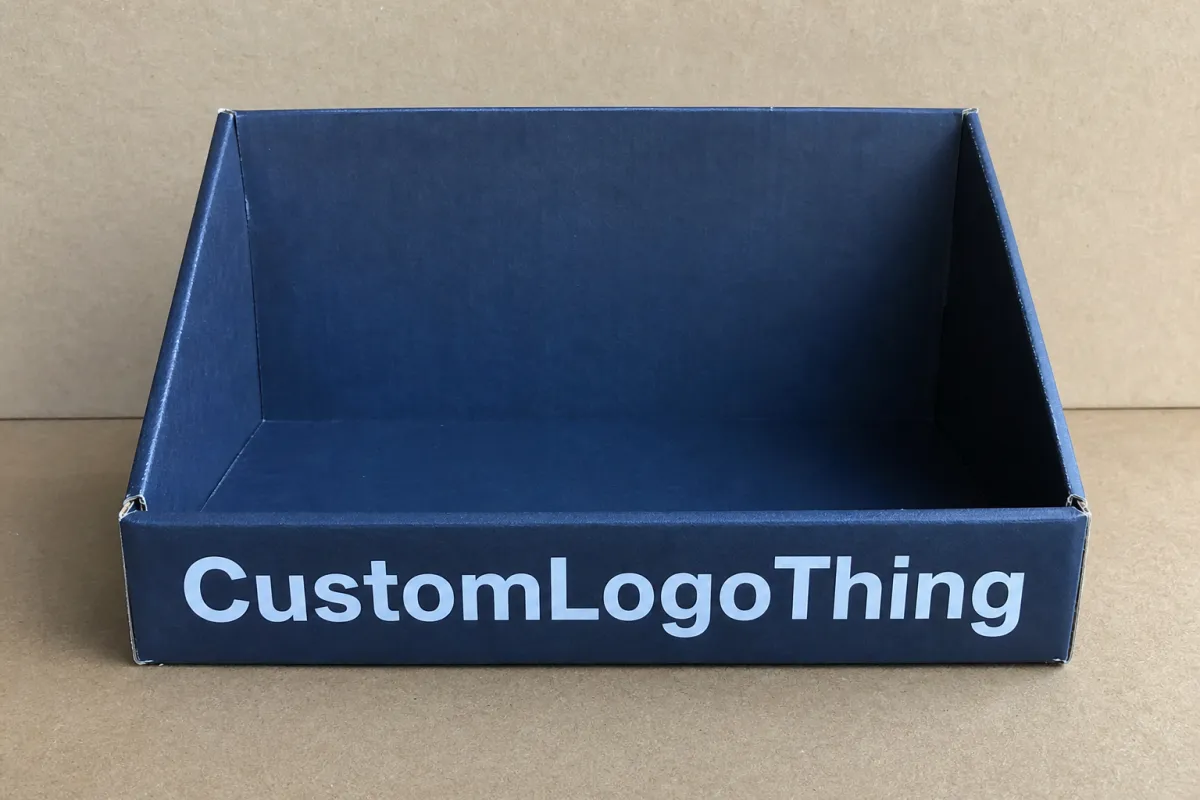
Custom rigid display boxes are shelf territory with a backbone. They are built to create presence fast, usually on a counter, in a boutique, at a trade show, or in a promotional setup where the packaging has to do some selling on its own. The rigid board keeps its shape instead of folding flat like a standard carton. That one detail changes the whole read. The product feels more deliberate. More expensive. Less disposable.
A typical build uses heavy paperboard or chipboard, usually wrapped in printed paper, specialty stock, or a laminated outer sheet. The graphics sit on the wrap, which is why the design work matters so much. Crisp color, sharp typography, and controlled branding all depend on the surface doing its job. Thin cartons have a way of telegraphing every dent and wave. Not exactly a luxury vibe.
These boxes show up where first impressions matter more than shipping abuse. Think boutique cosmetics, compact electronics, premium candles, jewelry kits, mini gifting sets, event giveaways, and limited-edition product packaging. They can sit on a counter, hold a product upright, or frame the item so the front panel tells the story in a few seconds. On a crowded shelf, that is often enough to beat a louder but cheaper competitor.
Rigid construction also changes presentation in practical ways. Corners stay square. Panels resist bowing. Edges keep looking clean after handling. The box can support cut-outs, windows, and inserts without sagging immediately. That gives the retailer a display that still looks intentional after a few days of customer contact instead of a tired carton that looks like it lost a fight with a shopping basket.
This is not a simple premium-or-not-premium decision. It is a question of whether the premium structure actually helps the product move. A high-end display box makes sense when the item value, margin, and retail environment can support it. If the product is low-margin and gets shoved into a deep shelf with no visibility, you are paying for theater. Nice theater, sure. Still theater.
If the box looks expensive but the product is hard to see, hard to grab, or hard to restock, the packaging is decorating the problem instead of solving it.
How custom rigid display boxes work in production
The build starts with board. Heavy chipboard or rigid paperboard is cut, scored, and assembled into the base shape. That core is where the stiffness comes from, and it is what keeps the box geometry clean. After that, the printed outer wrap gets applied, usually by hand or with semi-automated equipment depending on the run size and the design complexity. The wrap is where the visual work happens, which is why packaging design carries so much weight here. A weak layout can make even a solid structure feel generic.
The outer surface is often printed first, then laminated or mounted to the board for a smoother finish. Matte lamination, soft-touch coating, spot UV, foil, embossing, and textured specialty papers can all be added. Each one changes cost and lead time. Gloss can make the graphics pop. Soft-touch gives a richer feel. Foil pulls attention from across the table. None of that is magic, and none of it works if it has nothing to say.
Many custom rigid display boxes include inserts. Those inserts can be paperboard dividers, foam pieces, molded pulp, or die-cut trays. They keep the product from shifting, shape the presentation, and make the opening experience feel controlled instead of sloppy. If the item is small, shiny, fragile, or oddly shaped, the insert becomes part of the product experience. If the insert is wrong, the customer notices right away. The product rattles. Or tilts. Or disappears in a crater of empty space. That does not read as premium. It reads as someone guessed.
Display-specific details are where the engineering gets interesting. Front cut-outs, stepped trays, angled faces, header panels, and partial-open structures all change visibility. A 15-degree tilt can make a lip balm line easier to scan. A raised header can separate a product family on a counter. A front window can show the actual item while keeping the presentation tidy. These details sound small. They are not. They decide whether the display works in the real world.
There is always a tradeoff. More structure means more labor. More complex wraps mean more print setup. Fancy finishing means more inspection points. If you want a box that opens, displays, protects, and looks like a luxury object, the quote should reflect that ambition. No supplier can make physics and labor disappear just because the spreadsheet feels optimistic.
Brands that care about sustainability should pay attention to board selection too. Paper-based construction can support recyclability claims more easily than mixed-material builds, but the details depend on the exact materials, inks, coatings, and the local recovery stream. Foil, heavy lamination, magnets, and plastic windows can change the story quickly. If the claim matters, check whether the board and wrap choices actually support it instead of assuming they do. FSC-certified paper options are worth asking about, and the Forest Stewardship Council explains certification standards clearly at fsc.org. If the display will travel through parcel channels, ask the supplier how the structure behaves under transit testing patterns used by ISTA.
Custom rigid display boxes cost: what drives pricing
Pricing is where buyers get tripped up. They compare quotes that look similar on the surface and are not similar underneath. One supplier includes a 2 mm board. Another uses 1.5 mm. One quote includes laminated wrap and custom insert assembly. Another prices the shell only. One has foil. The other does not. Then everyone acts surprised when the cheaper option turns into the expensive one. Packaging math has no sense of humor.
For custom rigid display boxes, the biggest cost drivers are size, board thickness, print coverage, finishing, insert type, and labor. A small counter display with straightforward graphics and a simple paperboard insert can be relatively affordable. A larger structure with spot UV, foil, magnetic closures, a window, and hand-fitted inserts is a different animal. You are paying for material, machine time, and human assembly.
Quantity matters a lot. Setup costs do not vanish just because the order is small. That is why unit pricing usually drops as volume rises. A run of 250 units can carry a high per-piece cost because all the prep work is spread across a limited quantity. A 5,000-piece order usually improves the per-unit number because tooling, press setup, and assembly labor get distributed more efficiently. As a rough buying range, simple rigid display structures may land around $1.20-$2.50 per unit at moderate volume, while premium builds with specialty finishes and inserts can easily move into the $3.50-$8.00 range or more, depending on specification, supplier location, and freight assumptions.
Decoration is another big lever. Foil stamping, embossing, debossing, soft-touch coating, matte lamination, spot UV, and specialty papers all add cost. Sometimes the extra spend is worth it. A cosmetics launch with a high shelf price can justify a richer finish. A promo kit for a short campaign usually cannot. The trick is matching the finish to the product margin instead of piling on effects until the box looks premium enough. That is a fast way to spend money and still confuse shoppers.
There are also hidden costs people forget to include when they compare quotes:
- Tooling or dieline setup for custom shapes, windows, and inserts
- Sampling and prototypes, especially when fit is tight
- Freight, which can be meaningful because rigid packaging ships bulky
- Assembly labor if the box is not shipped flat or needs hand finishing
- Pack-out labor if the product is inserted before shipment
Use the same dimensions, the same board spec, the same finishing, the same insert method, and the same shipping assumption when you compare options. If one quote is based on a 1,000-unit run and another assumes 5,000 units, the numbers are not competing. They are two different quotes wearing the same outfit.
One more buying tip: ask every supplier whether the quote includes assembly, pack-out, and protective master cartons. A low piece price can turn into a bad deal once you add labor and secondary packaging. Comparing a shell-only number to a full-service number is how budgets get quietly shredded.
| Build level | Typical structure | Common finish | Best fit | Typical cost signal |
|---|---|---|---|---|
| Simple | Rigid base with printed wrap | Matte or gloss lamination | Counter promos, small gift sets | Lowest entry point; fewer assembly steps |
| Mid-tier | Rigid shell with custom insert and window | Matte lamination, spot color, selective gloss | Retail launches, cosmetics, accessories | Moderate cost; better presentation control |
| Premium | Thick board, special insert, shaped display face | Foil, embossing, soft-touch, specialty paper | Luxury product packaging, gifting, event kits | Highest cost; most labor and finishing |
Process and timeline for custom rigid display boxes
The best projects start with boring answers. Product dimensions. Target quantity. Retail channel. Budget ceiling. Launch date. If those basics are fuzzy, the dieline will be fuzzy too, and then everyone wastes time pretending "we will figure it out in production" is a strategy. It is not. It is hope with a spreadsheet.
Once the basics are clear, the supplier should build the structure file and show a proof or digital mockup. That is where packaging design gets practical. The layout has to fit the actual product, not the fantasy version of it. Barcode placement, logo size, claim hierarchy, panel bleed, fold lines, and insert clearances all matter. If you need custom printed boxes with a specific retail look, the proof stage is where the cost of a bad idea is still cheap.
Sampling matters even more with rigid packaging than with basic folding cartons because screen previews can hide fit problems. A product that looks fine in a render may sit too low in the window, block the branding panel, or rattle inside the insert. Prototype approval catches those problems before you commit to a full run. That is a much nicer moment to discover them.
A typical production sequence looks like this:
- Confirm specifications and artwork
- Finalize dieline and structural layout
- Review proofs and sample prototypes
- Print and finish the outer wrap
- Cut and assemble the rigid board
- Apply inserts, windows, and special components
- Perform quality checks and pack the shipment
- Freight the order to the final destination
Timelines vary with complexity. A straightforward run with standard finishing can move in roughly 12-18 business days after final approval if the supplier is organized and not buried in seasonal work. Add specialty finishes, custom inserts, or a packed retail launch schedule, and that window can stretch to 3-5 weeks or longer. Holiday seasons, major sales periods, and back-to-school windows can push lead times even further. Suppliers are not psychic. They cannot manufacture time out of thin air.
For projects that will ship through parcel networks or be handled multiple times before reaching the shelf, ask whether the structure should be tested against ISTA distribution profiles. That is not overkill if the box is carrying expensive product or fragile components. A display that survives in the factory but fails in transit has simply failed later, which is not a bargain.
The smoothest orders are the ones where the buyer treats the sample stage like a gate, not a formality. If the box is not right, stop. Fix it. Then proceed. That habit saves more money than people like to admit.
Key factors that make a display box actually sell
A display box sells when the product is visible, legible, and easy to understand in a quick scan. That sounds obvious. Plenty of packaging still manages to forget the shelf. It gets designed like a tiny poster instead of a retail object. Pretty graphics are not enough. The box has to function where it lives.
Start with fit. If the product leans, slides, hides the label, or forces a messy restock, the display is fighting the store instead of helping it. Counter displays especially need a stable footprint and enough rigidity to survive repeated touches. A display that tips after three customer interactions is not a display. It is a complaint generator.
Next is brand hierarchy. The logo should not fight the product name. The product name should not fight the benefit statement. And the benefit statement should not hide behind type that needs a magnifying glass. On a shelf, shoppers read fast. They want a cue, a promise, and a reason to pick up the item. Good retail packaging makes that scan easy. Weak branding makes the customer work too hard.
There is also shelf behavior. Some stores want compact counter footprints. Others need a display that can sit on a gondola shelf without blocking adjacent items. Some retailers restock from the front. Others from the back. If the box design ignores those habits, the staff will adapt by cursing the packaging. Retail is full of that kind of feedback.
Durability matters too, but not in a vague make it strong way. The box needs enough stiffness to hold shape under handling and enough surface protection to survive fingerprints, scuffs, and minor shipping friction. But there is a limit. Overbuilding the structure adds weight and cost without necessarily improving sales. The goal is not to make the heaviest box in the room. It is to make the smartest one.
Sustainability and compliance belong in the conversation as well. If your packaging claims recycled content, FSC sourcing, or recyclability, the materials must support the claim. If the product touches food, cosmetics, or sensitive consumer goods, the board and inks need to fit the category requirements. That is not a nice-to-have detail. It is the difference between a sensible packaging program and an expensive mess.
Brands that treat product packaging as a sales tool usually make cleaner decisions. They ask what the shopper sees first, how the product is removed, how the store restocks it, and what happens after the display has spent a week on the shelf. Those are the questions that matter. Fancy render? Nice to have. Sales performance? Better.
Common mistakes with custom rigid display boxes
The biggest mistake is designing for the rendering software instead of the actual shelf. A mockup can make almost anything look elegant if the camera angle is kind enough. The store is less forgiving. If the box blocks the product, hogs too much counter space, or makes the brand hard to read from three feet away, it has failed no matter how nice the art file looked.
Overbuilding is the second trap. Extra layers, oversized inserts, heavyweight board, and elaborate finishes can make a box feel premium, but premium does not automatically mean effective. I have seen brands spend heavily on a display that looked beautiful in a sample room and then sat too tall, too wide, or too awkward for the channel. In the real world, those dimensions matter more than the mood board.
Another common problem is noisy messaging. Too much copy. Too many badges. Too many colors competing for attention. Premium packaging is not supposed to look cluttered. If a shopper has to decode the front panel, the design has already lost some of its impact. Keep the hierarchy clean. Let the strongest claim do the work.
Quote shopping causes plenty of trouble too. A low number means very little if the quote excludes lamination, uses a thinner board, or assumes no insert assembly. Comparing those quotes as if they are identical is how buyers create false savings. The cheapest line item can become the most expensive decision on the project.
Skipping samples is the final classic mistake. The sample is where you catch fit issues, weak glue points, warped panels, and awkward opening behavior. If the product is fragile or the display is unusually shaped, this step matters even more. A production run is not the time to discover that the insert is 3 mm too tight or the top panel folds the wrong way. That is not a surprise. That is a budget problem.
Here is a simple checklist worth using before approval:
- Product fits without forcing or rattling
- Brand name is readable from a retail distance
- Display footprint matches the shelf or counter
- Insert holds product upright and secure
- Finish supports the price point, not just the mood
- Quote includes all assembly and freight assumptions
Those checks sound basic because they are basic. That is also why they get skipped. Then everyone acts shocked when the premium box becomes a very expensive lesson.
Expert tips and next steps for your first order
Start by collecting the unglamorous data: exact product dimensions, unit weight, target order quantity, retail channel, budget ceiling, and launch date. If you are missing two or three of those inputs, the packaging conversation will drift. Suppliers need a real brief to give a real quote. Otherwise, they are estimating while you are hoping, and nobody wins that game.
Ask for a sample or pre-production prototype before you sign off, especially if the structure uses inserts, windows, or a very tight fit. The sample tells you more than any render can. You want to see how the product sits, how the box opens, how the graphics land, and whether the display looks clean after a few handling cycles. That is the actual job.
Request a full spec comparison from every supplier. Not just price. Ask for board thickness, print method, finish, insert type, assembly requirements, pack quantity, and freight assumptions. If one quote includes packaging labor and another does not, You Need to Know that immediately. A fair comparison is the only comparison that matters.
Build a short approval checklist before production starts. It should cover artwork, barcode placement, copy, insert fit, shipping method, and carton count. Keep it simple enough that people actually use it. A six-line checklist is worth more than a two-hour meeting where everyone feels productive and nothing gets decided.
For brands ordering custom rigid display boxes for the first time, I would keep the first run focused. Choose one structure, one finish direction, and one primary retail use. That does not mean boring. It means controlled. You can always add foil, sculpted inserts, or specialty wraps on the next run once the design proves itself in market.
If you need to expand the rest of your retail packaging system, our Custom Packaging Products page is a useful place to compare formats before locking in the final structure. The right display box is usually the one that fits the product, the channel, and the margin without pretending to be all three at once.
Used well, custom rigid display boxes give a brand more than a polished look. They create presence, protect the product, and support the buying decision right where it happens. Used badly, they become expensive shelf decoration. Keep the design honest. Keep the quote apples-to-apples. Make the structure prove itself before you place the order. That is the part people skip, and then they pay for it.
FAQ
What are custom rigid display boxes used for?
They are used to present products at retail, on counters, in gift sets, and at events where the packaging needs to do part of the selling. They are especially useful for premium cosmetics, electronics accessories, small gifts, and launch kits that need a stronger shelf presence than folding cartons.
How much do custom rigid display boxes cost?
Cost depends on size, board thickness, print coverage, insert type, finish, and order quantity. A small, simple structure costs far less than a highly finished box with foil, windows, and custom inserts, so request apples-to-apples quotes before comparing suppliers. Freight and assembly can change the final number more than buyers expect.
What is the usual MOQ for custom rigid display boxes?
MOQ varies by supplier and structure complexity, but rigid packaging often starts higher than standard folding cartons because of labor and setup. If you need a low-volume test run, ask for a simplified structure or a sample-friendly production path before expecting a big price break.
How long does production take for custom rigid display boxes?
Timeline depends on artwork approval, sample signoff, finishing, and current factory load. Simple jobs may move quickly, but custom structures and specialty finishes usually take longer, so confirm lead time before setting a launch date. A rushed schedule usually means fewer finishing options and more risk.
Are custom rigid display boxes better than folding cartons?
They are better when you need stronger presentation, better shape retention, and a more premium shelf impression. Folding cartons are usually cheaper and easier to ship, so the better choice depends on budget, product value, and retail setting.
If you remember one thing, make it this: approve custom rigid display boxes only after the physical sample proves fit, shelf visibility, and restock behavior. A pretty render is not enough. The box has to survive the channel it will live in. If it does that, the structure earns its place. If not, it is just expensive decoration.

