Custom Rubber Patches for clothing are a practical answer to a narrow problem: some logos need crisp edges, readable fine detail, and enough durability to survive repeated wear without turning fuzzy or distorted. Embroidery can handle a lot, but once a design depends on small text, sharp geometry, or tight color separation, thread starts making compromises that are hard to ignore.
That is why these patches show up on jackets, uniforms, hoodies, caps, bags, and outdoor gear. They are molded rather than stitched, which gives them a cleaner outline and a more controlled surface. The tradeoff is just as real. They are thicker than woven labels, less forgiving than print, and sensitive to poor artwork or the wrong backing. If the patch is part of a larger retail presentation, it should be treated like one component in the whole package, not a loose accessory. For related packaging work, see Custom Packaging Products.
Why custom rubber patches for clothing beat embroidered details on tough garments
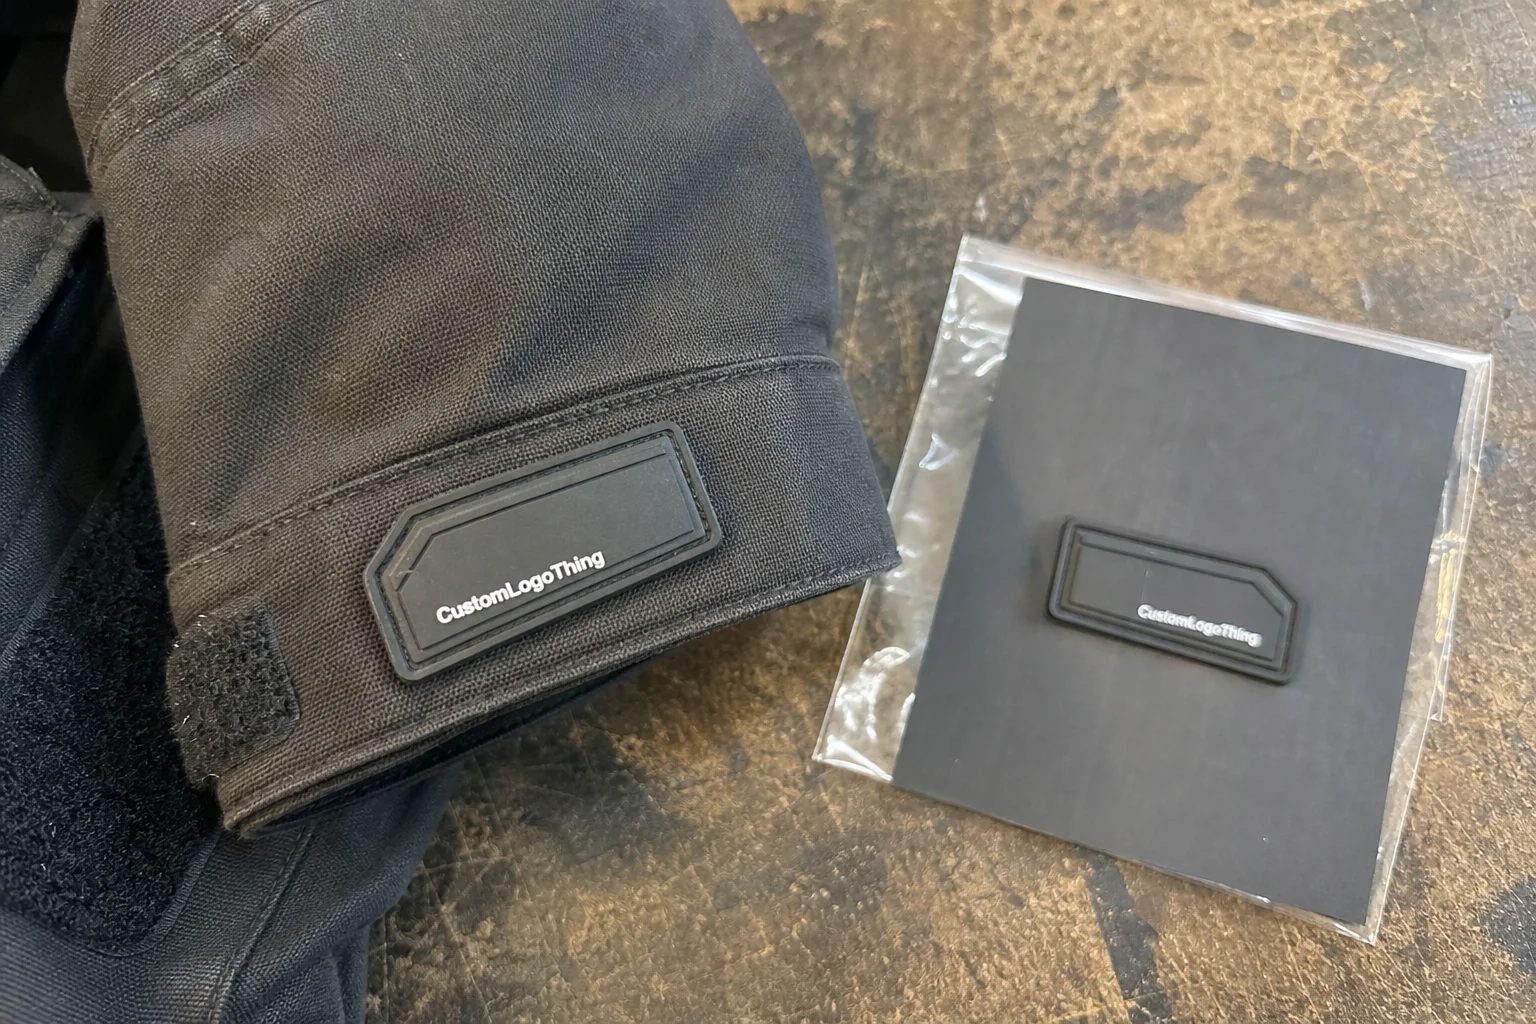
Embroidery is strongest when the design is simple. Add thin strokes, tiny type, or hard corners and the result can start to blur. The needle and thread build texture, not precision. Rubber patches do the opposite: they hold shape first, texture second.
That difference matters most on products that get handled, scraped, folded, washed, or carried outdoors. A utility jacket, rain shell, or backpack strap can wear down embroidered detail quickly. A molded patch usually keeps its profile longer because the form is built into the material itself. It is not indestructible, but it resists abrasion better than many stitched badges.
There are three material families buyers encounter most often:
- PVC-style rubber for raised detail, bold colors, and a more dimensional look.
- Silicone for a softer hand feel, a matte finish, and better heat tolerance.
- TPU-like constructions for thinner, more flexible patches that need to move with the garment.
Those choices affect more than appearance. PVC-style patches often run about 1.5 mm to 4 mm thick depending on the design. Silicone can be softer at the edge, which helps on garments where a stiff badge would feel out of place. TPU-like options sit flatter and are useful when the patch needs to bend rather than stand proud. On a hoodie or tee, that can be the difference between something that looks branded and something that feels bolted on.
For uniforms, outdoor apparel, caps, and merch, the appeal is straightforward: the logo stays readable and the edges stay clean. If the brand mark needs to be seen from a distance and still look tidy up close, Custom Rubber Patches for clothing usually beat woven labels, print, or embroidery on technical items.
“A good patch should look like it belongs to the garment, not like a separate object attached as an afterthought.”
How the production process works from artwork to finished patch
The process is not complicated, but it does punish vague artwork. It starts with a vector file review. AI, EPS, or an editable PDF gives the supplier clean paths, closed shapes, and measurable line weights. A PNG or JPG can work for a rough estimate, but it usually needs cleanup before anyone can quote with confidence.
After the artwork is checked, the mold or tooling is created. This step defines raised areas, recessed areas, borders, and the depth between color zones. A patch that looks good on screen can fail here if the details are too thin. As a practical rule, lines below roughly 0.8 mm to 1.0 mm become risky, especially on smaller patches or designs with several layers of detail.
Once the mold is approved, the colors are filled and cured. Pantone references help much more than monitor previews. Screens drift, lighting changes, and brand colors can look more precise on a file than they will in material. A physical sample or a Pantone call removes a lot of avoidable argument.
Typical backing options include:
- Sew-on for the strongest long-term attachment.
- Heat-seal for fabrics that can tolerate pressure and heat.
- Velcro for tactical, utility, or removable applications.
- Adhesive backing for temporary placement, mockups, or light-duty use.
The quality checks that matter are mechanical, not glamorous: sharp outer edges, even fill, no color bleed, consistent thickness, and a patch that does not curl or feel awkward on-body. If a supplier skips sample approval and pushes straight into bulk production, the buyer is usually just paying for surprises in a larger quantity.
For packaging and transit thinking, it helps to look at the patch as part of the product system rather than a single part. The guidance at Packaging.org is useful for material and finishing context, especially when a patch is sold with apparel, an insert card, or a retail box.
Custom rubber patch pricing: what drives cost and MOQ
Price is driven by more than size. The big variables are patch dimensions, number of colors, shape complexity, backing type, packaging requirements, and order volume. A simple 2-color rectangle is faster and cheaper to make than an irregular badge with six colors, tiny cutouts, and a Velcro back. That sounds obvious until the quote lands.
MOQ matters because tooling and setup are fixed costs. If those costs are spread over 100 pieces, the unit price rises. If they are spread over 5,000 pieces, the per-piece cost drops fast. Small runs are rarely cheap, even when the actual patch is small.
| Order Type | Typical Unit Price | Setup / Tooling | Best Fit | Notes |
|---|---|---|---|---|
| Sample / pilot run | $1.50-$3.50 | $40-$180 | First approvals, first-time buyers | Useful for checking edge quality, color accuracy, and thickness before scaling. |
| Small batch | $0.85-$1.80 | $40-$180 | Brand drops, limited runs, testing | Good for retail trials or garment-line experiments with limited risk. |
| Higher volume | $0.35-$0.85 | Usually absorbed better | Uniform programs, repeat SKUs | Better unit economics, but only if the design stays stable. |
The hidden cost is usually the cleanup. If the source file is messy, artwork correction may be charged separately. Rush fees are common. Split shipments cost more. Special retail packaging can also change the economics, especially if the patch is going into a branded kit or a boxed apparel program. If the order includes a custom printed insert, header card, or display packaging, keep that line item separate so the quote stays readable.
A good quote request is specific. Send the vector file, finished size, quantity, backing choice, color references, packaging needs, and delivery date. If you know the garment type, include that too. A patch for a denim jacket is not the same recommendation as a patch for a lightweight hoodie.
Timeline, lead time, and production steps you should plan for
A realistic schedule has more than one moving part: quote, artwork correction, sample approval, production, inspection, packing, and shipping. Buyers often focus on factory time alone, which is how deadlines get missed. Approval cycles and freight are usually where the calendar slips.
Repeat orders can move faster because the mold already exists and the artwork is locked. In those cases, production is often around 10 to 12 business days after approval. New custom jobs with fresh tooling, multiple colors, or unusual shapes generally land closer to 12 to 18 business days. If a sample is required first, add another 5 to 7 business days before bulk production starts.
Shipping changes the reality quickly. A short production window is not useful if the freight method adds a week. Domestic express is faster but expensive. International air is often the middle ground for urgent restocks. Ocean freight makes sense for large apparel programs, but it is not the right choice for a launch tied to a fixed date.
For shipments that include garments or retail-ready kits, transit protection matters. That is where packaging discipline stops being theoretical. The testing guidance at ISTA is a useful reference for thinking about damage risk, packing performance, and why a poorly protected product can arrive looking fine in a box and damaged after a week in transit.
Add buffer time. A two-week cushion is inexpensive compared with rebooking freight or explaining to a merch team why the badges are still in transit when the launch has already gone live.
Design and material choices that make the patch actually work on clothing
The patch has to work on the garment, not just in a flat file. A thick outer shell can support a deeper molded patch. A soft hoodie or lightweight tee usually needs a flatter profile with softer edges. If the patch is too stiff for the fabric, it can pull, wrinkle, or sit awkwardly even when the artwork looks excellent on screen.
Placement matters just as much. Chest placements are standard for branding. Sleeve patches add utility or streetwear character. Hem placements are subtle and often feel more premium because they do not shout. Caps and bags are more forgiving because the base material already has structure. On a light fabric, an oversized patch can distort the garment. On a heavier piece, a tiny patch can look under-scaled and accidental.
Color strategy can make or break the result. Limited palettes tend to look cleaner and approve faster. Once a logo starts adding tiny color islands or thin white separations, the mold becomes harder to read and the finished patch can look busy. Fewer colors, stronger contrast, bigger shapes. That is usually the safest path.
- Best for knitwear: thinner, softer material with rounded edges.
- Best for denim and canvas: more relief, stronger contrast, sew-on backing.
- Best for technical shells: lower profile and heat-seal only if the fabric can tolerate it.
- Best for bags and accessories: thicker molded forms and bolder branding.
If the patch is part of a retail product, the presentation around it counts. A hang card, polybag label, or insert card can turn a patch from a loose accessory into a finished branded item. That is one reason package branding and product packaging should be discussed in the same brief as the patch itself.
Common mistakes buyers make with custom rubber patches
The first mistake is sending artwork that is not production-ready. A low-resolution logo may look acceptable on a screen and fail in a mold. The supplier can usually clean it up, but that adds time and can distort the original intent.
The second mistake is preserving too much detail. Rubber is not a good place for micro-ornament, tiny copy, or hairline shapes. If the art is too busy, the result is either expensive or compromised. A strong patch design should simplify the logo without losing the brand.
Backing choice is another predictable failure point. Heat-seal on a fabric that cannot tolerate heat is a bad pairing. Sew-on can be wrong for applications that need a perfectly uninterrupted face. The attachment method should match the garment and the use case, not just the easiest option in the menu.
Color mismatch causes a lot of avoidable friction. Screen previews are not color proofs. If brand consistency matters, ask for Pantone references and a physical sample. That is cheaper than discovering a wrong blue after bulk production has already started.
Overcomplication drives up cost and lowers quality at the same time. Too many colors, too many line breaks, and too many shape changes all make the mold harder to execute. Buyers often try to force a print-first logo into a molded format and then blame the supplier when the result looks crowded. The translation is the issue.
Changing specs after approval is the final self-inflicted mistake. If the size, shape, color, or backing changes after the proof is signed off, the quote and the schedule should change too. That is not a surprise. It is a new job.
Expert tips for ordering custom rubber patches that look premium
Keep the artwork bold. That is the most reliable way to get a premium-looking result. Strong silhouettes, moderate detail, and clear contrast usually outperform crowded art. If the patch reads from arm’s length and still holds up close, the balance is probably right.
Order a sample before scaling, especially for a first run or a design with strict brand colors. A sample reveals whether the lines are thick enough, whether the relief feels right, and whether the patch thickness suits the garment. It is far cheaper to correct one mistake on a sample than on a full batch.
Match thickness to the product category. Heavier outerwear can support deeper relief and firmer edges. Tees and lightweight hoodies usually need a softer, lower-profile patch. Caps sit in the middle. If the patch looks too heavy for the garment, the whole item can feel off even when the logo itself is excellent.
Ask for a proof that spells out the size, Pantone references, backing type, and attachment method. If the supplier cannot document those basics clearly, the risk of confusion rises. It is also worth asking about packaging if the patch is being sold on its own or as part of a retail set. The difference between “accessory” and “finished product” is often a printed insert and a clean pack-out spec.
If the patch is tied to a launch, keep it connected to the wider packaging plan. That includes Custom Packaging Products for retail-facing programs and any carton or mailer specs that protect the goods in transit. Customers do not separate those details; they experience them as one purchase.
Next steps: how to brief a supplier and avoid a messy quote
Send the supplier the file, size, quantity, placement, backing choice, color references, and target delivery date. If the patch is going on a jacket, hoodie, bag, or uniform, say that plainly. The garment type changes the recommendation more than most buyers expect.
Ask for separate pricing on sample cost, tooling, unit cost, and shipping. A single lump-sum number is hard to compare and easy to misunderstand. A clean breakdown shows where the money is going and whether a cheaper quote is actually cheaper or just missing a line item that will appear later.
Approve one proof in writing before production starts. Not multiple half-edited email replies. Not a vague chat message. One proof. If the supplier updates the mold or color spec after that, there should be a clear revision trail.
If the patch will be used on a new garment line, uniform program, or retail drop, start with a small pilot run. That shows how the patch behaves on the actual fabric and whether the placement feels right on-body. It also reduces the risk of buying a full batch that looks fine in a file and awkward in real life. Follow that process and Custom Rubber Patches for clothing become easier to price, easier to approve, and less likely to waste time or money.
Are custom rubber patches for clothing washable and durable?
Yes, if the backing and attachment method match the garment and the edge bonding is solid. Sew-on usually gives the most reliable long-term durability. Heat-seal can work well, but only on fabrics that tolerate heat and pressure without damage.
What file do I need to get an accurate quote for custom rubber patches for clothing?
A vector file such as AI, EPS, or an editable PDF is best because it preserves clean edges and scalable line work. A PNG or JPG can still be used for an initial estimate, but it often needs cleanup before pricing and sampling are reliable.
How many colors can I use before the price jumps?
More colors usually raise setup complexity and can increase cost, especially on smaller orders. The bigger issue is often not the count itself, but whether the design has tiny separated areas that are hard to fill cleanly. A simple 3-color patch can be easier to make than a cramped 2-color design with many microscopic islands.
What is the best backing for custom rubber patches on jackets?
Sew-on is the safest choice for most jackets because it holds up well under wear and washing. Heat-seal can work on compatible shells or uniforms, but the fabric must tolerate heat and pressure. For rugged outerwear, sewing is usually the least fussy option.
How far in advance should I order custom rubber patches for clothing?
Plan for artwork review, sample approval, production, and shipping, not just factory time. If the patches are tied to a launch or season, add extra buffer so a slow approval does not blow up the schedule. A two-week cushion is often the difference between a normal delivery and a stupid emergency.