What Custom Shot Glass Stickers Actually Do on a Tiny Surface
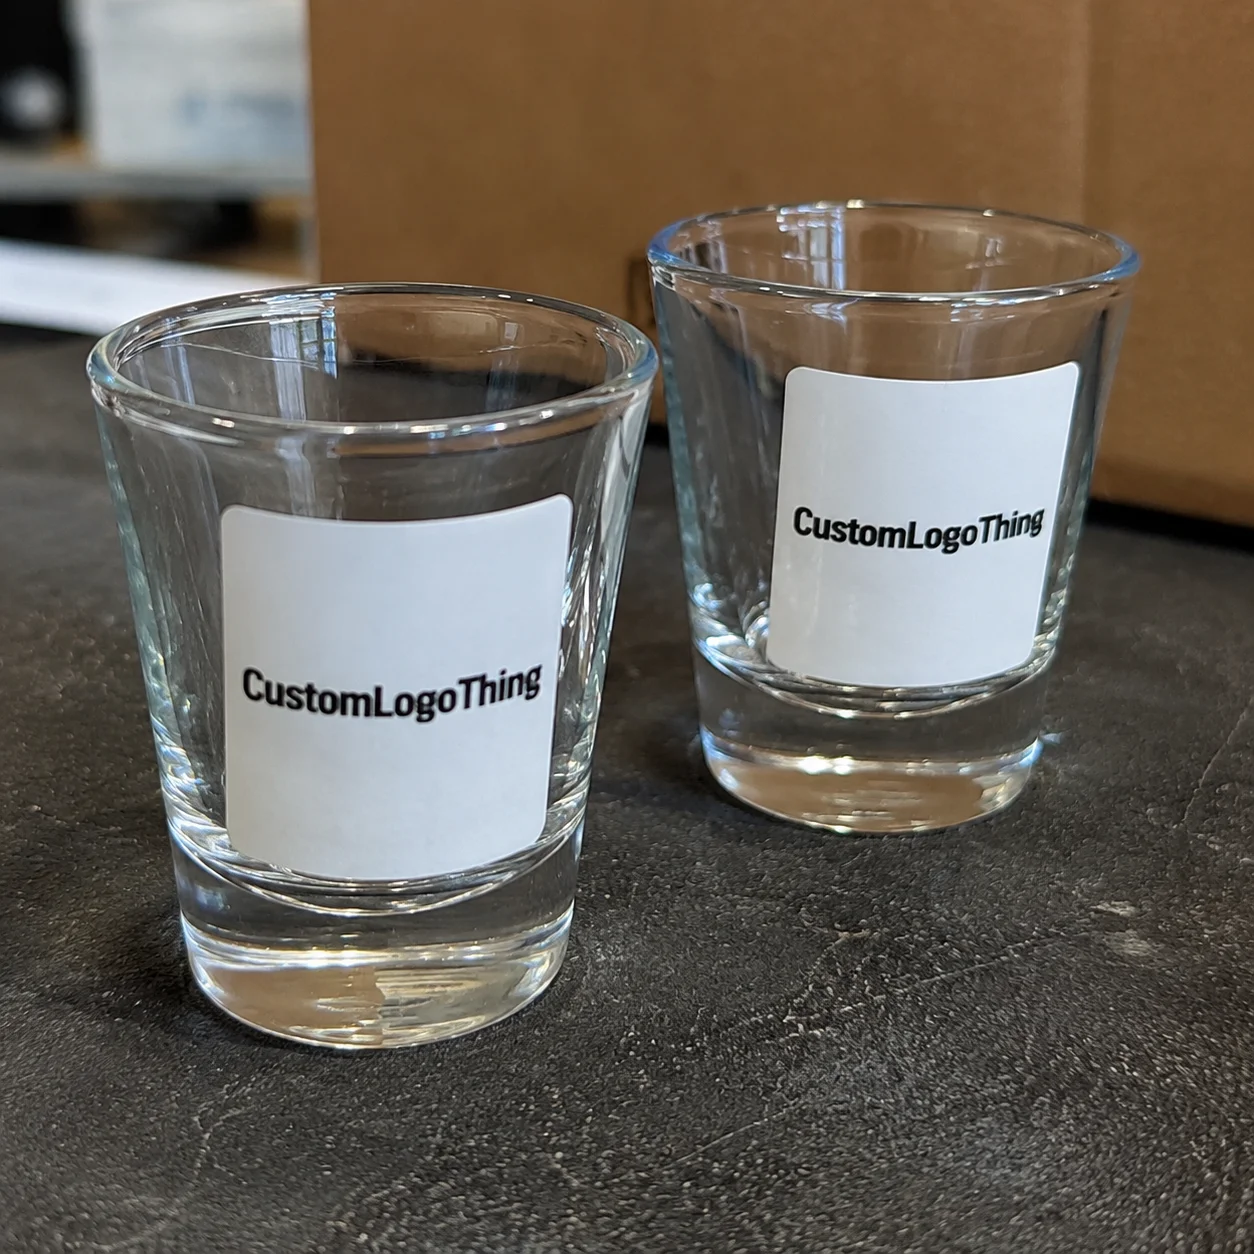
A 1.5-ounce shot glass gives you less usable branding space than most business cards. That is the odd pressure test behind custom shot glass stickers: they add identity, instructions, humor, or branding to glassware without locking the buyer into permanent printing.
One small label may need to do several jobs. It might carry a couple’s names and wedding date. It might identify rye, bourbon, mezcal, or non-alcoholic samples across a tasting flight. It might turn a bar giveaway into something guests keep instead of leaving beside a napkin stack. Small surface, heavy workload.
In packaging terms, these are adhesive labels or decals sized for straight, tapered, or novelty shot glasses. They show up in event favors, retail sets, distillery tastings, restaurant promotions, launch parties, bachelor and bachelorette gifts, and branded sampling programs. Front-facing marks often land around 0.75 to 1.5 inches wide. Larger wraps can work on certain straight-walled glasses, but curves make every extra millimeter more demanding.
Stickers, decals, and direct glass printing are related, but they are not the same purchase. A sticker is usually a Printed Adhesive Label on paper, vinyl, or film. A decal may be contour-cut, clear, or designed to sit visually closer to the glass surface. Direct glass printing applies ink straight to the glass, which can look polished and permanent, but usually carries higher setup costs and less flexibility for short runs or multiple names, flavors, or event dates.
The label affects more than decoration. It changes how the glass feels in the hand, how it photographs under event lighting, how quickly a guest can read it, and whether the finished item feels like branded packaging or a disposable favor. The strongest labels rarely shout. They make the glass feel intentional.
How Shot Glass Label Materials, Adhesives, and Finishes Work
Material choice drives performance more than many buyers expect. Shot glasses collect fingerprints, condensation, alcohol splashes, ice-bucket moisture, and abrasion from stacking or transport. A label that behaves perfectly on a flat mailer can fail fast on cold curved glass.
Paper labels are usually the budget option. They can work for dry indoor favor tables, one-night celebrations, or decorative glassware that will not sit near ice. White vinyl is more durable and better suited for handling, moisture, and longer display life. Clear film gives a “printed on glass” look, although light colors often need a white ink layer underneath or they disappear against the glass and liquid. Metallic film adds shine for premium favors, bottle-and-glass gift sets, or retail displays. Removable stock makes sense for rental glassware, reusable bar inventory, or short promotions where residue would create cleanup problems.
Adhesive matters just as much as face material. Permanent adhesive is the better fit for keepsake glassware, merchandise, and gift sets. Removable adhesive helps when the glass must be cleaned and returned to use. Moisture-resistant or freezer-grade adhesives can improve hold if glasses will be chilled, handled with damp hands, or placed near ice. Suppliers do not all use the same adhesive system, so the application environment belongs in the quote request, not as an afterthought after proof approval.
| Material | Best Fit | Typical Watchout | Common Cost Level |
|---|---|---|---|
| Paper label | Dry indoor favors and short events | Weak around condensation | Low |
| White vinyl | Bars, tastings, giveaways, and keepsakes | Can look bulky if oversized | Medium |
| Clear film | Minimal logo decals and premium presentation | Light artwork may need white ink | Medium to high |
| Metallic film | Luxury events and gift sets | Fine details can lose contrast | High |
| Removable stock | Rental glassware and temporary promotions | Lower long-term hold | Medium |
Finish changes both durability and perception. Gloss makes color pop and photographs brightly, but glare can reduce readability under flash or bar lighting. Matte softens reflections and often feels more refined. Soft-touch can be elegant, though it may show oils from fingers. Spot UV or foil can emphasize a logo mark, but those finishes add setup and require cleaner artwork. Lamination is less flashy. For moisture, scratch resistance, and repeated handling, it is often the practical upgrade that keeps the piece from looking tired halfway through an event.
Shape is the final constraint. Circles and ovals usually behave well on curved glass because they have fewer long edges fighting the surface. Rounded rectangles are safer than sharp-cornered rectangles. Contour-cut decals can look crisp, but tiny protruding points may lift or catch during handling. If the glass sticker is part of a broader branded set, it should be planned alongside menus, cartons, inserts, sleeves, and Custom Labels & Tags, not treated as a stray decoration ordered at the end.
Practical callout: if a shot glass will be cold, wet, or handled for more than a few minutes, basic paper should not be the default. Ask for vinyl, film, lamination, or a moisture-rated adhesive before accepting the lowest unit price.
Design Specs That Keep Tiny Glass Stickers Readable
Miniature labels punish clutter. A design can look clean on a 27-inch monitor and collapse into noise once reduced to a one-inch mark on curved glass. That is not always a design failure. It is physics, optics, ink behavior, and human attention colliding.
Start with fewer words. A logo, two initials, one date, or a short phrase usually works better than a full line of sentiment. For type, favor bold letterforms, open counters, and strong contrast. Hairline scripts can look beautiful on invitations but break down quickly on a 0.9-inch label. If script is non-negotiable, use it for one large word and keep the supporting text in a clean sans serif.
Vector artwork is preferred for logos and line art because it scales cleanly. Raster images should generally be supplied at 300 DPI at final print size. Build in bleed, often around 0.0625 to 0.125 inches depending on the supplier, and keep critical text inside a safe zone. On small die cuts, safe zones matter more than many buyers expect. A name that sits too close to a circular edge may look centered in a PDF but visually cramped after cutting.
Clear labels need another check: white ink. White ink acts like an undercoat, making pale colors visible against glass, liquid, and background surfaces. Without it, white type may not print at all, and light beige, blush, gold, or gray can become ghostly. Some clear labels intentionally skip white ink for a subtle etched look. That can be attractive, but it should be a choice, not a surprise.
Color expectations deserve a sober conversation. Screens use light; printing uses ink. PMS matching may be possible, but substrate, lamination, clear film, and label size can shift the result. For brand programs, provide exact color references and request a proof. For one-off events, visual consistency may matter more than laboratory-level color matching.
Glass and liquid color change the artwork too. Clear tequila leaves the label exposed. Amber whiskey warms everything behind it. Dark cocktails can swallow transparent designs. Frosted glass lowers contrast. Even the table surface matters if the glass is clear. A delicate pale-gold mark may sound perfect for champagne, candlelight, and beige linens. Elegant? Yes. Readable? Barely.
Use hierarchy by purpose. For brand activations, the logo should win. For weddings, names and date usually come first. For tasting sets, flavor, proof, or SKU should be legible before decorative art. QR codes need special caution: many require roughly 0.8 inches or larger, strong contrast, and enough quiet zone around the code to scan reliably. Test with multiple phones at final size, not from a zoomed-in proof.
- Logo files: AI, EPS, SVG, or high-resolution PDF are usually safest.
- Raster images: 300 DPI at final size is the baseline, not an upgrade.
- Bleed: allow extra artwork beyond the cut edge to prevent white slivers.
- Safe zone: keep text away from edges, especially on circles and die cuts.
- Clear labels: confirm white ink requirements before proof approval.
Pricing, MOQ, and Unit Cost Variables to Check Before Ordering
The price of custom shot glass stickers is not driven by size alone. A one-inch label can be inexpensive or surprisingly costly depending on material, finish, quantity, setup, proofing, cut complexity, and deadline.
Main cost drivers include sticker dimensions, print coverage, lamination, foil, spot gloss, contour cutting, number of artwork versions, and whether labels arrive on rolls or sheets. Rolls are efficient for machine application or fast hand application in a production line. Sheets can be easier for small teams labeling glassware at a prep table before an event.
MOQ, or minimum order quantity, varies by production method. Digital printing often supports smaller runs, sometimes starting around 100 to 250 pieces. Specialty finishes, metallic stocks, custom dies, and complex kiss-cuts may push minimums higher, often into 500, 1,000, or more. That is not just supplier preference. Setup time, press calibration, waste, finishing steps, and inspection still exist even when the sticker is tiny.
Unit cost usually drops as volume rises because setup is spread across more pieces. As a planning range, a simple small paper or vinyl label may land around $0.12 to $0.35 per piece at moderate quantities. Premium clear film, foil, metallic stock, or specialty finishes can move into the $0.40 to $1.20 range depending on complexity and quantity. Very small orders may cost more per unit because proofing and setup do not shrink in proportion to the label size.
Quote details can change the number quickly. Art cleanup may add cost if the only logo available is a low-resolution screenshot. Extra proof rounds may be billed after one or two revisions. Rush production, expedited shipping, split shipments, and multiple versions can raise the final price. If you need 12 different flavor labels at 100 pieces each, do not price it like one 1,200-piece label run.
For a cleaner quote, send exact size, quantity, material preference, finish, deadline, artwork files, application environment, and whether the labels need to resist condensation or light handwashing. Mention if the glass is tapered. Better yet, send a photo with a ruler in frame. The smallest missing detail often creates the largest delay.
Industry groups such as PMMI track how packaging automation and production workflows affect cost, waste, and throughput across categories. Shot glass labels are much smaller than a carton line, but the same logic applies: setup, changeovers, materials, and inspection time all show up somewhere in the price.
Process and Timeline: From Artwork Proof to Ready-to-Apply Stickers
A good order starts before anyone opens a print file. Choose the glass style. Measure the printable area. Select the material. Submit artwork. Review the proof. Approve production. Then the labels print, finish, cut, pack, and ship. It sounds linear, but delays usually happen in the middle.
Simple digital labels may move through production within several business days after proof approval, depending on queue and quantity. Foil, layered white ink, spot UV, specialty die cuts, and large-volume runs add steps. Each added process introduces another setup, another inspection point, and another chance for a missed approval to slow the job.
Build buffer time if the labels are tied to an event. The risk is rarely printing alone. It is artwork revision, unclear sizing, delayed proof approval, shipping transit, and the late discovery that someone needs 75 extra glasses for VIP bags. Application time matters too. Applying 500 tiny labels by hand can take several hours if alignment needs to look clean.
- Measure first: confirm the glass diameter, height, and usable front panel.
- Mock up: print a paper version at actual size and tape it to the glass.
- Proof carefully: check spelling, date, color, cut line, scale, and version count.
- Approve production: only after the proof matches the actual use case.
- Plan application: clean the glass, label at room temperature, and allow adhesive to settle.
A practical schedule works backward from the event date: gather artwork and glass details first, approve the design proof next, allow production after signoff, ship after quality checks, then reserve time for application. Add a few extra days for transit and hand labeling. Couriers and human hands do not care how good the proof looked on screen.
Testing one physical sample on the actual glass is the best insurance, especially for tapered shot glasses, textured glass, frosted surfaces, or wraparound labels. A straight rectangle may look level in a PDF and slant visually once applied to a cone-shaped glass. That small distortion can make the finished packaging feel careless even when print quality is excellent.
If the order belongs to a larger promotion, coordinate the sticker with coasters, inserts, sleeves, cartons, or Custom Packaging Products. Consistent branding does not mean every item repeats the same artwork. It means each component feels like it came from the same decision-making process.
Ordering and Application Mistakes That Waste Good Labels
The most common mistake is ordering a sticker that is technically beautiful but too large for the glass curve. Long edges lift. Rectangles wrinkle. Alignment gets strange. A 2-inch-wide label can feel modest on screen and oversized on a narrow shot glass.
Artwork mistakes follow close behind. Thin fonts vanish. Low-resolution logos pixelate. Missing bleed creates uneven edges. Overly detailed illustrations turn into noise. QR codes may print cleanly but fail to scan because they were reduced past their functional limit. If a design has to be explained, simplify it before printing.
Material mismatches can waste an entire order. Basic paper labels may be fine for dry favor tables, but they are a poor match for wet bars, outdoor receptions, chilled drinks, or glassware handled with damp hands. Alcohol splashes can also attack some inks and coatings. Ask for the right construction rather than assuming “sticker” means “waterproof.”
Application errors are painfully avoidable. Dirty glass blocks adhesion. Fingerprints on adhesive weaken the bond. Cold or wet surfaces cause failure. Rushed alignment makes the batch look uneven. Stacking glasses immediately after labeling can scuff the finish or shift edges before the adhesive settles.
- Test fit: place one label on the actual glass before applying the full batch.
- Check distance: read the design from arm’s length, not only up close.
- Condensation test: chill one filled glass and inspect adhesion after 20 to 30 minutes.
- Batch review: apply 10 labels, inspect them, then continue if placement is consistent.
- Handling check: rub lightly with dry and damp fingers to see how the finish behaves.
Storage is another quiet failure point. Keep labels flat, dry, and away from heat before application. Do not leave them in a hot car or damp event storage room. Adhesives and liners are more stable than they used to be, but they are still materials with limits.
There is also a sustainability angle. If labels are intended for short-term use, avoid overbuilding the specification just for bragging rights. If they are meant to become keepsakes, avoid underbuilding and creating waste through early failure. The EPA’s waste management hierarchy is a useful reminder: reduction and reuse usually beat fixing avoidable waste after the fact.
Next Steps: Build a Shot Glass Sticker Order That Holds Up
Start with the glass, not the artwork. Measure the usable area, choose label placement, decide whether the sticker is temporary or keepsake-grade, then estimate the exact quantity plus extras. That order of operations prevents most expensive surprises.
Gather the right files and facts before requesting a quote: logo, text, preferred colors, label dimensions, glass photos, event date, quantity, material preference, and finish examples. If the stickers will be applied to glassware that sits near ice, say so. If the glasses are decorative and will never be washed, say that too. The right specification depends on use.
Order 5% to 10% extra for application mistakes, VIP additions, vendor samples, damaged glassware, or guest count changes. For small runs under 100 pieces, the higher side is safer because one mistake has a larger percentage impact. For larger event or wholesale batches, extras are still cheap insurance compared with reprinting a small emergency run.
Before approving production, print a paper mockup at actual size, cut it out, tape it to the shot glass, and photograph it from table distance. Not glamour photography. Real distance. Real lighting. Real hands holding the glass. If the label fails there, revise before money goes into production.
For buyers already managing Custom Printed Boxes, tasting kits, or retail packaging, treat the glass label as one more visible touchpoint in the customer’s path. It does not need to carry the entire brand story. It does need to match the tone, quality, and purpose of the surrounding materials.
Once size, material, artwork, pricing, and timeline are clear, custom shot glass stickers become a controlled branding detail instead of a last-minute gamble.
FAQ
What size should custom shot glass labels be?
Most front-facing shot glass labels work best between about 0.75 and 1.5 inches wide, depending on the glass shape. Measure the usable area, then leave space around the edges so the sticker does not wrinkle on the curve. Print a paper mockup at actual size before approving production.
Are custom shot glass stickers waterproof?
They can be water-resistant or waterproof if made with vinyl, film, lamination, and the right adhesive. Basic paper stickers are usually not ideal for chilled drinks, condensation, or bar environments. Tell the supplier if the glasses will sit in ice, be handled wet, or need to survive light washing.
Can I put custom decals on tapered shot glasses?
Yes, but tapered glass makes sizing and shape more important because straight rectangles can skew or lift. Smaller centered stickers, ovals, circles, or custom contour cuts usually apply more cleanly than wraparound labels. A physical sample test is strongly recommended for unusual glass shapes.
How much do shot glass stickers cost per piece?
Unit cost depends on quantity, size, material, finish, shape, and production method. Simple small labels may cost only a few cents more or less based on volume, while premium clear film, foil, metallic stock, or specialty finishes can cost much more. Small runs usually have higher per-piece costs because setup and proofing are spread across fewer labels.
How early should I order custom shot glass stickers for an event?
Start once the glass size, artwork, and event date are known. Build in time for proofing, revisions, production, shipping, and applying the stickers to the glasses. For weddings, launches, or large branded events, avoid last-minute artwork approval because transit and application time are common bottlenecks.


