A plain trailer gets ignored. Add the right graphics and the same box becomes a moving sign at traffic lights, job sites, curbside pickups, restaurant lots, trade shows, and customers’ driveways.
That sounds simple because stickers sound simple. They are not. Trailer decals sit outside through UV exposure, rain, road grit, diesel film, pressure washing, tool scuffs, and the occasional parking-lot mistake. A thin indoor sticker with optimism is not built for that assignment.
Good trailer graphics combine outdoor-rated vinyl, weather-resistant adhesive, UV-stable ink, and usually a protective laminate. The job is not just to stick. The job is to stay readable, stay clean at the edges, and still look like it belongs to your business after the first dirty highway trip.
Custom Stickers for Trailers Are Road Signs You Own
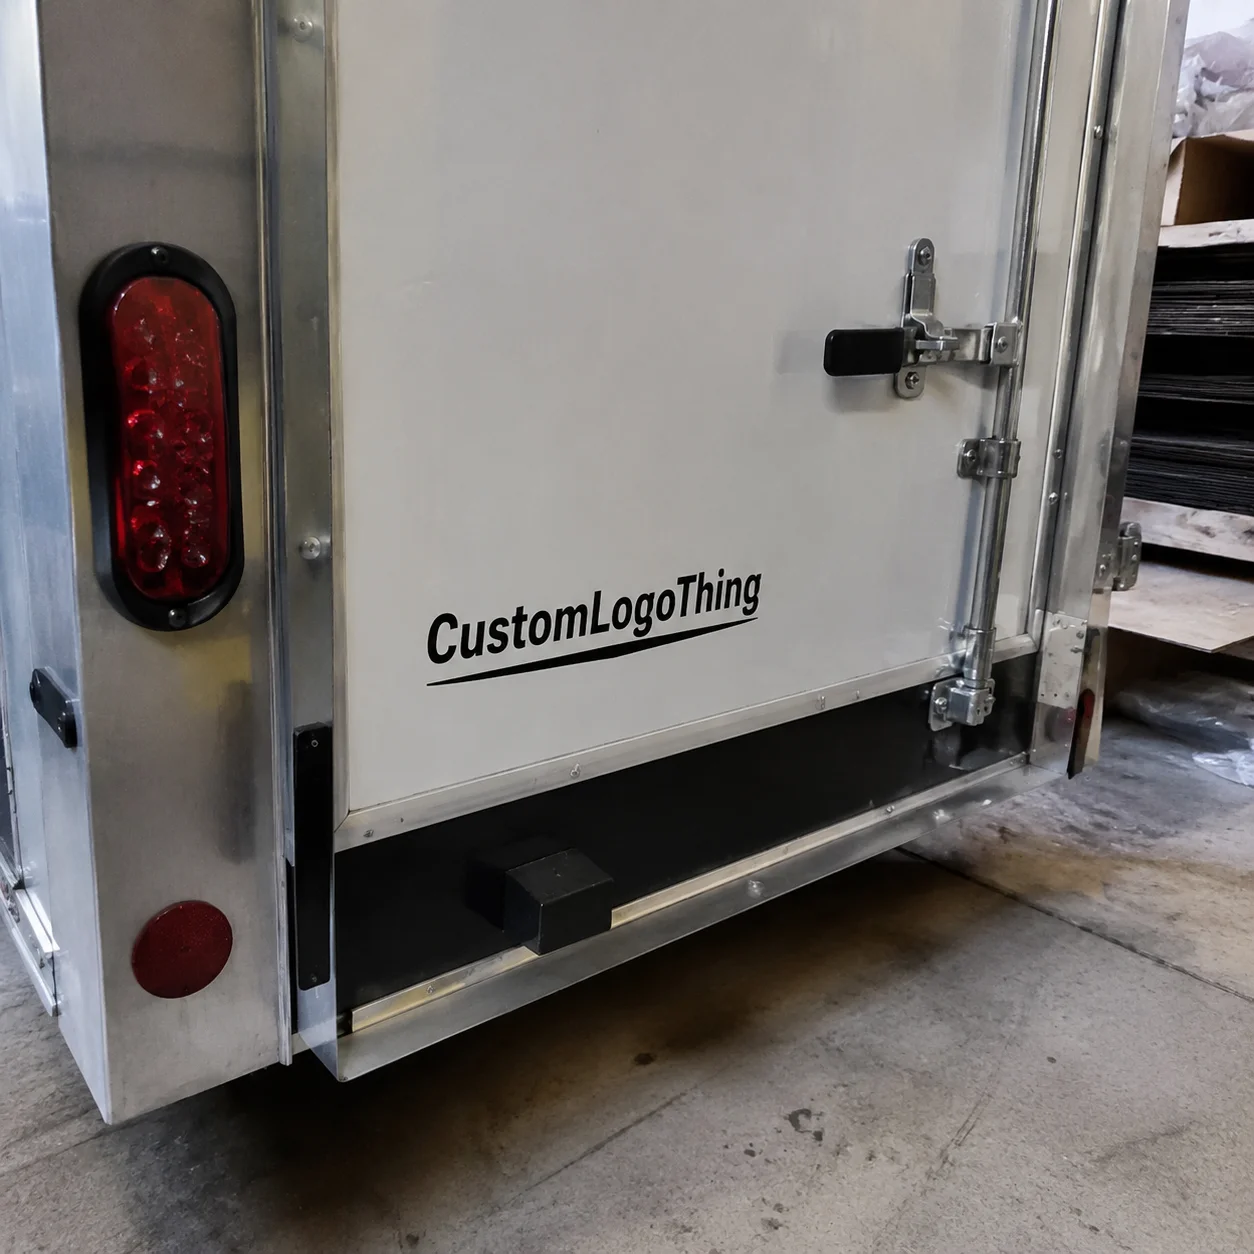
Custom stickers for trailers are adhesive graphics made for enclosed trailers, utility trailers, cargo trailers, food trailers, landscaping trailers, horse trailers, service trailers, and fleet trailers. Some are small logos on a door. Some are long lettering strips with a phone number and website. Others are reflective safety markings, DOT-style identification decals, or near-wrap graphics that cover most of a side panel.
Same product family. Very different production problems.
A 12-inch toolbox logo might ship flat in a mailer and install in five minutes. A 96-inch side graphic for an enclosed trailer may need transfer tape, panel splits, registration marks, a helper, and an installer calm enough not to panic when vinyl touches the surface slightly crooked. Large decals do not forgive hesitation. Vinyl is a material, not a magic carpet.
From a buyer’s point of view, trailer stickers sit between signage and packaging design. They need the clarity of a road sign and the brand consistency of product packaging. If your business already uses Custom Labels & Tags, custom printed boxes, or retail packaging, your trailer should not look like it belongs to a different company. Match the logo, colors, type style, and core message. Brand recognition should not stop at the carton.
Most trailer graphic orders fall into five practical categories:
- Small logo stickers: Usually 6 to 24 inches wide for doors, toolboxes, fenders, coolers, or rear panels.
- Medium branding decals: Often 24 to 60 inches wide for side panels, rear doors, or service identification.
- Long lettering decals: Website, phone, service area, license numbers, or safety text, often 36 to 120 inches wide.
- Reflective graphics: Used for nighttime visibility, emergency service vehicles, roadside work, safety markings, or rear-door warnings.
- Full or partial wraps: Large-format graphics covering major trailer areas, usually requiring professional design and installation.
The design standard is brutal: trailers are viewed from distance and motion. Your decal is not a brochure. It gets maybe three seconds. Logo. Service. Phone or website. That is usually enough.
How Trailer Decals Work: Vinyl, Adhesive, Ink, and Laminate
A trailer decal has four working parts. The vinyl film carries the design. The adhesive bonds the film to the trailer. The ink creates the graphics. The laminate protects the print from sunlight, cleaning chemicals, abrasion, and weather. Cheap one-layer stickers skip the armor and then act surprised when the road eats them.
Calendared vinyl is the common budget option. It is thicker and less conformable than cast vinyl, but it can work well on smooth, flat trailer panels for short-to-medium outdoor use. A typical outdoor rating may land around 3 to 5 years depending on the film brand, exposure, ink system, laminate, and cleaning routine.
Cast vinyl is thinner, more flexible, and better for curves, rivets, mild corrugation, or higher-end fleet graphics. It is usually the stronger choice when the decal must conform around panel features or hold a cleaner edge over a longer service life. It costs more because the material performs better in harder conditions.
Reflective vinyl improves visibility at night when headlights or work lights hit it. It is useful for service fleets, utility trailers, roadside work, rear-door warnings, and safety graphics. It can be stiffer and more difficult to install than standard white vinyl, and pricing is higher. Confirm the specific film rating before ordering, especially if the decal supports commercial safety requirements.
Surface compatibility deserves more attention than it gets. Painted metal, smooth aluminum, fiberglass, glass, and clean powder-coated panels usually work well after proper prep. Smooth plastic trim can work, but low-energy plastics may need testing. Textured, rusty, chalky, oily, oxidized, or silicone-contaminated surfaces are where adhesion goes to fail. The adhesive needs a clean, stable surface, not a layered history of wax, dust, and road grime.
Laminate is usually worth the money. It helps resist UV fading, rain, abrasion from road debris, pressure washing mistakes, and scratches from straps or tools. Gloss laminate gives brighter color pop. Matte looks more commercial and cuts glare. Specialty laminates can add anti-graffiti properties or extra abrasion resistance, though most standard business trailers do not need that spend.
Removable adhesive makes sense for short campaigns, seasonal promotions, temporary event trailers, or leased equipment. Permanent outdoor adhesive is the normal choice for business trailers and fleet branding. If the graphic needs to survive summers, winters, washing, and daily use, permanent adhesive with laminate is the safer default.
Buyer rule: If the trailer earns money, do not treat the decal like a party favor. Use outdoor vinyl, UV-resistant print, and laminate unless the graphic is intentionally temporary.
Key Specs to Decide Before You Ask for a Quote
A printer can quote faster when you bring real specs. “I need Stickers for My trailer” starts the conversation, but it does not price the job. Before contacting a supplier, gather the trailer type, panel dimensions, decal size, quantity, surface material, finish, expected outdoor lifespan, installation method, and deadline.
Measure usable panel space, not just total trailer size. A 6-by-12 enclosed trailer may have seams, rivets, hinges, vents, handles, lights, trim, or reflectors that reduce the clean print area. Rear doors are especially awkward because hardware breaks up the space. Measure twice. Then take straight-on photos. Angled photos distort scale and invite guesswork, which is a terrible production method.
Typical sizes vary by placement:
- Door logos: 12 to 24 inches wide for compact branding near handles or cab-facing doors.
- Side-panel branding: 30 to 72 inches wide for business name, logo, and service category.
- Phone and website lettering: 36 to 120 inches wide, often installed as separate cut vinyl or printed strips.
- Rear-door graphics: 18 to 60 inches wide, depending on hinges, latches, windows, and safety markings.
- Oversized enclosed trailer graphics: 72 to 144 inches wide or more, usually split into panels for easier installation.
Readability beats decoration. A phone number that looks elegant on a laptop screen may be useless from two lanes over. Bigger type wins. Strong contrast wins. Fewer words win. Dark graphics on a white trailer are usually clear. White graphics on a black or dark trailer can look sharp. Gray on silver looks sophisticated until nobody can read it. Then it is just expensive camouflage.
Artwork files matter. Vector files are best for logos, icons, and lettering because they scale cleanly. Common vector formats include AI, EPS, SVG, and production-ready PDF. High-resolution raster files can work for photos or textured artwork, generally at 150 to 300 dpi at final size depending on viewing distance. Low-resolution screenshots are not artwork, no matter how often they arrive in quote requests.
If your brand also uses Custom Packaging Products, ask the printer to match existing colors and files where possible. Exact outdoor color matching can vary because vinyl, ink, laminate, surface color, and sunlight all affect appearance. Still, brand references help. For serious fleet work, Request a Printed sample or color proof before producing the full set.
Also decide whether the decals will be shipped for DIY installation or prepared for a professional installer. Larger jobs may need transfer tape, panel splits, registration marks, installation notes, or labeled sections. Those details add prep time but reduce application mistakes.
Cost and Pricing Factors for Trailer Stickers
Trailer sticker pricing depends mostly on size, vinyl type, laminate, quantity, contour cutting, artwork prep, shipping format, and whether installation is included. Small decals can be inexpensive. Large graphics can climb quickly because material usage, finishing time, waste risk, and installation difficulty all rise together.
| Trailer Graphic Type | Typical Size Range | Common Use | Rough Price Range |
|---|---|---|---|
| Small logo or ID decals | 6–24 inches wide | Doors, toolboxes, rear IDs, small branding marks | $5–$25 each |
| Medium door or panel decals | 24–60 inches wide | Business name, service type, phone, website | $25–$150 each |
| Large side graphics | 60–144+ inches wide | Major side-panel branding or partial coverage | $150–$800+ each |
| Reflective graphics | Varies by layout | Night visibility, safety, roadside service | Often 1.5–3x standard vinyl |
| Full or partial wraps | Large multi-panel coverage | Fleet branding, food trailers, promotional trailers | Often thousands with design and installation |
These are practical buying ranges, not universal law. A simple 18-inch one-color cut decal may cost far less than a full-color laminated decal with contour cutting. A 10-foot printed graphic with laminate and careful packing costs more than a stack of small labels because the shop uses more vinyl, ink, laminate, bench space, and human patience.
Unit cost usually drops with quantity because setup, file prep, color management, material loading, and production time spread across more decals. Printing one giant decal is rarely cheap. Machines are not sentimental. They do not care that you “only need one.”
Common quote variables include outdoor lifespan target, reflective vinyl, specialty laminate, rush production, custom shape cutting, multiple designs, artwork cleanup, and shipping tube size. Large graphics often ship rolled in tubes, and oversized tubes can cost more than people expect. That is partly carrier pricing, partly packaging protection, and partly the reality of sending long, bend-sensitive material across the country.
For most businesses ordering trailer decals, the best tradeoff is simple: spend on laminate before fancy effects. Simplify shapes if contour cutting is driving up cost. Order spares for smaller decals, especially phone numbers, door marks, toolbox labels, or fleet IDs. A $12 spare can save you from a mismatched replacement six months later.
If sustainability claims matter to your brand, ask about material sourcing and production waste. Outdoor vinyl is not the same conversation as paperboard or FSC-certified retail cartons, but responsible purchasing still starts with better questions. For broader packaging sourcing standards, the Forest Stewardship Council is useful when reviewing paper-based packaging and branded collateral alongside vehicle graphics.
Process and Timeline: From Artwork to Installed Graphics
The normal process is straightforward: measure the trailer, choose decal locations, prepare artwork, request a quote, approve a proof, print, laminate, cut, package, ship, and install. None of those steps are exotic. Skipping one is how people end up with crooked graphics, wrong phone numbers, or decals that fight the installer.
Simple reorders may be produced in a few business days if the supplier already has approved files and material in stock. First-time custom jobs often take about one to two weeks from usable artwork and proof approval. Larger fleet sets, reflective layouts, or wrap-style projects need more planning, especially if installation has to be scheduled around working vehicles.
The proof is not decoration. It is the checkpoint. Review spelling, phone numbers, website URLs, logo placement, dimensions, panel breaks, colors, and trim lines. Yes, especially the phone number. It is amazing how often the number is the thing nobody checks because everyone assumes someone else checked it.
Production usually follows a predictable sequence. The shop prints the artwork on outdoor vinyl, lets the ink cure if required, applies laminate, trims or contour cuts the shapes, weeds excess vinyl when applicable, adds transfer tape for cut lettering or multi-part decals, and packs the order flat or rolled. Larger graphics may be labeled by side, position, or panel number to help installation.
Shipping timing deserves respect. Small decals often ship flat, which helps keep them easy to handle. Large graphics ship rolled in tubes. Extreme heat or cold during delivery can affect installation timing, so let the material acclimate indoors before applying it. Cold vinyl can be stiff. Hot vinyl can stretch. Neither mood is helpful.
Do not plan an event, launch, or fleet rollout the morning after approving artwork unless rush timing is confirmed in writing. If you need graphics for a trade show, grand opening, mobile food launch, or inspection, build in padding. A safe production window beats a dramatic email thread every time.
For shipping and package testing standards on broader branded packaging programs, organizations such as ISTA provide useful context around transport conditions. Trailer decals are not tested like cartons, but the thinking overlaps: design for the real handling environment, not the cleanest version of it.
Common Mistakes That Make Trailer Graphics Fail Early
Poor surface prep causes many early failures. Dirt, wax, silicone, rust, oxidation, diesel residue, and oily film block adhesion. The sticker gets blamed, naturally, but the surface was the problem. Clean means clean. For most smooth trailer surfaces, that means washing first, drying fully, and using an appropriate final wipe such as isopropyl alcohol before installation.
Fresh paint is another trap. Paint needs time to cure before adhesive graphics are applied. Depending on the paint system and conditions, that can mean several days to several weeks. Install too soon and the decal may bubble, bond badly, or damage the finish during removal. If the trailer was recently repainted, ask the painter for the cure window.
Bad sizing can ruin good material. Graphics crossing hinges, rivets, seams, vents, corrugation, diamond plate, or door gaps need planning. Sometimes the right answer is to split the artwork. Sometimes it is to move the design two inches. Sometimes it is to accept that the panel is not a billboard, despite the optimistic tape measure.
Skipping laminate is risky on working trailers. Landscaping trailers, construction trailers, cargo trailers, and food trailers face UV, rain, gravel, straps, tools, grease, and pressure washing. Unlaminated print may be fine for a short promotion, but for business branding it is usually false economy. Saving a little up front and replacing graphics early is not a discount. It is a payment plan for annoyance.
Temperature matters during installation. Many vinyl films prefer moderate conditions, often around 50°F to 90°F, though exact ranges depend on the material. Too cold and the adhesive will not flow properly. Too hot and the vinyl can soften, stretch, or become hard to position. Wind is also not your friend. Installing a 6-foot decal outdoors on a breezy day is a hobby for people who enjoy suffering.
Design clutter is another quiet killer. Tiny text, five services, three phone numbers, social icons, a slogan, a QR code, and a paragraph of credentials will not make the trailer more useful. It will make it unreadable. Three strong message points usually beat a brochure slapped on wheels: brand name, what you do, how to contact you.
Pressure washing can lift edges if the nozzle is too close or aimed into the decal seam. Use a wider spray pattern, keep distance from edges, and avoid blasting upward into overlaps or cuts. Good vinyl is durable. It is not invincible.
Measure, Choose, Proof, and Order with Fewer Surprises
Ordering custom stickers for trailers gets easier when you bring the right information. Start with photos. Take one straight-on photo of each trailer side, including the rear. Then measure usable panel areas, not just the whole trailer. Note hinges, rivets, vents, latches, lights, windows, seams, trim, and any textured areas that might affect placement.
Decide where the logo, service description, phone number, website, and service area should go. Keep the hierarchy simple. A side panel might carry the logo and main service. The rear might carry the phone and website for drivers behind you. A small door decal might repeat the brand. That structure works better than cramming every selling point into every location.
Choose the product level based on lifespan and surface:
- Budget vinyl: Best for short-term promotions, temporary campaigns, or smooth flat surfaces with limited lifespan needs.
- Laminated outdoor vinyl: The best default for most business trailers, cargo trailers, and service trailers.
- Cast vinyl: Better for curves, rivets, premium durability, and higher-end fleet consistency.
- Reflective vinyl: Best for visibility-focused graphics, rear markings, safety cues, and roadside service branding.
Send the supplier trailer photos, measurements, logo files, quantity, desired finish, deadline, shipping address, and installation plan. If you need matching decals for multiple trailers, say that early. Fleet consistency affects file setup, color control, and spare planning.
Ordering one extra set of smaller decals is cheap insurance. Door logos, toolbox marks, phone numbers, and small service labels get damaged, removed, or needed for new equipment. Trying to color-match a one-off replacement later can be irritating, especially if the original material, laminate, or print profile changed.
Review proofs slowly. Check spelling, phone numbers, sizing, edge placement, panel breaks, contrast, and whether important text lands near hinges or seams. Ask questions before approval, not after the print is laminated and cut. Production files are not mind readers.
Good trailer graphics do the same job as strong branded packaging: they make the business recognizable before anyone speaks to you. The best custom stickers for trailers start with a clean surface, a readable layout, the right vinyl, realistic pricing, and a deadline that does not require miracles.
FAQ
How long do custom trailer stickers usually last outdoors?
Outdoor laminated vinyl trailer stickers commonly last about 3–7 years depending on material grade, sun exposure, cleaning habits, climate, and how much road abrasion the trailer sees. Reflective and specialty films can have different lifespan ranges, so confirm the material rating before ordering.
What size should logo decals be for an enclosed trailer?
For side panels, many businesses use decals between 18 and 48 inches wide depending on trailer size and viewing distance. Phone numbers and websites should be large enough to read from traffic, often with fewer words and stronger contrast than a normal printed sign.
Can I install trailer decals myself?
Small and medium decals are usually realistic for careful DIY installation if the surface is clean, smooth, and dry. Large side graphics, reflective films, riveted panels, and multi-piece layouts are better handled by an experienced installer unless you enjoy buying replacement decals.
What affects the cost of custom stickers for cargo trailers?
Main cost drivers include decal size, vinyl type, laminate, quantity, contour cutting, artwork cleanup, reflective material, rush production, and installation needs. Ordering multiple decals or fleet sets usually reduces the unit cost because setup and production time are spread across the run.
Will trailer stickers damage paint when removed?
Quality vinyl usually removes cleanly from sound, fully cured paint, especially with heat and proper removal technique. Damage risk rises with old paint, rust, oxidation, low-quality repaint jobs, overly aggressive adhesive, or decals left in place past their intended service life.


