A cap is not a cheap little add-on once customers are paying for it. Custom Trucker Caps for ecommerce merch sit on someone’s head, show up in customer photos, get packed into gift bundles, and carry your logo through ordinary places where the difference between “retail product” and “trade show leftover” is painfully easy to spot.
That is the real job. A trucker cap has to work as apparel, packaging touchpoint, mobile brand marker, and small retail experience at the same time. If the crown collapses, the embroidery puckers, the patch is crooked, or the mesh feels harsh against the head, customers notice before they read the product description.
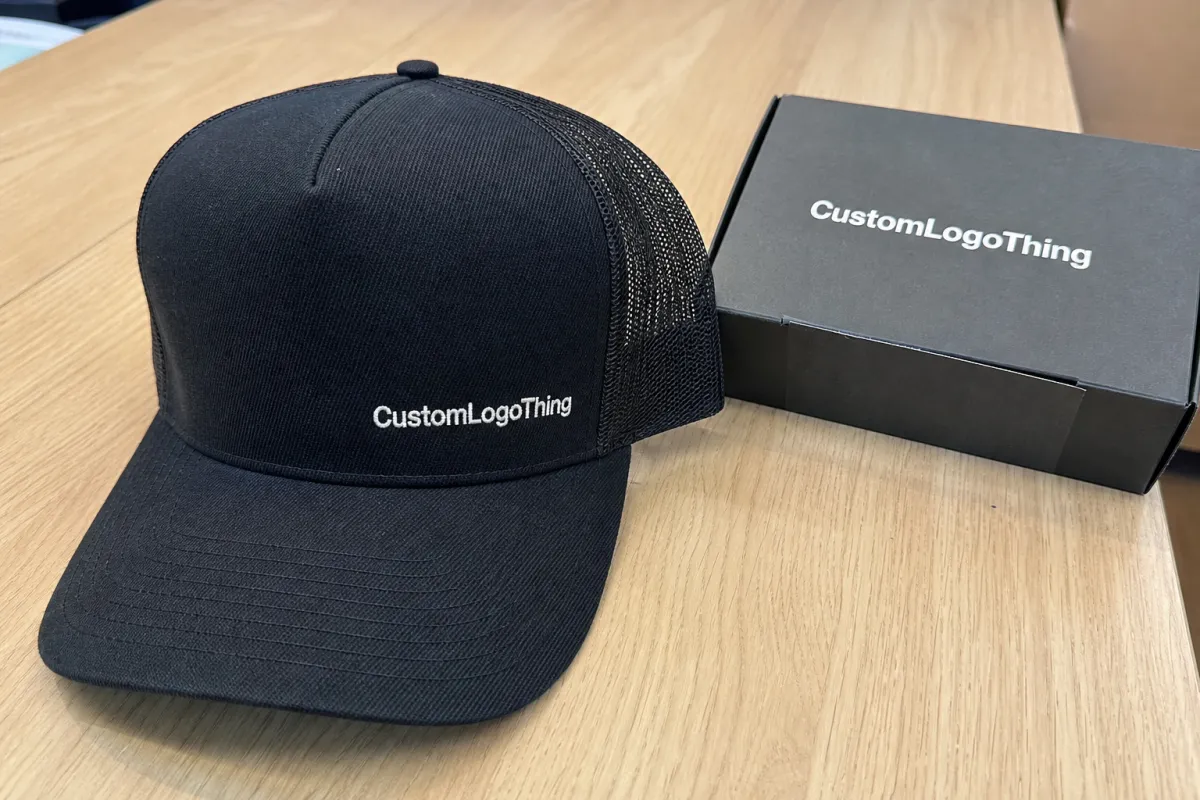
What Custom Trucker Caps for Ecommerce Merch Need to Do
Custom Trucker Caps for ecommerce merch are branded mesh-back caps made for online stores, creator drops, product bundles, events, loyalty rewards, and brand communities. They are different from giveaway hats because the buyer expects a finished product, not a logo-bearing object that was selected only because it was inexpensive.
Trucker caps work well online because they are lightweight, familiar, and visually clear. A typical cap weighs about 70 to 110 grams, which keeps shipping manageable compared with hoodies, drinkware, or rigid gift items. The front panel gives the logo a strong field, the snapback covers a broad size range, and the style fits many categories: outdoor, motorsport, coffee, brewery, food, fitness, streetwear, creator merch, and workwear-inspired lifestyle brands.
Before ordering, the buyer needs to define the cap as a real product spec. That means profile height, panel structure, mesh color, bill shape, closure, decoration method, artwork size, quantity, packaging, carton labeling, and fulfillment destination. “A black trucker with our logo” is a starting point, not a production brief.
The aim is not to find the cheapest hat that can physically hold a mark. The aim is to choose a cap that people will wear, photograph, reorder, and recommend without feeling like unpaid booth staff. The blank, decoration, and packing method all have to support the retail price you plan to charge.
Buyer rule: if the cap is sold as merch, it needs to feel like merch. If it feels like a freebie, price it like a freebie or improve the spec.
Ecommerce adds another constraint: the cap has to survive warehouse handling and parcel shipping. A good-looking hat that arrives crushed in a thin mailer is no longer a good-looking hat. It is a customer service ticket with mesh panels.
How Construction Affects Fit, Feel, and Perceived Value
A trucker cap is built from several parts that shape the final impression: front panels, mesh back, bill, sweatband, crown height, closure, internal buckram, taping, and top button. Change one piece and the whole fit can shift. That is why two caps with the same logo can feel like completely different products.
High-profile trucker caps usually have a taller crown and more logo space, often around 2.25 to 2.75 inches of practical front decoration height depending on the style. They look bold and retail-heavy, especially with patches or foam-front graphics. Mid-profile caps are safer for many ecommerce brands because they suit more head shapes without looking too tall. Low-profile caps feel relaxed and casual, but they limit decoration size and can make patches harder to position cleanly.
Structured fronts use internal support, usually buckram or laminated material, to hold the crown shape. They photograph better, stack more neatly, and support embroidered or woven patches well. Unstructured fronts feel softer and more broken-in, but a heavy patch can pull the panel down or create rippling. That worn-in feel can be excellent for the right brand; it just needs decoration that respects the softer base.
Common front and mesh materials include cotton twill, polyester foam, canvas, nylon, performance blends, vintage-washed cotton, standard polyester mesh, and recycled mesh. Standard polyester mesh is affordable and consistent. Softer mesh costs more but feels better against the head, which matters if the cap is positioned as a premium retail item. Recycled mesh can support sustainability claims, but those claims should be backed by supplier documentation rather than broad language. For paper-based hang tags and packaging components, the Forest Stewardship Council is a useful reference for FSC-certified materials.
Closures deserve more attention than they usually get. Snapback is the broad-fit default and remains the most practical choice for many ecommerce stores. Strapback looks cleaner and can feel more retail. Hook-and-loop fits utility, outdoor, and workwear programs. Fitted sizing can feel premium, but only use it if your audience expects sizes and your store can handle exchanges.
A bargain blank might save $0.40 per unit, then create returns, discounting, and reviews that mention a “weird shape.” That is not savings. It is delayed cost.
Decoration Options: Embroidery, Patches, Printing, and Labels
The main decoration options are direct embroidery, woven patches, embroidered patches, leather patches, faux-leather patches, rubber patches, screen printing, heat transfers, and sewn labels. Each method has a useful lane. Each also has a failure mode.
Direct embroidery is best for simple logos, short text, and clean retail basics. It lasts well, looks familiar, and works nicely for repeat orders. The limits are small type, fine lines, gradients, and complicated shading. Most front cap embroidery looks best under roughly 8,000 to 12,000 stitches for a standard logo. Higher stitch counts can work, but they add cost and may stiffen the panel.
Woven patches are better for detailed logos, small lettering, and crisp marks. They use finer threads than standard embroidery, so they can hold detail without turning the artwork into fuzz. For many ecommerce brands, woven patches offer a strong balance of cost, detail, and perceived value.
Embroidered patches add texture and a classic merch feel. They work well for badges, outdoor marks, motorsport graphics, and heritage designs. The artwork still has to be simplified. A mascot with tiny facial features, distressed shading, and fourteen colors will not become charming just because it is stitched onto a curve.
Leather and faux-leather patches fit outdoor, coffee, brewery, automotive, ranch, and heritage-inspired brands. Debossed or laser-etched patches can look expensive without using bright color. The tradeoff is brand fit. A leather patch on a glossy beauty or candy-colored creator brand may feel misplaced. Faux leather can support vegan positioning, though buyers should ask about heat resistance, edge durability, and how the material behaves after repeated wear.
Screen printing and heat transfers make sense for foam-front trucker caps, novelty drops, and bold graphic merch. Foam fronts are built for large visual hits, especially retro or event-driven graphics. Durability depends on the ink system, transfer quality, and surface compatibility. Caps are not usually laundered like T-shirts, but abrasion, sweat, sun exposure, and packing pressure still matter.
| Decoration Method | Best Use | Typical Cost Impact | Watchout |
|---|---|---|---|
| Direct embroidery | Simple logos, clean text | Low to medium | Tiny type and gradients fail quickly |
| Woven patch | Detailed logos, small lettering | Medium | Needs controlled border, edge, and placement |
| Embroidered patch | Premium badges, outdoor marks | Medium to high | Too much detail becomes messy |
| Leather or faux-leather patch | Heritage, coffee, brewery, ranch, automotive | Medium to high | Brand fit and edge durability matter |
| Foam-front print | Bold graphics and novelty drops | Low to medium | Surface compatibility affects durability |
Placement changes perceived value as much as the decoration method. Front center is safest. Side embroidery can add a retail detail for about $0.50 to $1.50 more per unit, depending on stitch count and quantity. Back labels help with recognition in product photos and warehouse handling. Inside taping looks premium, but it increases complexity and is usually better for larger runs or private-label programs.
Pricing, MOQ, and Unit Cost Factors Buyers Should Expect
Custom cap pricing depends on blank quality, decoration method, stitch count, patch type, color count, quantity, packaging, and shipping method. A single universal price without specs is only a guess, even if it arrives in a confident tone.
Basic decorated trucker caps often land around $5 to $9 per unit at higher quantities. Mid-tier ecommerce caps commonly sit around $8 to $14 per unit with better blanks, patches, side details, or cleaner finishing. Premium patch caps, custom builds, special materials, private labels, or lower-volume runs can reach $12 to $22 or more depending on the final spec and freight.
MOQ is a cash-flow decision, not a bravery contest. Lower minimums reduce risk but raise unit cost. Higher quantities unlock better pricing but can trap cash in slow inventory if the design is untested. For smaller ecommerce brands, 100 to 300 units per colorway is often a practical test range. If you have preorder data, wholesale commitments, or past merch sales, 500 units or more can make sense.
Setup costs also belong in the budget. Embroidery digitizing may run $30 to $100 per logo. Patch sampling can run $50 to $200. Rubber patch molds may add $100 to $300 or more depending on size and complexity. These charges are not mysterious penalties; they are the cost of converting artwork into repeatable production.
Packaging changes the math. Individual polybags may add $0.05 to $0.20 each. Hang tags might add $0.15 to $0.60 depending on paper, string, and print. Branded mailer boxes improve presentation but can add $0.70 to $2.50 or more before fulfillment labor. If caps ship with other Custom Packaging Products, plan the box size and insert layout early so the crown is protected rather than flattened.
Compare total landed cost, not just the quoted cap price. A low unit cost paired with expensive air freight or extra handling can erase the savings quickly. Math has a way of finding the corner you tried to cut.
Process and Timeline From Artwork to Shipped Inventory
A normal cap order moves through spec selection, artwork review, quote, proof, sample or pre-production photo, bulk production, quality control, packing, freight, and delivery. Skipping approval checkpoints may save a day, then cost weeks if the wrong detail reaches production.
Artwork review and quoting often take 1 to 3 business days when the buyer sends complete information. Proofing can take 2 to 5 business days. Sampling may take 7 to 14 days when needed. Bulk production commonly takes 2 to 5 weeks. Freight can take a few days domestically or several weeks depending on origin, carrier, service level, and customs requirements.
Rush production is more realistic for simple embroidery on in-stock blanks. It becomes difficult with custom patches, dyed materials, private labels, unusual mesh colors, special packaging, or anything that requires tooling. If the launch date is fixed, build the merch calendar backward and include time for receiving, product photos, ecommerce listing setup, and warehouse intake.
Vector files are preferred because they scale cleanly. Embroidery still requires digitizing, so a vector logo is not automatically stitch-ready. Raster images can help as references, but a low-resolution PNG pulled from a website should not be treated as production art.
Review every proof with patience: cap color, decoration size, thread colors, patch border, patch edge, placement, closure, packaging, carton labeling, and delivery address. If a 3PL is involved, confirm barcode labels, SKU names, carton marks, and receiving rules before cartons leave production.
For shipping tests and parcel packaging, standards from ISTA can help buyers think through drop, vibration, compression, and transit stress. A formal lab test is not necessary for every cap drop, but the principle is useful: protect the product through the full shipping path, not only until it looks good on a sample table.
Step-by-Step Ordering Guide for Ecommerce Merch Teams
- Define the merch role. Decide whether the cap is a paid product, gift-with-purchase, subscription box item, influencer kit, event drop, or loyalty reward. A $32 retail cap needs a different spec than a free bundle item.
- Choose the cap silhouette. Select profile height, panel count, mesh style, bill shape, closure, and colorway before fine-tuning decoration. Fit comes first.
- Match decoration to the logo. Use embroidery for simple marks, woven patches for detail, leather or faux-leather patches for heritage texture, and foam-front printing for loud graphic drops.
- Set quantity from demand. Use email waitlists, preorder data, past merch sales, audience size, or wholesale interest. Ego is not demand forecasting.
- Request a complete quote. Send cap style, colors, decoration method, artwork, quantity, packaging needs, delivery address, and in-hand date.
- Review the proof like a buyer. Check spelling, scale, thread colors, patch border, logo alignment, and placement. Do not approve artwork while half-asleep at midnight.
- Plan receiving and fulfillment. Decide whether caps ship to your warehouse, 3PL, event location, or kitting partner before cartons are already moving.
Custom Trucker Caps for ecommerce merch also need to fit the rest of the customer experience. If your brand uses printed boxes, tissue, inserts, stickers, or other retail packaging, the cap should not feel like an unrelated item dropped into the order. A simple hang tag, clean polybag, and correctly sized shipper can add more perceived value than an extra thread color nobody will notice.
If you are building a broader merch kit, review the options under Custom Packaging Products early. Hats, stickers, postcards, and apparel need different carton protection than glass jars, rigid gift boxes, or heavy promotional products. Obvious, yes. Still missed often enough to mention.
Common Mistakes That Make Branded Caps Hard to Sell
The first mistake is choosing the cheapest blank and expecting a retail-quality result. Customers can feel bargain-bin construction in the crown, sweatband, bill, and snapback. A cap that feels flimsy at unboxing has to work too hard to justify its price.
The second mistake is using artwork that is too detailed for the chosen decoration method. Thin lines, tiny type, gradients, distressed textures, and complex mascots often need simplification or a patch. If the logo becomes unreadable below 2.5 inches wide, adjust it before production rather than hoping stitches will solve it.
Too many colorways can create another problem. Three or four cap colors sound exciting until each one needs photography, inventory tracking, ad creative, email placement, SKU setup, and storage space. One strong colorway usually beats four weak ones.
Fit gets ignored because mockups are polite liars. A cap can look excellent in a flat digital preview and fit like a salad bowl. Ask about profile, crown shape, bill curve, and closure range. For larger orders, get a physical sample or at least a production photo on an actual cap form.
Ecommerce listings need better photography than a flat mockup. Use front, side, back, lifestyle, and close-up decoration shots. Buyers want to see the mesh, closure, patch edge, crown shape, and bill curve. If they cannot understand the product visually, they hesitate, and hesitation lowers conversion.
Packaging decisions are not minor decoration trivia. A cap that arrives loose in a limp plastic bag or crushed in an undersized mailer loses value before the customer tries it on. The review usually mentions that part.
Lead time is the last common failure. Merch tied to a launch, event, holiday, or seasonal drop needs padding. Production is not a vending machine. Build in time for approvals, sampling, freight, receiving, product photos, listing setup, and any 3PL intake requirements.
Next Steps Before You Request Samples or Place an Order
Create a one-page cap brief before contacting suppliers. Include audience, use case, target retail price, preferred profile, color palette, decoration method, quantity range, delivery location, and launch date. A clear brief produces better quotes and fewer strange assumptions.
Prepare clean logo files and a simplified version for small decoration areas. If your logo only works when it is six inches wide, it is not ready for a cap front. It is a billboard with commitment issues.
Set the target margin before reviewing quotes. Work backward from retail price, expected outbound shipping, platform fees, packaging, fulfillment fees, return allowance, and ad cost. If a cap costs $11 landed and sells for $24, the margin may look comfortable until pick-pack fees, discounts, and acquisition costs appear.
Ask for physical samples when the order size or launch risk justifies it. A sample costs less than 500 caps nobody wants to wear. If timing is tight, request detailed production photos showing the front, side, back, inside, closure, decoration close-up, and packaging.
Decide how the caps will be packed: bulk cartons, individual bags, hang tags, custom labels, belly bands, or direct-to-3PL carton labeling. If the cap is part of a product bundle, align it with the broader package branding so the unboxing feels planned rather than assembled five minutes before pickup.
Build a pre-launch checklist before the purchase order is signed: approve proof, schedule product photography, create ecommerce listings, confirm inventory receiving, prepare email and SMS launch, set reorder triggers, and decide how you will handle slow-moving colors. Strong ecommerce merch is not only a good-looking cap; it is a product with a spec, a margin, a timeline, and a customer experience that hold together.
FAQ
What is the best MOQ for custom ecommerce trucker hats?
For testing demand, 100 to 300 units is usually a sensible starting range. If your audience is proven or you have preorder data, 500 units or more can lower unit cost. Avoid splitting a small order across too many colorways because each colorway needs enough inventory to stay available.
How much do custom mesh-back caps usually cost for an online merch store?
Basic decorated trucker caps often range from $5 to $9 per unit at higher quantities. Retail-ready ecommerce caps with better blanks, patches, labels, or packaging often range from $8 to $14 per unit. Premium custom caps can reach $12 to $22 or more depending on materials, decoration, quantity, and freight.
Which decoration method is best for custom trucker caps for ecommerce merch?
Direct embroidery works best for simple logos and clean text. Woven patches are better for detailed artwork and small lettering. Leather, rubber, faux-leather, or embroidered patches work well when the brand needs a more premium or category-specific look.
How long does production take for custom trucker caps?
Simple orders on in-stock caps may take about 2 to 4 weeks after proof approval. Custom patches, private labels, special materials, or overseas production can take 4 to 8 weeks or longer. Add buffer time for sampling, freight, receiving, product photography, and ecommerce launch setup.
How should ecommerce brands package custom caps for shipping?
Use individual polybags when you need basic protection and clean warehouse handling. Add hang tags, branded labels, or belly bands when the cap needs stronger retail presentation. Avoid crushing caps in undersized mailers; use packaging that protects the crown and keeps the decoration sharp on arrival.


