Custom Vial Stickers Are Tiny, But They Have Zero Room for Sloppy Specs
A beautiful vial can still look cheap if the label lifts, wrinkles, smears, or turns your ingredient panel into microscopic soup. Custom vial stickers are small, curved, and often handled by oily fingers, wet hands, gloves, or fulfillment teams moving too fast because gravity and deadlines remain undefeated.
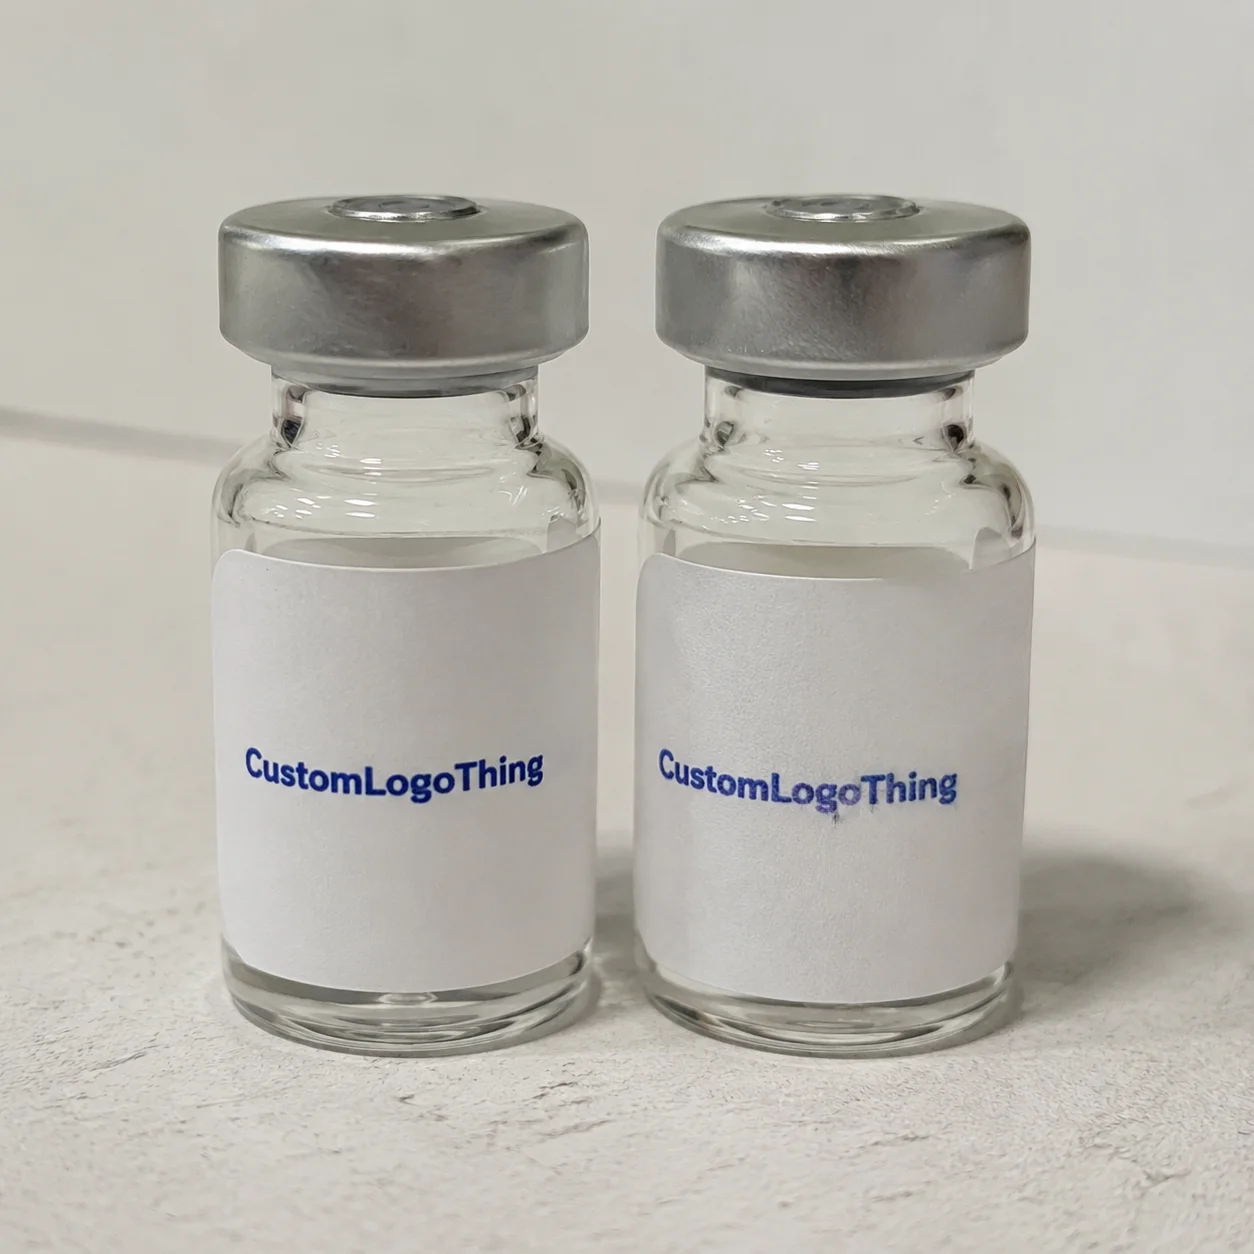
These labels are printed adhesive stickers sized for small cylindrical containers: serum vials, essential oil bottles, fragrance samples, lab tubes, supplement samples, cannabis or CBD sample vials where legal, and tiny promotional products. They can be decorative, functional, or both. A 10 ml glass vial may offer only 1.25 to 2 inches of usable label height, and the curve reduces how much copy a person can read in one glance.
Not every vial label has the same job. Decorative vial stickers carry the brand look. Compliance labels handle warnings, ingredients, dosage, volume, batch codes, or regulatory text. Batch labels support inventory and traceability. Tamper-evident seals bridge a cap and container to show opening. Wraparound product labels carry front, side, and back information in one continuous piece.
Small stickers are unforgiving. Cute, yes. Ruthless, absolutely.
A flat 3 x 3 inch sticker gives designers room to breathe; a vial label may need brand name, SKU, scent, concentration, barcode, lot number, and legal copy in a space smaller than a business card corner. Edges can lift at the seam, tiny type fills in, and glossy coatings can glare under retail lights. The defect rate does not have to be high to hurt. If 2% of labels lift on a 5,000-unit launch, that is 100 products someone has to inspect, rework, discount, or throw into the problem pile.
Typical buyers include skincare brands, fragrance houses, labs, supplement companies, sample programs, boutique makers, and product teams building branded packaging for subscription kits or trade show handouts. If the vial is part of larger custom packaging products, the label still needs its own spec. Matching a carton is nice. Staying stuck to glass after refrigeration is nicer.
The practical path is not mysterious: size the label correctly, Choose the Right adhesive and material, plan the artwork around the curve, approve a real proof, test if the surface or formula is tricky, and order with enough time to avoid launch-week panic.
How Vial Label Printing Works from Artwork to Finished Rolls
The workflow is simple on paper: choose the size, pick the material, prepare artwork, approve a proof, print, finish, cut, inspect, and pack. Trouble starts when one of those steps gets treated like a formality. On vial labels, a 1 mm sizing miss can create overlap, crooked seams, or exposed product information.
Most production orders are supplied as roll labels. Rolls are easier for hand application at scale and usually required for machine labeling. Sheet labels can work for test runs, internal samples, or 50-piece mockups, but they become annoying once someone has to peel and apply hundreds of tiny stickers by hand. A roll with the right liner spacing and release makes the job less miserable. Glamorous? No. Efficient? Yes.
Digital printing is common for short to mid-size runs, multiple scent versions, small batch labels, or variable data. It avoids some plate costs and is flexible for 500, 1,000, or 2,500 pieces. Flexographic printing usually makes more sense for larger repeat orders, especially when the same design runs at 10,000 pieces or more and unit cost matters. Flexo can also handle certain materials, varnishes, and production speeds better, depending on the supplier’s equipment.
Cutting matters more than buyers expect. Rectangles with rounded corners are common because sharp corners lift more easily on curved bottles. Circles, ovals, neck seals, tamper strips, and custom shapes all require clean die cutting. Rough edges on a 1-inch label look cheap immediately. There is nowhere to hide the mistake.
Finishes protect the print and change the look. Matte laminate gives a premium, soft retail packaging feel but can mute bright colors. Gloss laminate makes colors pop and improves moisture resistance, though fingerprints and glare show more. Soft-touch film feels expensive, but it can scuff depending on handling. Clear labels need white ink behind light colors or the design may disappear on amber glass, dark liquid, or a transparent vial. Metallic foil effects add shine, along with cost, setup, and proofing complexity.
Proofing should cover the dieline, bleed, safe zones, barcode size, copy placement, color expectations, roll direction, and white ink instructions. A decent proof is not decoration. It is the last cheap place to catch expensive problems.
Measure the physical vial. Do not trust only a product listing, supplier photo, or “standard 5 ml vial” description. Guessing is how labels become expensive confetti.
Key Specs: Size, Adhesive, Material, and Finish
Start with size. Measure the vial diameter, calculate circumference, then decide how much wrap coverage you actually want. Circumference equals diameter multiplied by 3.1416. If a vial is 18 mm wide, the circumference is about 56.5 mm, or 2.22 inches. A wrap label should usually leave a visible gap, often 1 to 3 mm, so the edges do not overlap or fight each other at the seam.
Height matters too. Leave clearance from the shoulder, base radius, cap, crimp, or any taper. A label that looks fine in a flat template can wrinkle when it crosses a curve. For narrow vials, a short front label may perform better than a full wrap label stuffed with copy.
Adhesive selection is not glamorous, which is why people ignore it until it ruins the order. Permanent adhesive works for most retail products. Removable adhesive fits temporary samples or lab identification where residue is a concern. Freezer-grade adhesive helps for cold storage or refrigerated samples. High-tack adhesive is useful on frosted glass, low-energy plastics, textured tubes, or containers that resist standard label bonding.
Materials drive durability. White BOPP film is a strong default for custom vial stickers because it handles moisture better than paper and gives a clean retail packaging look. Clear BOPP creates a no-label look on glass, especially with white ink under light graphics. Paper can work for dry indoor use, short-life samples, or budget labels. Textured paper looks premium for fragrance or apothecary-style package branding, but it dislikes oil and condensation. Polyester is tougher for demanding lab, chemical, refrigeration, or abrasion-heavy use.
Surface compatibility needs testing if the vial contains essential oils, alcohol, solvents, serums, or anything that may migrate onto the container. Glass, PET, HDPE, frosted coatings, ceramic finishes, and coated tubes all behave differently. Oil on the outside of the bottle can defeat a perfectly good adhesive. That is not the printer being dramatic; that is chemistry being rude.
| Material | Best Use | Typical Tradeoff |
|---|---|---|
| White BOPP Film | Moisture-resistant retail vial labels, skincare, supplements, samples | Less textured character than paper, but far better durability |
| Clear BOPP Film | No-label look on glass vials and fragrance samples | Usually needs white ink for readable light colors |
| Paper | Dry indoor samples, low-handling uses, budget runs | Weak around oils, condensation, and abrasion |
| Textured Paper | Premium boutique packaging design and apothecary branding | Higher cost and lower moisture resistance |
| Polyester | Lab, industrial, chemical splash, refrigeration, heavy handling | More expensive and less “soft” visually |
Readability has hard limits. For tiny labels, body copy often needs to stay around 5 to 6 pt minimum, and that assumes a clean font, strong contrast, and a quality print process. Legal text may demand larger sizes in regulated categories, so do not design first and ask compliance later. Barcodes and QR codes need enough quiet zone and physical size to scan; many tiny QR codes fail because someone shrank them until they looked “balanced.” Balanced and useless is still useless.
For broader label formats, Custom Logo Things also supports Custom Labels & Tags that can coordinate with cartons, inserts, and sample packaging. Keep the vial label functional first, then match the visual system.
Cost and Pricing Factors That Move Your Unit Cost
Pricing depends on quantity, label size, material, adhesive, finish, color coverage, shape, roll direction, and proofing complexity. Small custom runs cost more per piece because setup time, prepress, material handling, cutting, and packing are spread across fewer labels. Larger repeat runs usually lower unit cost significantly, assuming the spec stays stable.
As a planning range, simple digitally printed film vial labels might land around $0.18 to $0.45 each at 1,000 pieces, depending on size and finish. At 5,000 pieces, a straightforward BOPP roll label may drop closer to $0.07 to $0.18 each. Specialty adhesives, foil, clear stock with white ink, tamper seals, variable data, or unusual shapes can push those numbers higher. These are planning ranges, not a universal quote carved into a stone tablet.
Minimum order quantity varies. Some suppliers can print low quantities for testing, often 100 to 500 pieces. Custom materials, foil stamping, special dies, freezer-grade adhesive, or exact roll specifications may require higher minimums. If a quote looks suspiciously cheap, check whether it includes laminate, die cost, proofing, packing, and the right roll direction. Reprints are not a discount strategy. Shocking, I know.
Common add-ons include matte or gloss laminate, soft-touch film, foil, white ink on clear stock, variable data, multiple artwork versions, special dies, rush production, and freight. A five-scent fragrance sample set may look like one label order to the buyer, but to prepress it is five artwork versions, five proof checks, and sometimes five separate print lanes or rolls.
Ask for price breaks at 500, 1,000, 2,500, 5,000, and 10,000 pieces. That is where the buying decision gets useful. If 2,500 labels cost only a little more than 1,000, you may have your launch quantity. If 10,000 creates storage risk because ingredients, scents, legal copy, or branding may change, do not chase the lowest unit cost like it owes you money.
For first orders, order prototypes or a short pilot before a full launch run, especially with oily formulas, frosted containers, refrigeration, alcohol-based products, or machine application. Testing 100 labels is cheaper than explaining to a retailer why 5,000 units have peeling seams.
Process, Timeline, and Lead Time for Ordering Vial Labels
A clean order starts with spec confirmation, artwork review, digital proof, sample testing if needed, production, quality check, and shipping. Simple digital roll labels may move in about 5 to 10 business days after proof approval. More complex orders with foil, custom dies, specialty adhesives, clear stock with white ink, or large roll quantities often need 10 to 20 business days. Freight time sits on top of that, because printers have not yet defeated logistics.
The biggest delays are predictable: missing dielines, low-resolution logos, unconfirmed bottle dimensions, legal copy changes, barcode problems, and late proof approvals. A printer cannot responsibly produce a wrap label if nobody knows the vial diameter. “It is the small one” is not a specification.
Send the right information up front: vial diameter, label width and height, quantity, material preference, adhesive needs, finish, artwork file, exposure conditions, application method, and deadline. Mention if the product will face refrigeration, water, alcohol, oil, UV exposure, or rough fulfillment handling. If sustainability claims matter, ask about FSC-certified paper options and verify requirements through the Forest Stewardship Council.
Machine-applied labels need extra details. Confirm roll core size, unwind direction, label orientation, gap, liner type, outside diameter limits, and whether the machine needs leading edge orientation. Tell the printer before production. Not after. Please.
Hand application has its own needs. Rounded corners help release and reduce lifting. Adequate liner spacing makes labels easier to peel. A slightly thicker liner can help operators handle very small labels. If a team is applying 2,000 labels by hand, the difference between “fine” and “awful” may be a 1 mm spacing change.
Build buffer time for first orders. Adhesion testing, fit checks, and barcode scans should happen before the full production run if the container or formula is new. Larger product packaging programs often use ISTA-style distribution thinking for shipping tests; if your vials ship inside kits or cartons, review transit expectations through ISTA and test the whole pack, not just the sticker.
Quality control should be plain and specific. Check that labels release cleanly from the liner, edges are fully cut, print is centered, colors are within the approved expectation, barcodes scan, white ink is present where required, and rolls are wound in the correct direction. On small labels, “close enough” can become visibly wrong after the first 200 applications.
Common Mistakes That Make Small Vial Stickers Look Cheap
The first mistake is overloading the label. Small labels need hierarchy, not a legal novel in six-point type. Put the brand name, product name, volume, and required warnings in a clear order. Move secondary copy to a carton, insert, landing page, or outer packaging if regulations allow it.
The second mistake is choosing paper because it looked nice on a sample sheet. Paper labels can be beautiful. They can also stain, wrinkle, absorb oil, and peel around condensation. For essential oils, serums, refrigerated products, and heavily handled samples, film is usually the safer choice.
Poor edge planning causes ugly seams. Labels that wrap too far may overlap and lift. Labels that stop too close to the front panel can look crooked if hand-applied. Tapered containers are especially annoying because a rectangle wants to sit straight while the bottle shape disagrees. A physical fit test tells the truth faster than any template.
Weak contrast is another killer. Thin fonts, pale beige ink on clear stock, tiny QR codes, and decorative scripts may look elegant on a monitor at 400% zoom. Printed at vial size, they collapse. Use strong contrast, simple typefaces, and enough breathing room. If you need a magnifier to approve the proof, your customer probably needs one too.
Artwork files create plenty of preventable pain. Common problems include no bleed, raster logos pulled from websites, unrealistic color expectations, missing white ink instructions, ignored safe zones, and barcodes placed over seams. For clear labels, white ink is not optional if light graphics need to remain visible against glass, amber bottles, or pale liquid.
Regulated categories add another layer. Cannabis and CBD products where legal, supplements, lab materials, cosmetics, and chemicals may need batch codes, ingredients, warnings, dosage, tamper indicators, or readable required information. Requirements depend on product type and market, so verify with qualified regulatory support. A printer can produce the label. It is not your lawyer, and honestly, that is for the best.
Build a Vial Sticker Spec That a Printer Can Quote
A printer can quote faster and more accurately when the spec is clear. Before asking for pricing, gather the vial type, diameter, label width and height, quantity, material, adhesive, finish, artwork, application method, and deadline. If the labels need to match Custom Printed Boxes, cartons, or other retail packaging, include that context so the color and finish direction make sense.
Measure the vial with calipers or a flexible measuring tape. Decide how much gap should remain between label edges. For many small wrap labels, 1 to 3 mm is enough, but tiny containers, tapered shapes, or hand application may need more. If the label crosses a shoulder or curve, resize it. Wrinkles do not become charming because the brand palette is nice.
- Container: glass, plastic, frosted, coated, tapered, straight wall, cap style, and vial diameter.
- Label size: width, height, wrap coverage, gap between edges, and corner radius.
- Performance: water, oil, alcohol, refrigeration, UV exposure, abrasion, or chemical splash.
- Production: quantity, roll or sheet format, roll direction, core size, deadline, and shipping location.
- Artwork: vector logo, dieline if available, compliance copy, barcode files, white ink layer, and finish notes.
Choose material based on the use environment first and visual style second. Pretty labels that peel are just tiny brand liabilities. For most retail serum, fragrance, and sample vials, white BOPP with a protective laminate is a safe starting point. Clear BOPP is great for glass if the artwork is built correctly. Paper belongs in dry, low-risk environments unless testing proves otherwise.
Request a digital proof every time. For new containers, oily formulas, cold storage, machine labeling, or demanding handling, ask about a sample or pilot run before full production. Confirm whether the quote includes setup, die, proofing, finish, packing, and shipping. Also ask for multiple quantity breaks. One number does not show the real economics.
To speed up quoting, send vector artwork, container photos, sample vial dimensions, compliance copy, application method, roll direction requirements, and target in-hand date. If the vial label belongs to a larger package branding system, share the carton or pouch design too. Custom vial stickers work best when sizing, material, adhesive, and timeline are settled before the artwork is treated as finished.
FAQ
What size should custom vial labels be?
Measure the vial circumference and height first, then leave a small gap so the label edges do not overlap or lift. For very small vials, prioritize brand name, product name, volume, and essential compliance text instead of trying to fit everything. A physical test label is the safest way to confirm fit, especially on tapered or rounded vials.
What material is best for custom vial stickers?
White BOPP is a strong default for moisture resistance, durability, and clean retail presentation. Clear BOPP works well for a no-label look on glass, especially when white ink is used under light artwork. Paper can work for dry, low-handling products, but it is usually the first thing to fail around oils, condensation, or heavy handling.
How much do custom vial stickers cost?
Cost depends on quantity, label size, material, adhesive, finish, shape, and whether special effects like foil or white ink are needed. As a rough planning range, simple film labels may run about $0.18 to $0.45 each at 1,000 pieces and less at higher quantities. Ask for price breaks at several quantities instead of only quoting one number.
How long does it take to produce vial stickers?
Simple digital roll labels may take about 5 to 10 business days after proof approval. Custom dies, foil, unusual adhesives, large quantities, or machine-labeling requirements can push production closer to 10 to 20 business days. First-time orders should include extra time for fit checks, adhesion testing, and barcode scans before the full run.
Can vial stickers be waterproof or oil-resistant?
Yes, but the right combination matters: film material, compatible adhesive, and protective laminate or varnish. Oil resistance depends on the product formula, container surface, and handling conditions, so testing is recommended. For essential oils, serums, alcohol-based products, or refrigerated vials, avoid assuming a basic paper sticker will survive.


