Buyer Fit Snapshot
| Best fit | Die Cut Mailer Boxes for Subscription Brands projects where brand print, material claims, artwork control, MOQ, and repeat-order consistency need to be specified before quoting. |
|---|---|
| Quote inputs | Share finished size, material target, print colors, finish, packing count, annual reorder estimate, ship-to region, and any compliance wording. |
| Proofing check | Approve dieline scale, logo placement, barcode or warning zones, color tolerance, closure strength, and carton packing before bulk production. |
| Main risk | Vague material claims, crowded artwork, missing packing details, or unclear freight terms can make a low unit price expensive after revisions. |
Fast answer: Die Cut Mailer Boxes for Subscription Brands: Film, Print, MOQ, and Carton Packing should be specified like a repeatable production item. The safest quote records material, print method, finish, artwork proof, packing count, and reorder notes in one written spec.
Production checks before approval
Compare the actual filled-product size with the drawing, then confirm tolerance on folds, seals, hang holes, label areas, and retail display edges. Reserve space for logos, QR codes, warning copy, and material claims before decorative graphics fill the panel.
Quote comparison points
Review material grade, print process, finish, sampling route, tooling charges, carton quantity, and freight assumptions side by side. A quote is only useful when the supplier can repeat the same color, closure quality, and packing count on the next order.
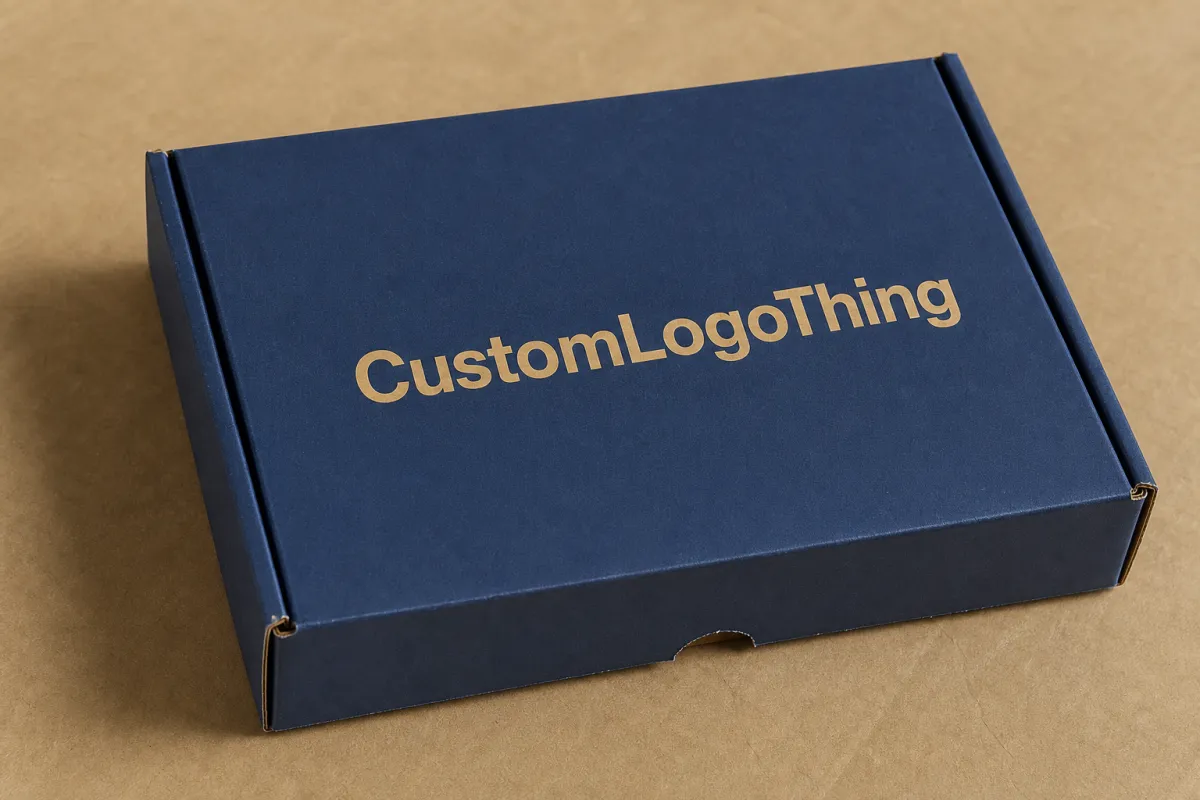
Die Cut Mailer Boxes for Subscription Brands: A Guide
Die cut mailer boxes for subscription brands can look flawless on a packing table and still fail in transit if the internal fit is off by only a few millimeters. That tiny gap can become product drift, corner crush, scuffed graphics, or a box that works loose under pressure. Structure matters as much as artwork, and in some programs it matters more.
Recurring shipments ask a box to do two jobs at once. It has to protect what is inside, then present a repeatable unboxing moment that feels deliberate rather than improvised. That pressure explains why Custom Die Cut mailers show up so often in beauty kits, wellness subscriptions, food and beverage clubs, apparel drops, and curated retail bundles.
A die cut mailer is a custom-cut folding box made from corrugated board, with scores, slots, tabs, and locking features that let it close without a stack of tape. For lighter presentation-driven kits, some brands use paperboard-style folding cartons, but the mailer format most teams reach for is corrugated because it better balances protection, stacking, and parcel handling. The right build keeps products organized, trims dimensional weight, and gives the customer a package that feels considered from the tear strip to the last insert.
The sections that follow break down how the box is built, what drives material and size decisions, how Pricing and Lead Times usually work, and where brands most often lose money. If you are comparing formats, you may also want to review our Case Studies, browse Custom Packaging Products, or compare lighter shipping options like Custom Poly Mailers for lower-weight kits.
A box does not fail because it is attractive or plain; it fails because the structure, product load, and shipping conditions were not matched closely enough to real handling.
Why Die Cut Mailer Boxes Matter for Subscription Brands
Subscription packaging faces a different kind of stress than a one-time retail shipment. The box has to be repeatable, cost-aware, quick to assemble, and durable enough to survive carrier handling month after month. A generic carton can move the product from one address to another, but it rarely delivers the fit, presentation, and consistency that recurring shipments demand.
That is why die cut mailer boxes for subscription brands get serious attention once a company starts to scale. A custom structure helps create the same opening sequence every time, which matters if the brand depends on unboxing videos, social sharing, or a strong first impression. Customers notice whether the product sits snugly, whether the contents arrive in a tidy arrangement, and whether the package feels designed rather than patched together.
The category also has a logistics side that gets overlooked. Subscription boxes often sit near the edge of their target parcel rates, so every extra inch can affect dimensional weight pricing. Major carriers do not bill on volume alone, but on billable weight, and a carton that crosses a threshold can cost more for the same product. A box that is just a little too large increases void fill, raises freight cost, and gives the contents room to move. A box that is too tight can crush product, bend inserts, or slow packing enough to hurt labor efficiency.
From a packaging buyer's point of view, the appeal is control. Panel size, flap geometry, closure style, and internal support can all be tuned so the finished box handles the product the way you want instead of forcing the product to adapt to an off-the-shelf carton. That matters most when the subscription changes by season, by SKU mix, or by market. A rigid system can make those changes expensive. A custom mailer can absorb them.
Sustainability often enters the conversation here too. Right-sized mailers usually use less board and less filler, which can cut waste in the fulfillment lane. Brands that want better recyclability have a simpler path when the structure is built with intention, not when packaging layers pile up out of habit. For programs that care about responsible fiber sourcing, certification standards such as FSC can help guide material selection, and the Forest Stewardship Council publishes guidance that makes supplier claims easier to evaluate.
Brands usually move away from generic packaging once one or more of these issues show up:
- Products rattle, lean, or shift inside the box during transit.
- Packing teams spend too much time adding tape, filler, or manual fixes.
- Brand presentation changes from one shipment to the next.
- Damage claims rise after carrier handling or longer delivery lanes.
- The box size pushes shipping costs higher than the budget allows.
Those are not cosmetic flaws. They are operational signals that the box format and the product load are out of balance.
How Die Cut Mailer Boxes Work from Dieline to Ship
The cleanest place to start is the dieline. That blueprint shows every panel, cut line, score line, fold, flap, tab, and lock feature. A useful dieline is more than a drawing. It is a production map that tells the converter exactly how the board should be shaped so the box folds cleanly and closes with the right amount of tension.
Once the dieline is approved, the manufacturing sequence usually follows a familiar path. Sheets are selected, printed if needed, then cut and scored with a die matched to the approved structure. Some box styles use glue in specific areas, while others lock mechanically through tabs or tuck features. The finished box should open smoothly, fold square, and return to shape after handling without springing apart.
Structure is where many projects stumble. A mailer can look fine in flat form and behave badly after folding if the scores are too shallow, the tabs are too loose, or the board is too stiff for the geometry. I have seen boxes that looked perfect on a sample table then bowed at the corners once filled, simply because the load path inside the box had not been thought through carefully. That kind of failure rarely shows up in a render.
Closure design is part of the protection story. Self-locking flaps can reduce tape use, which speeds packing and leaves the outside cleaner. Proper panel overlap helps the box resist corner crush and top-load pressure. If the route is rougher or the product is heavy, the structure should also keep the contents from drifting toward the edges where damage usually begins.
The opening experience is built into the structure too. A mailer can be engineered so the customer lifts a tab, pulls a tear strip, or opens a front flap in a deliberate sequence. That matters because a subscription box is part package, part performance. The reveal should feel controlled, not accidental. Interior print, insert placement, and product orientation all shape that moment. Even a plain exterior can feel premium if the first layer opens in a precise, quiet way.
Carrier handling sets the final test. The box needs to stay intact through sorting, stacking, conveyor movement, and final-mile handling. Many packaging teams test crush resistance, edge strength, and closure integrity before they approve full production. Standards and test methods from groups like ISTA are useful reference points, especially if the box moves through a distribution chain with several handoffs and changing pressure loads. The goal is not to overbuild everything; the goal is to build enough for the route the package will actually travel.
In practice, a well-designed box should do three things at once:
- Hold the product close enough that movement stays minimal.
- Survive normal parcel handling without opening or collapsing.
- Present a clean, repeatable unboxing sequence for the customer.
That combination is why die cut mailer boxes for subscription brands often outperform generic shippers, even before print enhancements enter the picture.
Key Size, Material, and Finish Factors
Size comes first, and it should start with the loaded kit, not the exterior dimensions of a sample someone liked in a catalog. Measure the product at its widest, longest, and tallest points, then add only the clearance needed for inserts, closures, and slight movement. A kit with a bottle, a pouch, and a sample card needs to be measured as one system, not as separate objects on a spreadsheet.
That sounds obvious until you watch a fulfillment team try to pack a box that was sized from product dimensions alone. The math looks right on paper and wrong in the warehouse. Closure pressure, fold tolerance, and insert thickness all take up space that spec sheets often ignore.
Material comes next. The usual decision is between lighter paperboard and corrugated board. Corrugated board suits most subscription mailers because the flutes give it better crush resistance, better stack behavior, and more forgiveness during parcel handling. Paperboard can still work for very light kits or nested promotional mailers, but it usually belongs to a narrower use case. The board should match the real conditions, not an ideal shipment path that never exists in practice.
Board thickness affects more than protection. It changes how the box stacks, how the flaps close, and how premium the package feels in the hand. A thin board can make a box feel flimsy even when the print looks sharp. A board that is too heavy can make the structure awkward to fold and can add cost without much return. For many mailer programs, the best zone is a grade that gives enough crush resistance for the route while still running well through packing stations.
Finish choices deserve the same attention. Matte finishes tend to read calm and modern, gloss can make color pop, soft-touch creates a more tactile premium feel, and uncoated stocks can feel natural and recyclable. Each option has tradeoffs. Gloss scuffs differently than matte, soft-touch can show handling marks, and uncoated surfaces may absorb ink differently depending on the print method. There is no universal winner; there is only the best choice for the product, brand, and shipping pattern.
Internal components matter almost as much as the outer shell. Inserts, paper cradles, dividers, and molded supports can keep items aligned and prevent the kind of movement that leads to damage. A good insert often lets the outer box stay smaller, because the insert itself becomes part of the fit strategy. That can reduce filler and make the interior look cleaner. In some cases, it also shortens pack time by giving the worker one obvious way to place each item.
Here is a simple comparison of common options:
| Box Option | Best For | Typical Strength | Usual Price Range | Notes |
|---|---|---|---|---|
| Lightweight corrugated mailer | Small kits, samples, and lower-weight subscriptions | Light to medium | $0.45-$1.10 per unit at 5,000+ | Common for cosmetics, sample sets, and modest contents that still need parcel protection |
| Corrugated mailer | Heavier or fragile contents | Medium to high | $0.65-$1.80 per unit at 5,000+ | Better for rougher shipping lanes and stacked fulfillment |
| Printed corrugated with finish | Brand-heavy unboxing | Medium to high | $1.10-$2.80 per unit at 5,000+ | Higher visual impact, more setup, more finish variables |
| Mailer with custom insert | Kits with multiple components | Varies by substrate | Adds $0.12-$0.65 per unit | Insert design can reduce product movement and packing time |
Those numbers are broad working ranges, not a fixed quote. Size, print coverage, board grade, and freight all influence the final figure, and smaller runs usually carry a higher unit cost because setup gets spread across fewer boxes.
Sustainability decisions work best when they stay practical. A recyclable board is useful only if the structure still performs. A box that uses less material but arrives crushed is not a better packaging choice. Many brands now ask for recycled content, paper-based inserts, and fewer mixed materials, and that can work well as long as the design still fits the product and the shipping lane. The EPA's packaging waste resources are a useful reminder that source reduction usually begins with right-sizing and material discipline, not with labels on the outside.
Die Cut Mailer Box Process and Timeline
A clean production schedule usually starts with three things: the product load, the target look, and the shipping requirements. Once those are clear, the packaging team can build a dieline, place artwork, and decide whether the box needs a simple structure or something more specialized. If the brand already has a warehouse team, bring in the people who actually pack the orders. They tend to spot closure issues and handling problems earlier than anyone else.
The next step is proofing. Delays often show up here, not in the cutting stage but in the revisions before cutting. A design may need a panel shifted for bleed, a barcode moved away from a fold, or a closure adjusted because the product sits too high inside the box. Those corrections are normal, but they take time. A strong proofing pass checks folds, glue areas, graphics, and panel alignment before the full run starts.
Sample approval matters because it reveals what a flat file cannot. A box can look correct on screen and still close too tightly, open too easily, or create pressure points on the product. A physical sample lets the team test closure, stacking, insert fit, and the feel of the opening sequence. Even a short schedule should make room for a real prototype. If the sample stage is rushed, the most expensive problems often show up after the cartons are already in production.
Lead time depends heavily on complexity. A plain kraft mailer with minimal print may move quickly once the dieline is approved. A fully printed box with special coatings, interior print, custom inserts, or structural changes needs more coordination. In many programs, the cutting and converting step is not the slow part. Approvals and final details are what push schedules back.
A practical planning sequence looks like this:
- Confirm product dimensions, weights, and fragile points.
- Build the dieline and decide on the board specification.
- Review artwork and make sure folds, bleeds, and barcodes are placed correctly.
- Approve a sample or prototype after checking closure and fit.
- Schedule production, freight, and warehouse receiving.
- Buffer inventory ahead of renewal dates or launch windows.
That last point matters more than many teams expect. Subscription businesses often work to fixed billing or renewal dates, so a late box can delay an entire campaign. The packaging schedule should line up with fulfillment windows, carrier pickup timing, and the warehouse receiving calendar. If the boxes arrive on the wrong day or in the wrong quantity, the downstream cost is often much larger than the packaging invoice itself.
For that reason, many brands keep a simple rule: do not finalize artwork until the sample is approved, and do not assume a ship date until the production schedule is tied to the actual carton spec. That discipline saves a lot of frustration later.
Cost, Pricing, MOQ, and Quote Basics
Pricing is usually driven by a few measurable factors. Box size affects board usage. Board type affects raw material cost. Print coverage affects press time and ink usage. Finish choices add setup complexity. Inserts and dividers add material and labor. Volume changes how those fixed costs are spread across the run, which is why a box that seems expensive at 500 units can look much more efficient at 5,000 or 10,000 units.
MOQ, or minimum order quantity, exists because a custom box is not just a piece of paperboard; it is a setup process. The die, press setup, scoring, folding, and quality checks all take time. For smaller runs, those fixed costs are divided across fewer boxes, so the unit price rises. For larger runs, the unit price usually falls, but the brand has to carry more inventory and store more cartons.
Many buyers are surprised by the hidden costs that sit outside the printed box itself. Freight can be significant, especially for oversized corrugated runs. Sample charges are common. Artwork changes after proofing can add delays or rework. Special coatings, foil, embossing, or spot varnish can add cost quickly, even when the structure is straightforward. If the box ships flat, palletization and warehouse receiving may also affect the total landed cost more than people expect.
For a realistic planning conversation, a buyer should ask for a quote that includes:
- Exact internal and external dimensions.
- Board spec, flute type, or paperboard caliper.
- Print method and ink coverage.
- Finish details such as matte, gloss, soft-touch, or uncoated.
- Insert count and insert material.
- Lead time from approval to shipment.
- Freight terms and destination assumptions.
- Any assembly or kitting charges.
That level of detail makes comparisons much fairer. A quote that looks cheaper may simply leave out freight, use a lighter board, or exclude the insert that keeps the product stable. If two suppliers are not quoting the same spec, the lower number is not necessarily the better deal.
As a rough planning guide, simpler mailers for smaller subscriptions can land in a lower unit-cost band, while fully printed mailers with premium finishes can move much higher. A meaningful price jump is common once interior print, custom inserts, or specialty coatings enter the spec. The real question is not "What is the cheapest box?" but "What is the lowest-cost structure that still protects the product and supports the brand?"
That distinction matters especially for recurring shipments, because a small per-unit difference compounds quickly over a year of monthly or quarterly sends. A ten-cent gap on a 20,000-box program is not pocket change; it is a line item that shows up in margin reviews.
Step-by-Step Guide to Choosing the Right Box
If you are narrowing down options, start with the kit itself. List every item that ships, including product dimensions, weight, fragility, and how much movement the contents can tolerate before they begin to damage one another. A subscription box with glass jars behaves very differently from one with folded apparel or single-serve sachets.
Next, decide what the package must do beyond transport. Some brands need a camera-ready reveal because customers post the unboxing. Others need the box to sit neatly on a retail shelf or display table. Some need the exterior to stay plain and economical while the interior carries the brand personality. Those are different goals, and the structure should follow the main use case instead of trying to do everything at once.
Then compare structures. In many cases, the simplest die cut design that protects the product is the strongest choice. Extra folds, decorative locks, and clever reveal features can add charm, but they also add tooling complexity and can slow packing. If the product is not fragile, a cleaner structure may be the better long-term answer.
A useful way to make the decision is to test a few sample paths:
- Basic fit sample: confirms dimensions, closure, and product movement.
- Shipping sample: checks stacking, crush resistance, and outer durability.
- Presentation sample: evaluates print, finish, and opening sequence.
That small testing ladder catches more issues than a single glossy prototype review. A box can look beautiful and still fail in the warehouse if the closure is awkward or the inserts slow down packing. It can also ship well but feel weak to the customer if the interior reveal is messy.
After the sample is approved, keep artwork and logistics in sync. Confirm barcodes, panel orientation, print-safe areas, and how the box will be packed on pallets or in cases. If the product line has multiple SKUs, standardize as much as possible so the warehouse is not handling three or four box variations with different fold patterns and insert layouts.
One more practical check helps more than people expect: test the box under real conditions, not just in a clean room. Shake it gently with the actual product inside. Stack a few filled boxes. Open and close the closure several times. Drop a filled sample from a reasonable handling height onto a padded test surface and inspect the corners. None of this replaces formal testing where it is needed, but it does reveal whether the design lives comfortably in the same world as your operation.
If the kit is light and the brand cares most about low-cost shipping, a different format may be the better choice. That is why many teams compare die cut mailers with other formats before locking the final spec. Sometimes the best decision is not the most elaborate one; it is the one that gives the right result with the fewest weak points.
Common Mistakes, Expert Tips, and Next Steps
The most common mistake is sizing by outside dimensions alone. Buyers see the outer footprint and assume the product will fit, but the internal dimensions, wall thickness, and insert geometry are what actually determine whether the box works. A difference of only a few millimeters can be enough to create loose movement or a pinched closure.
Another frequent issue is overstuffing the interior. If a kit needs force to close, the box is too small or the contents are arranged badly. Forcing the closure can damage the board over time, especially at the folds and corners. A box should close with firm, controlled pressure, not with strain. If a packer has to fight the carton, the design is already telling you something.
Carrier crush risk is easy to underestimate. A mailer that survives a short local route might fail on a longer parcel path with more sorting and stacking. Thinking about the shipping lane before selecting board grade and finish makes a real difference. A brand shipping regional kits may be able to use a lighter board than one shipping nationally through more varied handling environments.
From the factory floor perspective, the best tip is still the simplest one: test the real product in the real box. Do not use placeholder weights or rough stand-ins if the actual item is fragile or oddly shaped. A real fit test tells you more about corner pressure, motion, and opening behavior than a perfect digital mockup ever will.
Here are a few expert checks worth doing before production:
- Verify that folds do not cut into printed panels or logos.
- Check whether corners hold after several open-close cycles.
- Confirm that inserts do not slow packing to an unacceptable pace.
- Inspect how scuff-prone finishes look under warehouse lighting.
- Make sure the box still presents well after being handled by a few different people.
That last point matters because real packing stations rarely behave like a sample table. Different workers, different shifts, and different speed levels reveal small flaws in a design. If a structure only works when handled carefully by one person, it is not ready for a subscription program.
For the next step, audit the current kit and write down the true priorities. If damage reduction is the top concern, choose the structure and board that best protect the load. If presentation is the priority, protect the opening sequence and print quality while keeping the fit tight. If freight cost is hurting margins, right-size the box before adding decorative finishes. Then request a dieline, a sample, and a quote that reflects the exact spec instead of a rough estimate.
That process usually separates a workable packaging concept from a box that only looks good in a mockup. The strongest die cut mailer programs are built on that kind of clarity: product first, structure second, decoration third.
For brands scaling a recurring shipment program, die cut mailer boxes for subscription brands perform best when material choice, fit, print, and fulfillment planning all move together. Get those four pieces aligned, and the box becomes more than a container; it becomes part of the customer experience and part of the shipping strategy at the same time. Miss one, and the costs show up later as damage, rework, or freight creep.
The most practical takeaway is simple: start with the loaded kit, the shipping lane, and the warehouse process, then build the box around those realities. If the spec cannot survive that test, it is not ready for production, no matter how polished the mockup looks.
FAQ
What makes die cut mailer boxes for subscription brands different from standard shipping boxes?
They are custom-sized and scored to fit the product more tightly, which reduces movement and improves presentation. They also often use locking flaps or custom closures, so brands can reduce tape use while keeping the package secure. Most importantly, they are usually designed around both shipping protection and unboxing, not just transportation. That dual purpose is what separates them from a plain RSC shipper.
How do I choose the right material for subscription mailer boxes?
Use corrugated board for most subscription mailer programs because it handles stacking, compression, and parcel handling better than paperboard. Lighter paperboard can still work for very small, low-risk kits, especially when the route is short and the contents are gentle. The right material depends on product weight, shipping lane, and the experience you want the customer to feel when they open the box.
What affects the price of die cut mailer boxes the most?
Box size, board type, print coverage, and finish are usually the biggest drivers of unit cost. Order quantity matters because setup costs are spread across more boxes as volume increases. Inserts, special coatings, and shipping freight can also add meaningful cost beyond the printed box itself. If the quote includes assembly or kitting, that should be reviewed separately so the landed cost is clear.
How long does the process usually take for a custom mailer box order?
Timeline depends on design approval, sample review, and production complexity, not just the cut-and-fold stage. Simple structures with minimal print usually move faster than multi-component or highly finished packaging. It is smart to build in time for proofing so artwork, dimensions, and closure behavior are confirmed before full production starts. The earlier the sample is approved, the fewer schedule surprises you get later.
What should I test before ordering die cut mailer boxes for subscription brands?
Test the real product fit, closure strength, and whether the contents move during a shake test. Check how the box stacks, ships, and opens after handling, since those conditions reveal weak points quickly. Review the printed sample under real lighting so you can catch color shifts, alignment issues, or finishes that scuff too easily. If the box includes inserts, test the assembly time as well, because a structure that protects well but slows the line can still cost more than it should.


