Embroidered Beanies Logo Placement Guide: What Buyers Get Wrong First
A beanie logo can be technically centered and still look wrong on an actual head. That is the first problem this Embroidered Beanies Logo Placement guide needs to fix, because flat measurements lie with a straight face.
Beanies stretch. Cuffs roll a little differently from piece to piece. Ribbed knit can pull a circle into an egg shape. A logo that looks tidy on a mockup may sit too low, bow outward, or disappear into the fold once the wearer pulls the hat down. Great. Now your premium merch looks like it lost a fight with gravity.
Logo placement means more than “put it in the middle.” It includes the exact position, finished size, orientation, stitch method, thread colors, and decoration location used to put a brand mark on a beanie. Most buyer decisions land on the front cuff, side cuff, front body, back, or an attached patch. Each option changes visibility, comfort, Cost, and Production risk.
Beanies are less forgiving than flat products like tote bags, notebooks, or mailer boxes. Knit moves under tension. Thick thread adds stiffness. Tiny type can turn into a tiny crime scene after digitizing. A 0.5-inch shift may not matter on a hoodie, but on a 2.75-inch cuff, that same shift can make the logo look like it is sliding off the product.
The best placement balances five things: visibility, wearer comfort, decoration limits, budget, and the real use case. Retail merch needs taste. Employee gear needs consistency. Event swag needs fast recognition. Corporate gifting needs polish without billboard energy. Different job, different answer.
Use this as a practical buyer guide before you approve artwork, not after the first 500 pieces are already stitched. That timing tends to be expensive.
How Logo Placement Works on Cuffed, Uncuffed, and Slouch Beanies
Cuffed beanies are the safest choice for most embroidered logos. The folded cuff creates a more stable branding area, usually around 2.5 to 3.5 inches tall depending on the style. Front-center embroidery on that cuff is familiar, easy to photograph, and efficient for production teams to hoop and inspect.
That does not mean every cuff can take the same logo. Some cuffs are shallow. Some are chunky and ribbed. Some are fleece-lined, which can change how the fabric sits in the hoop. A logo that works on a smooth acrylic cuff may look heavy on a thick fisherman-style knit. The blank matters more than buyers usually expect.
Uncuffed beanies need more care. The logo often sits lower on the front body, but there is no clean fold acting as a visual frame. Place it too high and it floats. Place it too low and it lands awkwardly on the forehead. For many uncuffed styles, a finished logo around 2 to 3 inches wide works better than a wide 4-inch wordmark.
Slouch beanies are trickier because the fabric collapses and shifts. Side placement can work well here, especially for fashion brands, ski clubs, coffee shops, and retail merch that wants a quieter look. A smaller front icon also works. A large front wordmark on a slouch style? Usually not my favorite. It can wrinkle, tilt, and look accidental.
Front-center placement is the default retail option for a reason. It gives strong visibility in product photos, works for simple logos, and is easy for the wearer to understand. If you are ordering 250 giveaway beanies and need clean branding fast, this is usually the shortest path to a decent result.
Side placement feels more considered when done well. It says, “We thought about the product,” not “We found an empty spot and attacked it with thread.” It is useful for small icons, monograms, outdoor brands, and subtle staff gear. Back placement is possible for secondary marks, sizing icons, or team identifiers, but it is less visible in product photos and rarely deserves extra cost unless there is a clear reason.
Patches deserve their own lane. Woven, embroidered, leatherette, and PVC patches create a structured branded area on soft knit. They often handle small text and detailed shapes better than direct embroidery, especially when the logo includes thin lines, gradients, or a complicated badge shape.
Key Factors That Decide the Best Beanie Logo Position
Start with logo shape. Wide horizontal logos usually belong on the front cuff, where 2 to 4 inches of width can look balanced. Tall logos often need a patch, a simplified icon, or side placement so they do not look squeezed into a short cuff.
Size matters, but not in the way buyers think. Bigger is not automatically better. Many cuff embroidery areas work best around 2 to 4 inches wide and 1 to 2 inches tall. A 3-inch-wide mark on a 3-inch cuff can look sharp. A 4.5-inch-wide mark with dense fills may stiffen the cuff and fight the knit.
Stitch density is the quiet troublemaker. Heavy embroidery on stretchy rib knit can pucker, pull, or flatten the texture around the logo. Dense satin stitches may look beautiful on a polo shirt and clumsy on acrylic knit. A good digitizer should adjust stitch direction, underlay, pull compensation, and density for the fabric instead of treating every product like a flat canvas.
Logo detail is another filter. Tiny taglines, thin outlines, distressed textures, miniature registered marks, and gradients do not magically become crisp because someone clicked “embroider.” They need simplification. For direct embroidery, letters under roughly 0.20 to 0.25 inches tall can become risky, depending on font, thread, and knit gauge.
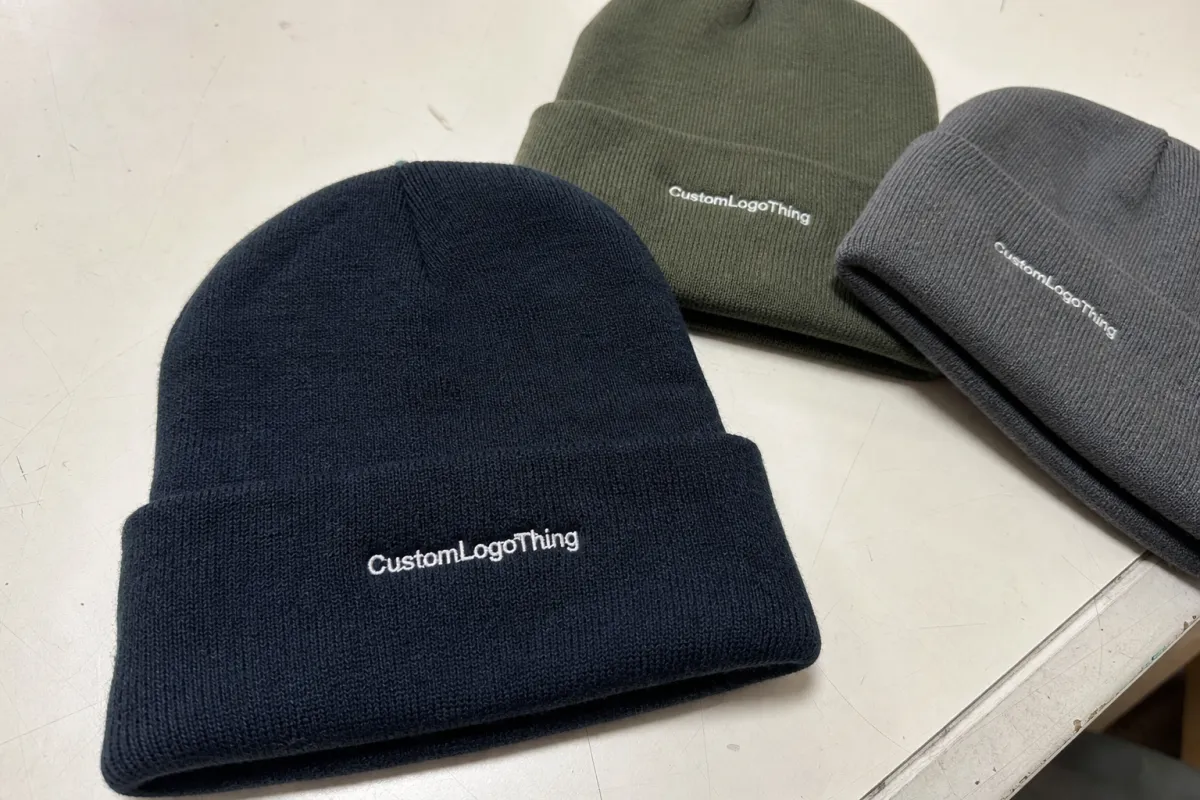
Thread contrast changes the whole personality of the beanie. White thread on black acrylic screams from across the room. Tonal charcoal on black feels retail and understated. Neither is wrong. High contrast helps recognition, but too much contrast on an oversized logo can make a premium beanie feel cheap.
Material affects the result too. Acrylic is common because it is affordable, warm, and widely available in bulk. Cotton blends can feel softer but may not spring back the same way. Recycled yarns vary by supplier and batch. Chunky rib has more texture for the needle to fight. Fine gauge knit gives a cleaner surface but can show puckering if the stitch file is too dense.
Wearer behavior also matters. Some people roll the cuff higher. Some pull the beanie low over the ears. Some wear it slouched at the crown. Your placement should work on a normal head, not only on a flat table under perfect lighting. The worn view is the truth.
Buyer rule: approve logo placement based on the beanie being worn, not only on a flat mockup. Flat beanies behave politely. People do not.
Brand intent should guide the final call. Streetwear merch may prefer side cuff embroidery or a patch. Outdoor teams may need bold front visibility. Employee uniforms often need repeatable front placement. Giveaways need a clean option that prices well and survives bulk production without drama.
Cost, Pricing, and Unit Cost Impact of Different Placements
Placement affects cost, but it is not always the biggest driver. The real pricing variables are stitch count, number of decoration locations, patch type, thread colors, digitizing, minimum order quantity, and sample requirements. A tiny side logo can cost less than a huge front logo. A detailed patch can cost more upfront but save a messy embroidery result.
A single front cuff embroidery is usually the most efficient option. It is standard, fast to set up, easy to inspect, and predictable for alignment. For basic acrylic cuffed beanies, many buyers see front embroidery quoted as the baseline decoration method. Unit pricing varies widely by blank quality and quantity, but a simple front embroidery run often prices cleaner than multi-location work.
Side, back, or multi-location embroidery can raise unit cost because each location adds handling time. The operator may need a different hooping position, another setup, or a second production pass. Alignment risk also increases. Factories charge more for that because extra handling is extra labor. Shocking, I know: factories like efficiency.
Digitizing is another line item. Buyers should expect a one-time setup cost to convert artwork into a stitch file unless the supplier includes it in the quote or has already produced that exact logo. Typical digitizing fees often land around $35 to $95 per logo, depending on complexity and vendor policy. Large or detailed designs can run higher.
Patches can be smart money. Woven patches handle small text better than direct embroidery. Leatherette patches give a premium retail look. PVC patches add dimension and durability, though they are not right for every soft winter beanie. Patch setup can cost more, but the finished brand area is more controlled.
| Placement or Method | Best Use | Typical Cost Impact | Buyer Watchout |
|---|---|---|---|
| Front cuff embroidery | Simple logos, staff gear, giveaways, retail basics | Usually lowest decoration cost for one location | Logo can look too low if cuff height is not checked |
| Side cuff embroidery | Subtle retail merch, icons, fashion positioning | Often slightly higher due to alignment care | Less visible in straight-on product photos |
| Back embroidery | Secondary marks, teams, staff identifiers | Higher if added as a second location | Low visibility for most buyers |
| Woven or embroidered patch | Detailed logos, small text, badge designs | Higher setup, cleaner detail control | Patch size and edge finish affect comfort |
| Leatherette or PVC patch | Premium merch, outdoor brands, structured marks | Moderate to high depending on material | Not every style matches every beanie fabric |
Ask for quantity breaks at 100, 250, 500, and 1,000 units. Lower quantities usually carry higher unit costs because setup and sampling are spread across fewer pieces. Larger runs bring better pricing, but only if the placement is approved correctly before bulk decoration starts.
Production Steps, Timeline, and Approval Process Before Bulk Embroidery
A normal custom beanie order follows a simple path: choose the beanie style, confirm the placement, submit vector artwork, digitize the logo, approve a digital proof, review a physical sample or photo sample, then release bulk production.
Rushed placement decisions create expensive problems later. Once embroidery starts, moving the logo half an inch is not a cute little edit. It is rework. On 500 pieces, that can mean delays, scrap, rush fees, or a very awkward conversation with your boss.
Timeline depends on quantity, decoration method, blank availability, and factory load. Still, practical ranges help. Artwork review and quoting may take 1 to 3 business days. Digitizing and proofing may take 2 to 5 business days. Sampling often takes 5 to 10 business days after proof approval. Bulk production may run 7 to 20 business days for many standard orders, with larger or imported programs taking longer.
Check the proof like you are paying for the mistake personally. Confirm finished logo size, placement from the cuff edge, thread colors, stitch direction, center alignment, and patch dimensions if used. Ask whether the mockup reflects the worn view or only the flat product view.
A physical sample is worth it for retail launches, influencer kits, premium employee gear, corporate gifts, or any order where brand perception matters. A photo sample can be acceptable for straightforward reorders or simple logos, but the photo should show the beanie on a form or head shape. One flat lay from six feet away is not approval. It is a shrug with pixels.
Quality control should not wait until the cartons arrive. For embroidery, review thread trims, loose stitches, logo tilt, puckering, spacing from the cuff edge, and consistency from piece to piece. For patches, check edge finish, adhesive or stitch-down method, corner lift, and whether the patch feels scratchy against the forehead. Comfort is part of quality. People will not wear a beanie that irritates them just because the logo is “on brand.”
For recycled yarns, organic cotton blends, or paper hang tags tied to a merchandise program, buyers may also care about documentation. Sustainability claims should be handled carefully. If those claims are part of the project, start with credible sources such as the Forest Stewardship Council for paper-based materials and the EPA greener products guidance for broader purchasing context.
Nominate one decision-maker. Approve in writing. Save the final spec sheet. That spec should include beanie style, color, material, logo size, thread colors, exact placement, decoration method, and approved sample image. Future reorders will thank you.
Step-by-Step Placement Guide for Choosing the Right Logo Location
A useful placement process should make decisions easier, not bury you under decoration jargon. Use this sequence before asking for a quote.
- Pick the beanie style first. Do not design placement for a cuffed beanie and then switch to a slouch style at the last minute unless you enjoy chaos. Cuffed, uncuffed, and slouch fits all change the visible decoration area.
- Measure the usable decoration area. Focus on the visible cuff or front panel after the beanie is worn. A cuff may measure 3 inches tall flat but show only 2.25 to 2.75 inches cleanly on a head.
- Simplify the logo for embroidery. Create a small-use version if the main mark has tiny text, gradients, shadows, distressed textures, or delicate linework. Embroidery rewards bold shapes.
- Choose placement by use case. Use front cuff placement for maximum visibility, side cuff placement for a subtle retail look, patch placement for detail, and back placement only when it has a job.
- Set a realistic logo size. Many beanie logos look best at 2.5 to 3.5 inches wide. Oversized embroidery can make a soft beanie feel stiff and cheap.
- Request a measured proof. Ask for the logo distance from the cuff edge, the center line, and the finished logo size. A floating mockup slapped onto a stock photo is not enough.
- Approve a sample or sample photo. Check the worn view, not only the flat lay. Confirm that the logo remains readable when the knit stretches.
One more practical detail: ask your supplier what embroidery file type and thread chart they use. Common production references include DST stitch files and thread libraries from major brands. You do not need to micromanage the machine file, but you do need confirmation that the production team is using the approved version.
If your beanie is part of a larger branded kit with boxes, mailers, or retail packaging, align the logo scale across the full experience. A tiny tasteful side icon on the beanie can pair nicely with a louder printed insert card. Not every surface needs to shout.
Common Placement Mistakes That Make Branded Beanies Look Cheap
Mistake one: placing the logo too low on the cuff. It gets swallowed by the fold, curves under the chin line, or looks like it is sliding off the product. Ask for the placement measurement from the top or bottom cuff edge so everyone is using the same reference.
Mistake two: making the logo too large. A massive embroidered logo can overpower the beanie, add stiffness, and make the wearer feel like a walking coupon code. For most retail-style cuffed beanies, restraint looks more expensive.
Mistake three: using detailed artwork without simplifying it. Thin lines, tiny text, complex icons, gradients, and distressed effects often turn muddy when stitched into knit fabric. Direct embroidery is not a laser printer. Painful, but true.
Mistake four: ignoring cuff stretch. A logo that looks perfect flat may widen, bow, or distort when worn, especially on ribbed knits. This is why a worn sample view matters so much in an embroidered Beanies Logo Placement guide.
Mistake five: choosing thread colors only from a screen. Thread has sheen, texture, and lighting shifts. Digital color matching helps, but it is not magic. If color is critical, request a thread chart reference or a sample photo under neutral light.
Mistake six: skipping sample review for a high-stakes order. That is how brands discover alignment problems after 1,000 pieces are already decorated. Sampling adds time, usually several business days, but it can prevent a much larger loss.
Mistake seven: treating every beanie style the same. Heavy acrylic, fine gauge knit, recycled yarn, fleece-lined cuffs, and chunky rib all behave differently under embroidery. The same 3-inch logo may look clean on one style and tortured on another.
Mistake eight: approving the wrong artwork version. It sounds basic because it is basic. Still happens. Make sure the file used for production matches the approved proof, especially if your brand has alternate icons, stacked logos, seasonal colors, or one-color versions.
Final Buyer Checklist Before You Approve Beanie Logo Placement
Before you approve bulk production, run through the boring checklist. Boring is good. Boring means fewer surprises.
- Confirm the beanie style, color, cuff height, and material blend.
- Confirm the decoration method: direct embroidery, woven patch, embroidered patch, leatherette patch, or PVC patch.
- Confirm finished logo size in inches or millimeters, not just “small” or “medium.”
- Confirm placement measurement from the cuff edge and center line.
- Confirm thread colors, patch colors, border style, and backing method.
- Confirm the artwork has been simplified for embroidery at the approved size.
- Confirm a digital proof, physical sample, or clear sample photo has been approved in writing.
Request a marked proof that shows exact placement. A vague mockup where the logo floats in the right neighborhood is not a production spec. It is decoration fan fiction.
Compare at least two options for brand-sensitive orders. Front cuff versus side cuff. Direct embroidery versus woven patch. Tonal thread versus high contrast. The better choice is often obvious once you see both options next to the beanie color and cuff height.
Review the logo on a worn form if possible. The worn view is the truth. The flat lay is just the product behaving politely for the camera. Save the approved spec sheet for reorders so future batches match instead of becoming a slow-motion brand consistency disaster.
A good beanie placement decision is not complicated. It is specific. Pick the right decoration area, respect the knit, simplify the artwork, check the sample, and write down the final spec. That is how you get custom beanies people actually wear instead of apology merch stuffed in the back of a closet.
FAQs
What is the best logo placement for embroidered beanies?
Front-center on the cuff is usually the safest and most visible placement for embroidered beanies. Side cuff placement works well for a quieter retail look. Patch placement is better when the logo has small details, small text, or a shape that does not stitch cleanly into knit fabric.
How big should a logo be on an embroidered beanie?
Most cuff logos work best around 2 to 4 inches wide and 1 to 2 inches tall, depending on cuff height, knit type, and logo shape. Small icons can go narrower. Wide wordmarks may need simplification. Avoid oversized embroidery because it can stiffen the cuff and distort the knit.
Does logo placement affect the cost of custom embroidered beanies?
Yes. A single front cuff embroidery is usually the most cost-efficient option because it is standard and fast to inspect. Side, back, oversized, patch, or multi-location designs can increase unit cost because they add handling time, setup complexity, and alignment risk.
Should I choose direct embroidery or a patch for beanie logo placement?
Choose direct embroidery for simple logos, bold icons, and clean wordmarks. Choose a woven, embroidered, leatherette, or PVC patch for small text, detailed artwork, or a more structured retail look. If the logo has gradients, thin lines, or tiny taglines, a patch is usually the smarter choice.
How do I approve an embroidered beanies logo placement guide proof?
Check the exact logo size, placement measurement from the cuff edge, thread colors, and center alignment. Review the logo on a worn form or sample photo whenever possible. Approve the final spec in writing and keep it for reorders so future production matches the original batch.


