A fitness Frosted Zipper Bags Packaging Insert checklist is the simplest way to keep pouch size, insert size, artwork, and production requirements aligned before quoting starts. Frosted bags soften visual noise, which can help the brand presentation, but that surface also makes sizing, contrast, and barcode placement less forgiving than buyers expect.
Think of the checklist as the working spec, not a formality. It should define what is being packed, how the insert sits in the pouch, and which details must be approved before production begins. For supplements, resistance bands, apparel accessories, and promo kits, the insert has to match the bag opening, the fold direction, and the shelf presentation at the same time.
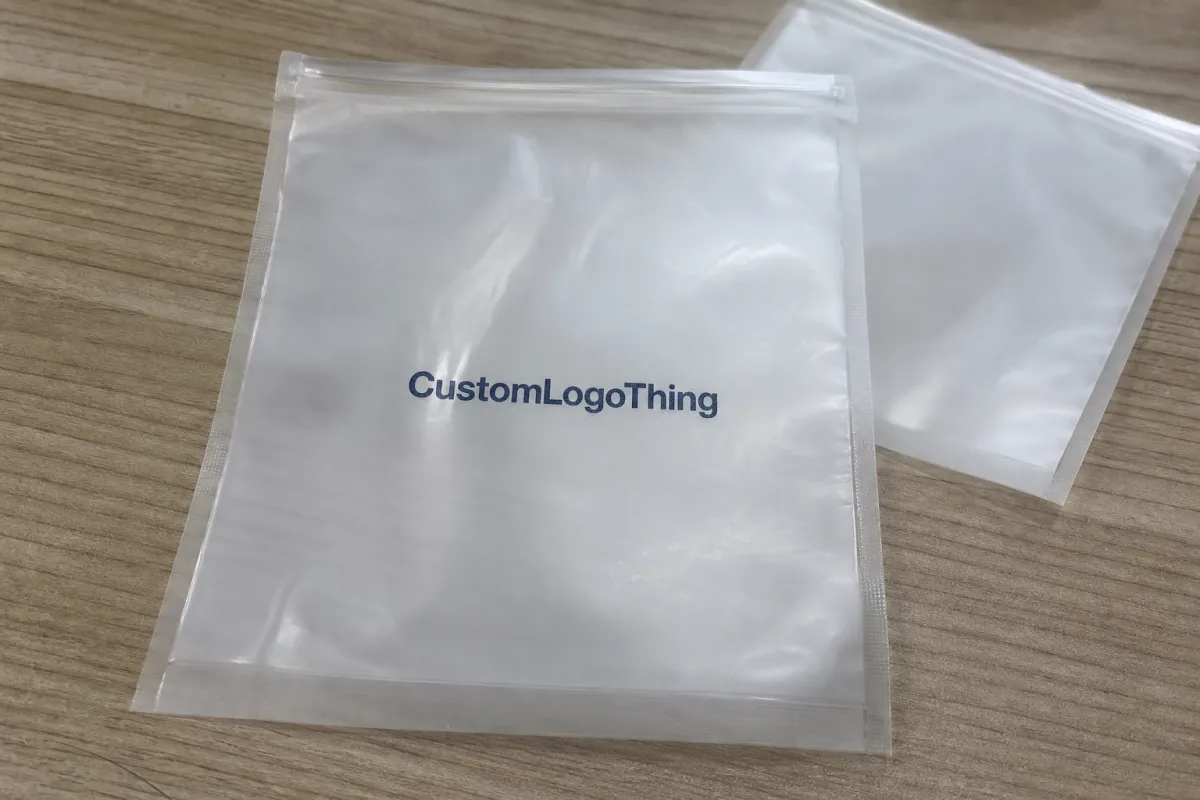
"A pouch can look finished from a distance and still fail if the insert is off by a few millimeters."
When the same order also needs matching collateral or outer packs, keeping the information tied to Custom Packaging Products helps the whole packaging system stay consistent across SKUs.
What a Fitness Frosted Zipper Bags Packaging Insert Checklist Covers
The job of the checklist is to turn a rough idea into a buildable spec. A frosted zipper bag may seem simple, but the usable space is affected by zipper track height, side seals, gusset depth, and insert stiffness. A card that looks fine on screen can bind at the zipper, ride too high, or curl once packed.
The checklist should capture the essentials clearly: finished bag dimensions, usable internal width and height, zipper style, bag thickness, insert stock weight, print coverage, barcode requirements, quantity targets, and final approval contact. With that information in one place, the supplier can quote the correct build instead of guessing, and the buyer can compare options on the same baseline.
For fitness brands, the insert often does more than fill empty space. It may explain a bundle, reinforce ingredients or usage claims, point to a workout plan, or present a small premium item as part of a polished kit. In that role, the insert is part of branded packaging, not just a loose sheet inside a pouch.
- Bag data: finished size, zipper position, usable opening, and gusset depth if present.
- Insert data: stock type, thickness, fold style, corner radius, and finish.
- Artwork data: live area, bleed, safe margin, spot white needs, and barcode size.
- Order data: SKU count, quantity by SKU, ship-to location, and approval contact.
If the launch includes more than one component, this checklist should also govern how the pouch, insert, and any companion piece are handled together. One clean record is easier to manage than multiple versions floating around in email, especially when the order also includes custom printed boxes or other adjacent packaging components.
How the Insert Checklist Flows from Dieline to Approval
The process usually starts with a rough idea and a measurement, then moves into a dieline, proofing, and signoff. Most problems show up at the handoff between teams. Marketing wants visual impact, operations wants packability and line speed, and the supplier needs a spec that can actually be produced.
A strong fitness Frosted Zipper Bags Packaging Insert checklist gives everyone one version of the truth. The most useful checklists make the decision points hard to miss: insert orientation, fold direction, whether the piece sits behind or in front of the product, barcode visibility through frosted areas, and whether any copy must stay clear of the zipper line.
It helps to break the work into three stages. First, define the physical build. Second, lock the artwork rules. Third, define approval and change control. That makes it easier to see where a project is stuck. A measurement issue is not the same as a color issue, and both are different from a late copy change.
- Dieline stage: confirm finished size, bleed, and safe area.
- Artwork stage: place logo, claims, barcode, and legal copy inside approved boundaries.
- Approval stage: record who signs off, which file is final, and what changes still need written approval.
For teams that manage multiple product packaging programs, the same habit helps with other Custom Packaging Products orders too. One master file structure reduces confusion about which mockup is current, which proof was approved, and whether any copy changed after the quote.
Key Specs That Shape Fit, Finish, and Shelf Presence
The build choices matter more than many first-time buyers expect. Frosted film softens contrast, so graphics that look crisp on a monitor may feel muted on the pouch. A zipper that sits too high can reduce usable insert height. A thicker pouch wall may improve hand feel, but it also changes how the insert sits and whether the card curls or flexes.
For the bag itself, buyers usually compare frosted PE, frosted PP, or a laminate with a matte feel. For the insert, common choices are 14pt to 16pt C1S for heavier brand cards, or 10pt to 12pt when the piece is mostly informational. If the insert needs to survive repeated handling, soft-touch or matte usually feels more refined than high gloss, though gloss can work when the artwork is bold and typography is large enough.
Graphics are part of fit and readability, not just decoration. White ink can lift a logo off a frosted surface, but heavy white coverage can make a layout feel busy. Thin type, especially below 7 pt, can disappear once the insert is viewed through frosted material or under store lighting. The checklist should record print coverage, contrast requirements, and any special white-underprint areas.
If sustainability matters, ask for FSC-certified paper on the insert side when that claim is relevant to the brand, and make sure the supplier can explain the paperwork clearly. The Forest Stewardship Council publishes the basics at fsc.org, which is useful when paper sourcing is part of the decision.
One detail that gets missed often is tolerance. For an insert card, a width or height tolerance of about +/-1 mm to +/-2 mm is often a practical conversation, but the right answer depends on the pouch design and the insert path through the zipper opening. If the layout runs close to the edges, ask for the tighter tolerance in writing.
- Material feel: frosted, matte, soft-touch, or gloss.
- Insert stock: 10pt, 12pt, 14pt, or 16pt depending on stiffness needs.
- Artwork control: minimum type size, barcode quiet zone, and white ink coverage.
- Fit control: finished size tolerance, fold direction, and zipper clearance.
Pricing, MOQ, and Unit Cost for Insert Programs
Price is driven by a few concrete factors: bag size, film thickness, zipper construction, insert complexity, number of print colors, and whether the order is one SKU or several. A simple one-color insert in a standard frosted pouch is a very different job from a multi-panel insert with dense copy, variable data, and fine barcode placement. That is why a quote without the checklist often misses something important.
MOQ matters too. Small test runs are useful when the packaging design is still being refined, but they usually carry a higher unit cost because setup time is spread across fewer pieces. Larger runs lower the per-unit number, but they require better forecasting and more confidence in the final artwork. For many buyers, the practical path is a pilot run to prove fit, then a production run that locks in better pricing.
| Run size | Typical unit cost | What usually changes | Best use case |
|---|---|---|---|
| 1,000-2,500 units | $0.42-$0.78 | Higher setup share, simpler proofing, fewer options | Pilot launch, sample market test |
| 5,000 units | $0.18-$0.34 | Better material buying, steadier production efficiency | Core SKU, first serious reorder |
| 10,000+ units | $0.10-$0.24 | Lower per-unit setup, stronger forecast discipline needed | Established product packaging program |
Those numbers are directional, not universal. A larger pouch, a more complex zipper, heavy print coverage, or multiple insert versions will move the price up. Freight, kitting, and special inspection can do the same. Buyers should also budget for prepress, proofing, and sampling as separate buckets, because those costs are easy to miss until the order is already moving.
When comparing branded packaging options, ask for pricing in a way that shows the real landed cost, not just the factory number. Unit price, proof fee, sample cost, freight, carton configuration, and any assembly step should all be visible. If the supplier cannot break those pieces out, the quote is harder to compare against other Custom Packaging Products options or against a different format altogether.
For material and shipping context, it also helps to check transit standards. The International Safe Transit Association explains common packaging test methods at ista.org, which can be useful if the pouch and insert kit will go through e-commerce fulfillment or repeated parcel handling.
Production Steps and Timeline From Proof to Shipment
Most schedule risk sits in the first half of the job. Once the file is clean and approved, production usually moves through artwork review, digital proof, sample or strike-off, final approval, scheduling, printing or converting, packing, and shipment. The exact pace depends on the supplier’s line load, the level of customization, and whether the order includes the pouch and insert as a matched set.
A practical timeline for a straightforward job is often 12-15 business days from proof approval to shipment, but that can stretch if the project needs new tooling, material sourcing, or revisions after the first proof. If the insert must match a pouch exactly, give the supplier enough time to verify both components together. A custom insert that looks fine on its own may still need small corrections once it is tested inside the bag.
The checklist protects the calendar. Missing logo files, a barcode edit, or a late approval can cost a full production slot. It is smart to build at least one extra review day into the internal process and, for launch projects, a shipping buffer on top of that. The buffer matters even more if the kit includes custom printed boxes or other package branding pieces that need to arrive together.
- File check: 1-2 business days for dimensions, bleed, and art readiness.
- Proof stage: 1-3 business days for digital proof review and feedback.
- Sample stage: 3-7 business days if a physical sample is required.
- Production and packing: often 5-10 business days for a standard run.
- Transit: depends on freight method and destination.
The most useful question is not "How fast can you ship?" but "What has to be approved before the job can safely start?" That keeps the team focused on the real blockers instead of assuming the supplier can absorb every revision without consequence.
Common Mistakes That Trigger Reprints or Delays
Most reprints come from a few repeatable errors. The first is using the wrong internal dimensions. A bag can measure close enough on a render, but if the insert card is even slightly too wide or too tall, it can snag at the zipper or shift after packing. The second is assuming that a screen proof shows the full result. It does not, especially on frosted material where contrast behaves differently once ink hits the substrate.
Another common miss is barcode placement. UPC and QR code areas need the right quiet zone and a clean print environment, or scan reliability drops. Thin copy is another trap. What reads neatly on a monitor can look fragile on frosted film, especially if the font weight is light and the background is not fully controlled. The checklist should call out minimum type size, barcode placement, and whether the proof was judged on a printed sample or only on screen.
Late changes hurt more than many buyers expect. If the order has already been released and someone wants to change quantities, finish, copy, or insert orientation, the schedule can slip and the cost can climb. That is not supplier drama; it is how print and converting work. Every revision affects setup, approval, and packing.
"A bag can pass the fit test and still fail the brand test if the insert looks crowded, dull, or inconsistent with the rest of the line."
Here is the short version of what usually causes trouble:
- Using a dimension that is close on paper but wrong inside the pouch.
- Skipping bleed or safe margins on a trimmed insert.
- Placing barcodes too close to a fold, edge, or zipper zone.
- Approving color from a monitor instead of a printed proof.
- Changing copy after the final quote or production release.
The easiest way to avoid those problems is to freeze the checklist before the quote is finalized. If you need a physical sample, ask for it early, especially when the artwork includes fine text, dense branding, or tightly aligned graphics. A solid checklist protects the order, the launch, and the reorder path that comes after it.
What should a fitness frosted zipper bag insert checklist include before I request a quote?
Start with exact bag dimensions, zipper style, and usable internal space, then add insert size, stock weight, finish, fold or orientation details, print coverage, barcode needs, quantity, and ship-to location. The more complete the checklist, the fewer surprises you get in the quote.
How do frosted finish and zipper style affect a fitness frosted zipper bag packaging insert?
Frosted film softens graphics, so contrast and type weight matter more than they would on a bright white surface. The zipper position also changes the top margin and usable insert height, and a tighter opening can require a narrower or more flexible insert.
What drives unit cost for frosted zipper bags with packaging inserts?
Bag size, film thickness, zipper construction, print coverage, number of colors, and the number of SKUs all affect cost. MOQ, proofing, packaging, and freight then shape the final landed number, which is why a clean checklist is so useful before you compare quotes.
How long does production usually take after artwork approval?
Simple jobs can move quickly once the proof is approved, but new artwork, revisions, custom materials, or a pouch-and-insert combo can extend the schedule. Shipping method and seasonal plant load can also change the final timeline, so it helps to keep a buffer.
What are the most common mistakes on a frosted zipper bag packaging insert checklist?
The biggest issues are wrong dimensions, missing bleed, thin text, barcode placement errors, and approving color from a screen instead of a printed proof or sample. Those are easy to miss, and they are also the ones most likely to trigger a reprint.


