Buyer Fit Snapshot
| Best fit | To Branded Shipping Labels projects where brand print, material claims, artwork control, MOQ, and repeat-order consistency need to be specified before quoting. |
|---|---|
| Quote inputs | Share finished size, material target, print colors, finish, packing count, annual reorder estimate, ship-to region, and any compliance wording. |
| Proofing check | Approve dieline scale, logo placement, barcode or warning zones, color tolerance, closure strength, and carton packing before bulk production. |
| Main risk | Vague material claims, crowded artwork, missing packing details, or unclear freight terms can make a low unit price expensive after revisions. |
Fast answer: To Branded Shipping Labels: Material, Adhesive, Artwork, and MOQ should be specified like a repeatable production item. The safest quote records material, print method, finish, artwork proof, packing count, and reorder notes in one written spec.
Production checks before approval
Compare the actual filled-product size with the drawing, then confirm tolerance on folds, seals, hang holes, label areas, and retail display edges. Reserve space for logos, QR codes, warning copy, and material claims before decorative graphics fill the panel.
Quote comparison points
Review material grade, print process, finish, sampling route, tooling charges, carton quantity, and freight assumptions side by side. A quote is only useful when the supplier can repeat the same color, closure quality, and packing count on the next order.
One blurred tracking mark can turn a tidy fulfillment shift into a pile of exceptions. A parcel can be packed correctly, insured properly, and routed through the right lane, then one poor scan from a guide to Branded Shipping Labels sends it into manual handling before it clears the first depot. That small rectangle carries more weight than most teams admit. It sits at the collision point of brand promise, warehouse reality, and carrier logic. Ignore it, and the failure shows up in labor, not just aesthetics.
If you manage ecommerce shipping or oversee order flow at scale, this is not a decorative side topic. A useful guide to branded shipping labels has to behave like an operations manual with a brand skin on it: stable, measurable, and repeatable under pressure. The path runs from design logic to production math, from scan reliability to labor impact, and from the first mockup to a rollout that still works when volume jumps at quarter-end.
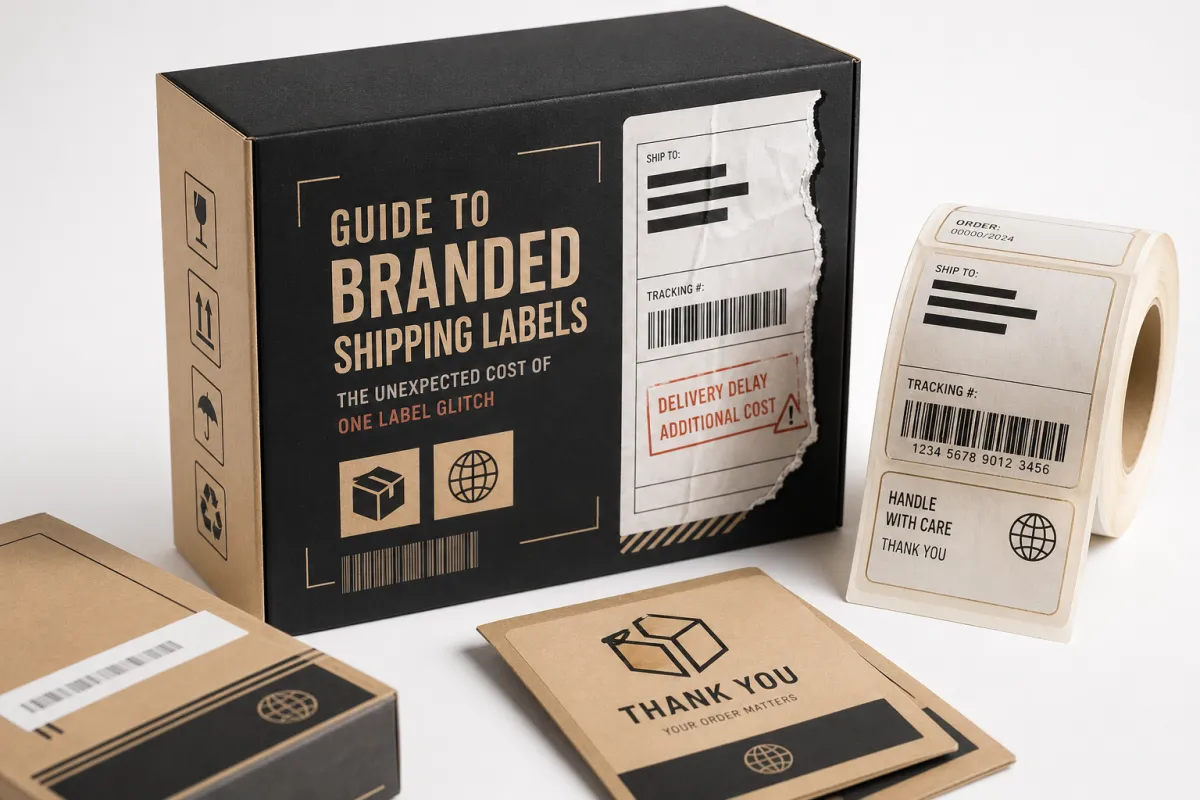
Guide to Branded Shipping Labels: The Unexpected Cost of One Label Glitch
One blurred code, one broken promise
Picture a DTC skincare brand shipping 12,000 parcels a month. Pickup starts, and one carrier branch reports that 7% of parcels in the morning manifest are throwing scan errors. The team assumes label defects are rare, maybe 2% at worst, and keeps the line moving. By afternoon, support is staring at 140 complaint threads from buyers asking where their package went. The shipping queue slows, fulfillment leadership spends 4-6 extra labor-hours reprinting and replacing affected labels, and customer response time slips. At a conservative labor rate of $24 an hour, that is roughly $3,400 gone in a single day, before you count missed delivery windows and the wear on customer trust. That is the kind of failure a guide to branded shipping labels has to prevent.
I have seen versions of this happen in real facilities. Not the dramatic kind with sirens and all that, just the quieter mess where a label prints fine on screen, then falls apart under dock lights and scanner pressure. The weird part is how fast it compounds. One bad lane becomes three, then the “temporary workaround” turns into a daily habit.
What a guide should cover, and what it should not try to do
Most teams begin with logo placement and miss the operating system around it. A useful labeling framework covers four layers: visual identity, machine readability, compliance, and production reliability. The brand block needs to look like part of the packaging system without crowding the address block, barcode quiet zones, or the carrier metadata that scanners and their software expect.
What matters most is deciding where each requirement lives. The label has to satisfy the person opening the box and the warehouse worker scanning in dim light. It also has to satisfy carrier validation logic and API checks. Those demands overlap, but they do not cancel each other out.
The biggest misconception is that branding can be bolted on after data architecture. It cannot. If your Custom Shipping Labels are designed before your routing rules are fixed, the final design becomes a museum piece: attractive, maybe, but operationally fragile.
Who this is for
The practical audience is narrow and familiar:
- Ecommerce brands under pressure to keep label output consistent.
- Wholesalers shipping a mix of pallet and parcel volume.
- Subscription brands with steady replenishment cadence.
- Fulfillment teams using multi-carrier routing and dynamic service rules.
In each case, the brand appears on transit packaging long before the buyer sees anything inside the box. The same pattern shows up again and again: the strongest teams are not always the most polished designers. They are the teams that set delivery guardrails early and measure every stage after launch.
By the end, label decisions should connect directly to outcomes: higher first-scan rates, fewer failed deliveries before POD, less exception handling, and cleaner order fulfillment throughput. This is not branding dressed up as logistics. It changes delivery consistency, cost per shipment, and how often customer service has to explain delay messages.
Guide to Branded Shipping Labels: Can the Program Stay Reliable in Real Shipping Flow?
Physical flow: from data to POD handoff
The label journey is more than print and stick. A practical guide should map the full path:
- Design assets and approved template check-in.
- Order database export with tracking, destination, and shipment metadata.
- Label rendering through the print system.
- In-line quality inspection with visual and machine-read checks.
- Carrier acceptance scan and facility handoff.
- In-transit scans and exception handling.
- Proof-of-delivery confirmation and return workflow.
Break that chain anywhere and the pain shows up later. If your database sends address fields after label generation, parcels get misrouted. If your print queue swaps fonts or margins without version control, tracking numbers become hard to read. If finishing damages the adhesive, peel reliability drops and returns rise.
Technical layers and where brands fail
Most solid programs separate the work into layers:
- Visible branding layer: logo, palette, typographic identity.
- Machine-readable layer: barcode, tracking, service-level marks, and routing markers.
- Carrier compliance layer: required fields and placement rules.
The most common failure is artwork-first design. Teams push full-bleed visuals and squeeze the carrier-compliant data into leftover space. The label may look sharp at first glance, then fail on first scan, especially on older handheld devices. A clear symbol with a stable quiet zone is worth more than a decorative crest with compressed machine text.
I still see the same mistake in fulfillment reviews: a label with polished gradients but a tracking barcode at 80% contrast on matte stock under warehouse lights. Contrast drops under glare, scanners ask for another pass, and the brand gets blamed for a systems issue it did not create. That is the part people miss when they treat labels like stickers instead of instructions.
Promotional versus operational labels
Branded label planning cannot ignore intent. Promotional labels push memory and repeat purchase intent. Operational labels push successful delivery. Both matter, though only one is optional. The best structure is a hybrid hierarchy: brand block fixed in a safe zone, machine-readable data in primary zones, and campaign content limited to optional areas.
The hybrid layout usually looks like this:
- Top-left: brand mark and support contact.
- Center: destination block, tracking, and barcodes.
- Lower strip: service code, dimensional weight band, handling icons.
If that hierarchy is not deliberate, one side of the operation loses every time: either customer appeal or scan accuracy.
Key Factors That Determine Performance of Branded Shipping Labels
Material and finish decisions that outlast style debates
Material choice is where many teams end up paying twice. Start with substrate and adhesive. For low-risk domestic mail in controlled settings, paper with standard pressure-sensitive adhesive is often enough. For mixed transit that includes truck handling and sort centers, stronger adhesive and weather resistance lower peel failures. For cold storage zones and damp conditions, synthetic film can earn its keep fast.
Matte laminates reduce glare, though they can soften scanner contrast on some dark labels if the barcode sits near-black. Gloss can improve contrast, yet bright facilities can throw glare across small human-readable text. If parcels are moving through bins, reject pockets, and fast sort lines, choose shipping materials for durability and edge stability before appearance.
The strongest comparison is often unexpected: a label that looks premium in a product photo can be cheaper in the long run than a cheaper sheet that fails dimensional weight scanning at the carrier gate and doubles labor. The label itself does not change dimensional weight, but poor service-code accuracy can still push the wrong handling path, and that is where print science and brand taste have to stop arguing and start trading data.
Print clarity: what “sharp” actually means
For a workable workflow, practical thresholds help more than vague language:
- Minimum print resolution: 300 dpi for general output.
- Recommended for brand plus dense data: 600 dpi.
- Barcode minimum module size: commonly 0.25 mm or above, depending on symbology.
- Target contrast: dark elements on light backgrounds should clear high-contrast thresholds in your scanner environment; if mixed lighting makes that uncertain, widen spacing and darken the darks.
Batch consistency matters more than a perfect single proof. One odd print is survivable only if quality checks catch it. If print drift shifts color over a 2,000-unit run, labels may still look fine to the eye while introducing machine-read errors. That mismatch is where the cost hides.
For carriers that require verification, treat barcode and text checks like line-speed control points, not optional polish.
Information architecture and data completeness
The standard model many teams use follows top-middle-bottom structure:
- Top tier: brand block, contact URL, legal disclaimers if needed.
- Middle tier: destination, sender, carrier details, shipping service, and package dimensions.
- Bottom tier: barcode or QR, special handling, return instructions if the lane requires it.
The danger is truncation: address lines cut by template width, missing suite or unit numbers, or postal code fields wrapped into impossible widths. In a production-focused template, define mandatory fields and hard character limits before design starts. If a field overflows, the order should fail validation before print.
Carrier specs and postal rules move. The cleanest approach is to track field logic as a controlled rule set tied to destination. If you export dimensional weight into the wrong column, billing changes and so does the cost profile.
Compliance and workflow fit
There is also the operational side: WMS, OMS, returns portal, and API endpoints. In a controlled setup, your label system needs late-order edits to propagate safely. If an address changes after the scan window, reprint must happen automatically or be blocked explicitly so mismatched data never reaches the dock.
Standards help keep the work honest. Many teams check packaging transport assumptions against references such as ISTA test methods for handling and Packaging Industry guidance on material performance. That does not remove risk, but it forces discipline around testing and verification.
Operationally, this is also where customized barcode labels can fail quietly: if the rule set changes but your template does not, one carrier update can invalidate an entire lane overnight.
Step-by-Step Guide to Designing and Ordering Branded Shipping Labels
Step 1: Build the shipping truth first
Before opening design software, map the shipment mix. Count orders by carrier, destination type, and average package shape. If 70% of your profile behaves like small parcel and 30% looks more like LTL cartons, the template needs parallel families. A one-size label for every channel usually fails. A practical approach starts with data: if three carriers dominate, create three primary templates, not thirty improvised variants.
Use the raw order fulfillment mix to split lane families:
- Urban, high-volume, flat-rate routes.
- High-dimensional-weight e-commerce bundles that need larger service labels.
- High-risk international parcels with customs blocks.
At this stage, you should also decide where visual language can be branded and where it must remain neutral. A Custom Shipping Label that can survive international handoffs usually looks less expressive but more reliable.
Step 2: Create a master template with protected zones
The first draft should define plain boundaries:
- Barcode margin and quiet zone floor.
- Human-readable tracking placement.
- Optional campaign strip.
- Peel edge and corner safety space for folded parcels.
That is not overengineering. It is standard hygiene in a scalable program. A protected zone keeps last-minute edits from pushing data off the edge. Without that structure, design revisions become accidental layout changes with costly consequences.
Step 3: Run 3 proof variants and hard-scan tests
I recommend light, medium, and premium builds:
- Light: minimal branding, maximum reliability.
- Medium: standard brand treatment with a restrained promotional area.
- Premium: stronger art layer with tighter margin review.
Each proof needs to be physical, not just digital. If you are using thermal transfer on direct thermal stock, the proof should include real substrate and real print calibration. A PDF that looks clean can still fail at pickup when a scanner reads the printed version.
When you compare variants, use metrics that include package damage and exception carryover, not only image clarity. A premium art layer can still be the wrong choice for a specific distribution lane if it causes 0.5% more scan retries.
Step 4: Choose integration method and validation
At this stage, choose one data path:
- API integration: fastest and lowest risk for continuous volume, but setup-heavy.
- CSV workflows: simpler for smaller teams, with moderate risk from malformed rows.
- Platform plugin: quick to deploy with e-fulfillment stacks, but less flexible on advanced field validation.
Whatever path you choose, enforce mandatory checks:
- Validate address field lengths.
- Block missing postal fields before print.
- Verify tracking number format per carrier.
- Flag dimensional anomalies where length + width + height triggers special handling.
If your labels are generated from API feeds, include checksum-style field verification and keep the parser rules versioned. It is the logistics equivalent of guardrails in a wet parking deck.
Step 5: Pilot then lock for scale
Pilot first is not optional if delivery consistency matters. Pick one SKU family, one region, one carrier, and a short monitoring window, usually 48 hours. Measure scan success, rejection, and returns caused by failed labels. If the exception rate crosses the threshold you set in advance, such as 1.2% in the first 300 scans, pause expansion and tighten the layout. That is where a guide to branded shipping labels beats instinct: it gives you a rollback point before margin loss becomes systemic.
Cost of Branded Shipping Labels: A Practical Pricing Breakdown
Where costs actually happen
Most procurement teams look only at unit price and get surprised six months later. A real cost structure splits total cost into three buckets: fixed setup, variable per-label, and fulfillment labor impact.
Fixed costs include design approval, preflight, template setup, and sometimes digital workflow setup. These often fall between $150 and $500 depending on complexity and integrations.
Variable per-label costs include substrate, print, finishing, and adhesive. In many operations, that lands around $0.18 to $0.28 per unit for mid-range runs when printing 5,000+ labels. At lower volume, cost can climb past $0.40 for the same finish.
Labor and exception costs include reprint time, relabeling, rerouting, and support handling. That part is less visible and usually more damaging when ignored.
Hidden cost factors nobody budgets for
The expensive truth sits in the details:
- Reprints from scan failure: each bad scan can add $0.30 to $2.20 depending on manual handling required.
- Label waste: one misaligned proof can waste 20-40 labels in a run.
- Storage damage: curled edges, edge lift, moisture exposure.
- Carrier exceptions: support costs and delayed pickup windows create knock-on penalties.
In high-volume fulfillment, hidden costs can exceed print cost by 10% to 25%, especially when staff spend repeated time correcting address data instead of shipping orders. In that sense, a stronger material grade can be cheaper once avoided rework is included.
Unit-cost levers you control
Here are the trade-offs teams can still decide:
- Material: paper versus synthetic, matte versus gloss, adhesive class.
- Finish: extra coating and anti-glare layers.
- Order volume tier: 1k, 5k, 20k+ monthly labels.
- Run style: one large print run versus continuous replenishment.
- Integration complexity: API-driven variable data adds setup but lowers manual error.
If your operation handles bulky packaging, include dimensional weight in pricing discussions. The label does not change dimensional weight by itself, but accurate routing data can still influence lane choice, handling class, and delivery speed in practice.
Pricing scorecard: scenarios that hold in practice
| Monthly run type | Typical monthly volume | Recommended material | Setup range | Variable unit range | Best fit |
|---|---|---|---|---|---|
| Low volume | 500-2,000 labels | 120 gsm paper, matte, standard adhesive | $150-$250 | $0.35-$0.55 | Controlled pilot, seasonal promos, small e-commerce teams |
| Mid-volume | 2,000-20,000 labels | 140 gsm paper or film blend, reinforced edge | $250-$450 | $0.20-$0.32 | Subscription and repeat fulfillment programs |
| Enterprise | 20,000+ labels | Film or synthetic hybrid, industrial adhesive | $400-$900 | $0.16-$0.25 | Multi-carrier, mixed channels, global returns |
Margin control, or how to decide upgrades are worth it
Set a target acceptable label cost per order by channel. If branded labels move a package from $0.22 to $0.30 each but cut customer support incidents enough to save $0.12 per order, the math still works. The decision is not sticker price alone; it is lifecycle cost. In a mature program, teams compare:
- First-scan success before and after.
- Average fulfillment time per shipment.
- Return incident volume tied to missing tracking or unclear labels.
- Review scores tied to perceived professionalism.
If the branded option produces measurable reliability gains, the upgrade pays for itself. Many teams discover that better barcode quality outperforms higher graphics spend in both margin and customer trust.
Process and Timeline: From Mockup to Carrier-Ready Scale
Week-by-week rollout model
Most teams underestimate sequencing. A practical rollout looks like this:
- Discovery (2-5 days): carrier mix, packaging formats, volume forecast.
- Template design (3-6 days): visual and compliance layout in two passes.
- Digital proof and compliance check (2 days): addressability and field mapping with carriers.
- Pilot run (3-5 days): small live batch across one carrier and one region.
- Review and correction (2 days): scan failures, trimming of margins, readability fixes.
- Full production: only after acceptance checkpoints are hit.
That schedule is aggressive for complex operations, though still realistic. A guide to branded shipping labels with weak controls always takes longer than planned.
Timeline checkpoints that prevent surprises
- Brand sign-off: no visual changes after this without a hard re-eval.
- Data mapping sign-off: field names, truncation limits, and fallback handling confirmed.
- Sample scan validation: at least 20 scans across two devices per carrier.
- First-batch acceptance: threshold-based pass or fail rule before scaling.
Use a shared acceptance sheet with pass criteria and owner names. If the test is only “looks fine,” you do not have a process. You have a hunch dressed as approval.
Parallel path planning: don't let design block integration
One productive tactic is to run design and operations setup at the same time. While art direction finalizes the master template, the integration team can prepare SKU mapping, system hooks, and return-label logic. That keeps launch from stalling while one department waits on another.
While design tweaks are in motion, configure carrier fallback mapping, API credentials, and warehouse printer profiles for the final three variants. That shortens launch delays and protects the first-batch window.
Rush and changes
Fast-track launches are common, and the request sounds simple. The reality is less forgiving. Rush printing can cut lead times to 3-7 days, but validation and compliance still need tests. Carrier field changes, customs format updates, or revised address conventions can demand an immediate template refresh. Plan an emergency window and keep a fallback template active. If exceptions cross your pilot threshold, say 2% or higher, roll back to baseline labels and continue refining from there.
“A branded shipping label should behave like a contract between your brand and the network that carries it. When either side cannot read it, the contract is broken.”
Common Mistakes and Fixes in Branded Shipping Label Programs
Mistake: Treating the program as pure marketing
If a guide to branded shipping labels is judged only by how polished it looks, the operational contract is already being ignored. Fix that by defining success metrics: first-scan rate, exception rate, and label waste percentage. I have seen teams improve operational outcomes by 15% simply by moving reporting away from “visual approval” and toward scan reliability dashboards.
Mistake: Oversized branding, undersized data
This is the most common failure pattern. The brand area grows until key fields can barely fit. The fix is simple and strict: define field priority and do not let design invade minimum data zones. Keep tracking and address fields dominant, then layer branding around them.
Mistake: Approving from monitor only
If a proof never reaches physical print and scan, you are guessing. In a proper audit, print samples on the final substrate and the scanner types used in live operations. Test across 2 to 3 lighting conditions: bright white, mixed fluorescent, and low-contrast dock lighting.
Mistake: No long-term replenishment planning
Another quiet failure is running out of buffer during peak weeks. Build safety stock by runway. If lead time is 7 days and daily demand is 1,200 labels, keep at least 10-14 days of coverage during volatile periods. That is not overkill; it is buffer design for ecommerce shipping spikes.
Mistake: Ignoring reverse flow
Returns and exchanges will happen. A future-proof system should include return-ready design logic: return barcode slot, order ID retention, and compatibility with reverse logistics labels. You can keep the same visual family while reserving a clean reverse pane.
Expert Tips and Action Steps: Your Guide to Branded Shipping Labels Launch
Build one source of truth
Keep every template version, carrier profile, and printing rule in one controlled repository. Version by carrier and region. A checksum-style validation is useful here: if a field map changes unexpectedly, the system flags it before print. In large operations, that single control can cut silent drift and accidental field loss dramatically.
Two-level approval workflow
Set this minimum model:
- Level 1: brand owner approves visual and brand hierarchy.
- Level 2: fulfillment lead approves machine readability and field completeness.
Do not collapse those gates into one person. A strong labeling program is a team standard, not a taste preference.
Set review cadence and supplier performance metrics
Use a 14-day review loop with concrete checkpoints: scan rates, reprint counts, print defects, and supplier response times. If support replies exceed your SLA, for example more than 24 hours on business days, escalate the service-level clause. The workflow is not stable by default.
Practical rollout checklist
- Choose two SKUs and one region.
- Select one carrier and one service tier.
- Set package protection and environmental handling assumptions.
- Run 48-hour monitoring after first dispatch.
- Scale only after scan and exception thresholds are met.
That gives you launch momentum without turning the first cycle into a full-channel risk event. If issues surface, you fix them quickly instead of retraining an entire shipping load.
Immediate next actions for teams ready today
Today, you can move from theory to execution in one cycle:
- Finalize template goals in one document.
- Schedule pilot print proofs this week.
- Define scan acceptance criteria with hard numeric thresholds.
- Launch one controlled batch in the next shipping cycle.
Pair this with the right companion products when needed: Custom Labels & Tags, Custom Shipping Boxes, and Custom Poly Mailers are useful, though only once the workflow is already locked. If you want results you can test, also review Custom Packaging Products and benchmark against relevant Case Studies.
Conclusion: Guide to Branded Shipping Labels That Improve Every Shipment
If one point deserves memory, it is this: a guide to branded shipping labels succeeds only when brand, compliance, and shipping reliability are treated as one system. A bad label does more than look wrong. It adds labor cost, delay risk, and confidence erosion before the parcel reaches the customer. Better architecture, sharper templates, and hard scan metrics can fix that.
Start with a practical baseline, test with physical proofs, and build governance around exceptions. A good package is not just attractive material. It is correct information, readable under pressure, and stable through transport cycles. If your system consistently outputs reliable labels, your guide becomes a growth tool rather than a recurring fire drill. Use the same rigor you bring to inventory planning, and your transit packaging starts to feel like part of your brand promise instead of a liability.
The most actionable takeaway is also the least glamorous: define protected zones, print real samples, scan them in real light, and do not scale until the first-batch numbers hold. That is the part that keeps a label program honest, and it is usually the difference between a pretty mockup and a shipping system that actually behaves.
FAQ
How does a guide to branded shipping labels improve both branding and shipping reliability?
It creates a repeatable template that protects identity and preserves required data hierarchy. Brand color and logo placement sit in approved zones while tracking, address, and service metadata remain machine-first. In a working framework, that reduces ambiguity and makes scan behavior much more predictable.
How long does it usually take to launch branded shipping labels from design approval to first shipment?
Small teams can often move in 1 to 2 weeks if design files, carrier specs, and shipment data fields are already normalized. Larger operations with deeper integration usually need 3 to 4 weeks for full validation. Pilot-first execution is almost always faster overall because first failure points usually surface in the initial micro-batch.
What is the biggest cost driver in branded shipping labels pricing?
Material and adhesive grade are major direct drivers because they affect durability and replacement rates. The larger hidden cost is operational: poor scan quality creates reprints, support overhead, and carrier exceptions. A lower unit price can become expensive if it reduces reliability. Match material to risk profile to keep costs in line.
Do branded shipping labels have to replace standard carrier labels completely?
No. Many teams use a hybrid model: carrier-required block plus branded panel on the same sheet. That keeps mandatory compliance intact while creating a visual brand touchpoint. Keep the same core rule set across hybrid labels, and scale only after proving scan metrics and labor impact in live batches.
How can I avoid failed scans when using highly branded shipping labels?
Set barcode quiet zones, keep high-contrast data, and maintain approved minimum dimensions for both barcode and human-readable text. Then validate with physical scanners, not just screens. In the first two batches, use a hard exception threshold and roll back nonessential design changes if scanning failure rises above that line.
What is one realistic first step for teams starting today?
Stand up a controlled pilot: two SKUs, one region, one carrier, 48-hour monitoring, then measure first-scan rate before expanding. It sounds simple, and that simplicity is exactly why it works.


