Buyer Fit Snapshot
| Best fit | Design Eye Catching Poly Mailers Fast projects where brand print, material claims, artwork control, MOQ, and repeat-order consistency need to be specified before quoting. |
|---|---|
| Quote inputs | Share finished size, material target, print colors, finish, packing count, annual reorder estimate, ship-to region, and any compliance wording. |
| Proofing check | Approve dieline scale, logo placement, barcode or warning zones, color tolerance, closure strength, and carton packing before bulk production. |
| Main risk | Vague material claims, crowded artwork, missing packing details, or unclear freight terms can make a low unit price expensive after revisions. |
Fast answer: Design Eye Catching Poly Mailers Fast: Film, Print, MOQ, and Carton Packing should be specified like a repeatable production item. The safest quote records material, print method, finish, artwork proof, packing count, and reorder notes in one written spec.
Production checks before approval
Compare the actual filled-product size with the drawing, then confirm tolerance on folds, seals, hang holes, label areas, and retail display edges. Reserve space for logos, QR codes, warning copy, and material claims before decorative graphics fill the panel.
Quote comparison points
Review material grade, print process, finish, sampling route, tooling charges, carton quantity, and freight assumptions side by side. A quote is only useful when the supplier can repeat the same color, closure quality, and packing count on the next order.
How to design eye catching poly mailers is not a cute branding exercise. It is a visibility problem, a shipping problem, and a trust problem packed into a thin layer of film. I have watched shoppers notice the mailer before they noticed the product inside, which is a strange little reality that keeps repeating itself in warehouses and on porches. A package can turn a low-cost shipment into a brand moment in about the time it takes someone to set down a coffee mug and unlock a phone. If you want how to design eye catching poly mailers to work in the real world, the mailer has to earn attention fast, then hold it long enough to feel deliberate.
How to design eye catching poly mailers starts with recognition, not decoration. A mailer that reads clearly from 6 feet away, survives a rough conveyor belt in Shenzhen or Dongguan, and still looks sharp in a phone photo will do more work than a crowded design stuffed with five fonts and a dozen tiny icons. I have seen that lesson repeat on factory floors, in buyer meetings, and in supplier calls where the most expensive idea was usually the one with the most ink coverage, which also tended to be the least useful. That is the tension inside how to design eye catching poly mailers: the package has to be bold without becoming noisy.
Custom Logo Things works with brands that need packaging to do real heavy lifting, so this piece stays focused on the factors that change results: contrast, layout, finish, cost, and timing. If you are comparing options, a smart starting point is often a well-built brief and the right substrate, whether that means browsing Custom Packaging Products or narrowing straight to Custom Poly Mailers. A 14 x 19 inch mailer and a 6 x 9 inch mailer do not just differ in size; they change freight cost, print coverage, and even whether a design can survive a 3-inch shipping label. That is why how to design eye catching poly mailers is always tied to production realities, not just artwork.
How do you design eye catching poly mailers for the first 3 seconds?
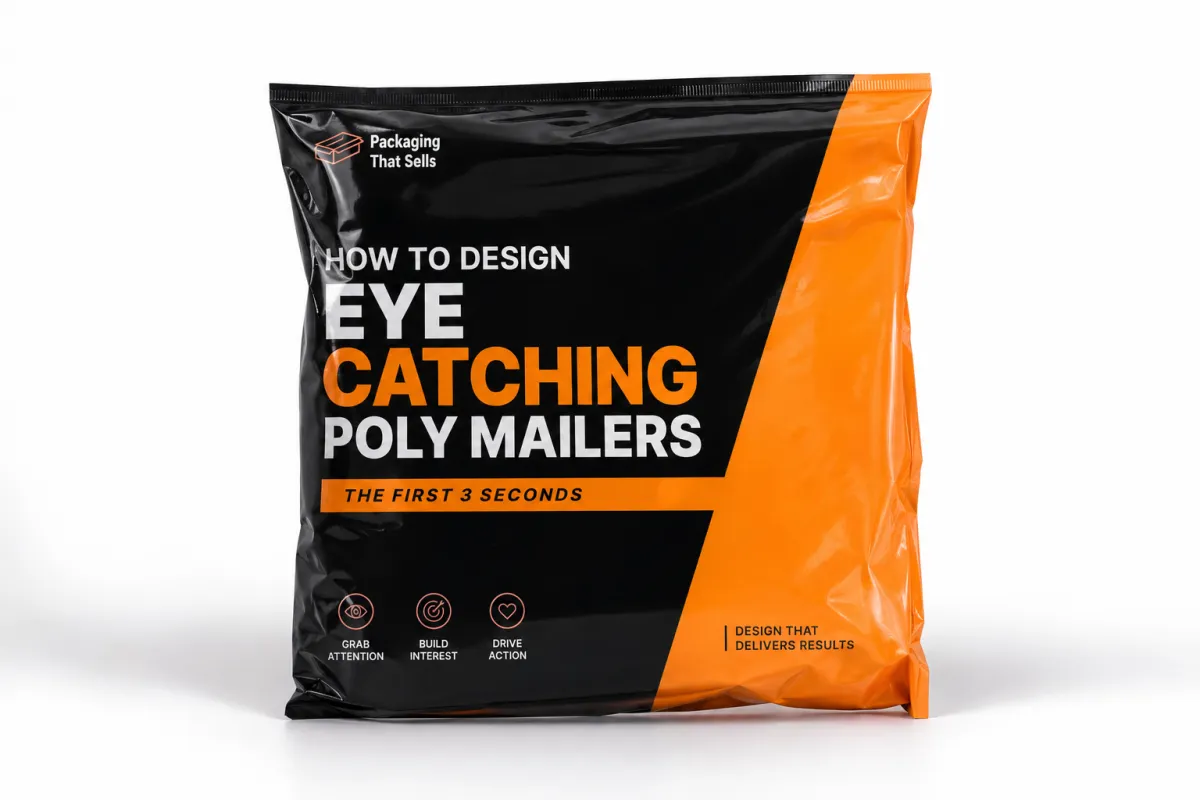
I still remember standing beside a sorting line in our Shenzhen facility while a buyer from a fast-growing apparel brand watched 500 plain White Poly Mailers move past under fluorescent lights rated around 4,000K. The one that stopped her was not the loudest one. It was a black mailer with a single silver logo, one bold diagonal stripe, and just enough whitespace to let the brand breathe. That moment stuck with me because it was so simple. The first rule of how to design eye catching poly mailers is blunt: the eye rewards clarity before it rewards detail.
A mailer gets about 3 seconds to do its job. In that window, the customer notices shape, contrast, logo placement, and whether the package feels intentional or improvised. Decorative artwork can help, but only after the design has established a strong visual anchor. If the package cannot be understood at arm's length, it will not be remembered at doorstep distance either. That is why how to design eye catching poly mailers is less about adding elements and more about Choosing the Right one to lead the composition.
On the production floor, the difference shows up fast. A merely decorative mailer looks busy on screen and flat in transit, while an effective mailer reads instantly even when the film catches glare or the corners pick up dust after 72 hours in a fulfillment center. A bold shape, a high-contrast logo, and one clear message usually outperform a full surface of patterns. The strongest layouts often land near a 60/30/10 balance: 60 percent visual rest, 30 percent supporting color, 10 percent focal point. That ratio is not sacred law, but it does save people from making a design that looks like a newsletter collided with a confetti cannon in aisle 7. It is one of the simplest ways I know to keep how to design eye catching poly mailers grounded in legibility.
One client meeting changed the way I explain how to design eye catching poly mailers. A beauty brand wanted to print a full collage of ingredients, slogans, and social icons. We mocked up the package both ways: a busy version and a stripped-back version with one centered mark and a 3 mm border. The minimal mailer looked more premium by a mile, and the product photos from their launch shoot confirmed it. The customer's hand reached for the cleaner package first, and the sales team told us the same thing after 1,200 units shipped from a warehouse in Los Angeles. That is not luck. That is recognition working exactly as it should, and it is a useful benchmark for how to design eye catching poly mailers that still feel premium.
Build the design from the brand story outward. If your brand is playful, the mailer can feel energetic through color blocks and an oversized wordmark. If the brand leans elevated or technical, a restrained layout with one sharp accent usually performs better. Either way, how to design eye catching poly mailers begins with the promise you want the package to make before it is opened, whether the mailer leaves a facility in Shenzhen, Ningbo, or Ho Chi Minh City. The best designs tell that story in one glance and one glance only.
My rule: if the package cannot be explained in one sentence, the design probably has too many ideas fighting for attention. A good one-sentence brief is usually 12 to 18 words long, like "black-and-silver mailer for premium athleisure shipments" or "matte kraft-look pouch for 250-gram candle orders." That short brief makes how to design eye catching poly mailers much easier because it forces the team to choose one message and one hierarchy.
How to design eye catching poly mailers for the unboxing moment
The best packaging does not stop at the porch. It has to move from porch to hands to social share, and each step changes the viewing distance. From the curb, the mailer needs bold contrast. In the kitchen or office, it needs cleaner detail. On camera, it needs one shape or logo that survives a vertical phone frame and a 9:16 crop. That layered job is what makes how to design eye catching poly mailers a strategic decision rather than a purely visual one.
I have watched customers post unboxings where the mailer itself became the backdrop. The package was not competing with the product; it was framing the story. Repetition helps here, but not the kind that fills every square inch and makes the whole thing feel like a fabric sample gone rogue. One repeated element, such as a logo pattern at 15 percent opacity or a thin border that appears on all four sides, can make the package feel branded without making it feel loud. That subtlety is part of how to design eye catching poly mailers too, especially when the photo is taken under 3200K indoor lighting.
Whitespace is not empty space. It gives the logo room to register. A lot of brands make the mistake of treating the mailer like a poster, but the viewer is not standing still for a gallery opening. They are holding a parcel under a light or snapping a quick photo beside a door with one shoe on and one shoe half-tied, often in under 8 seconds. A single visual anchor - a mark, a symbol, a short line of copy - usually reads better than six small graphics scattered across the front panel. How to design eye catching poly mailers often comes down to what you leave out.
Minimal layouts can win for a simple reason: they look more expensive. When I worked with a direct-to-consumer candle brand, we compared a full-bleed botanical print against a two-tone design with a centered mark and an off-white reverse. The cleaner version made the candles feel more premium at the same print cost because the package looked deliberate instead of crowded. One of the least discussed truths in how to design eye catching poly mailers is that restraint often signals confidence, especially when the unit price sits around $0.28 to $0.42 on a 5,000-piece run.
The outside should hint at the brand personality, not explain the entire catalog like a nervous intern giving a 12-minute elevator pitch. If you reveal everything on the mailer, you flatten the surprise. Let the package create a question, then let the product answer it. That tension keeps the unboxing moment from feeling predictable, and it gives the mailer a job beyond shipping. A package that leaves the facility in Shanghai on Tuesday and lands on a doorstep in Austin on Friday should still feel like a reveal, not a brochure. That is the practical side of how to design eye catching poly mailers: create anticipation without clutter.
Key Factors That Shape a Standout Poly Mailer Design
Color is usually the first thing people debate, but it should be chosen after the brand story and layout are clear. In practice, the strongest mailers use one main color family, one contrast color, and one neutral to keep the design readable. A bright coral on white can feel energetic; charcoal on cream can feel premium; cobalt on matte silver can feel technical. That choice sits at the center of how to design eye catching poly mailers, because color controls instant recognition before typography ever gets a chance to speak. The right palette can carry the whole package.
Finish changes perception faster than most teams expect. A matte surface softens light and tends to look more refined in photos, while a gloss finish punches up saturation and can make a simple logo feel louder. I have seen a 2.5 mil white mailer with a soft-touch matte laminate outperform a thicker glossy mailer in buyer feedback simply because the matte version photographed better under office LEDs. If your customer shares packaging on mobile, the finish matters as much as the artwork. Sometimes more, which is annoying if you spent three days arguing about the exact shade of blue. That is why how to design eye catching poly mailers should always consider finish and not only print file details.
Color choices that survive real shipping conditions
Warehouse lighting is brutal. It is usually a mix of LED panels, daylight from dock doors, and glare bouncing off plastic wrap. That is why low-contrast combinations disappear so easily. Pale gray text on pale blue film may look stylish in a mockup, but it can vanish once the parcel is stacked on a pallet or filmed in a dim hallway. A practical way to think about how to design eye catching poly mailers is to test the design in three places: a monitor, a fluorescent room, and a phone camera. If it fails any one of those, it needs work. A good mailer has to stay readable under stress.
Color also affects perceived size. Large solid blocks make a mailer feel more assertive. Thin stripes and small color accents feel quieter but more controlled. Neither is right in every case. A streetwear label may want a loud neon panel; a skincare brand may want a cream base with one deep accent. The right answer depends on what the product is supposed to promise before the seal is broken, and that promise can change by region - a matte black pouch may read premium in New York, while a kraft-inspired tone often resonates better in Portland, London, or Melbourne. Good how to design eye catching poly mailers work almost always starts with that promise.
Typography, logo placement, and spacing
Type weight matters more than type novelty. Sans-serif fonts with strong stroke width usually read better on polyethylene film than thin serif faces, especially when the print method softens edges by a fraction of a millimeter. For logo placement, the sweet spot is often the center third of the front panel or a slightly elevated position that leaves room for the shipping label. If the logo is too low, the label can hide it. If it is too high, the seal flap can interrupt the composition. I have watched a beautiful layout get bruised by a bad seal line, and yes, it was as annoying as it sounds. That is where how to design eye catching poly mailers gets real fast.
Spacing is the hidden hero. Give the logo enough clearance to breathe, and the package instantly feels more expensive. Crowding type against the edges can make even a premium design feel rushed. This is one reason how to design eye catching poly mailers often favors a single strong logo over a dozen supporting messages. A package should look confident, not like it is trying to win an argument with itself. A 4 mm to 6 mm margin can do more for legibility than another slogan ever will, especially when the mailer is photographed through a handheld phone camera.
One supplier negotiation in Dongguan taught me a blunt lesson: a client wanted four print colors, a gradient, QR code, social handle, and a tagline, all on a 14 x 19 inch mailer. The unit price was fine, but the design was fighting the format. We cut it back to two colors and one logo, and the package improved while the press setup became simpler. The customer saved on plates, reduced registration risk, and got a cleaner result. That is the kind of tradeoff that makes how to design eye catching poly mailers practical instead of theoretical, especially on flexographic runs above 5,000 pieces.
Material choice changes everything too. A 3 mil coextruded polyethylene film feels different from a lighter stock, and recycled content can shift the surface slightly depending on the blend. If you are adding an insert card or tissue paper, ask whether the paper should be FSC-certified through fsc.org. The outer mailer and the inner contents should feel like one system, not two separate purchases glued together with hope. A 350gsm C1S artboard insert, for example, can make a $0.32 mailer feel closer to a premium mailer and gift set. That is a useful detail when you are figuring out how to design eye catching poly mailers for a broader unboxing experience.
For sustainability and waste context, the EPA's packaging and recycling resources at epa.gov are worth a look, especially if your brand needs to explain material choices in plain language. Customers do not need a lecture. They need a clear reason why the package exists, how it performs, and what happens after use. A one-line note about recycled content, a resin code, or a return program in California or the EU does more than a paragraph of vague claims ever will. It also helps keep how to design eye catching poly mailers aligned with modern expectations for materials and waste reduction.
Cost and Pricing: What Changes Custom Poly Mailer Budget
Budget is where creative ambition meets manufacturing math. The biggest pricing levers are quantity, size, number of ink colors, artwork coverage, and finishing. A 6 x 9 inch mailer printed in one color with simple front-panel branding will cost less than a 14 x 19 inch mailer with full-bleed graphics on both sides. That sounds obvious, but I have sat in client reviews where the difference between those two choices was more than 40 percent on the final quote, which is enough to change a launch plan entirely. If you are learning how to design eye catching poly mailers, this is the part that keeps the project honest.
For a realistic comparison, here is the kind of pricing spread I see often. A stock mailer with a branded label can land around $0.12 to $0.25 per unit, depending on quantity and label complexity. A digitally printed short run might sit around $0.55 to $1.10 per unit for 500 to 1,000 pieces. A flexographic run at 5,000 pieces or more can drop into the $0.18 to $0.42 range per unit, especially if the artwork uses one to three colors and the print coverage is controlled. Those figures move with size, film gauge, and supplier location, so they should be read as planning numbers, not promises. They also show why how to design eye catching poly mailers is part design decision and part procurement decision.
| Option | Best For | Typical Unit Cost | Setup | Lead Time | Notes |
|---|---|---|---|---|---|
| Stock mailer + label | Testing a new design or a 100 to 500 piece pilot | $0.12 to $0.25 | Low, usually label artwork only | 3 to 7 business days | Fast and flexible, but less premium on shelf and camera |
| Digital print short run | Launches, influencer kits, seasonal drops | $0.55 to $1.10 | $75 to $250 proof and file prep | 7 to 12 business days | Great for lower volume and frequent artwork changes |
| Flexographic custom run | Established brands ordering 5,000+ units | $0.18 to $0.42 | $300 to $900 plates and press setup | 12 to 18 business days | Best unit economics once design is locked |
| Premium finish mailer | High-touch unboxing and premium positioning | $0.28 to $0.65 | Higher than standard due to finish and test proofs | 14 to 20 business days | Matte, metallic, or specialty textures raise perceived value |
Setup fees are real. So are plates, proofs, and sample freight. I have seen a quote look cheaper on the front page and then grow by 12 to 18 percent once the buyer added physical samples, rush shipping, and a color correction round. That is why how to design eye catching poly mailers should always be paired with a line-by-line quote review, not just a total price. Ask where the one-time fees stop and the recurring unit cost begins, and whether the supplier is quoting ex-factory in Shenzhen, FOB Ningbo, or landed to a warehouse in Chicago. Those details change the true budget more than most teams expect.
My rule for premium finishes is simple: if the package is likely to be photographed, gifted, or shipped repeatedly, the extra 4 to 10 cents per unit can be worth it. If the mailer is mostly functional and the product inside is the hero, save the money for better print consistency and a stronger logo lockup. A premium finish without a disciplined layout is just expensive confusion. I say that with love, but still - expensive confusion. On a 10,000-piece order, a $0.06 upgrade is $600, which is less painful than a launch that looks forgettable. That is also why how to design eye catching poly mailers should be decided alongside cost, not after it.
Spend where it matters by making one side do the heavy lifting and keeping the reverse side simple. The back panel often needs only shipping compliance marks, care notes, or a small brand repeat. That approach lowers print complexity while keeping the front memorable. It is one of the most efficient ways I know to keep how to design eye catching poly mailers aligned with budget reality, especially when a recycled-content film adds 1 to 2 cents per unit. A little discipline can preserve both margin and impact.
Step-by-Step Process and Timeline for Designing Poly Mailers
Good packaging work follows a sequence. If you skip the sequence, you spend the next two weeks fixing avoidable mistakes. I usually break the process into five stages, and each one has a different kind of decision attached to it. That structure keeps how to design eye catching poly mailers from turning into a vague art project with no production path, especially when a launch date in late March or early November is already locked. A clear sequence also makes it easier to bring a supplier, designer, and operations team into the same conversation.
Step 1: define audience, use case, and reaction
Start with the person who receives the parcel. Is it a repeat shopper who recognizes your brand instantly, a first-time buyer who needs reassurance, or an influencer who may post the package to 20,000 followers? Then define the shipping channel. A parcel moving through a boutique fulfillment center is handled differently than one traveling through a 3PL with high volume and heavy stacking. The reaction matters too: should the mailer feel playful, premium, technical, or minimal? If you do this well, how to design eye catching poly mailers becomes much more specific and much easier to execute.
Step 2: gather assets and references
Collect logos, vector files, Pantone references, product photos, and two or three competitor examples. I like a mood board with at least one layout that feels too plain, one that feels too busy, and one that lands in the middle. That contrast helps the team see what to keep and what to cut. It also makes how to design eye catching poly mailers more concrete, because everyone is reacting to the same visual evidence instead of vague opinions shouted across a conference table in Shanghai, London, or Austin. The best briefs usually travel with a small pile of hard references.
Step 3: sketch and simplify
Before you open a final proof, sketch three layouts at rough scale. Put the logo where the eye lands first. Decide whether the headline belongs on the front panel or should be dropped altogether. A layout that has one dominant message is easier to print, easier to inspect, and easier to photograph. In my experience, the best concept usually looks almost too simple when it is first drawn on paper, and that is often the point where someone says, "Shouldn't we add more?" and I have to resist the urge to say, "No, please, stop feeding the clutter." That pause is usually a sign that how to design eye catching poly mailers is headed in the right direction.
Step 4: proof, sample, and inspect
Request digital proofs first, then physical samples if the job is larger than 1,000 units or if color accuracy matters. Check bleed, seam alignment, barcode visibility, adhesive flap placement, and whether the type still reads at 18 to 24 inches. For transit performance, ask whether the sample was tested against a standard like ISTA 3A or ASTM D4169, both of which help simulate handling stress. If you want a deeper industry reference on transit testing, ista.org is a useful starting point, and many suppliers in Dongguan or Yiwu will know those test names by heart. This stage makes how to design eye catching poly mailers measurable instead of theoretical.
This also tends to be the stage where expensive surprises surface. A client once approved a sample that looked perfect on screen, then rejected the first physical pull because a dark band crossed the seam by 2 millimeters. It was not a design failure. It was an inspection failure. The fix was small, but catching it before production saved nearly 10,000 pieces of rework. I still remember the sigh in that room. It was the sound of everyone realizing that tiny mistakes are never actually tiny in a print run. The lesson carries straight into how to design eye catching poly mailers: proof the construction, not just the artwork.
Step 5: lock the timeline
A realistic schedule usually looks like this: 2 to 4 business days for concepting, 1 to 3 days for proof revisions, 3 to 7 days for sampling if a physical sample is needed, 12 to 18 business days for production, and 3 to 10 days for freight depending on the destination. If you need custom inks, specialty film, or a high season ship date, add extra time. That cushion matters more than optimism. It is a core part of how to design eye catching poly mailers without missing launch dates, especially when a retail event or influencer drop is tied to a fixed Monday or Friday release. Timing is part of the design brief whether teams admit it or not.
- Confirm size, film gauge, and print method.
- Approve the front-panel hierarchy before discussing decorative extras.
- Check the proof at 100 percent scale, not just on a laptop screen.
- Review seam, flap, and barcode placement on the physical sample.
- Sign off only after one person owns the final yes.
A focused approval checklist keeps revisions tight. If three people are sending notes with different priorities, the schedule stretches. If one owner consolidates feedback, production moves faster and the final result usually looks cleaner. I have seen that simple discipline shave three days off a rushed order more than once, especially on jobs that were already targeting a 12 to 15 business day production window from proof approval. It is a practical habit inside how to design eye catching poly mailers that saves time and stress.
Common Mistakes That Make Poly Mailers Forgettable
The easiest way to lose impact is to add too much. Too many slogans. Too many QR codes. Too many icons. Too many fonts. I once reviewed a mailer that carried a logo, a tagline, a discount code, an Instagram handle, a website URL, and a recycling message all on the same face. The result was technically complete and visually exhausted. That is not how to design eye catching poly mailers; that is how to design a package that asks for attention it has not earned. The surface can be busy or memorable, but rarely both.
Low contrast is another common mistake. Thin white type on a pale pastel film may look elegant in a mockup, but once the mailer is stacked under warehouse lights, the message drops out. The same problem shows up with metallic inks that look great on a sample board but become difficult to read in a moving camera frame. If the design needs a person to lean in, it is already asking too much. A 90 percent opaque graphic can still fail if the type size is under 8 pt or the line weight is too light. That is a common failure point in how to design eye catching poly mailers.
Fold lines and seal zones can ruin a good idea if they are ignored early. On certain bag sizes, the side gusset or flap seam can cut through a logo or clip the bottom of a pattern repeat. I have seen artwork that looked balanced at 2D proof stage but drifted once the mailer was formed and filled. The answer is not to avoid complex layouts entirely. It is to design with the actual construction in mind, which is one of the most practical habits behind how to design eye catching poly mailers. Construction always has the final say.
Another trap is designing only for screenshots. A package that looks perfect in a flat design file may fail after rubbing against a carton corner, sliding in a van, or picking up scuffs from nested pallets. Shipping is not a studio environment. It is rough, and the mailer should still hold its shape in the middle of that roughness. A scuff-resistant finish and a slightly simplified design often survive that reality better than a heavily detailed layout. A parcel that travels 800 miles from a facility in Shenzhen to a home in Denver does not care how elegant the mockup was. This is the moment when how to design eye catching poly mailers becomes a durability test.
Remember that the mailer has to support the brand even when it is partially hidden, scratched, or crushed. A strong logo, a clear color block, and enough whitespace can survive damage better than a fragile pattern that needs every inch to stay intact. If the package still feels recognizable with one corner folded, you are probably on the right track. I like to think of this as the 70 percent rule: if the design reads at 70 percent of its ideal condition, it will usually survive the route from warehouse to doorstep. That rule has rescued more than a few how to design eye catching poly mailers projects from looking great only in mockup form.
Here is the truth most people miss: how to design eye catching poly mailers is not about making a package impossible to ignore. It is about making it easy to recognize, easy to photograph, and hard to confuse with everyone else's shipment. A mailer that can do that on a $0.22 budget is doing serious work. It is also doing the kind of work customers remember without necessarily thinking about why.
Expert Tips and Next Steps for Your First Test Run
Before you place a full order, test one bold concept against one minimal concept. I like this approach because it produces a clean read on customer preference without leaning on room sentiment. Print 100 to 250 pieces of each version if you can, then use them in real shipping conditions for at least one week. That is the quickest way I know to make how to design eye catching poly mailers feel measurable instead of subjective, and it keeps the first run small enough to correct course without wasting 5,000 units. A pilot run is cheap insurance.
Measure more than looks. Track whether customers mention the packaging in email replies, whether the fulfillment team finds the print easy to read, whether the mailer gets photographed, and whether support tickets mention damage or confusion. If a design gets compliments but the type rubs off in transit, it is not a success. If it ships well but no one remembers it, it is not doing enough brand work. Both sides matter, and the difference can show up in a simple spreadsheet after 100 shipments. That is how how to design eye catching poly mailers becomes a repeatable process rather than a hunch.
One of the better pilot runs I ever saw came from a subscription snack brand that tested a bright orange mailer against a matte kraft-style look with a black logo. The orange version got more social shares, but the kraft version had higher repeat recognition in customer surveys by 17 percent. That result surprised the team, and it changed their second production run. Good packaging choices often come from that kind of tension, not from consensus. I love that kind of result because it proves people do not always know what they will remember until they see it in the wild. It also proves why how to design eye catching poly mailers benefits from testing, not guessing.
Use the pilot to build a short revision list. Keep it specific: enlarge the logo by 8 percent, increase the contrast between background and type, move the return address block 12 mm lower, or switch from glossy to matte. Vague notes like "make it pop" slow the process and rarely improve the outcome. Specific notes improve both the design and the production schedule, and they make a 12 to 15 business day timeline more realistic instead of aspirational. That kind of precision is a quiet advantage in how to design eye catching poly mailers.
If you are ready to move from concept to order, pick one product, one audience, one message, and one production method. That brief forces decisions. It also keeps the project focused on the real job, which is to turn how to design eye catching poly mailers into a repeatable packaging decision that supports sales, not just a design file that looks good on a monitor. A clear brief can stop a $1.10 short-run impulse order from becoming a $9,000 mistake. It can also make the entire workflow feel calmer.
For brands that need a fast place to start, browsing a focused assortment of Custom Poly Mailers can make the tradeoffs clearer. If the package needs to sit inside a broader launch, looking through Custom Packaging Products helps you keep the outer mailer, inserts, and branded details aligned from the beginning. That matters when your insert cards are 350gsm C1S artboard and your outer film ships from a plant in Jiangsu. It matters even more when how to design eye catching poly mailers has to fit into the rest of the brand system.
Honestly, the best packaging decisions are the ones that feel almost obvious once they are finished. The design reads in 1 second, the budget holds steady, the sample survives a test ship, and the customer remembers the brand name later. That is the standard I would use for how to design eye catching poly mailers: clear enough to work, distinctive enough to be remembered, and disciplined enough to manufacture well. If the final quote comes in at $0.24 per unit for 5,000 pieces and still looks premium, you probably did something right.
If you build from that brief, how to design eye catching poly mailers stops being a guessing game and starts becoming a system you can repeat across launches, SKUs, and seasonal campaigns. A system is what turns a one-off win into something a Shenzhen supplier can reproduce in April, July, and November without redesigning the wheel. That repeatability is the real payoff of learning how to design eye catching poly mailers well.
FAQ
How do you design eye catching poly mailers without making them look busy?
Use one focal point, such as the logo or a single bold shape, and let the rest of the surface support it. Keep the palette to 2 or 3 colors, and leave enough whitespace so the layout does not feel packed edge to edge. If the package needs 4 different messages to explain itself, it is already too crowded. A mailer with a 3 mm border and one centered mark often reads better than a full-bleed design with 6 competing elements. That is the simplest answer to how to design eye catching poly mailers without clutter.
What colors work best for eye catching poly mailers?
Start with brand colors, then test them in high-contrast pairings so the artwork reads from 3 feet away and in a phone photo. Bright colors can work well for playful brands, while dark-on-light or light-on-dark layouts often feel cleaner and more premium. Always check the final proof under warehouse-style lighting, because that is where many combinations fail. A cobalt-on-cream layout may photograph beautifully at 10 a.m. and disappear under 4,000K LEDs at 6 p.m. Good color testing is a core part of how to design eye catching poly mailers.
How much do custom eye catching poly mailers cost?
Price usually depends on quantity, size, print coverage, number of colors, and finish choices. A small digital run can cost far more per piece than a flexographic order of 5,000 units, even if the total order feels smaller. Setup fees, plates, proofs, and samples can change the total, so compare quotes line by line. In practice, I often see stock mailers at $0.12 to $0.25, digital short runs at $0.55 to $1.10, and flexo jobs at $0.18 to $0.42 per unit. That range is why how to design eye catching poly mailers should always account for budget early.
How long does it take to make custom eye catching poly mailers?
A basic concept can move quickly, but proofing and revisions often add several days. Production time varies by print method and supplier capacity, and freight can add another 3 to 10 days at the end. Build in extra room for sample review so color or seam issues do not delay the launch. A realistic total timeline is often 2 to 4 business days for concepting, 1 to 3 days for revisions, and 12 to 18 business days for production after approval. That timeline is one more reason how to design eye catching poly mailers should start with a clear brief.
Should I use full bleed graphics or a simple logo layout on poly mailers?
Use full bleed graphics when you want a bold, campaign-specific package with a lot of personality. Choose a simple logo layout when repeated shipments, premium positioning, or lower visual clutter are the priority. The best choice is the one that photographs well, reads quickly, and matches the product experience you want customers to remember. A full-bleed design can work on a 14 x 19 inch mailer; a simple logo layout often wins on a 6 x 9 inch size where space is tight. Either route can work if you follow the fundamentals of how to design eye catching poly mailers.


