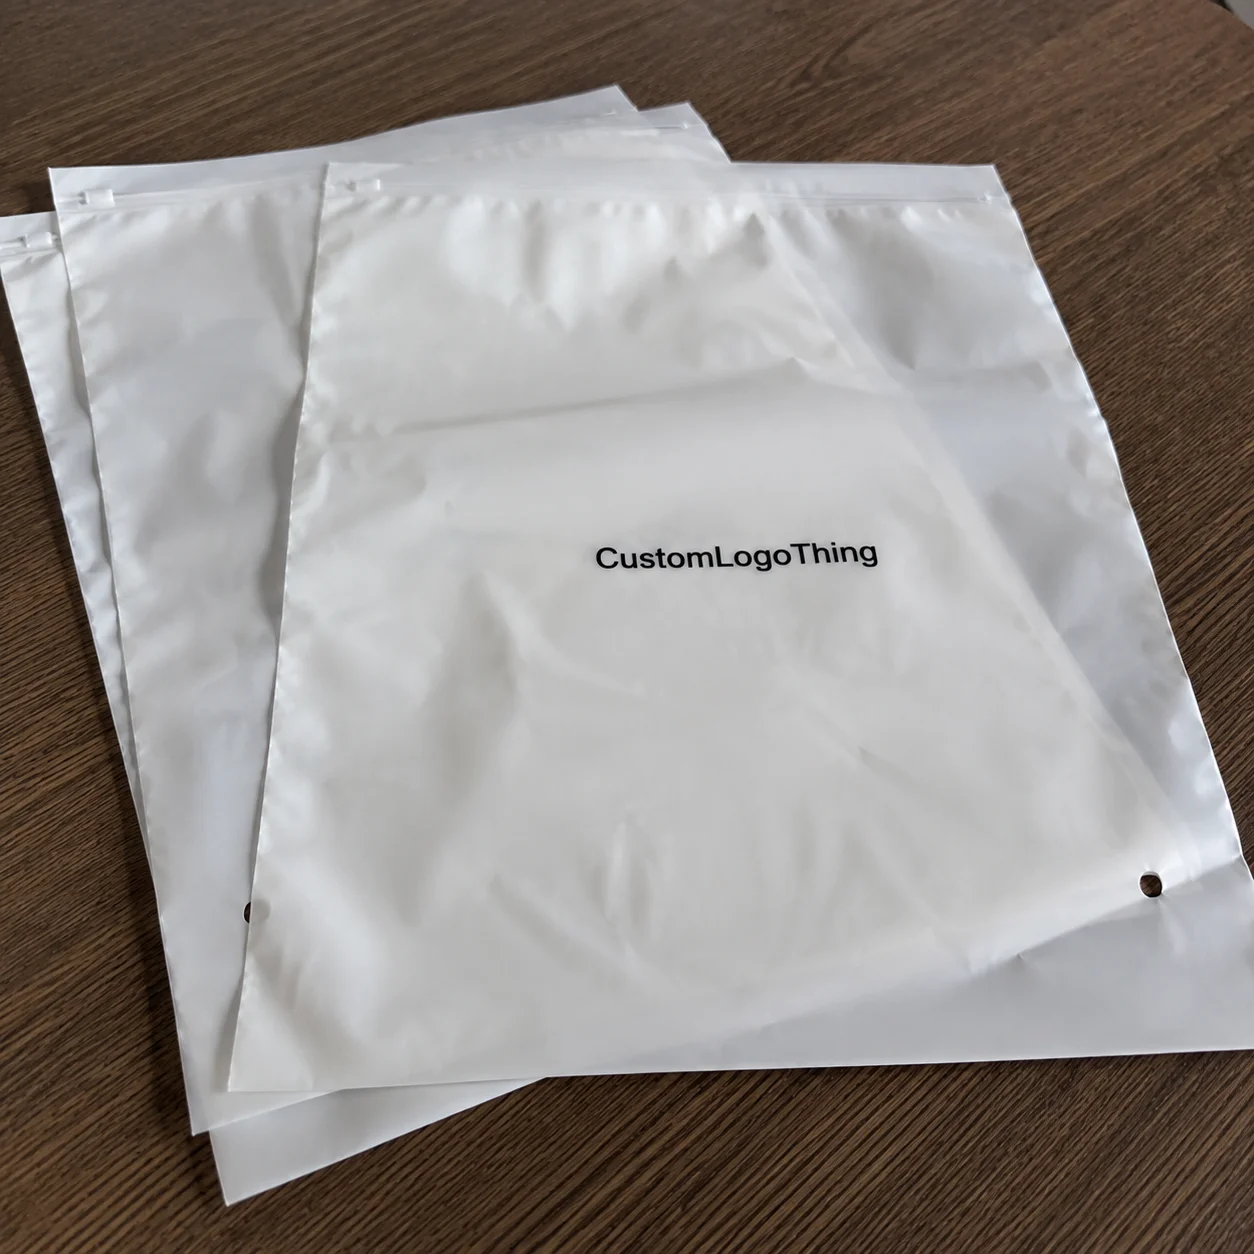
Buyer Fit Snapshot
| Best fit | Design Packaging for Cosmetics Line projects where brand print, material claims, artwork control, MOQ, and repeat-order consistency need to be specified before quoting. |
|---|---|
| Quote inputs | Share finished size, material target, print colors, finish, packing count, annual reorder estimate, ship-to region, and any compliance wording. |
| Proofing check | Approve dieline scale, logo placement, barcode or warning zones, color tolerance, closure strength, and carton packing before bulk production. |
| Main risk | Vague material claims, crowded artwork, missing packing details, or unclear freight terms can make a low unit price expensive after revisions. |
Fast answer: Design Packaging for Cosmetics Line: Material, Print, Proofing, and Reorder Risk should be specified like a repeatable production item. The safest quote records material, print method, finish, artwork proof, packing count, and reorder notes in one written spec.
Production checks before approval
Compare the actual filled-product size with the drawing, then confirm tolerance on folds, seals, hang holes, label areas, and retail display edges. Reserve space for logos, QR codes, warning copy, and material claims before decorative graphics fill the panel.
Quote comparison points
Review material grade, print process, finish, sampling route, tooling charges, carton quantity, and freight assumptions side by side. A quote is only useful when the supplier can repeat the same color, closure quality, and packing count on the next order.
How to design Packaging for Cosmetics line sounds like a creative problem. It is. After 12 years in custom printing and enough factory meetings in Dongguan, Guangzhou, and Longhua to test anyone’s patience, I can tell you it is also a math problem, a compliance problem, and a “will this leak in a hot truck in Texas” problem. Pretty packaging that fails in transit is not branding. It is a refund waiting to happen.
I remember one project in California where a client wanted frosted glass jars, matte black lids, and a soft-touch carton. Gorgeous. Honestly, I loved the sample set. It looked like it belonged on a boutique shelf in Paris. Then we tested the pump on the serum bottle, and three out of ten units dribbled product into the cap. That was a $1.80/unit package turning into a $6.40/unit mess once we added replacements, freight, and rework. That is why how to design packaging for cosmetics line is never just about the render. It is about product protection, shelf appeal, and the boring little details that keep your launch from embarrassing you.
In my experience, cosmetics packaging sits at the intersection of branded packaging, user experience, and compliance. The jar, tube, bottle, folding carton, or sleeve has to look like your brand, protect the formula, communicate ingredients and warnings, and survive the actual world. Humidity in Miami, warehouse stacking in Dallas, and overworked fulfillment teams in New Jersey all leave a mark. If you get those layers right, packaging helps justify price, creates stronger perceived value, and nudges repeat purchase. If you get them wrong, even a great formula can feel cheap.
Here’s what I’ll cover: structure choices, materials, costs, timeline, compliance, common mistakes, and the practical workflow I use when clients ask me how to design packaging for cosmetics line without wasting money. I’ll also give you the parts most people skip, which are usually the parts that cost them the most. (Naturally.)
How to Design Packaging for Cosmetics Line: Why It Matters
I once walked a Shenzhen line where a skincare brand had spent thousands on a metallic carton with blind embossing and foil. It looked expensive. It felt expensive. The problem? The inner bottle was unstable, the cap cracked under torque, and the carton insert didn’t hold the bottle upright during a drop test from 36 inches. Half the packaging was doing theater. The other half was doing nothing. That is the first lesson in how to design packaging for cosmetics line: beauty without performance is just a short-lived expense.
Cosmetics packaging is not a single box or jar. It is a system. Primary packaging holds the formula. Secondary packaging supports branding, retail presentation, and protection. Shipping packaging protects the product after it leaves the warehouse. Those layers work together, and if one layer is weak, the whole package feels weak. That holds true whether you are building custom printed boxes for a lip mask line or a full retail packaging system for a premium serum range. For a 5,000-piece launch, that difference can mean a quote of $0.22 per folding carton versus $1.90 per rigid setup, before freight.
Packaging also shapes first impressions in seconds. On shelf, consumers do not read your brand story first. They notice color, proportion, finish, and hierarchy. Online, they judge the product image in about the time it takes to blink. That is why package branding matters so much for cosmetics. Good packaging increases perceived value because the customer assumes the formula is better organized, safer, or more professional. Fair or not, that is the reality. A 50ml serum in a tall amber glass bottle often reads as more “serious” than the same formula in a thin PET bottle, even if the ingredient list is identical.
When clients ask me how to design packaging for cosmetics line, I always ask three blunt questions: What is the formula, where is it sold, and what problem does the package need to solve? The answer might be “ecommerce and leakage control,” or “Sephora-style shelf pop,” or “salon retail with clean-beauty signals.” Those answers change the structure, cost, and finish choices immediately. A brand selling in London salons has different label space needs than one shipping from a fulfillment center in Nevada to subscription customers in Florida.
So no, this is not just about making something cute. It is about product packaging that performs across shipping, shelf, and customer use. That is the real job.
“We thought the label was the problem,” one founder told me after a failed launch. “Turns out the jar and cap were the real villains.” She was right. Packaging usually gets blamed last, but it causes the earliest problems.
How Packaging for Cosmetics Line Works
How packaging for cosmetics line works is pretty straightforward once you break it into layers. The formula goes into primary packaging such as a jar, bottle, airless pump, dropper, tube, or compact. That unit may go into a folding carton, sleeve, rigid box, or mailer. Then there is the shipper, pallet, and warehouse handling layer. Every layer has a job. Every layer has a cost. Every layer can fail. A 30ml serum shipped in a 350gsm C1S artboard carton needs very different handling from a 200ml lotion bottle packed in a 1200gsm rigid mailer set.
For creams and balms, I usually look at jars or tubes with liner systems that resist product migration. For liquids and serums, closure torque, neck finish, and compatibility testing matter more than pretty labels. Powders need good closure logic and sometimes insert systems. Oils and actives can be reactive, which means the packaging material itself becomes part of the product decision. If your formula is aggressive, like certain acids or essential oil blends, you cannot just pick packaging because it looks clean on a mood board. A 15% glycolic serum in a polypropylene bottle may behave very differently from the same formula in glass with a low-grade cap liner.
Here is the approval flow I use with most clients who are learning how to design packaging for cosmetics line:
- Concept brief and packaging goals.
- Container and carton selection.
- Dieline confirmation or creation.
- Artwork layout and legal review.
- Physical sampling.
- Compatibility and transport testing.
- Final approval and production release.
Testing is where the fantasy meets reality. I have seen beautiful lids pop off after a 40°C warehouse hold test in Arizona. I have seen UV-coated cartons scuff badly under simple carton-to-carton friction. I have seen adhesive labels lift after humidity exposure in Singapore because somebody assumed “paper is paper.” It is not. For shipping validation, suppliers often reference ISTA testing protocols, and that matters if your cosmetics line will travel through multiple carriers or subscription-box fulfillment centers in Ohio or New Jersey.
Compatibility testing should include leak checks, closure torque, heat, humidity, and adhesion. Depending on the product, I also like to see fill-and-hold samples over at least 7 to 14 days before approval. Not always necessary, but enough to catch the obvious failures. If a supplier tells you one sample is enough for a full production run, I’d ask them what they are trying to avoid. Usually, I already know the answer.
How to design packaging for cosmetics line also depends on the channel. A DTC brand may prioritize unboxing and mailer durability. A retail brand may care more about shelf visibility, barcode placement, and peg-hole readiness. Amazon sellers need carton strength and scannability. Salons care about product presentation at hand height. Same product. Different packaging logic. A 100-piece salon refill program in Manchester does not need the same outer box spec as a 20,000-unit Amazon launch in California.
Key Factors in How to Design Packaging for Cosmetics Line
If you want the short version of how to design packaging for cosmetics line, here it is: start with brand position, customer behavior, and manufacturing reality. Skip any one of those and you will pay for it later. Usually twice.
Brand positioning drives the feel. Luxury skincare often uses rigid boxes, heavy paperboard, glass, foil, embossing, and restrained typography. Clean beauty might prefer uncoated paper, simple type, and natural textures. Clinical brands lean on white space, precise hierarchy, and restrained color. Indie color cosmetics can go bold with metallic inks, fluorescent accents, or unusual carton structures. The point is not to copy a trend. The point is to make the package look like your price point. A $58 eye cream in a 350gsm folding carton with foil accents can feel credible; the same cream in a flimsy 250gsm box will not.
Target customer and shelf context matter just as much. Selling through boutiques? You need premium feel and strong shelf presence. Selling online? You need photo-friendly surfaces and shipping durability. Launching in salons? Think portability and repeat use. Packaging design is not universal. A product that works in a spa setting may look lost in an Amazon thumbnail. A package designed for a display table in Los Angeles may need stronger color contrast than one built for a minimalist pharmacy shelf in Stockholm.
Material choices should match the formula and the brand. Paperboard is common for folding cartons and custom printed boxes because it is cost-effective and flexible. Rigid boxes support premium positioning. Glass works well for high-end skincare, but weight and breakage can raise freight costs fast. PET is lightweight and widely used for bottles. Acrylic looks premium but can be expensive and sometimes less recyclable. Aluminum can give a clean, modern feel and good barrier properties. Sustainable alternatives, like FSC-certified paperboard and recycled plastics, are easier to justify when the brand story supports them. If you want third-party chain-of-custody credibility, FSC certification details are worth reviewing. For a 10,000-piece carton order, switching from coated art paper to FSC-certified board may add about $0.04 to $0.09 per unit depending on the printer in Guangdong or Vietnam.
Labeling and compliance are not optional. You need room for ingredients, warnings, batch codes, barcode placement, country-specific claims, and sometimes language requirements. If you are selling in multiple markets, the copy space can get tight fast. That is why I always say how to design packaging for cosmetics line is partly a legal layout exercise. Brands love saying “minimal.” Regulators love saying “add more text.” On a 15ml treatment product, that often means a 30mm x 60mm label panel at minimum, not the 20mm x 35mm area the creative team wanted.
Cost and pricing should be built around MOQ, print method, finish complexity, and freight. A simple one-color carton at 5,000 pieces can cost dramatically less than a rigid set with foil stamping, soft-touch lamination, and a custom insert. That sounds obvious until the budget spreadsheet arrives and everyone acts surprised. Don’t. Surprised is expensive. Also, it never looks good in a meeting. One supplier in Shenzhen once quoted $0.15 per unit for 5,000 pieces on a plain 350gsm C1S artboard carton, then the price jumped to $0.31 per unit after the client added embossing, spot UV, and a window patch.
Here is a practical comparison I use during early planning:
| Packaging Option | Typical Use | Approx. Unit Cost | Best For | Watch Outs |
|---|---|---|---|---|
| Simple folding carton | Serums, creams, lip products | $0.18 to $0.55 at 5,000 pcs | Launches on a budget | Needs smart artwork hierarchy |
| Rigid box | Gift sets, premium skincare | $1.20 to $4.50+ | Luxury positioning | Higher freight and storage |
| Custom jar with decoration | Creams, balms, masks | $0.80 to $3.80+ | Signature primary packaging | Mold, decoration, and closure fit |
| Airless pump bottle | Serums, lotions, actives | $1.10 to $5.00+ | Performance and hygiene | Compatibility and pump quality |
One more thing people underestimate: manufacturability. A design can look amazing on screen and still be a nightmare to print, fold, or fill. I saw this with a metallic carton that had tiny white text reversed out of a dark background. The printer could run it, but only at a painfully slow speed, which pushed costs up by 18%. How to design packaging for cosmetics line always includes the boring question: can the factory actually make this at scale without hating you? Because if they hate you, your schedule will suffer. Dramatically. A carton produced in Dongguan on a Bobst line has different tolerances than one hand-finished in Milan or Los Angeles.
For brands building product packaging from scratch, I usually recommend getting one supplier to quote the full system: primary container, decoration, carton, insert, and freight. That gives you the real picture. A cheap bottle with an expensive insert is not cheap. That math has fooled more founders than I can count. I’ve seen people celebrate a low container quote and then stare in silence at the shipping bill like it personally offended them. A 50,000-unit rollout can add $4,000 in freight alone if the outer carton dimensions are poorly designed.
Step-by-Step Process for How to Design Packaging for Cosmetics Line
Step 1 is the one everybody wants to skip: define the product, customer, and sales channel before opening Illustrator. If you are learning how to design packaging for cosmetics line, You Need to Know the formula type, fill volume, shelf life, and where the product will sell. A 30ml serum for ecommerce does not need the same solution as a 100ml face cream sold in a department store. The first one may need stronger mailer protection in Chicago; the second may need stronger shelf visibility in Dubai.
Step 2 is building a real packaging brief. Not a vague mood board. A brief with dimensions, formula behavior, brand story, legal copy needs, target unit cost, and any technical requirements like airless dispensing or tamper evidence. I ask for container specs, closure type, and if possible, product viscosity. Yes, viscosity. Because once I visited a factory where the client had designed around a pump bottle that could not handle the actual formula thickness. We had to switch the pump at the last minute, which delayed launch by 19 days and added nearly $2,700 in resampling and freight. Fun times. The kind of fun that makes you stare into the middle distance.
Step 3 is structure and material selection. This is where you choose between stock and custom, paperboard and rigid, glass and plastic, standard closure and specialty dispensing. For many startups, the smartest answer is a stock primary container with custom printed boxes. That keeps costs manageable and still allows strong package branding. For premium lines, a custom structure can make sense if the order volume and margin support it. The packaging supplier should be able to show samples and production references, not just slick sales decks. A supplier in Guangzhou should be able to quote a 350gsm C1S artboard carton with matte lamination and spot UV in under 48 hours if the spec is clear.
Step 4 is visual system development. This includes logo placement, typography, color palette, finish, and information hierarchy. One strong hierarchy beats five competing ideas. I tell clients to place brand first, product name second, key benefit third, and legal or supplementary info after that. If everything screams, nothing speaks. Matte lamination, foil stamping, embossing, spot UV, and soft-touch finishes can all work, but each one should earn its spot. Extra effects are not a strategy. They are decoration. Pretty decoration, sometimes, but still decoration. A 2-color box with one foil detail can often outperform a 5-effect carton that costs $0.42 more per unit.
Step 5 is dieline work. Either your manufacturer supplies it or your designer creates one from exact dimensions. This is not a place for guessing. Bleed, safe zones, fold lines, glue tabs, and barcode quiet zones matter. I have seen designers build artwork on a “close enough” carton template and then panic when the barcode lands on a fold. That is not a creative problem. That is a preventable mistake. How to design packaging for cosmetics line correctly means respecting the dieline like it is sacred. Because it is. If the box is 62mm wide and the insert eats 4mm on each side, the artwork Needs to Know that before the file goes to print.
Step 6 is sampling. Order samples, then check print accuracy, closure fit, seam alignment, color consistency, and shipping durability. If you are doing a folding carton, ask for a structure sample and a printed proof. If you are doing bottles or jars, inspect neck finish, cap torque, and decoration quality. The best factories will also share test units that use actual production materials, not just presentation prototypes. That distinction matters more than most people realize. I wish it didn’t, but here we are. A pre-production sample from Ho Chi Minh City should match the final wall thickness, coating, and cap liner, not just the logo placement.
Step 7 is final approval and production planning. Once the files are signed off, confirm the schedule, carton count, inner pack configuration, and inbound inventory timing. Your launch date needs a realistic buffer. I usually tell clients to build at least 2 to 3 weeks of slack if the project has custom components or multiple sample rounds. Otherwise, one delayed cap can take your entire launch hostage. For many factories in Shenzhen and Ningbo, production itself is typically 12 to 15 business days from proof approval on simpler carton jobs, while decorated primary packaging can take longer.
For brands also assembling e-commerce bundles, I recommend reviewing our Custom Packaging Products options early in the process. It is easier to align structure, print, and shipping requirements before the artwork is finalized than after everybody has fallen in love with a design that can’t ship.
Cost, Pricing, and Timeline for Packaging for Cosmetics Line
The price of how to design packaging for cosmetics line depends on more variables than most founders expect. Quantity is the biggest one. A 3,000-piece order has a very different unit cost than a 30,000-piece run. Material choice matters next. Then printing method, decoration, inserts, coatings, and structural complexity. Freight can be shockingly large too, especially with glass or rigid packaging. A carton shipped from Shenzhen to Los Angeles may cost under $0.03 per unit in ocean freight on large volumes, while air freight can spike that by several times if the launch is urgent.
Here’s the plain version: a simple folding carton might run under a dollar each, while a custom decorated jar or airless bottle can push into several dollars per unit. That does not mean “expensive” is bad. It means your margin model needs to match your packaging choices. A $24 moisturizer in a $4 package is fine if the story, channel, and conversion rate support it. A $12 cleanser with a $4 package is much harder to defend unless the brand has serious pull. A direct-to-consumer brand in Austin may tolerate a $1.10 package if the lifetime value justifies it; a pharmacy line in Toronto may not.
Below is a rough cost view I often use in early quoting discussions. These are directional numbers, not promises. Real pricing depends on supplier, spec, and order size.
| Cost Driver | Lower-Cost Choice | Higher-Cost Choice | Typical Impact |
|---|---|---|---|
| Material | Standard paperboard | Rigid board, glass, acrylic | Can add $0.60 to $3.50+ per unit |
| Decoration | One-color print | Foil, emboss, spot UV, soft-touch | Can add $0.12 to $1.80+ per unit |
| Structure | Stock carton | Custom molded or special shape | Can add tooling or setup costs |
| Logistics | Lightweight paperboard shipper | Glass-heavy or oversized pack | Raises freight and warehousing costs |
Hidden costs are where budgets go to die. Sample rounds cost money. Plate fees exist. Custom molds exist. Design revisions can eat time and cash. Freight from Asia to North America can swing dramatically depending on volume and season. Warehousing is not free. And if your first run needs a redesign because someone forgot ingredient space, that is a fresh invoice you did not need. One project in Rotterdam added a second proof round and a revised insert, which pushed the budget up by $1,140 before a single unit shipped.
Timeline is the other trap. A basic project using stock components can move from concept to production faster. A custom package with special finishes, insert systems, and multiple proof rounds takes longer. In practical terms, I usually plan roughly:
- 1 to 2 weeks for briefing and structure direction.
- 1 to 3 weeks for design development and dieline work.
- 1 to 4 weeks for sampling and revisions.
- 12 to 20 business days for production, depending on the factory and complexity.
- 5 to 35 days for freight, depending on method and destination.
I had one client negotiating a “fast launch” who insisted the quote was too high. We trimmed the structure, removed a custom insert, and switched to a stock carton. That saved $0.46/unit and cut the timeline by 11 days. No drama. No magic. Just better decisions. That is the kind of practical thinking that matters when you are figuring out how to design packaging for cosmetics line without turning it into an expensive art project.
Common Mistakes in How to Design Packaging for Cosmetics Line
Most mistakes in how to design packaging for cosmetics line are not mysterious. They are just rushed decisions dressed up as confidence. I see the same ones over and over, from startup studios in Brooklyn to contract-packers in Penang.
Designing before confirming dimensions. If you do not have the actual bottle or jar measurements, your artwork will fight the dieline. Then the legal text gets squeezed, the logo lands awkwardly, and the barcode gets dangerously close to a fold. A 38mm cap on a 50ml bottle is not the same as a 43mm cap, even if the render looks close.
Choosing trend over function. A matte finish looks elegant until it scuffs in shipping. A beautiful magnetic closure feels premium until the shipping weight spikes. A tiny cap may photograph well but can be frustrating for the customer. I’ve watched brands spend $8,000 on finishes that looked great in a rendering and terrible after 200 warehouse touches. That is not a win. That is a very expensive lesson in humility.
Ignoring compliance space. Ingredients, warnings, country of origin, batch code, and barcode all need room. Regulatory requirements vary by market, so your package branding needs to leave practical space for the text you do not want to think about. You can’t design that away. You have to plan for it. If you sell in the EU, FDA-regulated U.S. channels, and the UAE, your copy map will not be identical.
Overcomplicating the visual system. Three typefaces, five colors, multiple foils, and a busy background usually create confusion. Strong packaging design uses hierarchy. Not clutter. One of my favorite client conversations ended with me saying, “If everything is premium, nothing is premium.” He grumbled, but he reduced the finishes and the carton looked better immediately.
Skipping prototyping. Digital mockups are useful. They are not proof. A 3D render will not tell you if the pump leaks, the label wrinkles, or the carton cracks at the fold. You need samples. Real ones. If a supplier resists sending production material samples, that is a clue. A sample from a factory in Yiwu should show the actual coating, not just a glossy photo in a sales PDF.
Underestimating total landed cost. Unit price is only part of the story. Freight, duties, warehousing, and MOQs can wreck a budget. I’ve seen a “cheap” pack become the most expensive option on the table because the minimum order forced 18 months of inventory into storage. That is not lean. That is a warehouse bill. A 20,000-unit run stored in New Jersey can quietly cost more than the extra $0.07 you tried to save on cartons.
For more visibility into packaging structures and material options, the Custom Packaging Products page is a useful starting point before you lock your specifications. I’d rather you compare options before you place a deposit than after the samples are already on a boat.
Expert Tips and Next Steps for How to Design Packaging for Cosmetics Line
If you want my most useful advice on how to design packaging for cosmetics line, start with the weakest point in the product experience. Is it leakage? Breakage? Pump performance? Shelf clutter? Build around that weakness first. Strong packaging solves a real problem before it tries to impress people. A 30ml facial oil sold in Florida needs a better cap seal than a display-only item photographed in a studio in Copenhagen.
Ask your supplier for samples made from actual production materials. Not presentation props. Not “close enough” demo pieces. Real samples. When I visited a supplier in Dongguan, they handed me a display version of a jar that looked flawless. Then they showed the production version, and the wall thickness was visibly different. The display sample was for sales. The production sample was for reality. Only one of those mattered. Guess which one got my approval.
Use one strong visual hierarchy: brand, product name, key benefit, then legal details. That keeps the package readable at a glance. It also improves ecommerce photography, which matters more than people admit. Clean hierarchy helps product packaging sell faster because the customer does not have to squint to figure out what they are buying. If you are selling a 2-piece lip set at $32, the package should make the value obvious in three seconds or less.
Build a launch checklist before approval:
- Container dimensions confirmed.
- Dieline checked and signed off.
- Artwork proof reviewed for spelling, bleed, and safe zones.
- Sample tested for leakage, fit, and finish.
- Barcode and legal copy verified.
- Supplier lead time and MOQ documented.
- Freight and landed cost estimated.
- Reorder point planned.
Before final approval, compare at least two suppliers on landed cost, lead time, and minimums. One quote is a guess. Two quotes are a decision. Three quotes are a negotiation. I’ve sat across the table from suppliers who shaved $0.09/unit only after I pushed on packaging material thickness and outer carton configuration. That sounds small until you multiply it by 25,000 units. Then it is real money. For a 25,000-piece carton order in Vietnam, a minor change from 300gsm board to 350gsm C1S artboard can affect both feel and freight by more than most founders expect.
Also, get comfortable with standards. ASTM specs can help with testing expectations, and environmental claims should not be made casually. If you plan to talk about sustainability, verify the paper source, resin content, or recyclable claim properly. The EPA sustainable materials resources are a good place to sanity-check environmental messaging before it hits your carton. If your carton says “recyclable” in Toronto, make sure the local recovery stream actually supports that claim.
My practical next steps are simple: gather formula specs, define your channel, request a dieline, choose a packaging supplier, and order a sample pack. That sequence saves time and prevents expensive redesigns. If you are still trying to figure out how to design packaging for cosmetics line, start with the facts, not the font choice. Fonts can wait. Fit cannot.
One last anecdote. A founder once told me she wanted “the most luxurious box possible.” I asked her budget. She said, “I don’t really have one yet.” That is not a budget. That is a wish. We built her a much smarter system: stock bottle, custom label, premium folding carton, and a clean insert. Her launch cost dropped by 37%, and the line still looked polished enough to charge $48 retail. That is the kind of result good packaging thinking should produce.
So yes, how to design packaging for cosmetics line is about aesthetics. It is also about cost control, manufacturability, compliance, and customer trust. Get those right, and the packaging supports the product instead of fighting it. Get them wrong, and you’ll spend your launch budget on reprints, replacements, and apologies. The clearest next move is simple: define the formula, lock the container dimensions, request a production-grade sample, and make every design decision after that one align with shipping, shelf, and legal reality. That order keeps you from designing a pretty problem.
FAQs
How do I design packaging for cosmetics line if I’m starting from scratch?
Start with product type, target customer, and sales channel before choosing colors or finishes. Then ask your supplier for a dieline and build artwork around the real dimensions, not guesses. Order samples early so you can catch fit, leakage, and print issues before production. If you are building a skincare line with multiple SKUs, make a simple packaging matrix first so you do not confuse the bottles, lids, and cartons later. A 15ml eye cream, a 50ml serum, and a 200ml cleanser should not share the same copy layout unless the dimensions truly match.
What is the most important part of how to design packaging for cosmetics line?
Function comes first. The package must protect the formula and work reliably for the end user. Branding is next because packaging has to communicate value in seconds on shelf or online. Compliance matters too, because missing legal text can delay a launch or force a reprint. A beautiful package that leaks is not premium. It is expensive disappointment. If the cap torque is off by even a small amount, the whole presentation can fail before the first customer opens the box.
How much does it cost to design packaging for cosmetics line?
Costs vary by material, quantity, printing method, and custom features. Simple folding cartons are usually much cheaper than custom jars, molded inserts, or rigid boxes. Sample fees, mold fees, freight, and landed cost can change the real budget fast. For example, a basic carton might start around $0.18/unit at 5,000 pieces, while a custom airless bottle system can be several dollars per unit depending on decoration and tooling. A 350gsm C1S artboard carton with matte lamination and one-color print in Guangzhou may quote very differently from a foil-stamped rigid box in Hong Kong.
How long does the packaging process usually take?
A basic run can move faster if you use stock components and simple printing. Custom structures, special finishes, and multiple sample rounds add time. Build in time for design, sampling, revisions, production, and shipping before your launch date. If your supplier says the whole thing will take “just a couple weeks,” ask what part they are conveniently forgetting. In many factories, production is typically 12 to 15 business days from proof approval, but sampling and freight can extend the overall schedule by several weeks.
What should I avoid when learning how to design packaging for cosmetics line?
Do not finalize design before confirming the actual container size and closure type. Do not ignore label rules or assume the supplier will fix compliance issues for you. Do not skip testing, because a gorgeous package that leaks is just expensive trash. And do not let aesthetics bully function. Cosmetics customers notice both, even if they do not say it out loud. A $24 cream in a package that cracks during a 48-hour transit test will earn complaints faster than a plain box that works.
Learning how to design packaging for cosmetics line gets easier once you stop treating packaging as decoration and start treating it as a business asset. That shift changes everything: the materials you choose, the suppliers you negotiate with, the costs you approve, and the way your customer experiences the brand. If you want your cosmetics line to look credible, ship safely, and sell well, the packaging has to do more than look pretty. It has to work.