Buyer Fit Snapshot
| Best fit | Pack Fragile Items in Mailers projects where brand print, material claims, artwork control, MOQ, and repeat-order consistency need to be specified before quoting. |
|---|---|
| Quote inputs | Share finished size, material target, print colors, finish, packing count, annual reorder estimate, ship-to region, and any compliance wording. |
| Proofing check | Approve dieline scale, logo placement, barcode or warning zones, color tolerance, closure strength, and carton packing before bulk production. |
| Main risk | Vague material claims, crowded artwork, missing packing details, or unclear freight terms can make a low unit price expensive after revisions. |
Fast answer: Pack Fragile Items in Mailers: Material Claims, Seal Quality, and Freight Cost should be specified like a repeatable production item. The safest quote records material, print method, finish, artwork proof, packing count, and reorder notes in one written spec.
Production checks before approval
Compare the actual filled-product size with the drawing, then confirm tolerance on folds, seals, hang holes, label areas, and retail display edges. Reserve space for logos, QR codes, warning copy, and material claims before decorative graphics fill the panel.
Quote comparison points
Review material grade, print process, finish, sampling route, tooling charges, carton quantity, and freight assumptions side by side. A quote is only useful when the supplier can repeat the same color, closure quality, and packing count on the next order.
How to pack fragile items in mailers is one of those packaging questions that sounds simple until the first cracked jar, bent accessory, or chipped ornament shows up in the returns queue. The real surprise is that fragile products usually fail less from brute force than from movement, which means a well-built mailer can outperform a loose box if the item is kept from shifting. That matters for ecommerce sellers because every extra inch of packaging can add postage, labor, and material waste, while the wrong packout quietly turns into replacements, refunds, and a pile of support tickets.
From a packaging buyer's point of view, how to pack fragile items in mailers is really about control: can the item survive a drop, a corner crush, and a rough conveyor ride without sliding around inside the shipper? If the answer is yes, a mailer can be a smart, lower-cost format. If the answer is no, the safer path is usually a different outer shipper, a reinforced structure, or a more rigid system such as custom printed boxes. That is the tradeoff, and it is worth understanding before a brand scales fragile SKUs across retail packaging or branded packaging programs.
I have seen plenty of packouts that looked fine on a bench and then fell apart the first time they moved through a carrier network. A little wiggle room can be enough to do the damage. So when people ask how to pack fragile items in mailers, I usually start with a blunt question: what is the product doing inside the package during transit, and how much room does it have to do it?
There is no magic material here. How to pack fragile items in mailers depends on the item itself, the protection layer, and the quality of the closure. A tiny glass sample vial is not the same as a ceramic ornament. A rigid electronics accessory is not the same as a bent metal part. The right setup usually comes down to three things: immobilize the product, protect the weak points, and choose a mailer that will survive handling without splitting open.
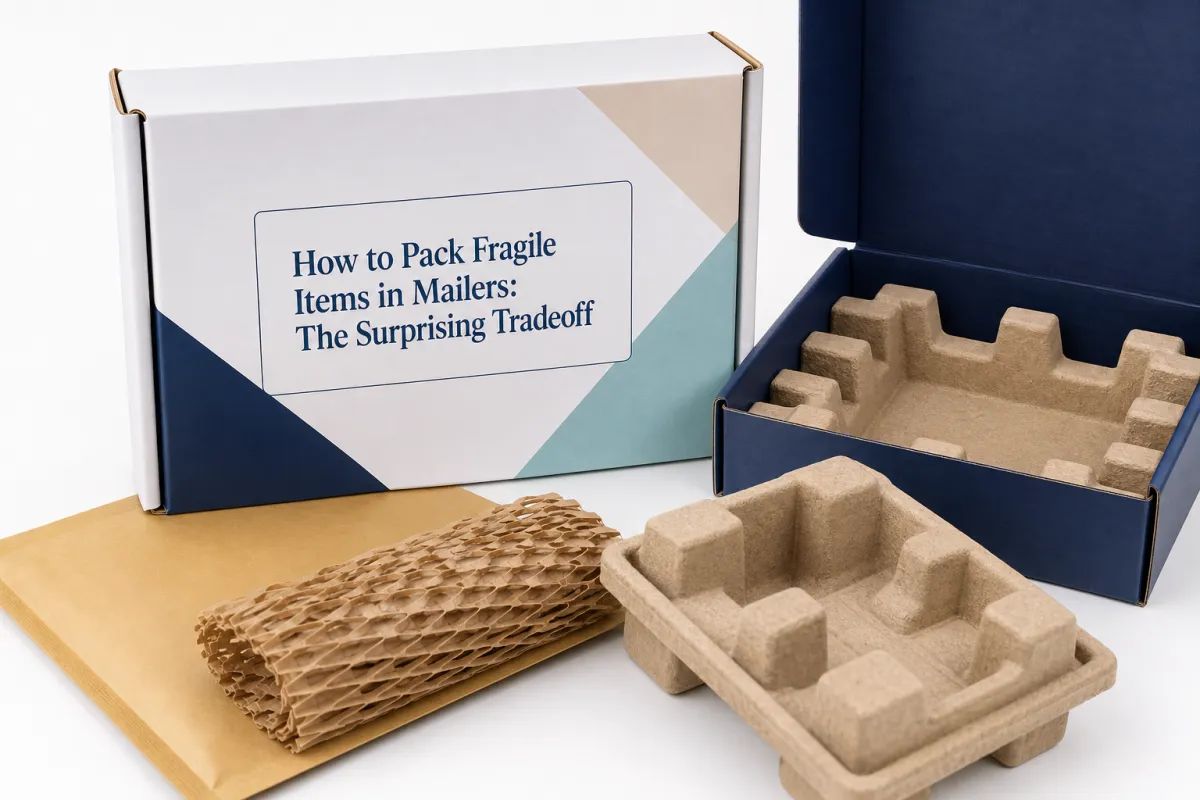
How to Pack Fragile Items in Mailers: The Surprising Tradeoff
How to pack fragile items in mailers starts with a counterintuitive idea: the package does not need to be large to be safe. In many shipping environments, a tighter structure reduces risk because there is less room for momentum to build. When an item rattles inside a package, even a decent outer shell cannot stop the repeated micro-impacts that chip glass, crack cosmetic jars, or bend lightweight components. The goal is not to drown the product in filler. The goal is to stop motion before it starts.
That is why how to pack fragile items in mailers can work for glass sample jars, cosmetics, electronics accessories, small decor, ceramic pieces with predictable geometry, and other lightweight goods that are fragile but not massive. These items often fail when they are allowed to move, strike a seam, or concentrate force on a single point. A mailer can do a strong job if the item is wrapped, centered, and sealed in a way that keeps it from shifting end to end. A loose packout, by contrast, can turn every conveyor vibration into damage.
Still, a mailer is not a substitute for physics. How to pack fragile items in mailers only makes sense if the item can survive the expected abuse profile: a drop from waist height, a corner crush in sorting, and some flexing in a truck or parcel bag. If the product shatters from side load, leaks under pressure, or punctures easily, the answer may be simple: do not force a mailer to do a box's job. In practice, the lowest-damage option is the one that matches the product, not the one that looks cheapest on a spreadsheet.
This tradeoff matters even more as order volume rises. One damaged parcel is annoying. A 2% damage rate on a 5,000-unit run can distort profit, waste time, and erode trust fast. That is why brands selling through ecommerce often test how to pack fragile items in mailers before they lock in a packout for subscription kits, promotional drops, or seasonal product packaging. The savings from smaller outer packaging can be real, but so can the cost of one weak seal or one underfilled cavity.
For packaging teams, the broader lesson is simple: how to pack fragile items in mailers is less about the mailer and more about the system around it. The outer mailer, the insert, the wrap, the orientation, and the closure all work together. If one part fails, the whole setup fails. That is true whether the item ships in a plain mailer, a padded version, or a Custom Printed Mailer used for package branding.
For readers comparing options, two useful reference points are the industry testing world and sustainability standards. ISTA publishes common transit test approaches, and FSC certification is relevant when paper-based cushioning or inserts matter. You can review the general testing context at ISTA and the material certification context at FSC. Those sites are not a substitute for real pack testing, but they help frame the standards conversation around how to pack fragile items in mailers.
Packaging rule: if the item can move, it can break. If it cannot move, the odds improve dramatically.
How It Works: Why Mailers Can Protect Fragile Items
How to pack fragile items in mailers works when the mailer acts as a flexible outer skin rather than a hollow tube. The best setups reduce empty space, keep the item centered, and spread the impact across a wider surface. A box usually resists crush better. A mailer usually cuts void space and weight. That is the core difference, and it explains why the same product may ship safely in one format and fail in another.
The protection usually comes from the layers inside the mailer, not the mailer alone. Bubble wrap is useful because it turns a sharp hit into distributed pressure. Foam sleeves help protect smooth surfaces from abrasion. Corrugated inserts add shape retention. Kraft paper can stabilize and fill awkward gaps. Molded pulp can cradle a product with repeatable geometry. In every version of how to pack fragile items in mailers, the internal material absorbs energy first, then the outer mailer keeps the bundle together.
Item geometry matters more than many sellers expect. Flat, narrow, and lightweight pieces are usually better candidates than bulky or highly irregular shapes. A small ceramic ornament with a broad base may pack well if it is wrapped correctly. A thin but tall item with a point load at the top may not. A rigid accessory with no exposed corners can be easy to stabilize. A brittle item with a sharp rim can be risky even inside a padded mailer. The smarter question is not "Is it fragile?" but "How does it fail?"
There is also a handling reality to face. Parcel networks include conveyor bends, bag drops, wet porches, and long line-haul chains. How to pack fragile items in mailers should account for all of that. A packout that looks fine on a desk can fail once it is flexed repeatedly or squeezed between heavier parcels. That is why seal strength, puncture resistance, and tear resistance matter just as much as cushioning. A weak closure can undo the whole setup.
For brands that care about package branding, mailers can be attractive because they are simpler to print, easier to stack, and often lighter to ship than rigid alternatives. But branded packaging does not help if the product arrives damaged. A cleaner economics model is to compare the mailer against the actual risk profile of the item. For some lightweight goods, the outer format is enough. For others, the better move is a more protective system with inserts, sleeves, or Custom Poly Mailers that are reinforced for the job.
How to pack fragile items in mailers also needs a clear limit line. If an item can leak, shatter, or puncture from moderate side load, the mailer system should be treated as a maybe, not a default. That is where the real cost of product packaging shows up. A few cents saved on materials can disappear quickly if the item needs to be reshipped, refunded, or replaced.
In test terms, the logic is simple: immobilization first, protection second, closure third. When those three are handled well, how to pack fragile items in mailers becomes a repeatable method rather than a gamble.
Key Factors That Decide If a Mailer Is Safe Enough
How to pack fragile items in mailers depends on a short list of variables that matter more than brand preference or habit. Weight, thickness, and brittleness usually come first. If the item is heavy for its size, a mailer is more likely to fail. If it has a thin wall or a sharp corner, the risk rises. If it can crack from a small flex, the design has to be tighter and more deliberate. These are the factors I would look at before I would think about color or print coverage.
Protection density is next. A fragile item should not be able to shift end to end, bounce side to side, or rotate enough to strike a hard edge. That is where many packouts go wrong. Sellers add more material, but not necessarily better material. A bundle stuffed with loose fill can still move. A well-fit insert or tightly wrapped layer is often more effective than simply adding volume. In how to pack fragile items in mailers, immobilization usually beats sheer quantity.
Then there is mailer performance itself. Seal strength matters. Puncture resistance matters. Tear resistance matters. If the closure pops open after repeated flexing, the entire shipment becomes vulnerable to contamination, scuffing, and loss. A thin outer layer may be fine for soft goods, but fragile items need a mailer that stays intact under handling. That is especially true when the item has a hard edge or a stiff accessory attached to it.
Shipping environment matters too, and it is easy to underestimate. A parcel going one state over faces a different handling profile than a parcel moving through multiple hubs. Hot trucks can soften adhesives. Wet porches can weaken paper-based layers. Long transit chains multiply the chance of a corner crush. The same packout that performs well on a short regional route can struggle on a longer lane. That is why how to pack fragile items in mailers should be tested in the actual service level you plan to use.
Cost always sits in the background, but it should not be an afterthought. The cheapest mailer can become expensive if it creates breakage, labor rework, or a spike in customer complaints. A slightly stronger structure can be the lower-cost choice once total landed cost is considered. That includes packaging, postage, packing time, damage replacement, and support handling. For small brands, that total cost view is usually more honest than a unit-price-only view.
Here is a quick way to think about the decision:
- Low risk: light, flat, non-leaking, non-sharp items with simple geometry.
- Medium risk: fragile items that can be immobilized with wrap and an insert.
- High risk: heavy, brittle, leak-prone, or point-loaded products that need crush protection.
That framework makes how to pack fragile items in mailers more practical. It moves the question away from opinion and toward product behavior. That is how packaging design should work: assess the item, match the system, then standardize the result.
One more useful reference point is testing discipline. ISTA-style distribution thinking and ASTM D4169-style package performance logic both remind teams that a package is only as strong as its weakest failure point. For a packaging team, that means a mailer should be judged by movement control, closure quality, and post-test appearance, not by how it looks on the packing bench.
Useful test question: if you shake the packout and hear movement, you have not finished the design.
Step-by-Step: How to Pack Fragile Items in Mailers
How to pack fragile items in mailers becomes much easier when it follows a fixed process. The point is not to improvise each order. The point is to build a repeatable method that a packer can follow under pressure and still produce a consistent result. A good step-by-step packout protects the item, speeds labor, and lowers variation across shifts.
- Inspect the item first. Check for hairline cracks, loose caps, sharp edges, exposed corners, or weak joints. How to pack fragile items in mailers starts with knowing where the product fails before it ever touches wrap or filler.
- Choose the right wrap. Bubble wrap handles impact well, foam protects delicate finishes, tissue or kraft can help with fill, and corrugated sleeves or inserts add structure. Pick the material based on the item's failure mode, not just on what is nearby.
- Build a snug inner bundle. The product should not slide end to end. If it can, add another layer, fold the edge differently, or size the insert down. This is one of the most important parts of how to pack fragile items in mailers because movement is often the real damage source.
- Check the fit before sealing. Gently shake the wrapped bundle. If you hear a shift, you still have work to do. The goal is a stable core that stays centered during transit.
- Insert the bundle carefully. Watch corners, seams, and closure zones. A hard edge pressed against a seam creates a failure point. When in doubt, rotate the item so the strongest side faces the highest-stress area.
- Seal with enough margin. The closure should hold after handling, not just look neat. Pressure-sensitive adhesives, heat seals, and self-seal strips all need enough contact area to do their job.
- Do a final shake and squeeze test. A compact, repeatable package should feel stable and flat enough to process efficiently. If it bulges unevenly, the packout probably needs adjustment.
That sequence works because it keeps the process boring in the best possible way. How to pack fragile items in mailers is not about cleverness. It is about consistency. The same person should be able to pack the same item the same way three hundred times without relying on instinct alone.
For Brands That Ship multiple SKUs, a short spec sheet helps a lot. One page can define the item orientation, wrap type, insert type, closure method, and exception rules. That is especially useful when packaging is tied to launch timing or retail packaging consistency. It also helps teams that use Custom Packaging Products to align mailers with broader product packaging and package branding standards.
How to pack fragile items in mailers also benefits from a few practical habits:
- Use the smallest mailer that still allows a safe closure.
- Keep the item centered instead of letting it ride against one wall.
- Reinforce weak points rather than adding random filler everywhere.
- Standardize orientation so packers do not improvise on each order.
- Set a clear exception rule for items that should never go in a mailer.
For teams building custom printed packaging, one helpful insight is that the outer print does not change the physics. A strong graphic system can improve package branding, but it will not save a weak packout. The mechanics still come first. That is true whether the order ships in a plain mailer, a padded version, or a more specialized system.
Common Mistakes That Turn a Simple Shipment Into a Claim
How to pack fragile items in mailers fails most often in predictable ways. The first mistake is treating a mailer like a box and assuming the outer layer alone can stop damage. It cannot. If the product has room to move, the package is already at risk. That is why a flat, tight bundle usually outperforms a loose, overstuffed one.
The second mistake is overpacking. This surprises people because they assume more material always means more safety. Not always. A swollen seam, a stretched closure, or a distorted profile can fail during sorting. If the mailer is fighting its own contents, it has already lost some of its protective value. How to pack fragile items in mailers should create a stable shape, not a stressed one.
The third mistake is using incompatible materials together. A slippery item inside loose filler can drift to one side and concentrate impact in a single spot. A hard object next to thin paper can punch through. A brittle ceramic item with no positional restraint can chip against the wall of the pack. Material choice needs to match the geometry and the fragility profile.
The fourth mistake is weak sealing. A self-seal strip that barely touches, a rushed heat seal, or a fold that is meant to "hold for now" all create risk. Shipping systems do not reward optimism. They reward closure integrity. In how to pack fragile items in mailers, the seal is one of the cheapest places to prevent a claim, so it should be taken seriously.
The fifth mistake is skipping a real test shipment. A bench test is useful, but it is not the same as a parcel moving through carrier handling. Small-batch transit tests catch failures that a tabletop shake test cannot. If the goal is to scale, that one sample run matters more than most teams think.
Other common errors include:
- Using a mailer that is too thin for the product's edges or weight.
- Letting heavy items sit against seams or corners.
- Ignoring humidity or temperature when choosing adhesives.
- Changing the packout without updating the packing SOP.
- Assuming every SKU in the same product line can share the same setup.
What makes these errors expensive is not just breakage. It is the ripple effect. A damaged item creates a replacement shipment, a support ticket, a possible review issue, and a hit to margin. That is why how to pack fragile items in mailers should be documented and audited like any other production process. Small mistakes get amplified fast when order volume climbs.
There is also a strategic mistake that shows up in fast-growing brands. Teams can become attached to a mailer format because it looks clean or keeps postage low, even after the damage rate rises. That is when packaging design stops being design and becomes inertia. If the item no longer fits the system safely, switch the system. Sometimes the right answer is a different mailer; sometimes it is a box; sometimes it is a hybrid solution with insert protection. The wrong answer is forcing the same setup forever.
Honestly, the best insurance against claims is not extra fear. It is better process control. How to pack fragile items in mailers gets easier once the team knows where failure usually begins: movement, stress, weak closure, and poor fit.
Cost and Pricing: When Mailers Save Money and When They Do Not
How to pack fragile items in mailers often gets sold as a savings move, and sometimes it is. Mailers can reduce dimensional weight, cut void fill, and speed packing. For lightweight, fragile goods that fit a snug format, the cost profile can be excellent. But the math only works if the packout holds up in the real shipping environment. A cheap mailer with a high damage rate is not cheap. It is just underpriced at purchase and overpriced everywhere else.
Break the cost into direct and hidden buckets. Direct costs include the mailer, the cushioning, labels, and labor time. Hidden costs include replacements, customer service, returns processing, and reputation damage. When teams evaluate how to pack fragile items in mailers, they often focus on the unit price of the mailer itself. That is the smallest part of the picture.
Here is a practical comparison for common fragile-item packouts. These are typical rough ranges for larger runs and will vary by print coverage, material thickness, and closure style:
| Packaging option | Typical unit cost | Best fit | Risk profile | Operational note |
|---|---|---|---|---|
| Thin poly mailer + loose wrap | $0.11-$0.22 | Very light, low-fragility items | Higher risk if item moves | Fast to pack, but weakest protection |
| Padded mailer | $0.24-$0.48 | Small accessories, cosmetics, light decor | Moderate risk if product has sharp edges | Good balance of speed and protection |
| Reinforced mailer + insert | $0.42-$0.95 | Brittle items that need stabilization | Lower risk when fit is tight | Better for standardized fragile SKUs |
| Small rigid box with padding | $0.55-$1.20 | Heavier, sharper, or crush-sensitive items | Lowest risk for many brittle goods | Often higher postage and more labor |
Those ranges show why how to pack fragile items in mailers can be attractive. A mailer can save money when the product is light, the closure is secure, and the cushioning requirement is modest. It can also save labor because fewer pieces are involved and the packout is simpler to standardize. For growing brands, that simplicity has value because labor is often the hidden cost that swallows the apparent material savings.
Mailers become expensive when the item demands too much internal protection. If you need heavy foam, rigid inserts, reinforced seams, and special closure steps just to make the package survive, the economics can drift toward a box-based system. The same is true if breakage rates climb above the point where replacement cost outweighs postage savings. In that case, a box can be the cheaper total-cost choice even if its unit price is higher.
Another useful way to think about the decision is SKU-by-SKU comparison. Do not generalize from one product line to another. One ceramic accessory might fit how to pack fragile items in mailers perfectly. Another item in the same category may need a different structure because of its wall thickness, edge shape, or weight distribution. Comparing each SKU separately is slower at first, but it usually produces better margins over time.
If you are working through a product launch, the business question is simple: what is the expected total cost per delivered order? Packaging cost per order plus expected damage cost per order is a better metric than materials cost alone. That one shift changes how teams evaluate product packaging, custom printed boxes, and flexible mailer formats. It also keeps package branding in the right place: useful, but never allowed to override protection.
For larger custom runs, print coverage and material choice matter. Heavier graphics, specialty finishes, and stronger substrates can move pricing enough to matter. As a rough planning reference, many custom packouts need 12-15 business days from proof approval to production shipment, though that depends on the product, volume, and finishing details. That kind of lead time is normal enough that operations teams should plan around it early, especially if how to pack fragile items in mailers is being rolled out for a seasonal drop or a new retail packaging program.
In short, how to pack fragile items in mailers saves money when the item is stable, the line is standardized, and damage stays low. It does not save money when the package is forced to do more than it should. A little honesty on that point saves a lot of headache later.
Process and Timeline: Testing, Scaling, and Expert Next Steps
How to pack fragile items in mailers should be treated like a small packaging project, not a guess. The fastest way to scale safely is to test two or three pack styles, compare them, and then standardize the best one before full rollout. That process may feel slower than picking the cheapest mailer on day one, but it prevents the much more expensive problem of discovering failure after dozens or hundreds of orders have already shipped.
A practical rollout often looks like this. First, select the SKU or small group of SKUs that need a mailer solution. Second, build prototype pack styles with different cushioning levels, insert types, and closure methods. Third, run small batch tests: shake checks, drop tests, and a handful of real carrier shipments. Fourth, compare the results against your current setup. Fifth, write the final packing spec and train the team.
How long should that take? For a small line, internal prototype work can happen in a few days if the materials are on hand. Real transit testing usually needs a few more days because you want the sample to move through the carrier network, not just through the warehouse. If you are ordering custom mailers or custom printed packaging, add the production lead time on top. For many programs, that means planning several weeks ahead rather than waiting until launch week.
There are a few expert shortcuts that improve the odds quickly. Use the smallest mailer that still closes safely. Standardize item orientation so the fragile side always faces the same direction. Reinforce the known weak point instead of padding every surface equally. And make the exception rule explicit: if the product has a sharp edge, a leak risk, or a crush-sensitive profile, route it out of the mailer system before it causes trouble.
It also helps to document the process in one place. A good SOP should include the material list, the wrap method, the insert spec, the closure method, and the pass/fail criteria for movement. Add one photo of the final packed result. Add one note about which items should never go into the mailer system. That may sound basic, but it prevents a lot of drift when staff changes or order volume spikes.
For brands building package branding around shipping materials, this is the point where structure and appearance need to work together. Custom Logo Mailers can support the unboxing experience, and retail packaging can look cleaner when the outer shipper is tidy. But visual polish should never outrank performance. If the packout is unstable, the customer never gets far enough to notice the print. That is why the best packaging teams pair aesthetics with process discipline instead of treating them as separate jobs.
If you are deciding what to standardize next, a short checklist is helpful:
- Audit your current fragile SKUs and rank them by damage risk.
- Test three packaging combinations with real samples.
- Compare damage rate, packing time, and total shipping cost.
- Choose the version that gives the lowest delivered-order cost.
- Update the SOP before scaling to the full catalog.
If you need packaging options that support that rollout, start with the broader assortment at Custom Packaging Products and then narrow into the format that fits your product line. That is usually the cleanest way to align product packaging, branded packaging, and shipping performance without overcomplicating the operation.
For anyone still deciding how to pack fragile items in mailers, the final answer is rarely dramatic. Test a few builds. Measure movement. Watch the seals. Compare the total cost per delivered order. Then standardize the version that keeps damage down without overloading the budget. That is the real work behind how to pack fragile items in mailers, and it is the difference between a package that merely ships and a package that arrives intact.
Can you pack fragile items in mailers without using a box?
Yes, if the item is small, light, and can be immobilized with padding or inserts. How to pack fragile items in mailers works best when the product cannot shift inside the package. Do not use a mailer alone for items that crack from pressure, have sharp edges, or need strong crush protection. If the item rattles during a shake test, it needs more stabilization.
What is the best padding for fragile items in mailers?
Bubble wrap is the most versatile choice for impact and abrasion control. Foam sleeves work well for smooth or delicate surfaces that scratch easily. Paper fill and corrugated inserts help when you need shape retention, not just softness. The right answer in how to pack fragile items in mailers depends on whether the item needs cushioning, positioning, or both.
How do I know if a mailer is strong enough for glass or ceramics?
Check whether the item can be fully immobilized and still stay below the mailer's stress limit. Use reinforced or padded mailers only, never thin poly mailers for exposed glass or brittle ceramics. If the item has a point load, sharp rim, or heavy base, a box is usually safer. How to pack fragile items in mailers is not about forcing every product into the same format.
How do shipping costs change when fragile items go in mailers?
Mailers can lower cost by reducing package weight and dimensional weight. They can raise cost if the item needs extra cushioning, stronger closures, or expensive replacements after damage. The cheapest option is the one with the lowest total cost per delivered order, not the lowest materials cost. That is why how to pack fragile items in mailers should always be tied to damage data.
What should I test before I switch my fragile items to mailers?
Test drop performance, seal strength, item movement, and crush resistance. Ship a few samples through the real carrier network before rolling the method out widely. Compare damage rate, packing time, and total shipping cost against your current setup. If the bundle shifts or the closure weakens, refine the design before scaling how to pack fragile items in mailers across the full line.


