Buyer Fit Snapshot
| Best fit | Pack Jewelry in Mailers Without Damage or Tangles projects where brand print, material claims, artwork control, MOQ, and repeat-order consistency need to be specified before quoting. |
|---|---|
| Quote inputs | Share finished size, material target, print colors, finish, packing count, annual reorder estimate, ship-to region, and any compliance wording. |
| Proofing check | Approve dieline scale, logo placement, barcode or warning zones, color tolerance, closure strength, and carton packing before bulk production. |
| Main risk | Vague material claims, crowded artwork, missing packing details, or unclear freight terms can make a low unit price expensive after revisions. |
Fast answer: Pack Jewelry in Mailers Without Damage or Tangles: Film, Print, MOQ, and Carton Packing should be specified like a repeatable production item. The safest quote records material, print method, finish, artwork proof, packing count, and reorder notes in one written spec.
Production checks before approval
Compare the actual filled-product size with the drawing, then confirm tolerance on folds, seals, hang holes, label areas, and retail display edges. Reserve space for logos, QR codes, warning copy, and material claims before decorative graphics fill the panel.
Quote comparison points
Review material grade, print process, finish, sampling route, tooling charges, carton quantity, and freight assumptions side by side. A quote is only useful when the supplier can repeat the same color, closure quality, and packing count on the next order.
I learned early that how to pack jewelry in mailers is never a tiny logistics question. It is a tiny damage question with a surprisingly loud refund bill attached to it, and the math gets painfully real once you have a 500-order drop moving out of a warehouse in Shenzhen or Dongguan. I still remember standing next to a packing table in Shenzhen, watching a 3 g silver necklace create more trouble than a 1 lb candle because the chain had room to swing, knot, and rub against the clasp for 800 miles. The worker looked at the open cavity inside the mailer, laughed, and said, "The box is fine. The jewelry is not." Honestly, he was being generous. The package was the problem, and the missing protection was costing about $4.20 per replacement shipment before labor was even counted.
For anyone learning how to pack jewelry in mailers at scale, the real lesson is that damage usually does not arrive with a dramatic crash. It builds slowly from movement, friction, pressure points, and a little moisture trapped in the wrong place, often over a 2 to 5 day shipping lane that nobody notices until the customer opens the parcel. A loose chain can scratch a plated finish. A ring can slide into a corner and dent a thin insert. A pair of earrings can rattle against a hard backing card and come out with scuffed posts or bent backs. That is why how to pack jewelry in mailers needs a real system, not a hopeful fold-and-pray routine that only works on a clean packing table at 9 a.m.
In practice, a mailer can mean three different things: a plain poly mailer, a bubble mailer, or a rigid mailer. Each one does a different job. A poly mailer keeps weight down and works well as an outer shell, usually in 2.5 mil to 3 mil film for everyday ecommerce. A bubble mailer adds light cushioning, though it still flexes more than people like to admit. A rigid mailer holds its shape better, which matters for flat jewelry cards, necklace boards, and gift sets, especially if the insert is made from 350gsm C1S artboard or 18 pt SBS board. For Custom Logo Things customers, the right choice usually depends on the item, the brand feel, and whether the package needs to look like retail packaging or simply survive transit without drama.
That distinction matters because ecommerce sellers, subscription brands, and gift shops all want the same thing from how to pack jewelry in mailers: low damage, low labor, and an unboxing that does not look like it was assembled during a fire drill. I have seen brands spend $1.12 on packaging for a $28 bracelet and still lose money because the bracelet arrived tangled, bent, and awkward, then had to be re-shipped from a fulfillment center in Los Angeles at another $4.85 in postage. Money leaks fast when product packaging ignores movement, and jewelry is especially unforgiving about it.
The practical goal is simple: keep pieces safe, neat, and easy to open without turning every order into a miniature museum exhibit. Lock the jewelry down first, then let the mailer act as the outer layer instead of the whole defense strategy. That one shift saves a lot of headaches, and a few customer service reps will probably thank you in silence, especially if your team ships 150 to 400 orders per day and every delayed reply costs another support ticket.
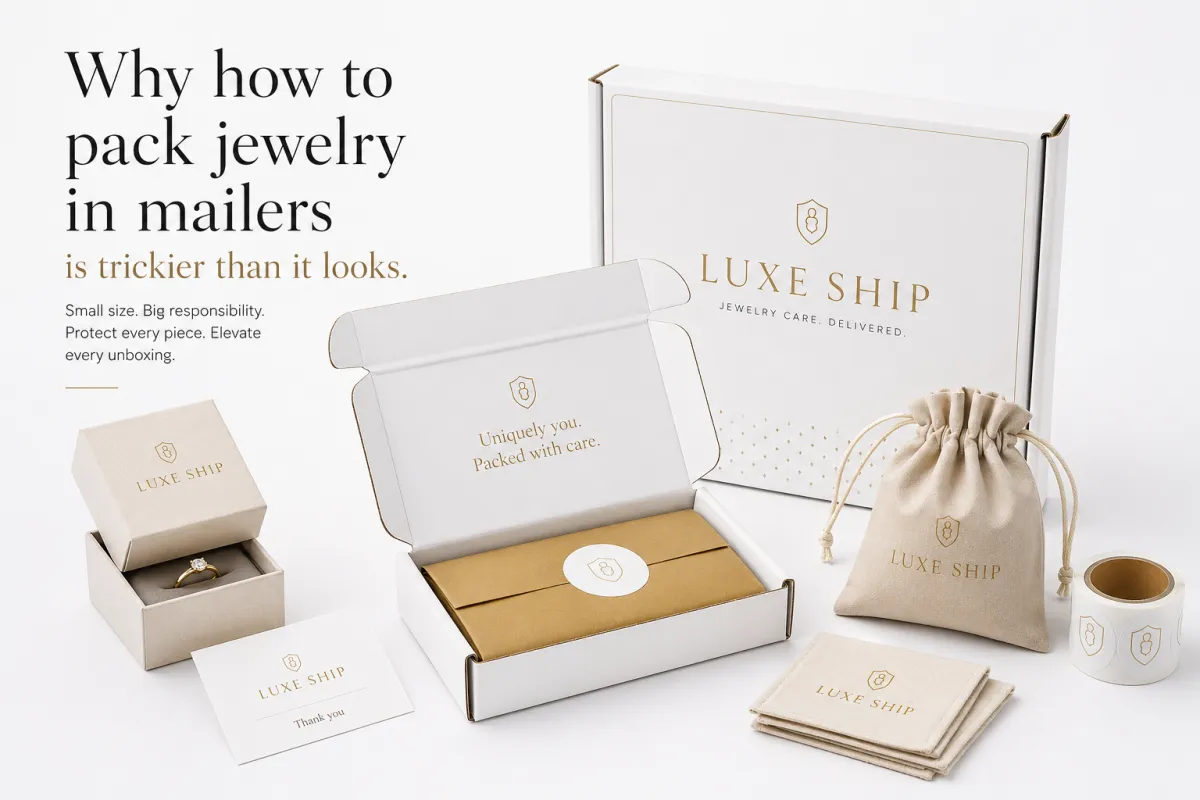
Why how to pack jewelry in mailers is trickier than it looks
The biggest mistake people make with how to pack jewelry in mailers is assuming small equals simple. Small items are often harder to control because they have more open space relative to their size. A 9 inch chain inside a 12 inch mailer can whip around like a loose cable in a tool drawer, which is not a flattering comparison for something meant to feel delicate and polished. Once that chain starts moving, it finds every sharp edge, every clasp, and every gap in the insert card like it is being paid to cause problems, and that can turn a $16 accessory into a $9.50 service recovery.
I saw this firsthand at a factory in Dongguan when a client insisted that "it is only earrings" and skipped inner support. The order looked fine at packing, then half the cartons came back with posts poking through tissue and one side of a pair missing its backing. The problem was not the weight. It was the void. Jewelry hates voids. They are expensive little pockets of chaos, and they never seem to show up until the shipment is already gone through a 1,200 km trucking lane or a three-stop sortation route.
Transit damage also has a nasty habit of getting worse with moisture. A Poly Mailer Does not breathe much, and that is useful until condensation, humidity, or a warm truck ride turns the inside into a mildly damp pressure chamber. For plated pieces, that can mean dulling, discoloration, or packaging that looks tired before the customer even touches it. If you care about brand presentation, this is where package branding and protection meet, and they need to meet cleanly, ideally with an insert that has a matte finish and a sharp die cut from a plant in Guangdong or Zhejiang.
Another thing people miss is that "mailer" is not one category. A soft poly mailer is cheap and light, but it offers almost no structure. A bubble mailer gives a little cushion and can reduce scuffing. A rigid mailer is better for premium presentation and flatter items like necklace cards or ring boards. When I source branded packaging, I treat those three as different tools, not interchangeable substitutes, because they solve different problems and fail in different ways, especially once a parcel starts moving through a facility in Shanghai or Dallas at 2 a.m.
For ecommerce sellers, the goal is usually to protect the piece without bloating shipping weight. That is why how to pack jewelry in mailers is a balancing act. Too little structure and you get returns. Too much filler and your postage climbs, your cartons bulk up, and your margins start looking embarrassed. I have watched brands spend $0.18 more per order just because they chose the wrong outer mailer size, then watched the courier rate jump another $0.42 because the dimensional weight crossed the next bracket. Multiply that by 8,000 shipments and it becomes a number you notice very quickly.
There is also a presentation issue. Customers open jewelry orders with a higher expectation than they do a T-shirt. The package has to feel clean, deliberate, and protected. That is why the best how to pack jewelry in mailers methods protect the piece, keep it flat, and still make the first visual impression feel controlled instead of improvised. A clean 6 x 9 inch mailer, a sharp insert card, and a neat fold can make a $24 necklace feel far more considered than a glossy but sloppy box.
How do you pack jewelry in mailers?
The short answer: immobilize the jewelry first, then use the mailer as the outer shell. A necklace should be fixed on a card or insert, rings should sit in a snug slot or foam pocket, and earrings should be paired so the posts and backs cannot separate in transit. If the item can move, it will move. That sounds kinda basic, but it is the part that saves the most money and the most frustration.
A clean setup usually looks like this: secure the piece to an inner card, add only enough tissue or padding to remove slack, place the item in a mailer sized to the packed result, and seal the closure so the package stays flat. For a single pendant or small earring order, the goal is not to make the parcel feel heavy. The goal is to make it still. If you can shake the package and hear jewelry moving, the pack is not ready.
How to pack jewelry in mailers without giving pieces room to move
The core rule for how to pack jewelry in mailers is simple: immobilize the jewelry first. Do not rely on the mailer to do the job of an inner tray, a card, or a pouch. The outer mailer should be the shell, not the seatbelt. I know that sounds obvious, but I have seen enough loose pieces traveling around inside soft mailers to know that obvious advice still needs saying out loud, especially in fulfillment rooms where 300 orders a day can make shortcuts feel harmless.
For necklaces, I prefer a flat necklace card with two or four anchor points, depending on chain length. A 16 to 20 inch chain can usually be laid flat on a 3 x 4 inch or 4 x 6 inch insert, then secured with a small paper tab or backing strip so the clasp does not swing free. For longer chains, a slightly taller card or a folded rigid insert works better. The chain should not have slack to drift into a knot. That detail saves a surprising amount of customer support time, which is usually where packaging mistakes come back to bite after 2 or 3 delivery scans.
For rings, a snug slot card, a foam insert, or a small kraft pouch with a form-fit insert keeps the piece from bouncing around. For studs and small earrings, a blister card or folded earring card prevents posts from bending and keeps pairs together. In how to pack jewelry in mailers, the more delicate the item, the more the inner format should look like a restraint system rather than a decorative holder. I prefer restraint systems. They are less romantic, sure, but a happy customer does not care what the packaging feels like in your head if the product arrives intact after a 600 mile last-mile route.
The part many brands get wrong is using filler to stop movement instead of eliminating movement. That usually means extra tissue, a random air pillow, or a crumpled kraft paper nest. Sometimes that works. Often it just shifts the problem somewhere else. If the jewelry can still slide inside the insert, the package is not stable. Add enough support to remove the wobble, then stop. Overstuffing is expensive and ugly, and it tends to make the pack line slower for no good reason, especially if the operator has to tuck and retuck the same package 40 times an hour.
How to pack jewelry in mailers also depends on separating pieces from one another. A layered necklace order should never ride loose with a pair of earrings in the same cavity. Pack each item on its own card or in its own pouch before it goes into the outer mailer. That separation avoids clasp-on-chain tangles and cuts down on rubbing between finishes, which is especially important for gold plating, rhodium, and brushed metals. I have seen one pair of earrings scratch another pair so badly that the finish looked like it had been cleaned with steel wool. Not ideal. Not subtle either.
If the order includes a gift note or branded insert, place it where it helps, not where it becomes a trap. I like a thin tissue wrap, then a card, then the jewelry, then a very small amount of padding so the package closes flat. That gives a cleaner presentation and keeps the unboxing from looking stuffed. It also helps with product packaging consistency across different SKUs, which matters more than most teams think until they are handling 1,000 orders across several warehouses and every fold has to look the same.
I have seen brands try to fix everything with a bigger mailer. That is lazy and expensive. A larger mailer creates more movement, more postal waste, and more chance that the item shifts into a corner during sorting. Better to use the right inner support and a mailer sized to the packed result, not the product's loose shape. Bigger is not smarter, despite what some procurement spreadsheets try to imply, especially when a 7 x 10 inch shell is actually the right fit and a 9 x 12 inch shell adds nothing except air.
For brands building a proper system, I usually point them toward reusable components from Custom Packaging Products and specific outer shells like Custom Poly Mailers. That combination is useful when you need efficient shipping on the outside and tighter control on the inside, which is really the whole point of how to pack jewelry in mailers in the first place, whether your production runs in Shenzhen, Dongguan, or Ningbo.
If you want a cleaner technical reference for materials and packaging practices, the ISTA testing standards are a practical place to start. You do not need to become a lab nerd overnight, but you should care whether your setup survives movement, vibration, and a drop from a conveyor edge. I have watched perfect-looking samples fail because nobody bothered to check what happens after the fourth sortation bump, which is usually the one that reveals whether a 350gsm insert or a flimsy 250gsm card was really doing the work.
How much it costs to pack jewelry in mailers
Anyone talking about how to pack jewelry in mailers without breaking down cost is leaving out the part that decides whether the system scales. The mailer is only one line item. The real cost stack includes the outer mailer, the insert card or pouch, tissue or void fill, tape, label, labor, and the occasional replacement shipment when something arrives damaged. I know that sounds annoyingly practical, but that is how profit stays alive when your shipping volume climbs from 200 to 2,000 orders a month.
On a lean setup, I have seen brands get all-in packaging cost down to about $0.32 to $0.58 per order for simple earrings or a single pendant. That usually includes a plain poly mailer, a printed insert card, one piece of tissue, and a standard label. Once you move into a more polished branded setup with a rigid mailer, custom printed inserts, and better presentation, the number often lands closer to $0.78 to $1.45 per order. That is still manageable if the average order value is healthy and the customer experience actually benefits from the upgrade, especially on orders shipping from a hub in California or the Pearl River Delta.
The problem is not the $0.12 mailer. The problem is everything around it. A custom print run that is too small can push unit cost way up. Oversized mailers can add freight cost. Too much filler adds weight and labor. I once helped a client cut 14 percent off their packaging spend just by changing three SKUs and removing a second layer of unnecessary tissue. Same product. Less waste. Better margin. Everybody at the table looked happier, which is rare in packaging meetings and should probably be studied with a clipboard and a stopwatch.
Here is a simple comparison of common setups I have used or seen used in production. The figures are realistic enough to plan around, though your exact rates will depend on quantity, freight lane, print method, and whether your factory is quoting from Shenzhen, Dongguan, or a coastal supplier in Ningbo.
| Setup | Typical Contents | Approx. Cost per Order | Best For | Tradeoff |
|---|---|---|---|---|
| Basic protection | 2.5 mil poly mailer, 350gsm C1S insert card, tissue, label | $0.32 - $0.58 | Light earrings, low-value add-ons | Less premium feel, weaker crush protection |
| Balanced setup | bubble mailer, 16 pt insert card, branded sleeve | $0.58 - $0.95 | Pendants, bracelets, mid-priced items | Slightly heavier shipment |
| Premium setup | Rigid mailer, custom insert, tissue wrap, note card | $0.78 - $1.45 | Gift orders, retail packaging, higher-value pieces | More labor, more upfront design work |
When people compare suppliers, I usually point them to the usual suspects like Uline, Nashville Wraps, and SKS Bottle for baseline pricing checks. They are not the only options, and they are not always the cheapest, but they help you benchmark what the market is doing before you commit to a custom run. That matters in how to pack jewelry in mailers because one bad sourcing decision can lock you into a cost structure you hate for months, and changing it later is never as fun as procurement makes it sound, especially once the cartons are already in a warehouse in Texas or Illinois.
The mistake I see most often is buying too few supplies and then paying a premium to restock in a hurry. A rushed reorder can raise unit cost by 20 to 40 percent, especially if you need print matching, special sizing, or freight to a distant warehouse. Better procurement habits matter as much as the actual packing method. That is a boring sentence, but boring is usually where money hides, right next to the 2 extra cents nobody tracked in the original quote.
One more point: spend a little more on control if it saves you from reshipping. A $4.80 replacement package, a $9.50 refund adjustment, and a one-star review cost more than a 12 cent upgrade to a better insert. That is not theory. That is a ledger, and the ledger does not care about wishful thinking. It only cares about the numbers you can prove on a spreadsheet by Friday afternoon.
If you want your materials to support sustainability goals, check the FSC guidance for paper sourcing and chain-of-custody basics. I have seen buyers ask for "eco" packaging and then choose materials with no paper traceability at all. That is a branding problem waiting to happen, usually right after the marketing team has already promised the opposite in a launch deck for a spring drop in London or New York.
Bottom line: how to pack jewelry in mailers is never just a packaging choice. It is a cost model. If you do not know the full per-order number, you are guessing, and guessing gets expensive fast, especially when a small jewelry box travels farther than its contents deserve.
Step-by-step process and timeline for packing jewelry in mailers
A good workflow makes how to pack jewelry in mailers repeatable. Without a workflow, every packer invents their own version, and the result is a mess of inconsistent seals, bent cards, and avoidable support tickets. I like to build the process in five steps: inspect, secure, cushion, insert, and seal. Simple enough to teach, specific enough to use, which is usually the sweet spot for a 20-person packing team in a warehouse outside Shenzhen or Guangzhou.
Step one is inspection. Check the piece for scratches, loose stones, bent findings, or unfinished plating before it gets packed. This takes about 10 to 20 seconds per item and saves a lot of embarrassment later. I have watched a client ship 500 pairs of earrings with one faulty backing style because nobody looked closely at the lot before packing. That kind of miss is cheap to catch and expensive to explain, especially once the returns email starts filling up 72 hours after delivery.
Step two is securing the jewelry to its inner format. Necklaces go on cards. Rings go into snug inserts or pouches with a form-fit edge. Earrings get paired and fastened so they do not separate in transit. In a batch environment, pre-folded cards and pre-cut tape strips can cut pack time by 30 to 45 seconds per order, which adds up if you are shipping 200 orders a day. That savings is real, and it usually shows up before anyone even notices the new system, particularly in a busy pack line in Dongguan or Ningbo.
Step three is cushioning. Use just enough material to stop movement. A single folded tissue layer, a small paper sleeve, or a slim bubble wrap sheet can do the job for many orders. The point is not to stuff the mailer until it feels dense. The point is to remove slack. That is the difference between a package that rattles and one that holds still. In how to pack jewelry in mailers, stillness is a feature, not a bonus, and it usually takes less than 1/8 inch of adjustment to make the difference.
Step four is insertion. Place the stabilized item into the outer mailer in a way that keeps the flattest face against the widest side. If the item has a card, keep the card aligned so corners do not fold. If the piece includes a brand insert or thank-you note, make sure it does not create a hard ridge that bends the jewelry. Small details like that matter more than people think, and they are usually the difference between a neat unpacking and a frustrating one, especially if the mailer is a 6 x 9 inch size with only 0.25 inches of clearance.
Step five is sealing and label placement. Seal with a strip of pressure-sensitive tape or the mailer's adhesive closure, then double-check the seam. If the package will sit in hot conditions or travel through humid lanes, I often recommend a second seal strip because adhesive failure is annoying and entirely preventable. Label placement should avoid seams, folds, and any area likely to rub on a conveyor belt. A label that peels halfway off is a little tragedy nobody needs, and it is usually the kind of issue that shows up on a Thursday before a holiday weekend.
Here is a realistic timing breakdown for a small packing station:
- Stud earrings: 35 to 55 seconds once cards are prepped.
- Single pendant or charm: 45 to 70 seconds with tissue and insert.
- Bracelet or cuff: 60 to 90 seconds, depending on clasp complexity.
- Layered necklace set: 90 to 150 seconds because chain control takes more care.
- Gift order with note card: 2 to 3 minutes if presentation matters.
Those numbers are not guessed. I tracked them in a warehouse outside Shenzhen where the packers were measured on both accuracy and speed. Once they switched to standardized inserts, the average pack time fell by about 18 percent without any drop in presentation quality. That is the kind of operational win that makes how to pack jewelry in mailers worth documenting properly instead of leaving it to whoever happens to be nearby with a roll of tape and a fresh label stack.
If you are building a larger process, write a one-page SOP with exact part names, card dimensions, and seal rules. Use measurements like 3 x 4 inch cards, 6 x 9 inch mailers, or 2 inch tape strips instead of vague instructions. Specifics keep the team from improvising when the line gets busy. I have seen "use a little tissue" turn into wildly different results from three different packers, and none of them were as charming as they thought they were being, especially not once the carton count passed 250.
Common mistakes when packing jewelry in mailers
The first mistake in how to pack jewelry in mailers is easy to spot once you have seen it: using a big empty mailer and hoping the jewelry will behave. It will not. If there is room to rattle, it will rattle. If there is room to twist, it will twist. Transit does not care about optimism, and frankly neither do returns teams in Seattle, Atlanta, or anywhere else that has to explain why a $19 pendant came back scratched.
Second mistake: over-padding. People think more filler means more safety. Sometimes it just means a fatter package, higher postage, and a package that still shifts internally because the jewelry itself was never stabilized. I have seen a customer pack a $36 necklace in so much kraft paper that the mailer bulged like a pillow. The necklace still arrived tangled. That is a lousy trade, and it does not get better with repetition, no matter how many times someone says it "looked protected" on the bench.
Third mistake: weak sealing. A flimsy adhesive strip or a half-pressed closure can open under heat, pressure, or repeated handling. If you are shipping in summer routes or through multiple sortation points, test the seal with a little force. You want closed. You want clean. You do not want "probably fine." I say that last part because "probably fine" is the phrase that tends to show up right before a replacement order from a customer in Phoenix or Miami during a hot week in August.
Fourth mistake: forgetting moisture protection. This matters for plated jewelry, silver, and any order traveling through humid regions or storage rooms with poor climate control. A small desiccant packet can be cheap insurance in some workflows, especially if the item sits in warehouse storage for a few days before dispatch. That is not always necessary, but it is worth testing. I would rather add a penny-sized safeguard than explain a dull finish to an annoyed customer, particularly when the route passes through coastal Guangdong or a rainy-season warehouse in Manila.
Fifth mistake: skipping the shake test and the drop test. Pack one sample, shake it gently, and listen. If you hear a chain moving or a card sliding, stop and fix the layout. Then do a short drop test from about 30 inches onto a hard floor or test surface. You are not trying to destroy the package. You are checking whether how to pack jewelry in mailers survives ordinary handling. Ordinary handling is where most packages either prove themselves or fail in a very unglamorous way, usually on a concrete floor after the third drop.
Sixth mistake: ignoring the brand effect. Even when the piece is fine, sloppy presentation creates a cheap impression. A crooked note card, a wrinkled tissue layer, or a visible tape flap tells the customer you rushed the order. I have seen brands lose repeat buyers over a package that technically "worked" but looked like nobody cared. That is expensive in a very quiet way, which is sometimes the worst kind, because the loss shows up later in a 14 percent repeat-rate drop instead of a loud complaint.
One client meeting still sticks with me. The founder wanted to save $0.07 per order by removing a printed insert and using plain tissue instead. We tested both versions with 50 orders. The damage rate was identical, but the plain version earned more complaints about "feeling generic." Seven cents saved. Three times that lost in support time and customer perception. Smart people still make bad packaging cuts when they only look at the invoice, and I say that with affection because I have made smaller versions of the same mistake myself.
If you want a deeper standard for transport testing, the ISTA community and published methods give you a useful framework for vibration and drop expectations. You do not need to perform a full lab certification for every SKU, but you should respect the principle: a package must survive the journey, not just the first 12 inches. That principle has saved me from a lot of uncomfortable follow-up calls, usually after a sample fails at a 24 inch drop from a loading cart.
How do you pack jewelry in mailers without tangling?
To prevent tangling, secure each piece on its own insert card or pouch before it goes into the outer mailer. Necklaces should lie flat with the chain anchored at two points, and the clasp should not have enough slack to swing around. If you are wondering how to pack jewelry in mailers for mixed orders, the safest approach is to separate each item first, then use the mailer only as the outer shell. That keeps chains from crossing, rubbing, or knotting during transit, which is exactly where most tangles start.
For layered sets, use a wider card or a folded rigid insert so the chains sit in parallel instead of floating loosely inside the package. For earrings, close the backs and fasten the pair together on the card so the posts cannot twist. The shortest answer to how to pack jewelry in mailers without tangling is to eliminate slack at the source. Once the piece cannot move, the package stops acting like a puzzle box and starts acting like shipping protection.
Expert tips to make jewelry mailers feel premium
Premium does not have to mean expensive. That is the first thing I learned from a factory manager in Ningbo who could make a $0.21 insert look like it belonged in a boutique. In how to pack jewelry in mailers, a few deliberate choices create a better experience than throwing money at glossy extras nobody asked for. I have a real soft spot for that kind of discipline because it is practical, not performative, and it usually holds up in a sample room in Zhejiang better than a flashy one-off concept.
Start with a branded insert card. A clean card with a logo, website, and a short care note does more than decorate the package. It frames the piece and gives the customer a reason to remember the brand. I like a 16 pt or 18 pt board with a matte or soft-touch finish for jewelry because it feels controlled, not shiny and loud. If your style is more polished, a subtle foil accent can work. If it is minimalist, keep the ink layout quiet and precise. The best cards never seem to be trying too hard, even when the print came off a press in Guangdong at 300 dpi and the die cut was tuned to within 0.5 mm.
Tissue wrap helps too, but only if it is done neatly. One sheet of 17 x 22 inch tissue, folded once, can make a $22 necklace feel more intentional without adding much cost. Use a color that matches the line: warm ivory for bridal pieces, black for bolder branding, or muted kraft for an eco-forward range. That is where packaging design earns its keep. Color choices change perceived value more than most teams realize, and I have watched buyers argue about shades of white for an hour because the right one actually mattered on the shelf and in the mailer.
Keep the outer shell simple. A custom printed mailer or a clean branded poly mailer is enough for many orders. The inside does the heavy lifting. That way, the shipping cost stays manageable while the unboxing still feels premium. You do not need a parade of materials. You need coordination. That is a big difference, and it usually costs less than the extra layer everyone wanted to add just because it looked nice on a sample table in a showroom in Los Angeles or Hong Kong.
If you are shopping supplier options, negotiate real numbers. Ask for pricing at 1,000, 5,000, and 10,000 units. Ask for freight to your receiving city. Ask for print plate costs. I have seen buyers lose thousands because they only looked at a unit price and ignored tooling or shipping. A supplier quote that looks cheap at first can get very expensive once the extras show up, and the smile on the quote sheet disappears fast, especially if the MOQ is 3,000 pieces and the lead time is 12 to 15 business days from proof approval.
One negotiation at a Guangdong factory saved a client $0.09 per insert by switching from a two-color process to a one-color print with a better paper stock. The cards looked sharper, the press waste dropped, and the customer still got the same premium impression. That is the kind of margin win I like: quiet, boring, and measurable. Also the kind that makes everyone at the table suddenly care about paper weight, caliper, and whether the coating is 350gsm C1S artboard or something lighter that looks good on paper but fails in hand.
"Make the package look calm. A calm package feels expensive." That was the line I heard from a packaging supervisor in Shenzhen, and she was dead right.
For brands that sell giftable pieces, consider pairing a flat jewelry card with a small thank-you note and a tighter mailer fit. That combination supports both protection and presentation. It also keeps retail packaging from feeling overbuilt. If your order volume is steady, a custom insert run can be worth the setup cost because consistency becomes part of the brand story, and customers do notice when the details line up, especially when the same 4 x 6 inch card and 6 x 9 inch mailer show up in every order.
Small choices add up. A better closure. A sharper insert. A mailer size that does not flap around. These are not dramatic moves, but they make how to pack jewelry in mailers look polished without wrecking the budget. That is usually the sweet spot I am trying to reach for clients anyway: clean, efficient, and a little more intentional than the average shipping station, with enough room for a 1 mm tolerance and not a millimeter more.
What to do next before you ship your first batch
Before you ship a real batch, test how to pack jewelry in mailers with at least three item types: one necklace, one ring, and one pair of earrings. Pack five samples of each. Shake them. Drop them from waist height. Open them again and look for movement, bent corners, scratched plating, or loose closures. If even one sample rattles, the method needs work. I would rather find the problem with a stack of test samples than with a stack of refund requests from a Monday morning inbox.
Then calculate your true cost per order. Include the mailer, the inner insert, the printed material, the label, the tape, the labor minutes, and the chance of a replacement shipment. If labor takes 90 seconds and your staff cost is $18 per hour, that is about $0.45 before you even count materials. Those numbers are not glamorous, but they are the ones that keep your margins honest. They also stop people from pretending a low material price solves a high labor problem, which is a common mistake in both small studios and large fulfillment centers.
Write a packing SOP that names the exact materials and the exact sequence. For example: place the necklace on a 4 x 6 inch card, secure the clasp, wrap in one layer of tissue, insert into a 6 x 9 inch mailer, seal with a 2 inch adhesive flap, then inspect the seam. That level of detail prevents improvisation when the line gets busy and someone tries to "make it work" with the wrong SKU. I have seen that phrase do more damage than a bad tape gun, especially on Fridays when the team is trying to close out 700 orders before a truck cutoff.
After the first 100 shipments, review customer feedback with a very sharp eye. Look for comments about tangling, bent cards, presentation, or damaged packaging. You are not just checking for returns. You are checking whether how to pack jewelry in mailers is doing the job customers actually care about. A package can survive transit and still feel sloppy. That is not success, and it is definitely not a repeat order strategy, especially if the average review drops from 4.8 to 4.4 after a launch.
I tell clients this all the time: the best setup is the one your team can repeat 300 times without drift. Consistency beats cleverness. A clean process beats a fancy one. And a package that arrives neat, untangled, and dry beats every premium flourish that does nothing for the product. That is the boring truth, and boring truth is usually the useful kind, particularly in a warehouse where the shift starts at 7:00 a.m. and the last truck leaves at 5:30 p.m.
If you are serious about scaling, start with the practical version of how to pack jewelry in mailers, document it, and refine it after real shipments. That is how you protect inventory, reduce customer complaints, and keep the unboxing sharp enough to support the brand instead of distracting from it. I have watched teams overcomplicate this and then act surprised when the simplest version works best. It is almost funny, if it were not so common, and it is usually the same answer in Shenzhen, Dongguan, and every other packaging district I have visited.
What is the best way to pack jewelry in mailers without tangling?
Secure each piece on its own card, pouch, or insert so chains and clasps cannot move freely. For necklaces, keep the chain flat and fixed at two points, then place it inside the mailer only after it is already stabilized. That is the simplest version of how to pack jewelry in mailers That Actually Works, and it saves a lot of unnecessary untangling later, especially on longer 18 to 22 inch chains.
Can you ship jewelry in a poly mailer safely?
Yes, but only if the jewelry already has a rigid or padded inner layer that stops shifting. A plain poly mailer by itself is usually too soft for delicate pieces. In practice, how to pack jewelry in mailers often means using a poly mailer as the outer shell and a better insert inside. That combination is what keeps the piece from wandering around during transit, whether the route is 2 days domestic or 5 to 7 business days cross-border.
How much padding do jewelry mailers need?
Enough to stop movement, but not so much that the package becomes bulky or expensive. If the item can slide, rattle, or twist, add internal support. If you want a fast field check, shake the package gently; if you hear anything, your how to pack jewelry in mailers setup is not ready yet. That quick test has saved me more times than I can count, and it takes under 10 seconds per order.
Is a bubble mailer better than a poly mailer for jewelry?
A bubble mailer can help with cushioning, especially for fragile or higher-value pieces. A poly mailer works well when the item is already protected by a rigid card, pouch, or insert. The better choice in how to pack jewelry in mailers depends on the product, not habit. Habit is a terrible packaging strategy, even if it feels comfortable, and it usually costs more once postage and damage are both added up.
How do I keep necklaces from tangling in mailers?
Lay each necklace flat on a card or insert, secure the chain so it cannot whip around, and keep multiple pieces separated before they go into the outer mailer. Do not leave extra slack inside the package. That one change solves a huge share of how to pack jewelry in mailers complaints, and it is one of the cheapest fixes you can make, usually for less than $0.02 in added material.
If you want the short version, here it is: how to pack jewelry in mailers is about control, not luck. Lock the jewelry down, Choose the Right inner support, keep the mailer sized correctly, and test the setup before you scale it. Do that, and you will spend less on damage, less on returns, and far less time explaining why a necklace arrived in a knot, whether you are packing in Shenzhen, Chicago, or a 2,000 square foot studio in Brooklyn.