Order Logo Patches Ecommerce Merch Beanies That Sell
Logo Patches Ecommerce Merch Beanies: What Buyers Notice First
Shoppers judge a beanie quickly, especially on a collection page where the product image may be smaller than a postage stamp. For logo patches ecommerce merch beanies, the patch often carries the sale before anyone reads the description. It gives the hat a focal point, makes the brand visible in thumbnails, and tells the buyer whether the item feels like retail merch or leftover promo stock.
These beanies are branded knit hats finished with sewn-on or heat-applied patches. Common patch types include woven, embroidered, faux leather, genuine leather, rubber, PVC, sublimated, and printed fabric. They show up in creator drops, corporate stores, brewery shops, coffee shop retail shelves, employee programs, fundraiser stores, outdoor events, gift bundles, and winter merch launches.
The appeal is practical. A patch creates a clean, repeatable branded area on a soft knit surface that otherwise stretches, compresses, and shifts. Direct embroidery still works for many simple designs, but small letters can sink into ribbing, curves may distort as the knit stretches, and thin outlines often lose their shape. A patch gives the logo a defined edge and a more controlled surface.
That consistency matters for ecommerce. If 300 beanies ship from a fulfillment center, the logo should sit in the same place, read clearly in product photos, and survive normal wear without curling, cracking, or looking crooked. The buyer does not care that knit goods are harder to decorate than flat fabric. They only see the finished hat.
Blunt buyer rule: the job is not to put a logo on a beanie. The job is to choose a patch style, knit body, placement, and price point that make the product worth buying before the customer touches it.
How Patch Styles Work on Beanies Without Looking Cheap
Patch style changes the whole personality of the hat. Woven feels clean and retail-ready. Leatherette feels warm and giftable. PVC feels bold and modern. The wrong choice can make a decent beanie look like a conference giveaway, and no amount of clever product copy fixes that.
Woven patches
Woven patches are often the safest choice for detailed logos, small lettering, icons, fine lines, and art that needs sharp edges. They are flatter than embroidered patches, which helps on tight cuff beanies and short fisherman styles where bulky decoration can overwhelm the fold. A common woven patch width is about 1.5 to 2.5 inches, with either a heat-cut edge for clean geometric shapes or a stitched edge for a more traditional badge feel.
Because the design is woven into the patch rather than stitched heavily on top, woven patches can hold more detail at a smaller size. They are not magic, though. Very thin type, distressed textures, tiny dates, and trademark marks still need to be checked at actual patch size.
Embroidered patches
Embroidered patches are thicker, more textured, and familiar to buyers who like classic merch. They work best for bold marks, block letters, simple crests, outdoor-style badges, and designs with clear contrast. They struggle with tiny text because thread has physical width. If a tagline is barely readable on a laptop proof, it will not become crisp after stitching.
The advantage is character. A clean embroidered patch can make a basic cuff beanie feel more substantial, especially when the art has simple shapes and enough open space. The tradeoff is detail control.
Leather, leatherette, PVC, and printed patches
Faux leather and genuine leather patches are popular for coffee brands, maker labels, ranch-inspired graphics, breweries, lodge merchandise, and lifestyle products. They usually use debossing, embossing, or laser engraving instead of full-color printing. Genuine leather can vary in tone, grain, and surface texture. That variation can look rich, but it is not ideal for brands that need exact color consistency across every unit.
Leatherette is more predictable and often easier to price for larger runs. It can mimic the warmth of leather while keeping the color, thickness, and surface finish more consistent from patch to patch. It also avoids some of the sourcing and variation concerns that come with natural hides.
PVC and rubber patches add dimension, strong color, and a water-resistant feel. They fit streetwear, tactical, fitness, youth, and sport-adjacent brands. On beanies, they need restraint. A PVC patch that looks great on a backpack can feel heavy or stiff on a soft cuff, so many projects stay around 1.5 to 2.25 inches wide unless the cuff is tall and stable.
Printed patches work for gradients, illustrated mascots, full-color art, and designs with subtle color shifts. Quality depends on the print method, base fabric, edge finish, and abrasion resistance. If the design has small details or pale ink on a dark base, ask how it will hold up to rubbing, packing, and repeated wear.
Attachment methods
Sewn-on patches are the standard for durability on knit beanies. A good sew-down should hold the patch flat without pulling the cuff out of shape. Heat-applied patches can work on some materials, but stretch knits need testing because heat, pressure, rib height, and yarn content all affect the bond. Adhesive-only patches are not serious merch for a product people will actually wear.
Shape matters too. Rectangles, squares, circles, ovals, shields, arches, and simple die-cut shapes are easier to place and sew cleanly. Complicated edges with sharp points and tiny turns may look clever in a proof but rough on a curved, folded cuff.
Patch Size, Placement, Knit Style, and Color Choices
Most beanie patches land between 1.5 and 3 inches wide. Smaller patches feel refined, especially on fisherman beanies, minimalist merch, and premium lifestyle designs. Larger patches can work for outdoor retail or streetwear, but they need a stable cuff and simple art. A 3-inch patch with dense copy on a stretchy rib knit can buckle, curl, or look pasted on.
Centered on the cuff is the safest retail placement. It photographs cleanly, works for marketplace thumbnails, and gives buyers an immediate read. Offset placement can feel more boutique, but the product photography must show it clearly. Side placement is useful for subtle branding, although a front-facing thumbnail may hide the logo unless the hero image is angled.
Cuffed beanies are usually the easiest body for logo patch decoration because the folded band creates a firmer display area. Slouch beanies need more planning because the fabric collapses and shifts. Fisherman beanies suit smaller patches, often 1.25 to 2 inches wide, because the cuff height is shorter. Pom beanies already have visual weight at the top, so the patch should not compete with the pom or crowd the fold.
Knit texture is a real production issue, not a minor design detail. Ribbed knits stretch and move, so stiff patches may pucker if they are too wide or sewn too tightly. Fine-gauge knits can support cleaner edges and smaller details. Heavy acrylic, recycled polyester, wool blends, cotton blends, and mixed yarns all behave differently during sewing and heat application.
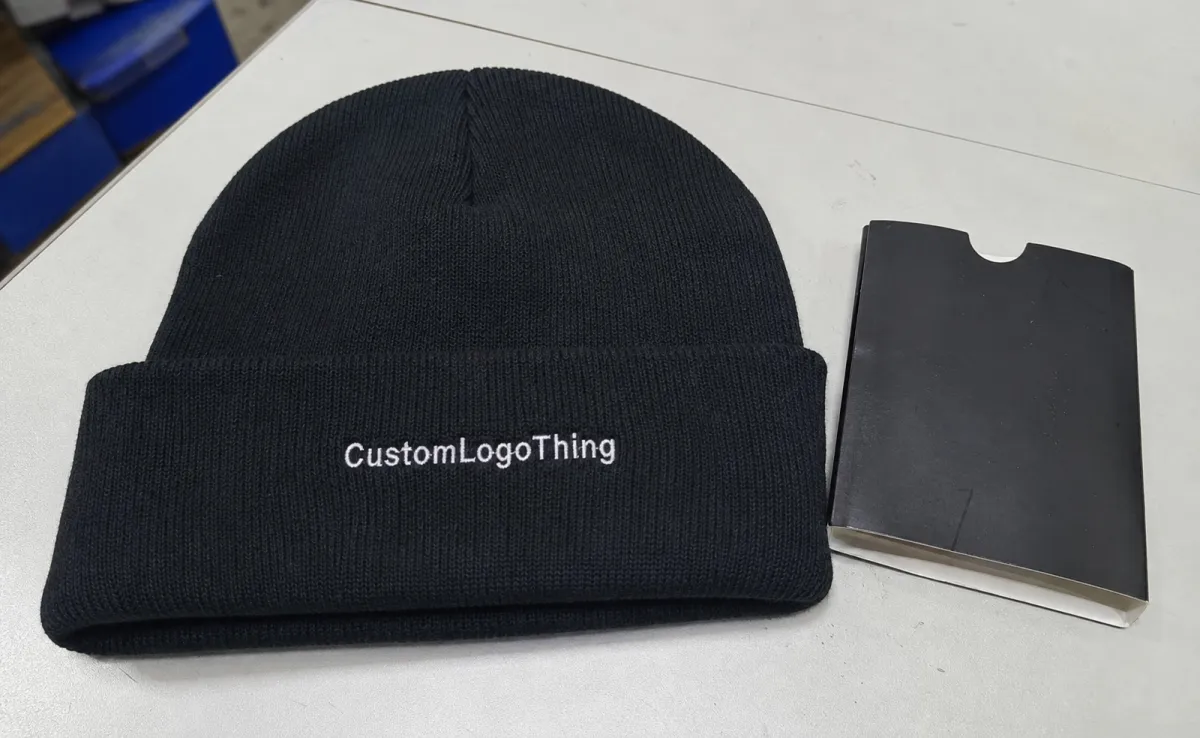
Color does more selling online than many buyers expect. High contrast usually performs better because the patch remains visible in thumbnails, social feeds, and quick-scroll product grids. A black beanie with a tan leatherette patch reads instantly. A navy beanie with a slightly darker navy patch can look elegant in person and disappear online unless the lighting is excellent.
Tone-on-tone branding is not wrong. It can look premium and quiet. It does, however, require close-up photography, good shadow, and a customer who values subtle branding. For first-time merch drops, high-contrast patch options are usually easier to sell and easier to evaluate from early sales data.
Simplify the logo before production. Remove tiny taglines, hairline outlines, distressed texture, small registration marks, and microscopic founding dates unless the final patch size supports them. Print the logo at actual patch size or view it on screen at that scale. If it looks cramped there, it will look cramped on the hat.
Cost, Pricing, MOQ, and Unit Cost Tradeoffs
Custom patch beanies have two main cost layers: the blank beanie and the patch with application. Comparing only blank beanie prices gives a false picture. A $3.80 blank can become an $11.50 landed product once the patch, sewing, setup, packaging, freight, and handling are included.
Cost drivers include patch material, patch size, color count, stitch density, mold or die charges, setup fees, application labor, beanie quality, order quantity, packaging, and shipping method. Lower minimums are possible for simple woven, embroidered, and leatherette projects, but unit cost drops as setup and labor spread across more pieces.
| Patch Type | Best Use | Typical MOQ Reality | Common Cost Tradeoff |
|---|---|---|---|
| Woven patch | Detailed logos, small text, clean ecommerce photos | Often practical for test runs around 50-100 pieces | Good detail and low profile, less texture than embroidery |
| Embroidered patch | Bold logos, classic merch, outdoor badges | Often practical around 50-100 pieces depending on setup | Strong texture, weaker for tiny lettering |
| Leatherette patch | Coffee, maker, lifestyle, brewery, and outdoor brands | Often practical around 48-100 pieces | Premium look, limited full-color detail |
| Genuine leather patch | Premium retail, gifting, and heritage-style merch | Often better for larger runs due to material and setup | Natural variation looks rich, but color can vary |
| PVC or rubber patch | Streetwear, tactical, fitness, youth, and sport merch | Often higher due to mold cost | Dimensional and durable, but heavy if oversized |
For broad planning, many custom patch beanies land around $7 to $16 per unit before premium packaging or rush freight. Small runs may sit higher. Larger orders can come down, but not always. A heavyweight knit with a custom PVC patch and individual retail packaging will not price like a basic acrylic cuff beanie with a small woven label.
Setup costs deserve attention. Woven and embroidered patches may include digitizing or setup fees. PVC patches may require a mold. Leather patches may need a die, engraving setup, or deboss plate. Packaging adds its own costs: hang tags, barcode labels, suffocation-warning poly bags, belly bands, carton sorting, and retail-ready folding all add labor, materials, or both.
Margin math should happen before the order is placed. If a beanie retails for $24 to $38, the landed cost must leave room for ecommerce platform fees, fulfillment, returns, payment processing, markdowns, influencer seeding, and ads. Good-looking merch with no margin becomes inventory with a motivational quote attached.
Paying more can be rational if the added cost improves perceived value. Better knit weight, cleaner patch edges, tighter sewing, more accurate color matching, and better packaging can support a higher retail price. Ask for good-better-best pricing across two quantities and two patch types. One isolated quote rarely tells you enough.
Production Steps, Timeline, and Lead Time Expectations
The normal production path is straightforward: artwork review, patch recommendation, digital proof, optional sample or pre-production approval, patch production, beanie decoration, quality control, packing, and shipping. Each step prevents a specific kind of mistake. Skipping one may save a day and create a larger problem later.
Artwork review checks logo detail, color count, minimum line thickness, patch size, border requirements, and whether the design can be produced cleanly on the chosen material. Vector files such as AI, EPS, or clean PDF files speed this up. A blurry screenshot can often be redrawn, but redraw time adds cost and can delay proofing.
A digital proof should show patch size, placement, colors, shape, edge style, and attachment method. Review it at full size, not just as a tidy mockup on a screen. Check spelling, logo orientation, patch dimensions, and whether the design sits correctly on the actual cuff height.
Sampling adds time and cost, but it is sensible for retail launches, larger orders, unfamiliar materials, strict brand color standards, or any project where product photography must match the final shipment closely. A pre-production sample can reveal weak contrast, a stiff patch, crooked placement, loose stitching, or a detail that looked fine on a PDF and poor in thread or engraving.
Lead times vary by supplier, season, inventory, and patch type. Simple domestic projects using in-stock beanies may run roughly 10 to 20 business days after proof approval. Custom leather tooling, PVC molds, complex art, sampling, overseas production, holiday demand, or freight congestion can push timing into the 4 to 8 week range.
Most schedule problems come from ordinary delays: late artwork, slow proof approval, color changes, unavailable beanie colors, holiday closures, freight issues, and last-minute packaging requests. Plan backward from the launch date and include production, shipping, fulfillment setup, product photography, ecommerce listing work, and a buffer for corrections.
If sustainability claims are part of the merch story, confirm material details early. Recycled yarn, FSC-certified paper hang tags, lower-plastic packaging, and recycled-content mailers can affect sourcing, price, and lead time. The Forest Stewardship Council is a useful reference for paper-based packaging claims, while ISTA provides transport testing standards for packaged products moving through parcel networks.
Step-by-Step Ordering Guide for Ecommerce Merch Buyers
A clean order starts before the quote. Vague specs produce vague pricing, and vague pricing turns into long email threads. Define the product as if it is already headed for a sales page.
- Define the buyer and use case. A streetwear drop, ski lodge gift shop, corporate employee store, brewery merch wall, and creator bundle should not default to the same patch or beanie body.
- Choose the beanie body first. Decide on cuffed, slouch, fisherman, pom, recycled yarn, heavyweight knit, cotton blend, wool blend, or budget acrylic before locking the patch size.
- Simplify the logo. Provide vector art when possible, remove tiny copy, choose a patch shape, and specify Pantone references or close color targets if color accuracy matters.
- Compare two patch options. Woven versus leatherette. Embroidered versus PVC. Printed versus woven. Two options keep the decision useful instead of turning into an endless research project.
- Request quantity breaks. Ask for unit cost at 50, 100, 250, and 500 pieces if those quantities fit the launch plan. Include setup fees, sample cost, production timeline, shipping estimate, and packaging options.
- Review the proof carefully. Check spelling, patch dimensions, placement, thread or material colors, edge style, logo direction, and the relationship between patch height and cuff height.
- Approve production after launch details are aligned. Confirm photography needs, ecommerce SKU names, color counts, fulfillment rules, packaging, and inventory allocation by color.
For logo patches ecommerce merch beanies, a useful quote request includes beanie style, beanie color, quantity, patch type, patch width, attachment method, target delivery date, packaging needs, and logo file. Add a photo reference if a particular retail look is the goal. Keep expectations grounded. A low-cost acrylic beanie can be a strong merch item, but it will not feel like a boutique wool hat.
Common Mistakes That Make Patch Beanies Hard to Sell
The first mistake is using artwork with too much detail. If the logo needs a microscope, it does not belong on a 2-inch patch. View the art at final size. If the tagline vanishes or the icon turns muddy, simplify before production.
The second mistake is choosing the cheapest beanie body and expecting premium reviews. A good patch cannot fully rescue a thin, scratchy knit. Ecommerce photos may earn the first click, but customer reviews will call out poor hand-feel, weak stretch recovery, loose shape, and itchy yarn.
The third mistake is making the patch too large or too stiff for the cuff. Oversized patches on stretchy rib knit can pull, buckle, or look like a license plate attached to fabric. Many cuff folds sit around 2.5 to 3.5 inches tall, so a 2-inch patch often reads better than a 3-inch patch with crowded art.
The fourth mistake is treating product photos as an afterthought. Buyers cannot feel the knit through a screen, so the patch needs to read clearly in front, side, close-up, and worn images. A useful photo set includes one straight-on shot, one angled shot, one close detail, and one worn or styled image for fashion-driven products.
The fifth mistake is ordering too many colorways too soon. One color can be smart for a small test run. Two or three controlled colors can also work well: black, heather gray, forest green, navy, cream, and rust are common starting points. Five colors at 40 units each may create more leftovers than two colors at 100 units each.
The sixth mistake is skipping packaging and labeling decisions. If beanies are going into fulfillment, retail bundles, subscription boxes, or corporate stores, poly bags, hang tags, stickers, barcode labels, carton labels, and SKU rules matter. Packaging affects receiving, picking, returns, and the customer’s first impression.
The seventh mistake is approving placement without confirming fold height. A patch that looks centered on a flat mockup can sit too low once the cuff is rolled. Ask for placement measured from the cuff edge, not just “center front.” That small production detail prevents a surprising number of disappointing boxes.
Before You Request a Beanie Patch Quote
Create a simple spec sheet before asking for pricing. Include beanie style, yarn or material preference, colors, estimated quantity, patch type, patch size, logo file, placement, packaging needs, and target delivery date. A one-page spec can save several rounds of clarification.
Decide what matters most: lowest unit cost, fastest turnaround, premium feel, recycled or lower-impact materials, exact brand color, retail-ready packaging, or flexible MOQ. You can optimize for several of those priorities, but not all at once. Cheap, fast, premium, fully custom, and low minimum rarely live in the same quote.
Prepare artwork properly. Send AI, EPS, or PDF vector files when available, plus a PNG for quick reference. If all you have is a low-resolution screenshot, expect cleanup time. If the logo includes gradients, hairline strokes, tiny taglines, or distressed texture, ask whether woven, printed, engraved, or simplified art will produce the cleanest result.
Ask for a recommendation, not just a price. A capable supplier should tell you if woven will outperform embroidery for your logo, if the leatherette patch is too large, if PVC will feel heavy, or if the target delivery date is unrealistic. That production judgment is part of the value.
Request clear quote details: unit cost, MOQ, setup fees, sample fees, production lead time, shipping method, carton count if relevant, packaging costs, and what happens if colors or materials are out of stock. Logo Patch Beanies sell better when the product, packaging, photography, and sales page are planned together instead of patched together after production.
FAQ
What patch type works best for ecommerce merch beanies?
Woven patches are usually best for small details, clean linework, and sharp ecommerce photos. Embroidered patches work well for bold, simple logos with a classic merch feel. Leatherette or leather patches suit premium outdoor, coffee, maker, and lifestyle brands. PVC patches fit modern, sporty, tactical, or streetwear-style beanies.
How much do logo patch beanies usually cost to order?
Cost depends on beanie quality, patch material, patch size, quantity, setup fees, application labor, packaging, and shipping. Many projects fall around $7 to $16 per unit before unusual packaging or rush freight, but small runs and premium materials can cost more. Quantity breaks help compare test-run pricing against bulk-order pricing.
What is the best patch size for merch beanies?
Most beanie patches work best between 1.5 and 3 inches wide. Small patches look cleaner on fisherman and minimalist cuff beanies. Larger patches can work for streetwear or outdoor brands, but they need a stable cuff, simple logo art, and enough fold height to sit flat.
How long does production take for custom patch beanies?
Timeline depends on artwork readiness, proof approval speed, patch type, sample needs, beanie inventory, production queue, and shipping method. Simple in-stock projects may take roughly 10 to 20 business days after proof approval, while custom PVC, leather tooling, complex sampling, or overseas production can run longer. Build in time for photography, fulfillment setup, and delivery buffer.
Are sewn patches better than heat-applied patches for beanies?
Sewn patches are usually the safer choice for long-term durability on stretch knit beanies. Heat-applied patches can work for some materials, but they should be tested because knits stretch, flex, and react to heat differently. For ecommerce merch customers will wear repeatedly, adhesive-only patches are not a reliable option.


