Logo Patch Beanies Artwork Proof Checklist for Coffee Shops
Why Coffee Shop Beanies Go Wrong at the Proof Stage
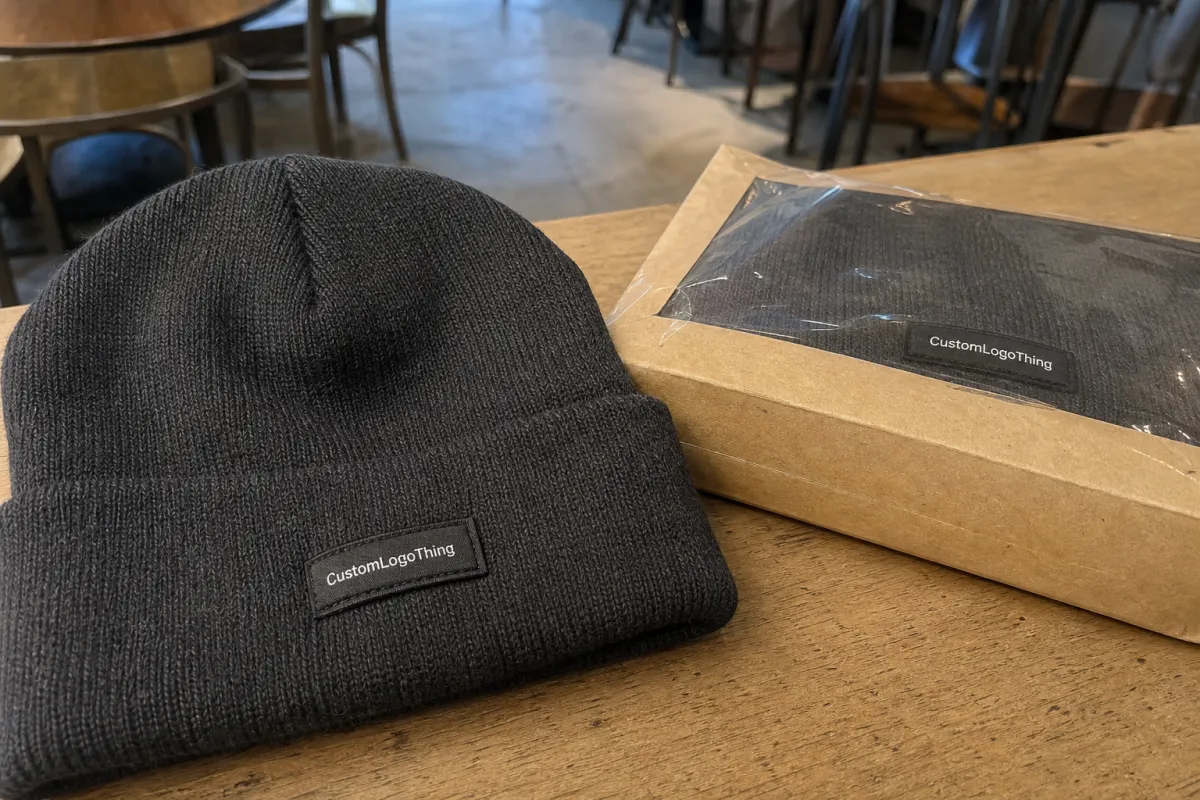
A cafe orders 144 beanies for winter merch, approves the proof in less than two minutes, then opens the cartons and finds a patch that looks tiny on the cuff. Cute, expensive, and completely avoidable. A logo patch beanies Artwork Proof Checklist for coffee shops is not extra paperwork; it is the last low-cost chance to catch sizing, color, placement, and artwork problems before production turns them into inventory.
An artwork proof is a production preview. It should show the beanie style, cuff type, patch shape, logo placement, patch dimensions, decoration method, thread or print colors, backing method, and any packaging notes that affect the finished order. For custom beanies, the proof is the bridge between a logo that looks sharp on a laptop and a product someone will actually wear on a cold walk to your shop.
Buyers often expect a proof to behave like a perfect photo of the finished item. Most proofs are not that. A digital mockup may not show exact knit stretch, leather grain, thread sheen, PVC thickness, or the way a patch bends across a cuff. Screen color is also overconfident. Your monitor, the supplier’s monitor, and the final thread or patch material may each tell a slightly different story.
Coffee shop merch has to do several jobs at once. It needs to look clean on staff during a rush, sit well on a retail shelf, photograph clearly for social posts, and survive the kind of daily wear that includes rain, tote bags, espresso splatter, and being shoved into a coat pocket. That means proof review needs to cover more than “does the logo look nice?” It should test legibility, scale, cuff height, color contrast, material fit, and whether the beanie still feels like your brand rather than a generic promo item.
Proof approval is not a formality. It is the buyer signing off on size, spelling, color direction, placement, and production method. Treat it like money, because it is.
This is especially true for owners, managers, merch leads, and marketing teams who do not order decorated apparel every week. Most people learn proofing the hard way once. Better to slow down here than turn 12 dozen beanies into a storage-room monument to optimism.
How a Logo Patch Beanie Proof Works Before Production
The usual sequence is simple. You send the logo, quantity, beanie style, preferred patch type, delivery target, shipping details, and brand colors. The supplier reviews the artwork, flags production issues, prepares a digital proof, and sends it back for approval. You request changes if needed. Production starts only after written approval, payment terms, and final specifications are complete.
A useful proof should include the beanie color, cuff type, patch material, patch dimensions, decoration method, placement, thread colors or print colors, quantity, and shipping or packaging notes. If your order includes individual poly bags, hang tags, retail labels, barcode stickers, or split shipments to multiple cafe locations, those details should be in the approval trail too. Small omissions are easy to miss in email and hard to fix after cartons are packed.
There are three proof-related stages worth understanding. A digital proof is the fastest and least expensive, usually delivered as a PDF or image mockup. A pre-production sample is one physical unit made before bulk production, useful for premium retail drops, new artwork, or an unfamiliar patch method. A production sample is pulled from the actual bulk run, which helps confirm quality but arrives later, when changes may be limited.
Patch choice shapes the proof. Woven patches handle fine detail better than most embroidery because tighter threads can produce cleaner small forms. Embroidered patches have texture and a classic merch feel, though tiny letters can fill in or soften. Faux leather patches look rugged and retail-friendly, especially with debossed or laser-etched artwork, but they are not ideal for full-color logos. PVC patches resist moisture and wear, yet they can feel more tactical than cozy. Printed patches work for complex color artwork or smaller runs, though they may not carry the same perceived value as woven or leather.
Good files save time. Vector artwork such as AI, EPS, SVG, or a production-ready PDF is best because it can scale without turning into pixel soup. A high-resolution PNG can help as a visual reference, but it is rarely enough for precise patch production. If the logo has gradients, distressed texture, fine lines, tiny type, or a circular badge packed with micro text, expect simplification.
That simplification is not laziness. It is production reality. The awkward question needs to come early: does the logo still work at 2.5 inches wide? If not, make a patch version. Keep the full cafe logo for signage, menus, and packaging; use the simplified mark for beanies.
One blunt detail: after approval, spelling mistakes, wrong colors, bad sizing, and weak placement often become the buyer’s problem. Suppliers should take responsibility for errors they introduce, but if the approved proof says “expresso,” you may have just purchased 144 jokes.
Artwork Details Coffee Shops Must Check Before Approval
Start with readability at real size. A patch that looks sharp at 400 percent zoom can become a beige postage stamp on an actual cuff. Print the proof at 100 percent if you need to. Hold it 2 to 3 feet away, which is closer to how customers will see it on a staff member or retail display.
Check the exact patch dimensions in inches, not just the visual proportions on a mockup. Common beanie patch sizes often sit around 2 x 1 inches, 2.5 x 1.25 inches, or 3 x 1.5 inches. A wide horizontal logo may need 3 inches. A compact icon may look better at 1.75 to 2.25 inches wide. The cuff height decides what feels balanced.
Placement is not universal. Center-front patches are easy to read and usually best for retail beanies. Side placement feels quieter and can work well for staff uniforms. Vertical patches can look sharp on ribbed or fisherman styles if the logo is built for that orientation. Wrap-style labels add a boutique feel, but they can cost more and require careful sewing alignment.
Color deserves more attention than it usually gets. Compare brand colors to available thread, woven yarn, faux leather, PVC, or printed patch options. Perfect Pantone matching may cost more, require custom material, or be impossible on certain substrates. If color is critical, ask for thread charts, material swatches, or Pantone references. For paper hang tags or certified packaging, the FSC is a useful reference for broader material and sourcing standards.
Contrast is where tasteful ideas can disappear. A black logo on dark brown faux leather may look moody in the proof and nearly invisible under cafe lighting. Cream thread on oatmeal knit can look soft and premium, or it can look like nothing happened. Subtle is not the same as legible.
Typography is another frequent trouble spot. Small taglines, establishment dates, neighborhood names, and circular badge text often need to be enlarged, simplified, or removed. If the cafe name is the brand, do not make customers squint to read it. If the slogan only works at menu size, it probably does not belong on a 2-inch patch.
Spelling checks need fresh eyes. Have someone who has not stared at the file for three hours review the cafe name, accent marks, neighborhood name, slogan, social handle, and punctuation. Also check the edge and backing details: merrowed edge, laser-cut edge, heat-applied backing, sewn-on patch, or adhesive support for sewing. These choices affect durability, texture, cost, and the way the patch sits after wear.
Cost, MOQ, and Unit Pricing for Patch Beanie Orders
Pricing depends on beanie quality, patch type, patch size, decoration method, number of colors, order quantity, packaging, freight, and whether sampling is required. A single universal price for logo patch beanies is usually a guess, a placeholder, or a sign that key details have not been discussed yet.
Small custom patch beanie runs carry higher unit costs because setup, digitizing, artwork cleanup, and labor are spread across fewer units. Many suppliers set minimums around 50, 100, or 144 pieces. Fully custom knit colors, premium yarns, specialty patch materials, or custom-dyed components may require higher minimums, sometimes 300 pieces or more.
For planning, basic custom patch beanies may land around $6 to $10 per unit at moderate quantities. Mid-range retail-friendly options often sit around $9 to $16 per unit. Premium beanies with nicer yarn, custom patches, hang tags, and individual packaging can reach $16 to $24 per unit before freight. These are planning ranges, not guaranteed quotes.
| Option | Typical Use | Common Unit Range | Tradeoff |
|---|---|---|---|
| Budget acrylic beanie with printed patch | Events, giveaways, short promotions | $6-$10 | Lower cost, less retail appeal |
| Mid-range cuff beanie with woven patch | Staff wear and cafe merch shelves | $9-$16 | Good balance of detail, durability, and price |
| Premium knit beanie with faux leather patch | Holiday bundles, retail drops, gifts | $14-$22 | Better perceived value, less color detail |
| Custom knit or specialty patch program | Larger brand launches or multi-location cafes | $18-$28+ | More control, higher MOQ and longer lead time |
Cost adders include oversized patches, metallic thread, custom Pantone-dyed materials, PVC mold fees, individual bagging, hang tags, rush production, split shipments, and multiple beanie colorways. Two beanie colors can be manageable. Six colors in a 100-piece order can turn a clean patch decision into a contrast problem and a quoting headache.
Setup fees also matter. Embroidery may require digitizing. Woven patches may carry setup charges. PVC often needs a mold fee. Artwork cleanup or logo redraws can be billed separately, especially if the file arrives as a 600-pixel screenshot pulled from a website header. Screenshots are reference images, not production art.
For a coffee shop buyer, it is useful to quote three versions: good, better, and best. One budget event beanie, one reliable staff beanie, and one retail-quality merch beanie. The cheapest option is not always cheaper if customers do not want to buy it. If your landed cost is $9 to $16, retail pricing around $22 to $35 may make sense depending on brand strength, neighborhood, season, and perceived quality.
Use the proof checklist alongside the quote. Confirm whether freight, tax, proofing, samples, packaging, and revision rounds are included. A low unit price looks less charming after rush freight, setup, and surprise bagging charges appear.
Process and Timeline From Artwork Proof to Finished Beanies
A realistic timeline starts with artwork review, often 1 to 3 business days after the supplier receives complete files and specs. First digital proofs can follow in that same window, although busy seasons may stretch it. Each revision round can add another 1 to 3 business days. Sampling can add 1 to 2 weeks. Bulk production often takes several weeks depending on quantity, patch method, material availability, and season.
The clock usually starts after proof approval, deposit, final specs, and all missing decisions are complete. Production cannot responsibly begin while patch size, beanie color, and shipping address are still floating around in six email threads.
The core process is straightforward: artwork check, proof creation, buyer approval, patch production, beanie decoration, quality control, packing, and shipping. Larger distribution programs may reference standards from ISTA, especially if goods move through parcel networks or fulfillment centers. A local cafe order may not need formal package testing, but cartons still need to arrive without crushed retail merch.
Rush orders are sometimes possible. They are not free magic. Rush production can mean extra fees, limited beanie colors, fewer patch choices, fewer revision rounds, and a higher risk of missing something obvious. If the merch drop is tied to holiday bundles, winter staff uniforms, a local market, or an anniversary release, plan earlier than feels necessary. Then add a buffer.
Proof delays usually come from predictable problems: low-resolution logos, missing Pantone references, unclear patch dimensions, too many decision-makers, or late changes to the beanie color. One person should own final sign-off. Committees are useful for broad input and terrible for production timelines.
Build in time to inspect the shipment before launch. Open cartons. Count units. Check patch placement. Pull a few beanies onto an actual head or folded display shape. If something is wrong, discovering it three days before a merch drop is frustrating. Discovering it while customers are waiting at the counter is worse.
Save the final approved proof with the quote, invoice, material notes, and reorder details. Future you will not remember whether the patch was 2.5 inches wide or 2.75 inches wide. Future you will also be annoyed. Be kind to that person.
Logo Patch Beanies Artwork Proof Checklist for Coffee Shops
Use this logo patch beanies Artwork Proof Checklist for coffee shops before giving written approval. Not after production. Not after the courier drops cartons by the back door. Before.
- Confirm the beanie style. Check cuff height, knit weight, fit, color, and whether it is adult, youth, slouchy, ribbed, or fisherman style. A short cuff can make a normal patch look oversized.
- Confirm patch material and method. Choose woven, embroidered, faux leather, PVC, printed, debossed, or laser-etched. Match the method to the logo detail and the purpose of the merch.
- Check patch size in inches. Compare the patch dimensions against the cuff height. A 3-inch-wide patch may look strong, or it may take over the beanie if the cuff is shallow.
- Review logo clarity at actual size. Print the proof at 100 percent if needed. Look at it from normal viewing distance, not zoomed in like a detective in a crime show.
- Verify color direction. Compare brand standards against available thread, yarn, leather, PVC, or print colors. Ask for swatches or charts when color accuracy matters.
- Check placement and orientation. Confirm centered front, side placement, vertical patch, horizontal patch, or wrap label. Think about how staff will wear it and how retail customers will see it on a shelf.
- Proof every character. Check spelling, punctuation, taglines, city names, establishment dates, accent marks, and social handles. Have a second person review it.
- Confirm order details. Review quantity, color breakdown, packaging, shipping address, delivery target, freight terms, and reorder notes.
- Save the approval packet. Keep the final proof and quote together so reorders do not become a scavenger hunt through old emails.
If the proof raises doubts, ask direct questions. Which details might not reproduce well? What change would improve the patch? Which parts of the proof need final written approval? A capable supplier should answer plainly and explain the tradeoffs without making the process feel mysterious.
Common Proof Mistakes That Make Beanies Look Cheap
The first mistake is approving a patch that is too small for the brand mark. Tiny patches can look premium, but only when the logo was designed for that scale. A detailed cafe crest squeezed into 1.5 inches wide usually looks like a smudge with confidence.
The second mistake is keeping every detail from the main logo. Fine-line illustrations, tiny coffee beans, micro taglines, distressed texture, and small “established” dates often need to go. The patch version of a logo can be simpler than the storefront version. That is not brand betrayal; it is using the right version for the material.
Low contrast is another classic. The digital proof looks quiet and refined. The finished beanie looks like the patch forgot to show up. If the logo needs to be read from 3 feet away, choose contrast first and mood second.
Ignoring the cuff causes real problems. A patch that sits perfectly on a flat mockup can buckle, crowd, tilt, or look awkward once the cuff stretches on a head. Ribbed knits move. Thick cuffs add bulk. Fisherman beanies usually have less vertical space than buyers expect.
Mixing too many beanie colors in one small order can also create trouble. It sounds flexible, but it complicates patch color choices and can raise cost. A cream patch might look great on black, forest, and charcoal. It may look weak on oatmeal. One patch design across multiple beanie colors needs contrast testing before approval.
Staff beanies and retail beanies should not always use the same spec. Staff may need durability, wash tolerance, and a practical color that hides daily wear. Retail buyers care more about style, hand feel, texture, and giftability. If the beanie is meant to sell at $28, it needs to feel like $28.
Skipping a physical sample can be fine for a small repeat order with known artwork. For a major drop, premium launch, or brand-new patch method, it is a real risk. Digital proofs are useful, but a sample shows scale, texture, and wearability in a way a PDF cannot.
The last mistake is approving by committee. Five people giving vague feedback is how timelines collapse. Gather input early, then let one responsible person approve the final version. A checklist should make approval faster and clearer, not more theatrical.
Final Checks Before You Approve Your Beanie Proof
Gather the final logo file, brand color references, preferred beanie color, patch material choice, order quantity, target delivery date, and shipping address before asking for the proof. Complete information shortens the process. Half-decisions create revision loops.
Print the proof at actual size and tape it to a folded beanie or a similar cuff shape. It is low-tech and very effective. If the patch looks too small, too wide, too low, or too quiet on a real cuff, fix it before approval.
Ask the supplier three direct questions: What details might not reproduce well? What change would improve the patch? What part of this proof needs final written approval? The answers will tell you whether the order is ready or whether the artwork still needs work.
Decide the purpose before approving. Is the beanie for staff uniform use, retail merch, loyalty gifts, holiday bundles, event giveaways, or a wholesale cafe collaboration? A $7 giveaway beanie and a $30 retail beanie do not need the same specification. Treating them as the same product usually leads to overspending, underwhelming quality, or both.
Run one final pre-approval review: logo size, patch dimensions, color contrast, placement, spelling, quantity, unit price, setup fees, lead time, freight, packaging, and delivery address. Then save the approved proof, quote, invoice, and material notes in one folder for reorders.
The best logo patch beanies Artwork Proof Checklist for coffee shops is the one used before production, not after the box arrives and everyone suddenly becomes a branding expert.
FAQ
What should a coffee shop check first on a logo patch beanie proof?
Check logo readability at actual patch size before anything else. Then confirm patch dimensions, placement on the cuff, color contrast, and spelling. If the logo includes tiny text or fine illustration, ask whether it should be simplified for weaving, embroidery, leather, or printing.
How big should a logo patch be on coffee shop beanies?
Common patch sizes are around 2 x 1 inches, 2.5 x 1.25 inches, or 3 x 1.5 inches. The right size depends on cuff height, logo shape, and whether the beanie is meant for subtle staff wear or retail merch. Always review the patch at actual size, not only on a zoomed-in digital mockup.
Do coffee shops need a sample before approving logo patch beanies?
A sample is smart for larger orders, premium retail merch, new logo artwork, or strict brand color requirements. For small repeat orders, a digital proof may be enough if the supplier already has approved artwork and specs. Sampling adds time and cost, but it can prevent a much more expensive bulk-order mistake.
What artwork file works best for custom logo patch beanies?
Vector files such as AI, EPS, SVG, or production-ready PDF are best. High-resolution PNG files can help with visual reference, but they usually are not ideal for production artwork. If the file is low resolution, expect cleanup, simplification, or redraw fees.
How long does the artwork proof process take for logo patch beanies?
A first digital proof often takes 1 to 3 business days after complete artwork and specs are submitted. Each revision round can add another 1 to 3 business days. Sampling and bulk production add more time, so coffee shops should build in a buffer before merch drops, holiday launches, or staff rollouts.


