Logo Patches Material Guide for Fitness Brands: Buy Smarter
Logo Patches Material Guide for Fitness Brands: What Actually Survives Sweat
A patch can look expensive on day one and look tired after three wash cycles, one spin class, and a customer who treats care labels like decorative poetry. That is why a practical Logo Patches Material guide for fitness brands has to start with use, not aesthetics.
The right patch depends on sweat, stretch, wash frequency, garment weight, skin contact, and how the brand should feel in hand. A patch on a heavyweight hoodie can be chunky and textured. A patch on leggings needs to behave like it understands physics.
Logo patches are sewn, heat-applied, hook-and-loop, or adhesive-backed brand elements used on leggings, hoodies, caps, gym bags, staff uniforms, recovery apparel, and retail merch. They may be woven, embroidered, molded PVC, rubber, silicone, leatherette, TPU, or heat-transfer style labels. Same branding job. Very different performance profile.
Fitness products take more abuse than ordinary lifestyle apparel. They meet detergent, body heat, sweat, compression fabrics, friction from benches and barbells, and laundry loads that combine sports bras with towels, hoodies, and jeans. Charming, but not gentle.
The main choices are easier to compare once supplier catalog noise gets stripped away: woven patches for clean detail, embroidered patches for texture, PVC or rubber patches for bold sweat-resistant branding, silicone patches for flexible raised marks, leatherette patches for lifestyle merch, and TPU or heat-transfer labels for stretchwear.
Buyer rule: softer and more flexible usually means less dimension. Thicker and more premium-looking often means more weight, more bulk, and more risk on compression garments.
How Patch Materials Behave on Activewear Fabrics
Fabric decides more than most buyers expect. Polyester jersey, nylon-spandex, cotton fleece, mesh, rib knits, and performance blends all react differently to sewing, heat, pressure, and repeated washing. A patch that works on a 320gsm hoodie can be a mistake on a 180gsm stretch tee.
Woven patches are the clean-detail option. They work well for small logos, fine lettering, badge shapes, sleeve tabs, and quiet branding. Because the design is woven with thread rather than built from thick surface stitching, the patch stays relatively flat. Typical apparel sizes run from 0.75 to 2 inches wide, though larger badge patches may sit closer to 2.5 to 4 inches.
Woven labels are useful when the logo has small type or tight geometry. They still have limits. Very thin strokes can blur, micro text can close up, and high-contrast curves may need artwork adjustment. Ask for a digital proof that shows the woven interpretation, not just the original logo dropped onto a template.
Embroidered patches bring texture and visual weight. They suit caps, hoodies, sweatshirts, varsity-style gym merch, staff outerwear, and heavier cotton blends. On tight activewear, embroidery can feel scratchy or bulky, especially with dense stitch coverage over about 70%. Nobody wants a chest patch that feels like a tiny rug.
Embroidery also changes fabric behavior. Dense stitching can stiffen the patch face and create a “boardy” feel. On fleece, that may be fine. On a fitted tank, it can distort the garment or irritate skin. For smaller marks, partial embroidery over twill or felt can control cost and reduce stiffness.
PVC and rubber patches are durable, raised, and sweat-resistant. They are strong candidates for gym bags, caps, outerwear, duffels, tactical training gear, and heavier athleisure pieces. The tradeoff is weight. A 2-inch molded PVC patch can pull or pucker on thin stretch fabric, especially if the garment is lightweight, curved, or compression-fit.
Silicone patches feel more modern and performance-friendly. They are flexible, washable, soft-touch, and usually better for stretch applications than stiffer rubber-looking patches. For fitness apparel, silicone often makes sense when the brand wants raised branding without turning the garment into armor.
Silicone is not magic. A thick silicone patch can still telegraph through thin fabric, and some applications need a compatible adhesive layer or sew channel. If the patch will be heat-applied, test the exact fabric blend. Nylon-spandex, brushed performance knits, and water-repellent finishes can all complicate adhesion.
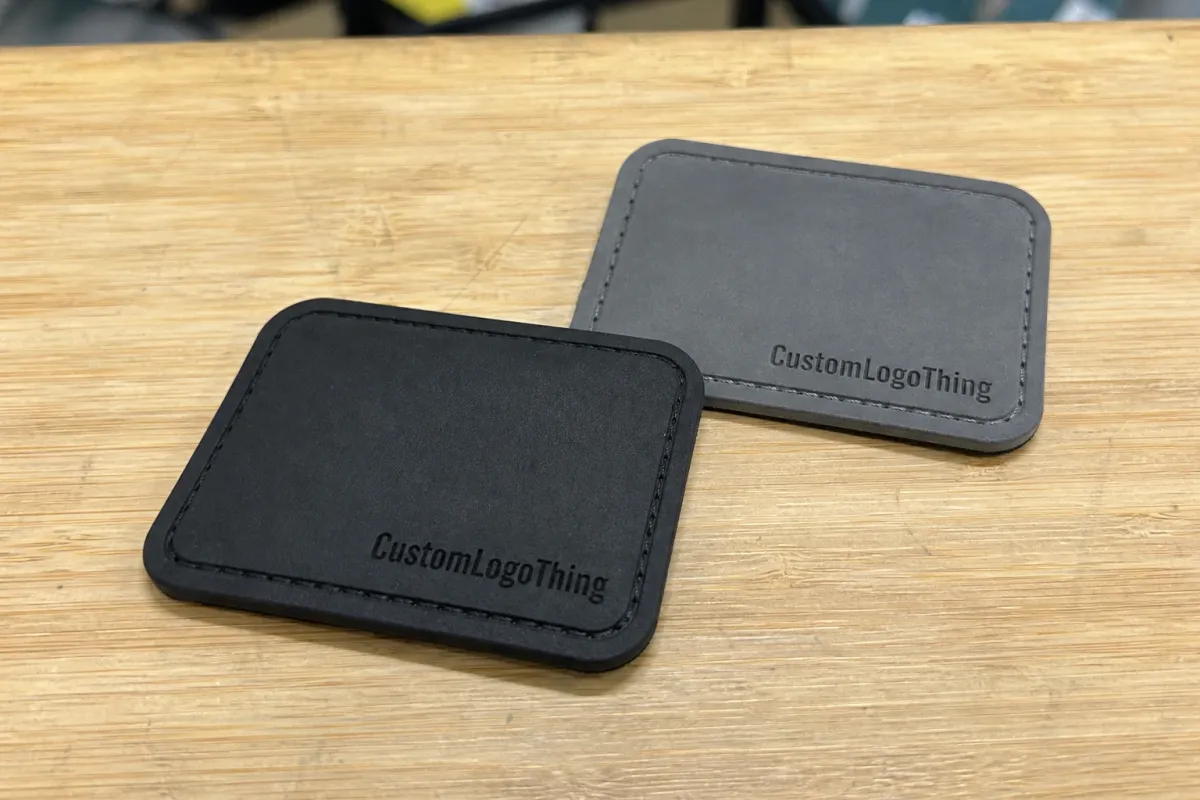
Leatherette patches need careful placement. They look good on yoga studio merch, recovery apparel, beanies, lifestyle hoodies, and premium retail extras. They are not the hero choice for high-sweat compression gear. Sweat, heat, and repeated abrasion can make leatherette age faster than buyers expect.
For leggings, sports bras, and technical tops, TPU labels and heat-transfer branding are close cousins to patches and often perform better. They sit low, flex with the fabric, and reduce irritation. Serious material selection should include them even if they are not traditional sewn patches.
Key Specs That Matter Before You Choose a Patch
Before asking for samples, decide the boring specs. Boring specs prevent expensive surprises. You need size, thickness, backing, edge finish, color count, logo detail level, garment placement, and expected wash conditions.
Size is the first filter. Small chest patches usually land around 1 to 2 inches wide. Sleeve, hem, or waistband patches often sit around 0.75 to 1.5 inches. Bag, hoodie, or cap patches commonly run 2 to 4 inches, depending on logo complexity and how loud the brand wants to be.
Thickness changes the whole garment. Thin woven patches sit cleaner on tees, tanks, and lightweight layers. Thicker PVC, rubber, or silicone patches can add perceived value, but they may pull on 160-220gsm jersey or cause puckering on stretch blends. On compression fabric, even 1.5mm can feel noticeable.
Weight deserves the same attention as thickness. A patch that feels substantial in a hand sample may become awkward after it is sewn to a curved garment panel. Gravity, stretch recovery, and repeated wash agitation all show up after approval if no one tests the combination first.
Edge finish matters too. Merrowed edges give a classic badge look and work well on round or simple shapes. Laser-cut edges are better for modern silhouettes and irregular outlines. Heat-cut woven edges keep small shapes crisp. Molded edges are standard for PVC, rubber, and silicone because the patch is formed in a tool.
Backing choices are not decorative. Sew-on backing is usually the safest for long-term durability. Heat-seal backing speeds application but needs testing for temperature, pressure, dwell time, and wash resistance. Hook-and-loop works for removable training gear or tactical patches. Adhesive backing is mostly for temporary use or positioning before sewing. Trusting adhesive alone for retail activewear is optimistic. Not in a good way.
Logo detail has limits. Tiny type, gradients, fine outlines, and hairline marks often fail in embroidery or molded rubber. Woven construction can hold more detail, but even woven patches have minimum line weights. Fitness brands love minimal marks for a reason. Sometimes the simple logo is not boring; it is manufacturable.
Placement can make or break the patch. Avoid high-stretch zones, inner thighs, underarms, folding waistbands, bra bands, and areas that rub against benches, straps, or equipment. If the customer feels the patch before they see it, the placement is wrong.
Color matching also needs adult supervision. Thread, yarn, silicone, PVC, printed ink, and leatherette all reflect light differently. A black patch on black fabric may look sharp in one material and muddy in another. For brand-critical color, use Pantone references where possible and approve a physical sample under neutral light.
Cost, Pricing, MOQ, and Unit Cost Tradeoffs
Patch pricing depends on material, size, quantity, mold or setup needs, color count, backing, edge finish, and packaging. The cheapest quote is rarely cheapest after peeling, returns, complaints, or a reorder where the color does not match.
Woven patches are usually one of the most cost-efficient choices for detail and volume. Embroidered patches can also be affordable, but price rises with stitch coverage, thread count, and size. PVC, rubber, and silicone often require molds, so the upfront cost is higher. Leatherette pricing varies based on embossing, debossing, print method, and backing.
| Patch Type | Best Use | Typical Starting Cost Range | Common Setup Cost | Fitness Buyer Watchout |
|---|---|---|---|---|
| Woven | Tees, tanks, sleeves, small logos | $0.18-$0.55 per piece at 500-1,000 units | Low artwork setup | Flat and clean, but less dimensional |
| Embroidered | Hoodies, caps, sweatshirts | $0.35-$1.20 per piece at 500-1,000 units | Digitizing fee | Can feel bulky on tight apparel |
| PVC or Rubber | Bags, caps, outerwear | $0.70-$2.20 per piece at 500-1,000 units | Mold fee often $60-$200+ | Durable, but heavy on thin fabric |
| Silicone | Performance apparel, premium athleisure | $0.80-$2.50 per piece at 500-1,000 units | Mold fee often $80-$250+ | Flexible, but requires fabric testing |
| Leatherette | Lifestyle merch, beanies, recovery apparel | $0.45-$1.60 per piece at 500-1,000 units | Deboss or print setup | Not ideal for high-sweat zones |
Minimum order quantities follow the same logic. Woven and embroidered patches can often support lower starting runs, sometimes 100 to 250 pieces depending on supplier. Custom molded PVC, rubber, and silicone may start closer to 300 to 500 pieces because tooling needs to be justified.
Unit cost drops hard with quantity. A 100-piece test run can look painfully expensive per patch. At 500 pieces, the math usually improves. At 1,000 pieces or more, premium materials like silicone or molded rubber become easier to justify, especially for retail drops with predictable reorders.
Never compare quotes without matching specs. A 2-inch woven sew-on patch is not the same product as a 2-inch molded silicone heat-applied patch. Same size. Totally different beast. Ask for two or three quantity tiers so you can see the price break instead of guessing.
Packaging can also affect cost. Individual bagging, barcode labels, application instructions, recycled insert cards, and pre-sorting by garment size or color all add labor. Sometimes that labor is worth it. Sometimes it belongs at the decorator or fulfillment stage instead of the patch supplier. Map the handoffs before approving the quote.
Production Steps, Timeline, and Lead Time Expectations
The standard process is not complicated, but skipping steps creates expensive nonsense. Confirm the application, choose material, finalize artwork, approve a digital proof, approve a physical sample if needed, move into bulk production, inspect, pack, and ship.
Artwork should be vector whenever possible: AI, EPS, or clean PDF. Pantone color targets help for PVC, silicone, woven yarn, printed leatherette, and packaging inserts. Thread colors are matched from thread charts, not magically pulled from a hex code. If a supplier does not flag tiny details before production, that is a red flag.
Simple woven or embroidered patches can often move faster than molded rubber or silicone because there is no curing tool to build. A typical digital proof may take 1-3 business days. A physical sample can take 5-10 business days for woven or embroidered styles and 7-15 business days for molded PVC or silicone. Bulk production often runs 10-20 business days after approval, depending on quantity and season.
Physical samples matter for new materials, new placements, premium retail launches, and any patch that touches skin. Digital proofs are useful, but they do not show hand feel, edge stiffness, garment drape, or whether the patch makes the wearer angry after 20 minutes.
Application time also matters. Sew-on patches add labor at the garment factory or decorator. Heat-applied patches require testing for temperature, pressure, dwell time, and fabric compatibility. A common heat press window might be 275-320°F for 8-15 seconds, but that depends on the adhesive and fabric. Nylon and spandex blends can be fussy. Respect the test.
Quality control should not stop at counting pieces in a bag. Check dimensions, color, edge finish, backing, logo clarity, surface defects, and attachment strength. For sewn patches, inspect puckering and thread tension on the actual garment panel. For heat-applied patches, run wash tests and check corners, edges, and stretch recovery after drying.
Plan around shipping and reorders. Fitness brands launching seasonal drops should build in buffer for sample revisions, customs, freight delays, inspection, and garment production alignment. Finalize patch specs before garment production locks, not after the hoodies arrive and everyone suddenly remembers branding.
If you want to see how branded details affect finished product presentation, the Custom Logo Things case studies are useful for thinking through material, placement, and launch timing together instead of treating patches as a last-minute decoration.
Step-by-Step Material Selection for Gym Apparel
A useful material guide should make decisions easier, not bury you under swatches. Use the product first. Then choose the patch.
- Identify the product category. Leggings, sports bras, hoodies, caps, staff uniforms, and gym bags do not need the same patch. Many brands go sideways right here.
- Rank performance demands. Score sweat exposure, stretch, wash frequency, abrasion, and skin contact from low to high. A patch on a duffel bag can be rugged. A patch on leggings has to behave.
- Match material to use case. Choose woven for detailed logos on lightweight apparel, silicone or TPU for flexible performance branding, PVC or rubber for bold bag and outerwear patches, embroidery for hoodies and caps, and leatherette for lifestyle merch.
- Choose attachment method. Sew-on is safest for durability. Heat-seal is efficient when tested properly. Hook-and-loop works for removable training gear. Adhesive alone should not be trusted for retail activewear.
- Test placement on the actual garment. Not a similar fabric. Not a mockup. The actual garment. Stretch it, wash it, fold it, and wear it before approving bulk.
- Order samples in the top two materials. Do this for hero products, retail drops, or any item expected to carry brand perception.
- Lock a spec sheet. Include size, colors, backing, edge, placement, tolerance, care requirements, packaging, and approved sample date.
For technical apparel, it is usually smarter to test woven versus silicone than debate five exotic materials for three weeks. Two realistic options beat ten fantasy options. Every time.
Packaging deserves a quick mention too. Raised patches can change folding, stacking, hangtag placement, and polybag sizing. If your brand uses recycled materials, kraft paper belly bands, corrugated cardboard mailers, or FSC-certified inserts, check that the patched garment still packs cleanly. For forest-based packaging claims, review the FSC certification standards before printing icons or claims on inserts.
Common Mistakes Fitness Brands Make With Logo Patches
The biggest mistake is choosing the patch that looks best in a flat photo instead of the one that survives movement, sweat, washing, and actual human use. Flat photos sell ideas. Wear testing sells fewer returns.
- Using thick patches on thin stretch fabric. The result can pucker, sag, peel, or feel like someone taped a coaster to the garment.
- Shrinking detailed logos too far. Tiny taglines, thin strokes, and gradient marks rarely translate cleanly in embroidery, woven construction, or molded materials.
- Ignoring skin comfort. A patch near the neck, waistband, inner arm, or sports bra band needs a soft edge and low irritation risk.
- Skipping wash testing. A patch may pass a quick press test but fail after detergent, heat, sweat, and repeated abrasion.
- Choosing leatherette for high-sweat gear. Leatherette can look premium on a mood board and still be wrong for compression apparel.
- Approving color from one material only. Thread, woven yarn, molded silicone, printed ink, and leatherette surfaces all reflect color differently.
Another quiet mistake is forgetting fulfillment. Raised patches can affect folding boards, stack height, barcode placement, hangtag location, and polybag fit. If you are trying to reduce post-consumer waste or shift toward biodegradable packaging components, the product still has to pack without crushing the branding.
Testing standards help buyers ask better questions. For transit packaging, ISTA protocols are widely used to evaluate shipping performance. For material and wash behavior, suppliers may reference ASTM-style test methods depending on the patch and garment. You do not need to memorize every standard. You do need to ask what was tested, how many cycles ran, and what counted as failure.
Before You Request Samples or a Quote
Create a short patch brief before contacting a supplier. Include product type, fabric composition, order quantity, target patch size, logo file, placement, backing preference, color target, packaging needs, and launch deadline. A clean brief gets you a better answer faster.
Pick two realistic material options instead of asking for every patch type under the sun. Compare woven versus silicone for tees. Compare PVC versus embroidered for gym bags and caps. Compare leatherette versus woven for recovery apparel. Too many options just create decision fog.
Ask for the supplier’s recommendation based on use case, not just a price sheet. A decent supplier will tell you when a material is wrong for your garment. A bad one will happily quote the disaster.
Request pricing at multiple quantities, including your likely reorder quantity. Good quote tiers are usually 100, 500, and 1,000 pieces for early-stage runs, or 500, 1,000, and 2,500 pieces for brands with steadier demand. That gives you a real view of unit cost instead of one lonely number pretending to be strategy.
Ask what testing is needed before bulk production: wash test, stretch test, heat-press test, abrasion test, or sample sewing on the actual garment. For heat-applied patches, document temperature, pressure, dwell time, peel behavior, and wash results. For sewn patches, check edge lift, puckering, thread tension, and skin feel.
Document approval details in writing: artwork, size, color standard, backing, edge finish, placement, tolerance, packaging, lead time, and approved sample reference. If you are preparing a broader branded product launch, reviewing real custom branding examples can help align patches with labels, bags, inserts, and retail presentation.
Use the patch decision as a product decision, not a decoration decision. Choose the material that fits the garment, the use case, the budget, and the customer’s laundry habits. Especially the laundry habits.
FAQs
What is the best logo patch material for fitness apparel?
For lightweight activewear, woven, silicone, or TPU-style patches usually work better because they stay flatter and more flexible. For hoodies, caps, and gym bags, embroidered, PVC, rubber, or silicone patches can add more texture and shelf appeal. The best choice depends on fabric stretch, sweat exposure, wash frequency, patch placement, and the brand look you want.
Are PVC logo patches good for gym clothing?
PVC patches are durable, bold, and sweat-resistant, so they work well on gym bags, caps, outerwear, and heavier athleisure pieces. They can feel too stiff or heavy on thin tees, leggings, sports bras, or compression garments. If the garment stretches a lot, test PVC carefully or consider silicone or TPU instead.
How much do custom logo patches cost for fitness brands?
Cost depends on material, size, quantity, colors, backing, edge finish, and whether tooling or digitizing is required. Woven and embroidered patches are often more budget-friendly at lower quantities, while silicone, rubber, and PVC usually have higher setup costs. Ask for quote tiers at 100, 500, and 1,000 pieces so you can see the real unit cost breakpoints.
Should fitness brands choose sew-on or heat-applied logo patches?
Sew-on patches are usually the safest choice for durability, especially on garments that will be washed often. Heat-applied patches can be efficient and clean-looking, but they must be tested on the actual fabric for temperature, pressure, stretch, and wash resistance. For high-stretch fabrics, application testing is not optional unless you enjoy preventable problems.
What logo patch material works best for leggings and sports bras?
Low-profile woven labels, silicone patches, TPU-style patches, or heat-transfer branding usually perform better than thick embroidered or PVC patches. Avoid bulky patches in areas that stretch, rub, fold, or sit directly against skin. Test the patch after washing and stretching the garment because flat-table approval does not prove real-world performance.


